Welcome to our comprehensive guide on how to rotate a component in Solidworks Assembly. Whether you’re a beginner or an experienced user, learning how to manipulate and rotate components within an assembly is an essential skill for designing and assembling parts in Solidworks.
In this blog post, we will cover various methods and techniques on how to align, rotate, and change the orientation of components in Solidworks Assembly. We will walk you through step-by-step instructions, providing useful tips and tricks to help you efficiently rotate and position your components.
So, if you’ve ever wondered how to rotate a part, change the rotation center, switch planes, or any other related queries in Solidworks Assembly, you’ve come to the right place! Let’s dive in and explore the techniques to enhance your design workflow and achieve precise component rotations in Solidworks Assembly.
Keywords: How do you align an assembly in SolidWorks?, How do I change the orientation of a Solidworks assembly?, How do you rotate a part in SolidWorks drawing?, How do you rotate a fixed component in Solidworks?, What is offset in Solid Edge?, How do you invert a part in Solidworks assembly?, How do you rotate gears in the same direction?, How do you rotate items in Solidworks?, How do you rotate an assembly?, How do you use gears in Solidworks?, How do you change the rotation center in NX?, How do I change the rotation point in NX?, How do you rotate parts in Creo Assembly?, What is override position in NX?, How do I change a fixed component in Solidworks?, How do you Unfix a component in Solidworks assembly?, How do I change the position of a part in Solidworks?, How do I rotate a sketch in Solid Edge?, How do you switch planes in solid edge?, How do you rotate orientation in SolidWorks?, How do you rotate a part in Solidworks assembly 2020?
How to Easily Rotate Components in SolidWorks Assembly
In the exciting world of SolidWorks assembly, sometimes you just need to get your components in the right position. And what better way to do that than by rotating them? If you’ve ever found yourself scratching your head and wondering how to perform this mystical feat, fear not! We’re here to walk you through the process step by step, so that you can become a component-rotating wizard in no time.
Step 1: Select Your Component
First things first, you’ll need to choose the component that you want to rotate. Think of it as selecting your MVP (Most Valuable Part). Click on the component in the assembly tree or on the model itself to make sure it’s highlighted and ready for some creative spinning action.
Step 2: Utilize the “Move Component” Tool
The secret to rotation lies in the ever-mighty “Move Component” tool. You can access it by navigating to the “Assembly” toolbar and clicking on the “Move Component” button. This tool is like the DJ of SolidWorks, allowing you to mix, remix, and rotate your components with style.
Step 3: Set Your Rotation Axis
Now, here comes the fun part: setting the rotation axis. Imagine you’re about to spin a roulette wheel, but instead of winning or losing money, you’re aiming for the perfect component placement. To choose your axis, simply click on any 3D edge, sketch line, or even a face of another component. SolidWorks will use that as your reference and rotate your selected component accordingly.
Step 4: Control the Angle of Rotation
Gone are the days of limited rotation options. With SolidWorks, you have complete control over the angle of rotation. Simply enter the desired degree in the “Rotation Angle” box, or use your mouse scroll wheel for some interactive spinning action. Don’t forget, precision is key here, so take your time and make those adjustments until your component is dancing to your tune.
Step 5: Explore Advanced Options
If you’re feeling extra adventurous, SolidWorks offers some advanced options to elevate your component rotation game. You can enable “Collision Detection” to ensure your component doesn’t clash with any neighboring parts, or even activate “Rotate About Screen Axis” to spin your part around like a record player. The possibilities are endless!
And just like that, you’ve mastered the art of rotating components in SolidWorks assembly. So go ahead, embrace your inner maestro and let the symphony of precise positioning begin. Remember, with great rotation skills come great design possibilities!
Note: The instructions provided here are based on SolidWorks 2023. If you’re reading this in the future, make sure to adapt the steps to the version you’re using to unlock the full potential of component rotation.
Now it’s time to put this knowledge into action and revolutionize your assembly process. Happy rotating!

FAQ: How to Rotate Component in SolidWorks Assembly
Frequently Asked Questions about Rotating Components in SolidWorks
Are you struggling to rotate components in SolidWorks assembly? Don’t worry, you’re not alone! In this comprehensive FAQ-style guide, we’ll answer the most common questions about rotating components in SolidWorks and provide you with step-by-step solutions. So, grab your coffee and let’s dive right in!
How do you align an assembly in SolidWorks
To align an assembly in SolidWorks, follow these steps:
- Open the assembly you want to align.
- Go to the “Assembly” tab and click on “Move Component.”
- Select the component you want to align.
- Choose the desired alignment method, such as “Mate” or “Align.”
- Select the reference features or planes for alignment.
- Click “Apply” to align the component in the desired position.
How do I change the orientation of a SolidWorks assembly
Changing the orientation of a SolidWorks assembly is a breeze! Just follow these simple steps:
- Open the assembly you want to modify.
- Go to the “Assembly” tab and click on “Rotate Component.”
- Select the component whose orientation you want to change.
- Choose the desired rotation method, whether by angle or by reference geometry.
- Enter the angle or select the reference geometry for rotation.
- Click “Apply” to see the magic happen!
How do you rotate a part in SolidWorks drawing
Rotating a part in a SolidWorks drawing is as easy as one, two, three! Here’s how you do it:
- Open the drawing you want to modify.
- Select the part you wish to rotate.
- Go to the “Rotate” command under the “View Layout” tab.
- Choose the rotation method, such as “By Angle” or “By Reference Geometry.”
- Specify the desired rotation angle or select a reference geometry for rotation.
- Click “OK” to rotate the part to your heart’s content!
How do you rotate a fixed component in SolidWorks
Ah, the age-old question of rotating a fixed component in SolidWorks. Fear not, for we have the answer!
- Select the fixed component you want to rotate.
- Right-click on it and choose “Float.”
- Now you can freely rotate the component to your heart’s desire.
- Once you’re done, right-click on the component again and select “Fix” to lock it in its new position.
What is offset in Solid Edge
In Solid Edge, offset refers to the distance between two entities or features. This allows you to create parts or features at a specified distance from existing geometry. It’s like pushing things apart or pulling them closer together, all while maintaining precise measurements. Think of it as the art of giving things personal space!
How do you invert a part in SolidWorks assembly
Have you ever wanted to turn a part upside down in SolidWorks assembly? Well, we’ve got you covered!
- Open the SolidWorks assembly that contains the part you want to invert.
- Select the part and right-click on it.
- Choose “Component Properties” from the right-click menu.
- In the “Component Properties” dialog box, go to the “Position” tab.
- Change the “Rotation” values to achieve the desired inversion.
- Click “OK” and voila! Your part has magically turned upside down!
How do you rotate gears in the same direction
Rotating gears in the same direction sounds like a harmonious dance, doesn’t it? Well, here’s how you make your gears groove together:
- Open your SolidWorks assembly containing the gears.
- Select one of the gears that you want to rotate.
- Go to the “Rotate Component” command under the “Assembly” tab.
- Choose the rotation method, either by angle or by reference geometry.
- Specify the desired rotation angle or select a reference geometry as the driver.
- Click “Apply” to rotate the gear in the same direction as its companions. Let the rhythm flow!
How do you rotate items in SolidWorks
Rotating items in SolidWorks is a piece of cake! Follow these simple steps:
- Select the item you want to rotate.
- Go to the “Rotate” command under the “Modify” tab.
- Choose the desired rotation method, either by angle or by reference.
- Specify the rotation angle or select the reference geometry.
- Click “OK” to witness the glorious rotation of your item. It’s like watching a ballerina pirouette!
How do you rotate an assembly
Ready to spin your SolidWorks assembly? Let’s get to it:
- Open the assembly you want to rotate.
- Select the component you wish to rotate around a specific axis or point.
- Go to the “Rotate Component” command under the “Assembly” tab.
- Choose the rotation method that suits your needs – angle or reference geometry.
- Specify the rotation angle or select the reference geometry to define the rotation axis.
- Click “Apply” and revel in the rotation of your entire assembly. It’s like giving your creation a twirl!
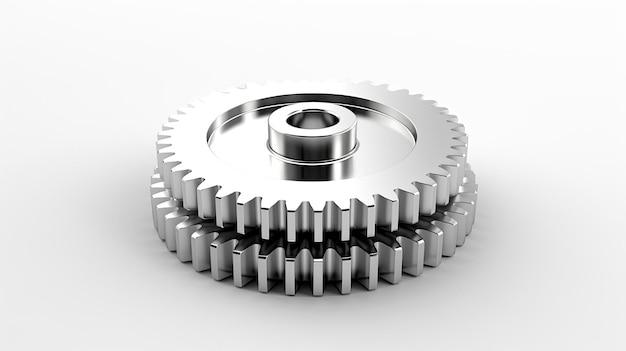
How do you use gears in SolidWorks
Gears are the unsung heroes of mechanical assemblies, and SolidWorks allows you to use them with ease. Here’s how:
- Open your SolidWorks assembly and navigate to the “Design Library” tab.
- Expand the “Gears” folder.
- Drag and drop the gear type you desire into your assembly.
- Configure the gear parameters, such as pitch diameter and number of teeth, to fit your design.
- Watch in awe as your gears come to life, ready to transmit torque and change the world. Who said gears aren’t cool?
How do you change the rotation center in NX
In NX, changing the rotation center is a breeze. Follow these simple steps:
- Open your NX assembly and select the component in which you want to change the rotation center.
- Go to the “Rotate Component” command.
- Select the “Center of Rotation” icon.
- Click on the desired point in the assembly to set it as the new rotation center.
- Marvel at the newfound power to rotate around the chosen center. It’s like having the universe at your fingertips!
How do I change the rotation point in NX
Changing the rotation point in NX is as easy as a flick of the wrist. Just follow these steps:
- Select the component you wish to modify in your NX assembly.
- Go to the “Rotate Component” command.
- Choose the “Rotation Point” option.
- Click on the desired location in the assembly to set it as the new rotation point.
- Enjoy the mesmerizing freedom of rotating around your carefully chosen point. It’s like playing conductor to the symphony of your creation!
How do you rotate parts in Creo Assembly
Rotating parts in a Creo assembly is a breeze! Here’s how to do it:
- Open the Creo assembly that contains the parts you want to rotate.
- Select the part you wish to rotate.
- Go to the “Rotate” command under the “Modify” tab.
- Choose the rotation method, such as “By Angle” or “By Reference Geometry.”
- Specify the rotation angle or select a reference geometry to define the rotation axis.
- Click “OK” to see your part rotate gracefully. It’s like watching a skilled acrobat perform in perfect harmony!
What is override position in NX
In NX, override position allows you to temporarily change the position of a fixed or constrained component within an assembly. It’s like giving your components a bit of flexibility, just for fun! Here’s how to do it:
- Select the fixed or constrained component you want to override in your NX assembly.
- Right-click on the component and choose “Override Position.”
- Use the manipulation handles to move or rotate the component as desired.
- Admire the temporary liberation of your component from its previous position.
- When you’re ready, right-click on the component again and select “Cancel Override Position” to bring it back to its original location. It’s a temporary party for your components!
How do I change a fixed component in SolidWorks
Have a fixed component in SolidWorks that’s overstaying its welcome? Here’s how you deal with it:
- Select the fixed component you want to change.
- Right-click on it and choose “Float.”
- Make any necessary modifications to the floating component, such as adding mates or moving it around.
- Once you’re satisfied with the changes, right-click on the component again and select “Fix” to lock it in its new position.
- Bask in the glory of your dynamic yet controlled assembly!
How do you Unfix a component in SolidWorks assembly
Oh dear, did you accidentally fix a component in your SolidWorks assembly and now want to undo it? Fear not, we’ve got the solution:
- Select the fixed component that you want to unfix.
- Right-click on it and choose “Float.”
- Feel the sweet sensation of freedom as your component becomes unfixed.
- Remember that with great freedom comes greater responsibility. Right-click on the component again and select “Fix” if you want to re-establish control. It’s all about finding the right balance!
How do I change the position of a part in SolidWorks
If you want to change the position of a part in SolidWorks, follow these simple steps:
- Select the desired part in the assembly.
- Drag and drop the part to the desired location.
- Marvel at the ease with which you can rearrange your parts. It’s like playing with a virtual LEGO set!
How do I rotate a sketch in Solid Edge
Rotating a sketch in Solid Edge is a stroke of genius. Here’s how you do it:
- Open your sketch in Solid Edge for editing.
- Select the sketch entities you want to rotate.
- Go to the “Rotate” command under the “Home” tab.
- Choose the rotation method, such as “By Angle” or “By Reference Geometry.”
- Specify the rotation angle or select a reference geometry to define the rotation axis.
- Click “OK” to witness your sketch twisting and turning. It’s like watching an artist create a masterpiece!
How do you switch planes in Solid Edge
Switching planes in Solid Edge is a walk in the park! Here’s how you do it:
- Open the Solid Edge part or assembly you’re working on.
- Go to the “View” tab and click on “Rotate View.”
- Use the rotation handles to change the view orientation.
- Enjoy the exhilarating feeling of navigating through different planes. It’s like having your very own jetpack!
How do you rotate orientation in SolidWorks
Rotating orientation in SolidWorks can make your head spin with joy. Just follow these steps:
- Select the component or assembly you want to rotate.
- Go to the “Orientation” command under the “Modify” tab.
- Choose the desired rotation method – either “By Angle” or “By Reference Geometry.”
- Specify the rotation angle or select a reference geometry to define the rotation axis.
- Click “OK” to witness the magical transformation of your creation. It’s like the world tilting on its axis!
How do you rotate a part in SolidWorks assembly 2020
If you’re using SolidWorks Assembly 2020 and want to rotate a part, here’s how it’s done:
- Open your SolidWorks assembly in version 2020.
- Select the part you wish to rotate.
- Go to the “Rotate Component” command under the “Assembly” tab.
- Choose the rotation method – either by angle or by reference geometry.
- Specify the rotation angle or select the reference geometry for rotation.
- Click “Apply” to witness the magic of rotation in action. SolidWorks 2020 has never felt more exhilarating!
That concludes our comprehensive FAQ-style guide on rotating components in SolidWorks assembly. We hope these answers have brought enlightenment, laughter, and joy to your SolidWorks adventures. Remember, when it comes to rotating components, the only limit is your imagination! Happy rotating, and may your designs spin with success in the year 2023 and beyond!