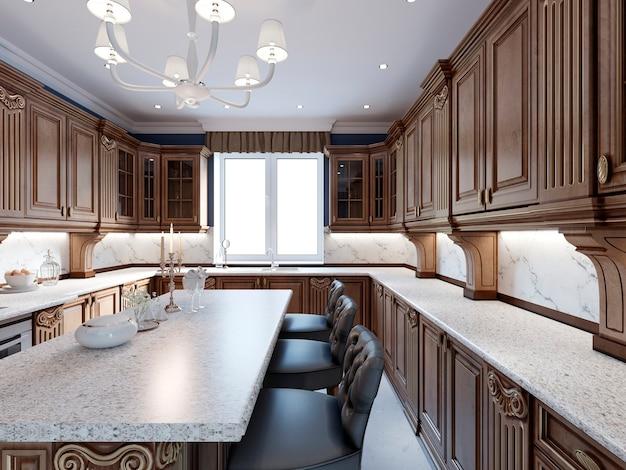
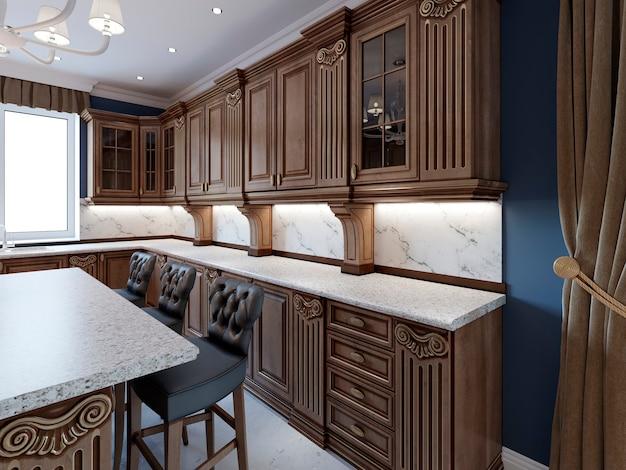
Wood cabinets are a popular choice for kitchens, but over time, they can start to look outdated or worn. If you’re ready to give your stained wood cabinets a fresh, modern look, then whitewashing may be the perfect solution. Whitewashing is a technique that allows you to lighten the color of the wood while still preserving its natural grain and texture.
In this blog post, we will explore the process of whitewashing stained wood cabinets, including the difference between pickling and whitewashing, the best paint for laminate cabinets, and tips for achieving a modern look with oak cabinets. We will also address common questions, such as whether it’s possible to whitewash already stained wood or paint over stained wood without sanding. So, if you’re ready to transform your kitchen cabinets without breaking the bank, keep reading to learn how to create a beautiful, whitewashed finish.
Keywords: pickling vs whitewashing, paint for laminate cabinets, making oak cabinets look modern, whitewashing stained wood, painting cabinets without removing doors, whitewashing finished oak cabinets, whitewashing already stained wood, painting over stained wood without sanding, staining vs painting wood, popularity of white washed floors, whitewashing stained and varnished wood, painting over stained and varnished wood, whitewashing laminate cabinets, using Kilz primer on stained wood.
How to Give Your Stained Wood Cabinets a Whitewashing Makeover
So, you’ve got these beautiful wooden cabinets that have seen better days. They’re stained, worn out, and just not doing justice to your kitchen or bathroom. But before you go ahead and rip them out, let me introduce you to the magical world of whitewashing. Yes, my friend, you can give those cabinets a fresh, modern look with a simple but effective technique called whitewashing. Buckle up, because I’m about to take you on a journey of beautiful transformation!
Gather Your Supplies
Before we dive into the nitty-gritty of whitewashing, you’ll need to round up a few key supplies. Don’t worry; this won’t break the bank. You’ll need some sandpaper (medium and fine grit), a liquid deglosser, painter’s tape, a quality paintbrush, a paint tray, and of course, some whitewash stain. It’s like gathering your trusty squad of DIY heroes to help you conquer this project!
Prep Work: Sand and Degloss
Alright, now that you have your supplies ready, it’s time to get down and dirty with some prep work. Start by sanding the surfaces of your cabinets using the medium-grit sandpaper. You want to create a smooth and even surface for the whitewash to work its magic. Once you’re done, wipe away the sanding dust and say goodbye to those pesky imperfections!
Next up, grab that liquid deglosser and give your cabinets a good wipe-down. This step is crucial for removing any existing finishes or residue that might interfere with the whitewash. Think of it as a fresh start for your cabinets, wiping away all the grime and sins of the past.
Tape It Up, Picasso!
Now comes the fun part! Take your painter’s tape and carefully line the edges of your cabinets, protecting any areas you don’t want to get whitewashed. This step requires precision, so channel your inner Picasso and create those clean lines. Show those cabinets who’s the boss!
It’s Whitewashing Time, Baby!
Alright, now that you’ve prepped like a pro, it’s time for the main event – the whitewashing itself! Grab your paintbrush and dip it into the whitewash stain. Make sure to spread the stain evenly over the brush, like you’re buttering toast on a lazy Sunday morning.
Now, in smooth strokes, apply the stain to your cabinets, working in the direction of the wood grain. Don’t worry if it looks too dark; you can always lighten it up later. Let the whitewash stain work its magic and bring new life to your cabinets. Feel like a fairy godmother waving her wand and transforming pumpkins into carriages – with a modern twist, of course!
Bring on the Layers
Here’s where you can really get creative and add some depth to your whitewash makeover. Apply additional layers of whitewash stain to achieve your desired level of coverage. Remember, it’s always better to start with a lighter touch and build up gradually. Trust me, your cabinets will thank you for it!
Dry and Admire
Once you’ve finished applying the whitewash, step back, take a deep breath, and admire your handiwork. Your cabinets are now basking in their new glory! But before you jump in too quickly, let the stain dry completely. Give it a good 24 hours to work its magic and set its roots. And trust me, the wait will be well worth it.
Embrace the New Look
Congratulations, my friend! You’ve successfully whitewashed your stained wood cabinets like a pro. Now, stand back and revel in the beauty of your kitchen or bathroom makeover. The once tired, stained wood has transformed into a fresh, modern canvas that radiates elegance and sophistication. It’s like bringing a touch of beachy charm and sun-kissed excitement right into your home. They say a whitewashed cabinet is like a ray of sunshine, and I couldn’t agree more!
So, kick back, relax, and enjoy your freshly whitewashed cabinets. Invite friends over, just to show off your newfound DIY skills. And remember, when life hands you stained wood cabinets, grab that whitewash stain and create your own little piece of magic! Cheers to a fabulous kitchen or bathroom upgrade!
—————
*Note: This blog post is for informational purposes only. Please ensure proper safety precautions and follow the manufacturer’s instructions when working with chemicals and tools.
FAQ: How Do You Whitewash Stained Wood Cabinets
Don’t worry, we’ve got all your burning questions about whitewashing stained wood cabinets covered! We’ve gathered the most frequently asked questions and compiled the answers in one convenient place. So, grab a cup of coffee, sit back, and let’s dive into the world of whitewashing cabinets!
What’s the Difference Between Pickling and Whitewashing
Pickling and whitewashing are both techniques used to lighten wood surfaces, but they differ in their application methods and results.
Pickling involves using a white or light-colored stain that is applied to the wood and then wiped off, leaving a subtle whitewashed effect. This technique is great for achieving a rustic and weathered look.
Whitewashing, on the other hand, involves diluting white paint with water, applying it to the wood, and then wiping off the excess. This method creates a more opaque and even white coat on the surface, allowing the wood grain to still show through.
What Kind of Paint Should I Use on Laminate Cabinets
Painting laminate cabinets can be tricky, but with the right products, it’s totally doable! Make sure to choose a high-quality latex or oil-based paint that is specifically designed for laminate surfaces. Remember to clean and lightly sand the cabinets before applying the primer and paint, ensuring better adhesion and a long-lasting finish.
How Can I Make Oak Cabinets Look Modern
If you’re tired of the traditional oak look and want to give your cabinets a modern twist, there are a few things you can do:
- Paint them: A fresh coat of paint in a contemporary color can instantly update your oak cabinets.
- Replace the hardware: Swapping out the old handles and knobs with modern ones can make a big difference.
- Add glass inserts: Removing some cabinet doors and replacing them with glass inserts creates an open and airy feel.
- Install under-cabinet lighting: Adding lighting under the cabinets enhances their modern appeal and creates a warm ambiance.
Is Dark Trim Out of Style
While dark trim was trendy for a while, design trends are ever-evolving. Dark trim can still work in certain settings, especially when paired with light-colored walls and furnishings. However, if you want to keep up with the latest design trends, opting for lighter trim colors like white or off-white can give your space a more fresh and modern look.
How Can I Paint My Kitchen Cabinets Without Removing the Doors
Painting kitchen cabinets without removing the doors is a technique called “in-place painting” and can save you a lot of time and effort. Here’s how you can do it:
- Clean and prep: Thoroughly clean the cabinets and remove any grease or dirt by using a kitchen degreaser. Lightly sand the surfaces to create a better bond for the paint.
- Tape and cover: Use painter’s tape to protect the surrounding areas and cover the countertops and floors with drop cloths.
- Prime and paint: Apply a high-quality primer to ensure good paint adhesion. Once the primer is dry, apply your chosen paint color using a brush or roller, making sure to use smooth and even strokes.
- Allow to dry: Let the paint dry completely before adding a second coat if needed. Once dry, remove the tape and enjoy your newly painted kitchen cabinets!
Can I Whitewash Dark Wood
Absolutely! Whitewashing can be a great way to lighten up dark wood surfaces and create a more rustic or coastal vibe. Just make sure to test the whitewash mixture on a small, inconspicuous area before tackling the entire piece. This way, you can adjust the ratio of paint to water to achieve your desired effect.
Can You Whitewash Finished Oak Cabinets
Yes, you can whitewash finished oak cabinets. However, before applying the whitewash, make sure to thoroughly clean the cabinets to remove any dirt or grease. Lightly sand the surface to create better adhesion for the whitewash. Then, follow the whitewashing steps of diluting white paint with water, applying it to the cabinets, and wiping off the excess. Repeat the process as necessary to achieve the desired level of whitewashing.
How Do You Whitewash Already Stained Wood
To whitewash already stained wood, you’ll need to sand the surface lightly to remove the existing finish and create a texture for the whitewash to adhere to. Once sanded, follow the whitewashing steps by diluting white paint with water, applying it to the wood, and wiping off the excess. Remember to test the whitewash mixture on a small area first to ensure it achieves the desired effect.
Can You Paint Over Stained Wood Without Sanding
While it’s generally recommended to sand stained wood before painting to ensure better adhesion, there are alternative options. You can use a high-quality bonding primer that is specifically formulated to adhere to glossy or stained surfaces. This primer creates a strong bond between the wood and the paint, eliminating the need for sanding. However, keep in mind that sanding provides the best surface for paint adhesion, so it’s still ideal to lightly sand stained wood if possible.
Is It Better to Stain or Paint Wood
The choice between staining or painting wood depends on your personal preferences, the desired look, and the condition of the wood. Here are a few things to consider:
Staining:
– Enhances the natural beauty and grain of the wood.
– Allows for translucency, meaning you can still see the wood beneath the stain.
– Provides a more traditional and timeless look.
– Requires proper preparation, including sanding and conditioning the wood.
Painting:
– Offers a wide range of color options to match your style and decor.
– Can cover up imperfections and create a sleek, uniform appearance.
– Provides a more modern and contemporary look.
– Requires proper surface preparation, including cleaning, priming, and sanding.
Ultimately, the decision between staining and painting wood comes down to your personal taste and the vision you have for your space.
Are Whitewashed Floors Popular
Absolutely! Whitewashed floors have been popular for some time now and continue to be a sought-after flooring choice. They add a light and airy feel to any space, making it appear larger and more inviting. Whether you opt for solid white or a subtle whitewashed effect, this trend brings a touch of coastal charm and a relaxed atmosphere to any room.
How Do You Whitewash Stained and Varnished Wood
Whitewashing stained and varnished wood requires a bit of extra preparation, but it can be done. Here’s what you’ll need to do:
- Clean and sand: Thoroughly clean the wood surface to remove any dirt and grease. Then, sand the stained and varnished surface lightly to scuff it up, allowing the whitewash to adhere better.
- Apply a stripper: Use a chemical stripper to remove the varnish completely. Follow the instructions on the stripper’s packaging and wear appropriate safety gear.
- Whitewash: Dilute white paint with water to create the desired whitewash consistency. Apply the whitewash using a brush or rag, following the wood grain. Wipe off any excess for a more even finish.
- Seal the whitewash: Once the whitewash is dry, you can apply a clear topcoat or sealant to protect the wood and enhance the whitewashed effect. Choose a finish that matches your desired level of sheen.
Can You Paint Over Stained Wood
Yes, you can paint over stained wood. However, for the best results, it’s recommended to sand the stained wood lightly before painting. Sanding creates a surface texture that allows the paint to adhere more effectively. Additionally, using a high-quality bonding primer designed for painting over stained surfaces can further improve paint adhesion and longevity.
How Do You Whitewash Over Stained Cabinets
To whitewash over stained cabinets, you’ll first need to prepare the cabinets by cleaning them and lightly sanding the surface. Then, create a whitewash mixture by diluting white paint with water. Apply the whitewash using a brush or rag, following the wood grain. Allow the whitewash to sit for a few minutes, then wipe off the excess with a clean cloth. Repeat the process until you achieve your desired level of whitewashing.
How Can I Paint My Kitchen Cabinets Without Brush Marks
Painting kitchen cabinets without brush marks may require a bit of finesse, but it’s definitely achievable. Here are a few tips to help you achieve a smooth finish:
- Prepare the cabinets: Clean the cabinets thoroughly, remove any hardware, and lightly sand the surfaces to create a better bond for the paint.
- Use the right tools: Opt for high-quality brushes or foam rollers specifically designed for smooth finishes. These tools can help minimize brush marks.
- Apply thin coats: Instead of applying a single heavy coat of paint, apply multiple thin coats. This allows the paint to level out and reduces the chances of brush marks.
- Sand between coats: After each coat of paint has dried, lightly sand the surface with fine-grit sandpaper. This helps smooth out any imperfections and ensures a smoother final finish.
- Consider a paint conditioner: Adding a paint conditioner or extender to the paint can help improve flow and reduce brush marks.
Remember, practice makes perfect! If you’re uncertain, try painting on a test piece or the backside of a cabinet door before tackling the entire project.
Can You Whitewash Wood Without Sanding
While sanding is generally recommended to ensure better adhesion when whitewashing wood, there are some alternatives you can try. One option is to use a deglossing agent or liquid sandpaper. These products help remove the gloss from the wood surface, allowing the whitewash to adhere better. However, keep in mind that sanding provides the best surface for the whitewash to bond to, so it’s still ideal to lightly sand the wood if possible.
What’s the Difference Between Whitewash and White Paint
The main difference between whitewash and white paint lies in their application and appearance.
Whitewash is a translucent solution that involves diluting white paint with water. When applied to a surface, it allows the texture and grain of the wood to show through, creating a more rustic or weathered look.
White paint, on the other hand, is a solid, opaque color that completely covers the surface it’s applied to. It typically provides a more uniform and modern appearance, hiding the natural texture and grain of the wood.
It’s important to consider the desired outcome and the specific look you’re trying to achieve when deciding between whitewash and white paint.
Can Oak Cabinets Be Stained White
Yes, oak cabinets can be stained white, giving them a fresh and modern appearance. However, staining oak cabinets white requires proper preparation to ensure the best results. Here’s how you can do it:
- Clean and sand: Thoroughly clean the cabinets and remove any dirt or grease. Lightly sand the surface to create better adhesion for the stain.
- Apply a white stain or pickling solution: Use a white or light-colored stain specifically designed for wood surfaces. Apply the stain to the cabinets using a brush or rag, following the wood grain. Wipe off any excess for a more even finish.
- Allow to dry and seal: Let the stain dry completely according to the manufacturer’s instructions. Once dry, apply a clear topcoat or sealant to protect the stained cabinets and enhance the white color.
What Happens If You Don’t Sand Before Staining
While sanding before staining is highly recommended, skipping this step can lead to a few potential issues:
- Poor adhesion: Without sanding, the stain may have a hard time adhering to the surface, resulting in an uneven or patchy appearance.
- Uneven color: Sanding helps to remove any previous finishes, dirt, or irregularities in the wood surface. Without sanding, the stain may be absorbed differently in different areas, leading to an uneven color distribution.
- Limited penetration: Sanding opens up the pores of the wood, allowing the stain to penetrate more deeply. Without sanding, the stain may only sit on the surface, resulting in a less rich and long-lasting color.
Sanding is an essential step to ensure a smooth and successful staining process.