Picture this: it’s a beautiful summer day, and you’re excited to water your plants and wash your car using your outdoor faucet. But as you turn on the spigot, you notice something alarming. Instead of a smooth, flowing stream of water, you see a leak, seeping its way into your home. Uh-oh—not exactly the backyard paradise you had in mind!
A leaking outside faucet can be frustrating and, if left unattended, can lead to significant water damage inside your house. But fret not! In this guide, we’ll delve into the reasons why an outside faucet can leak into your home and provide you with practical solutions to fix the issue.
Understanding the Irritating Leaks: Causes and Consequences
Have you ever wondered why your outdoor faucet decides to misbehave when you connect your garden hose? Well, there are several reasons for this common frustration. From worn-out washers to damaged valves, the culprits behind a leaking outside faucet can vary.
Not only can a leaky outside faucet be an annoyance, but it can also cause water to seep into walls and damage the structural integrity of your house. As leaks continue, they create a conducive environment for mold growth, which can lead to health issues and expensive repairs.
Don’t Panic! You Can Fix It
Fear not, homeowner! We’re here to guide you step-by-step through potential solutions for your outdoor faucet woes. Whether it’s a simple fix like replacing a washer or a more complex issue like a damaged pipe behind your brick wall, we’ve got you covered.
In this blog post, we’ll address common questions like how to replace an outside faucet, what to do when the shut-off valve starts leaking, and why your spigot might be leaking when you connect the hose. With our comprehensive tips and suggestions, you’ll be equipped with the knowledge and skills to tackle these plumbing quandaries head-on.
Prevention Is Key—Keep Your Faucet Leak-Free
They say an ounce of prevention is worth a pound of cure, and that couldn’t be truer when it comes to outside faucet leaks. We’ll also discuss preventive measures you can take to ensure your outdoor faucet stays leak-free year after year.
So, grab your favorite beverage, settle into a comfy chair, and get ready to become a plumbing pro. Say goodbye to frustrating leaks and the potential for water damage. Let’s dive into the world of outside faucet troubleshooting and bring peace back to your watering routine!
Outside Faucet Leaking into House
Having a leaky outside faucet can be a real pain. Not only does it waste water and increase your water bill, but if the leak gets big enough, it can even cause damage to your house. If you’ve noticed water seeping into your home from an outside faucet, don’t panic! In this guide, I’ll walk you through the common causes of this issue and provide you with some simple solutions to get that pesky leak under control.
Understanding the Problem
When it comes to outside faucets, the main culprits behind leaks are usually damaged washers, worn-out gaskets, or loose connections. These components can wear down over time due to exposure to the elements, causing water to escape from the faucet and find its way into your home. Don’t worry, though – fixing these issues is usually a straightforward process that you can handle on your own.
Checking for Damage
First things first, you’ll need to locate the source of the leak. Go outside and inspect your faucet thoroughly. Look out for any visible signs of damage, such as cracks in the handle or fittings, or water dripping from the spout even when the faucet is turned off. Identifying the specific area of damage will make it easier to tackle the problem head-on.
DIY Solutions
If the leak is minor, you might be able to fix it yourself without calling in a professional. Start by turning off the water supply to the faucet. Next, grab your trusty wrench (it’s time to put those DIY skills to the test!) and tighten any loose connections. If that doesn’t do the trick, you may need to replace the washer or gasket – both items are inexpensive and readily available at your local hardware store.
Consider Going Pro
If you’ve tried the DIY route and the leak persists, it may be time to bring in the pros. Sometimes, a leaky outside faucet can be a symptom of a larger problem within your plumbing system, such as a damaged pipe or a faulty valve. A licensed plumber will have the knowledge and expertise to diagnose the issue accurately and provide the most effective solution. While it may cost a bit more upfront, the peace of mind and long-term savings are worth it.
Prevention is Key
Once you’ve successfully fixed the leak, it’s essential to protect your outside faucet from future damage. Consider investing in a faucet cover or wrapping the exposed pipes with insulation during the colder months to prevent freezing and cracking. Regularly inspect and maintain the washers, gaskets, and fittings, as a proactive approach can help catch any potential leaks before they become a major headache.
By taking the time to address a leaking outside faucet promptly, you can save yourself from unnecessary headaches and expenses down the line. Whether it’s a simple DIY fix or a job for the pros, remember that prevention and regular maintenance are essential for keeping your faucet in tip-top shape. Happy fixing, and here’s to no more unexpected indoor showers!
Hose Leaking in House
Is your hose causing trouble inside your house? Don’t worry, you’re not alone! Leaking hoses can be a real nuisance, but fear not, because I’ve got some tips to help you tackle this soggy situation.
Signs of a Leaking Hose
Before we dive into the solutions, let’s make sure we’ve identified the problem correctly. Here are a couple of signs that might indicate you have a sneaky hose leak lurking in your house:
Damp Walls
If you notice moist spots or discoloration on your walls, especially near a faucet connection, you might be dealing with a leaky hose. No need to panic, though – we’ve got you covered!
Mysterious Water Pools
Are you encountering mysterious puddles appearing out of thin air? It’s like your house has its own secret water feature! Well, chances are, your hose is the culprit. It might be leaking and turning your home into an accidental swimming pool.
Finding the Leaky Culprit
Now that we know what to look out for, it’s time to play detective and find the leaky culprit. Here’s how you can track down the source of the problem:
Inspect the Connections
Start by checking the connections between your hose and the faucet. Look for any signs of wear, loose fittings, or cracks. Those sneaky leaks love to hide in plain sight!
Water Pressure Test
To narrow down the search, turn on your faucet and observe the pressure. If it’s weaker than usual or you hear strange hissing sounds, there’s a good chance you’ve found the leaky link.
Fixing the Leak
Okay, now that we’re equipped with knowledge and detective skills, it’s time to get our hands dirty and fix that leaky hose. Here are a couple of methods to stop the drip:
Teflon Tape Magic
One easy fix is to wrap some Teflon tape around the faucet thread before connecting your hose. This simple yet effective solution can often prevent those pesky leaks from happening.
Replace the Washer
If the leak persists, it’s time to give the hose washer some attention. Unscrew the hose, remove the old washer, and replace it with a new one. This little switcheroo might just be the key to dry and happy walls.
Preventing Future Leaks
We’ve solved the mystery and fixed the leak, but let’s not forget about prevention. Here are a few tips to keep your hose in tip-top shape:
Store It Properly
When you’re not using your hose, make sure to store it properly. Hang it up or coil it neatly to avoid any kinks or stress on the connections.
Check for Wear and Tear
Regularly inspect your hose for any signs of wear and tear. Look for cracks, splits, or weak spots that could potentially turn into future leaks. Catching them early can save you from future indoor floods!
Time to Bid Farewell to Leaky Hoses
With these helpful tips and tricks, you can easily bid farewell to those pesky leaks and keep your house dry. Remember, it’s all about staying vigilant and taking action as soon as you spot any signs of trouble.
So go ahead, fix that hose, and enjoy a leak-free life inside your home!
Outside Faucet Replacement
When to Replace your Outside Faucet
Is your outside faucet dripping incessantly or causing water to leak into your house? It might be time to consider getting a replacement. Outside faucet leaks aren’t just a nuisance; they can also lead to costly water damage if left unaddressed. In this section, we’ll explore when it’s appropriate to replace your outside faucet and discuss some signs that indicate it’s time for an upgrade.
Identifying the Problem
Before jumping to conclusions about needing a full replacement, it’s essential to diagnose the issue accurately. Begin by checking for common problems such as loose connections, damaged washers, or worn-out seals. If a simple fix doesn’t solve the problem, it’s wise to call in a plumber to assess the situation. They will be able to determine whether a repair or a replacement is the best course of action.
The Benefits of Replacing Your Outside Faucet
Opting for a brand-new outside faucet can bring a range of benefits. Firstly, it ensures a secure and watertight connection, reducing the risk of leaks and potential damage to your home. Additionally, modern designs often come with innovative features like frost-free capabilities and built-in backflow prevention, which provide added convenience and protection.
DIY or Professional Installation
While it’s tempting to undertake a DIY project, replacing an outside faucet is often best left to the professionals. Hiring a plumbing expert ensures the installation is done correctly and efficiently while avoiding potential pitfalls or complications. Although it may involve some additional costs, the peace of mind and long-term durability outweigh the initial expenditure.
Faucet Options and Considerations
Choosing the right outside faucet for your home may seem overwhelming, given the plethora of options available. Key factors to consider include the faucet’s material, durability, and compatibility with your existing plumbing system. Brass and stainless steel are popular choices due to their durability and resistance to corrosion. Consult with a plumber to select the best option that suits your specific needs and budget.
Replacing your outside faucet when it starts leaking into your house is a crucial step towards maintaining a functional and leak-free outdoor water supply. By understanding when to replace, the benefits of doing so, and seeking professional assistance, you can ensure a smooth and efficient transition. Remember to choose a faucet that suits your requirements and enjoy worry-free watering for years to come.
Why Does an Outside Faucet Leak
Have you ever encountered a pesky outside faucet leaking into your house? Don’t worry, you’re not alone. Many homeowners have faced this frustrating issue at some point. In this subsection, we’ll delve into the reasons behind why your outside faucet might be leaking. So, grab a cup of coffee and let’s get to the bottom of this!
The H2 Heading
Damaged Washer or O-Ring: The Silent Culprit
One of the most common causes for an outside faucet leak is a damaged washer or O-ring. These seemingly insignificant components play a vital role in preventing water from leaking. Over time, however, they can wear out, leading to those annoying drips. So, if you notice water dripping even when the faucet is turned off, it might be time to check the washer or O-ring.
Freezing Temperatures: Nature’s Mischievous Game
Ah, the whims of Mother Nature! Freezing temperatures can wreak havoc on your outside faucet, causing it to leak. When water freezes inside the pipe or valve, it expands, leading to cracks or bursts. Once the ice melts, you’ll find yourself dealing with a leaky faucet. To prevent this from happening, ensure you properly winterize your outside faucet and protect it from icy shenanigans.
Loose Connections: It’s All about Being Tight
Sometimes, the solution to a leaking outside faucet can be as simple as tightening a few connections. Over time, the nuts and bolts holding everything together can become loose due to regular use or wear and tear. A loose connection may allow water to seep out where it shouldn’t. So, channel your inner handyman and give those connections a good tightening to restore peace and dryness to your home.
Excessive Water Pressure: The Hulking Faucet Nightmare
Water pressure is great when you want a refreshing shower, but it can be your worst enemy when it comes to your outside faucet. If the water pressure is too high, it can put a strain on the faucet, causing it to leak. Consider installing a pressure regulator or contacting a professional to adjust your water pressure to a more faucet-friendly level.
In conclusion, an outside faucet leaking water into your house can stem from various reasons. From damaged washers or O-rings to freezing temperatures, loose connections to excessive water pressure – each culprit has its own mischief to cause. Remember, understanding the cause of the leak is the first step towards finding a solution. So, put on your detective hat, grab your toolbox, and bid adieu to that pesky leak!
Now that we’ve explored the reasons behind outside faucet leaks, let’s move on to the next exciting subtopic: How to Fix an Outside Faucet Leak like a Pro!
What Causes an Outside Faucet to Leak
Age and Wear
As with most things, age can take its toll on an outside faucet. Over time, the components that make up the faucet can deteriorate, causing leaks. O-rings and washers can wear out, and the rubber seals can become brittle and cracked. This can lead to water seeping out from the base of the faucet or from around the handle. So, if your faucet has seen better days, it may be time to consider a replacement.
Freezing Temperatures
One of the main culprits behind outside faucet leaks is freezing temperatures. When water inside the faucet freezes, it expands, which can cause the faucet to crack or develop small fissures. As the ice thaws, these cracks can lead to leaks. To prevent this, it’s crucial to properly winterize your outside faucet by shutting off the water supply and draining any remaining water from the pipes.
Loose Connections
Another common cause of outside faucet leaks is loose connections. Over time, the fittings and connections between the faucet and the pipe can become loose or worn out. This can result in water seeping out from the joint, causing a leak. Simply tightening the connections with a wrench can often resolve this issue. However, if the leak persists, you may need to replace the fittings or seek professional help.
High Water Pressure
Excessively high water pressure can put undue stress on your outside faucet, leading to leaks. When the water pressure exceeds the recommended levels, it can cause the seals and washers inside the faucet to fail, resulting in leaks. Installing a pressure regulator can help keep the water pressure within safe limits and prevent damage to your faucet.
Improper Installation
Sometimes, an outside faucet may leak due to improper installation. If the faucet was not correctly connected to the water supply pipe or if the sealing materials were not installed properly, it can result in leaks. In such cases, you may need to consult a professional plumber to reinstall or repair the faucet correctly.
Remember, addressing a leaking outside faucet promptly is essential to prevent water damage to your home and conserve water. By understanding the common causes of outside faucet leaks, you can take the necessary steps to prevent and resolve them. Stay tuned for the next section on how to fix a leaking outside faucet.
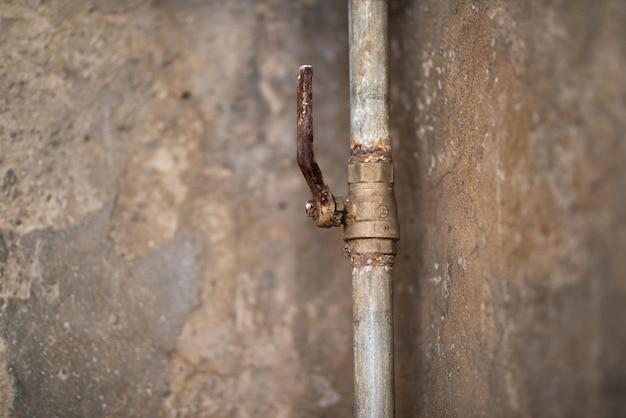
Outside Faucet Leaking Behind Brick: What You Need to Know
Identifying the Problem
Is water mysteriously finding its way inside your house? You might have an outside faucet leaking behind brick. Don’t worry, it’s a common issue and one that can be easily resolved. Here, we’ll delve into the main causes, potential consequences, and practical solutions for dealing with a leaky outside faucet behind brick.
Why Do Outside Faucets Leak Behind Brick
When the temperature drops, water trapped inside the faucet can freeze and expand, putting pressure on the pipe. Over time, this can lead to cracks or even a complete rupture. Additionally, the constant exposure to the elements can cause wear and tear on the faucet, resulting in leaks. If your faucet is hidden behind brick, detecting the problem might be a bit more challenging.
Common Signs of a Leaky Outside Faucet
So, how do you know if you have a leaky outside faucet hidden behind brick? Keep an eye out for these telltale signs:
1. Dampness or Water Stains – Moisture on or around your brick wall could signal a hidden leak.
2. A Surge in Your Water Bill – If your water bill suddenly spikes without explanation, a concealed faucet leak might be the culprit.
3. Water Pressure Fluctuations – Low water pressure is often a sign that water is escaping somewhere in the system.
Fixing an Outside Faucet Leak Behind Brick
Now that you’ve identified the problem, it’s time to tackle the solution. Follow these steps to fix your leaky outside faucet:
1. Turn off the water supply – Locate the main shut-off valve and turn off the water to prevent further leaks.
2. Expose the faucet – With caution, carefully remove the outer layer of bricks to reveal the faucet.
3. Inspect for damage – Check for cracks, breaks, or any visible signs of damage on the faucet and connecting pipes.
4. Repair or replace – Depending on the severity of the damage, you may need to repair or replace the affected parts. It’s best to consult a professional plumber for complex repairs.
5. Rebuild and test – Once the repairs are complete, carefully rebuild the brick enclosure around the faucet. Turn the water supply back on and check for leaks.
Preventing Future Leaks
To avoid dealing with another outside faucet leaking behind your brick, consider these preventive measures:
1. Insulate your pipes – Adding insulation to your exposed pipes can help prevent freezing and subsequent leaks.
2. Disconnect and drain – Before winter arrives, disconnect and drain outdoor hoses to prevent water from freezing inside.
3. Regular maintenance – Perform routine inspections of your outside faucets to catch any potential problems early.
Whether it’s a small drip or a major leak, addressing an outside faucet leaking behind brick is essential for a dry and damage-free home. By identifying the signs, taking prompt action, and implementing preventive measures, you can effectively resolve the issue and ensure a functional outdoor faucet all year round.
Shut off Valve for Leaking Outside Faucet
So, your outside faucet is leaking into the house, huh? That’s a bummer. But fear not, my friend, because there’s a nifty little device called a shut off valve that can come to your rescue.
What is a Shut Off Valve
Think of the shut off valve as the gatekeeper of your home’s plumbing system. It’s like the bouncer at a club, but instead of keeping out riff-raff, it controls the flow of water. This valve is usually located near the foundation of your house, inside a small utility box. Its purpose? To shut off the water supply to your outside faucet (and other areas if needed), preventing leaks and water damage.
How to Locate the Shut Off Valve
First things first, you need to find the shut off valve. Thankfully, it’s not that hard. Typically, you’ll find it near the outside wall where your faucet is attached. It might be a small round or rectangular metal box, often labeled “water shut off.” Open the box, and you’ll discover your magical shut off valve.
Shutting Off the Water Supply
Now comes the fun part. To stop that leaky outside faucet, turn the valve clockwise (to the right) until it’s fully closed. Ah, the satisfaction of stopping the flow of water! And just like that, your inside-the-house water problem is solved. Goodbye, water damage! Goodbye, annoyance!
Don’t Forget to Reopen the Valve
But wait, there’s more! Remember to turn the shut off valve counterclockwise (to the left) to reopen the water supply when you want to use your outside faucet again. Otherwise, you’ll end up with a whole other set of problems, like not being able to water your plants or wash your car. Trust me; you don’t want that to happen!
Having a shut off valve for your outside faucet is like having an emergency exit in case of leaks. It’s a simple yet effective solution that prevents water damage and saves you from unnecessary headaches. So, next time your outside faucet is leaking into the house, just locate that trusty shut off valve, give it a twist, and voila – problem solved! You can thank me later. Happy plumbing adventures!
How to Fix a Leaky Faucet Outside of Your House
So, you’ve got an annoying outside faucet leaking into the house? Don’t worry, you’re not alone. This pesky problem is more common than you think. But fear not, because I’m here to guide you through the steps of fixing that leaky faucet like a pro!
Assessing the Situation
First things first, let’s figure out what’s causing the leak. It could be a worn-out washer, a loose connection, or even a cracked pipe. Take a close look at the faucet and try to pinpoint the source of the leak. Is it a steady drip or more of a spray? Understanding the problem will help you tackle it with confidence.
Gathering the Tools
Now that you know what you’re up against, it’s time to gather the necessary tools for the job. You’ll need an adjustable wrench, a new washer (if that’s the issue), some Teflon tape, and maybe even a flashlight if the faucet is tucked away in a dark corner of your yard. Trust me, having everything within reach will save you from unnecessary trips back and forth.
Shut Off the Water
Before you start tinkering with the faucet, make sure to turn off the water supply. Locate the shut-off valve, usually found near the faucet or in the basement. Give it a good twist to stop the flow of water. Now you can work on fixing that leak without getting sprayed in the face. Safety first, folks!
Fixing the Faucet
If the leak is caused by a worn-out washer, you’re in luck. This is a simple fix that won’t require much effort. Use your adjustable wrench to unscrew the faucet handle and expose the stem. Remove the old washer and replace it with a new one of the same size. Apply a bit of Teflon tape to ensure a watertight seal. Tighten everything back up and give it a test run. Voila! Your faucet should be leak-free.
Call in the Professionals
If you’ve followed the steps above and the leak persists, it might be time to call in the experts. Sometimes the issue runs deeper than a simple washer replacement, and a professional plumber can provide the correct solution. Don’t hesitate to seek help if you’re unsure or if the problem seems more complex.
Now you’re armed with the knowledge to fix that leaky outside faucet and keep your house dry. Remember, a determined DIY spirit often leads to success. Happy fixing!
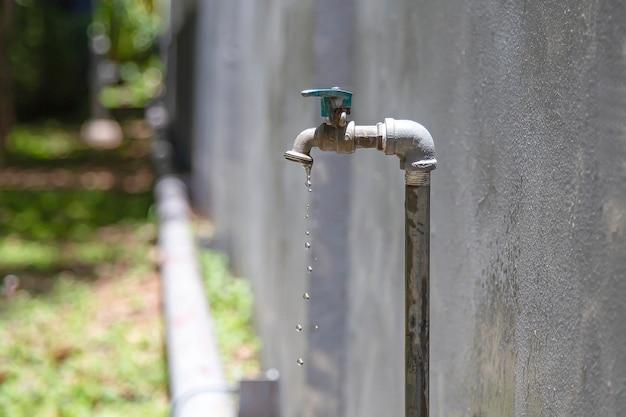
What to Do if Your Outdoor Spigot is Leaking
Leaky outdoor spigots can be a real headache, causing water damage, increasing your water bill, and wasting a precious resource. If you’ve noticed your outdoor faucet leaking into your house, it’s important to take action quickly to prevent further damage and address the issue. Here are a few steps you can take to tackle the problem head-on:
Check for Obvious Issues
Start by doing a visual inspection of your outdoor spigot. Look for any obvious signs of damage, such as cracks in the faucet or loose fittings. If you spot any issues, you may be able to tighten loose connections or replace damaged parts yourself. Just be sure to turn off the water supply before attempting any repairs.
Tighten Connections
If the leak is originating from a loose connection, you can try tightening it with a wrench. Gently snug the fitting, being careful not to overtighten and potentially cause further damage. Don’t forget to turn off the water supply before getting your wrench out!
Replace the Washer
Leaky spigots are often caused by deteriorated or worn-out washers. To replace the washer, you’ll first need to turn off the water supply and disassemble the spigot. Once you’ve removed the old washer, take it with you to the hardware store to ensure you get the correct replacement. Install the new washer, reassemble the spigot, and turn the water supply back on to check for leaks.
Call a Professional
If you’re not comfortable tackling the repair yourself or if the leak persists after trying the above steps, it’s best to call in a professional plumber. They have the knowledge and expertise to accurately diagnose the issue and provide a long-term solution. While it may cost a bit more, sometimes it’s better to leave it to the pros.
Prevention is Key
To prevent future outdoor faucet leaks, it’s important to take proper care of your spigot. Disconnect hoses before the cold weather sets in to avoid frozen pipes, and make sure to insulate any exposed pipes. Regularly inspect your spigot for any signs of damage or wear and tear, and address any issues promptly to avoid bigger problems down the line.
Remember, dealing with a leaking outdoor spigot is not only a matter of saving water and preventing damage to your home, but it’s also an opportunity to flex your DIY skills or support local professionals in their trade. With a little know-how and some basic tools, you can conquer the leak and keep your outdoor spigot flowing smoothly for years to come.
Why is my outside faucet leaking inside the house
If you’ve noticed water seeping into your home from an outside faucet, you might be wondering what the cause could be. There are a few common reasons why your outside faucet is leaking into the house, and understanding them can help you address the issue quickly. Let’s take a closer look at some of these potential causes:
1. Damaged or worn-out seals
One possible reason for your outside faucet leaking inside the house is damaged or worn-out seals. Over time, the rubber seals that help prevent water from leaking can deteriorate due to regular use and exposure to the elements. If these seals become compromised, water can start to seep into your home instead of flowing out of the faucet as intended.
2. Loose or damaged pipe connections
Another possibility is that the connections between the outside faucet and the pipes leading into your home have become loose or damaged. These connections can weaken over time, especially if not properly maintained. When this happens, water can escape through the gaps and find its way inside the house, causing leaks and potential water damage.
3. Freezing and thawing
In colder climates, freezing and thawing can also contribute to outside faucet leaks inside the house. When water freezes, it expands, which can put pressure on the pipes and cause them to crack or burst. As the ice thaws, the water trapped inside can leak into your home. Proper insulation and winterization of the outside faucet can help prevent this issue.
4. High water pressure
Excessive water pressure can also be a culprit behind your outside faucet leaking into the house. If the water pressure is too high, it can strain the seals and connections, leading to leaks. Consider installing a pressure regulator to control the water pressure and protect your faucet from damage.
5. Faulty faucet design or installation
Sometimes the problem lies with the faucet itself. If it was poorly designed or installed incorrectly, it could be prone to leaks. In such cases, replacing the faucet with a higher-quality one or seeking professional assistance may be necessary to resolve the issue.
When faced with a leaking outside faucet that is causing water to seep into your house, it’s essential to determine the root cause. By understanding the possible reasons behind the leak, such as damaged seals, loose connections, freezing, high water pressure, or faulty design or installation, you’ll be better equipped to address the issue effectively. Whether it requires simple maintenance or professional help, taking prompt action can prevent further damage and ensure your faucet functions as it should.
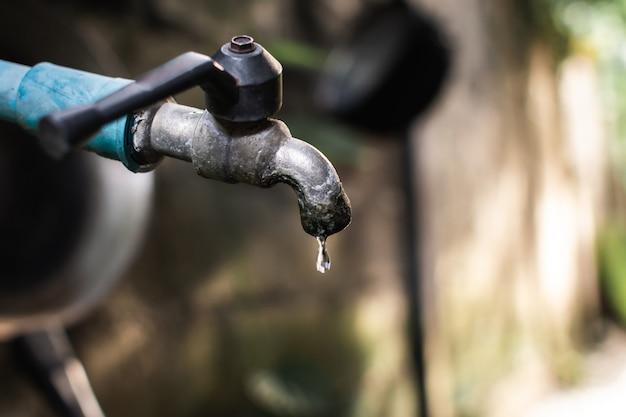
When I Turn On My Spigot, It Leaks in the Wall
If you’ve ever experienced the frustrating phenomenon of turning on your spigot only to find water leaking into your house, you’re not alone. This unexpected plumbing issue can be quite a headache to deal with. But fret not, my friend! In this subsection, we’ll dive into the possible causes of this problem and explore some practical solutions to get your outdoor faucet back to its leak-free glory.
The Culprit: A Faulty Spigot
One of the primary reasons behind water leaking into your house when you turn on the spigot could be a faulty or worn-out valve. Over time, the internal seals of the spigot may deteriorate, leading to leaks. So, what can you do about it? Well, the good news is that replacing a faulty spigot is relatively easy and inexpensive.
Taming the Leaky Beast: How to Fix It
To fix a leaky spigot that’s causing water to seep into your house, follow these simple steps:
Step 1: Shut Off the Water Supply
First things first, locate the main shut-off valve for your outdoor faucet and turn it off. This will prevent any further water from leaking into your home and give you a dry canvas to work with.
Step 2: Remove the Old Spigot
Using a wrench, carefully loosen the nuts connecting the spigot to the water supply pipe. Once the nuts are loose enough, you can remove the old, leaky spigot.
Step 3: Install a New Spigot
Now that you’ve bid farewell to the troublesome spigot, it’s time to bring in a new one. Take your shiny replacement spigot and connect it to the water supply pipe. Tighten the nuts securely, but be careful not to overtighten and damage any components.
Step 4: Test It Out
With the new spigot securely in place, turn on the water supply and test it out. Voila! If everything went smoothly, you’ll have a fully functioning outside faucet that no longer leaks water into your house.
Preventative Measures: Keep Leaks at Bay
To avoid future leaks and potential water damage, consider these preventive measures:
-
Insulate Your Pipes
Cold temperatures can cause pipes to freeze and crack, leading to leaks. Insulating your pipes can help prevent this unfortunate situation.
-
Regularly Check for Leaks
Keep an eye out for any signs of leaks or dripping water around the spigot. Early detection can save you from major headaches later on.
-
Disconnect and Drain
Before the freezing winter months arrive, remember to disconnect and drain your outdoor hose connections. Doing so will protect your pipes from freezing and potentially causing leaks.
So, there you have it – a comprehensive guide to dealing with an outside faucet that leaks water into your house. By replacing a faulty spigot and taking some preventative measures, you can bid farewell to those pesky leaks and enjoy a leak-free home. Time to put an end to that unwanted indoor swimming pool!
Outdoor Faucet Leaking Inside Wall When Turned On
If you’ve noticed water seeping into your house when you turn on your outdoor faucet, you may be facing a leak inside the wall. Don’t worry, though; this subsection will guide you through everything you need to know about this particular issue and how to tackle it.
The Possible Culprits
Loose Connections or Damaged Pipes
One of the main reasons for an outdoor faucet leaking inside the wall is loose connections or damaged pipes. Over time, the constant use, changes in temperature, and even accidental bumps can cause these connections to weaken or pipes to develop cracks.
Freezing and Thawing
In cold climates, freezing and thawing can wreak havoc on your plumbing system. When water freezes inside the pipes, it expands, leading to cracks or bursts. After a cold spell, when the ice thaws, water can leak into the walls, causing damage.
Identifying the Problem
Telltale Signs
Detecting a leak inside the wall may not always be obvious. Watch out for damp or discolored patches on your walls, musty odors, or peeling paint, as these could indicate water damage. You might also hear the sound of running water behind the walls when you turn on the faucet.
Professional Help
If you’re unsure about the source of the leak or unable to locate it, it’s best to seek the help of a professional plumber. They have the experience and tools to diagnose the problem accurately and provide the most suitable solution.
Fixing the Leak
Shut Off Water Supply
Before attempting any repairs, make sure to shut off the water supply to prevent further damage. This valve is usually located near the outdoor faucet or inside your home.
Fixing Loose Connections
If the leak is due to loose connections, you can try tightening them using a wrench. Be careful not to overtighten, as it can cause damage. If the fittings are too damaged, replacing them might be necessary.
Dealing with Damaged Pipes
Repairing or replacing damaged pipes will require more expertise. It’s advisable to consult a professional plumber in such cases, ensuring the problem is dealt with effectively and preventing any further complications.
Preventive Measures
Insulation
To prevent freezing and thawing issues, consider insulating your outdoor pipes. This helps protect them from extreme temperatures and reduces the risk of leaks.
Regular Maintenance
Perform routine checks on your outdoor faucet and surrounding pipes to catch minor issues before they turn into major problems. Look for signs of wear and tear, and address them promptly.
By understanding the possible causes, detecting the signs, and knowing how to fix the issue, you can confidently tackle an outdoor faucet leaking inside your wall. Remember, when in doubt, it’s always a good idea to consult a professional.
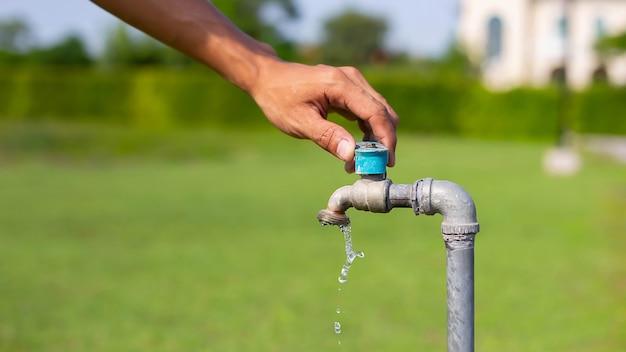
Why Does My Outdoor Spigot Leak When I Connect to the Hose
So, you’re outside on a sunny day, ready to water your plants or wash your car, and you connect the hose to your outdoor spigot. But wait! Suddenly, you notice water leaking from the connection, and your plans are put on hold. Why does this happen? Let’s dive into the world of outdoor spigot leaks when connecting to a hose and uncover the reasons behind this frustrating phenomenon.
The Dreaded Spigot Leak: A Common Problem
Leaky outdoor spigots when connected to hoses are a common issue that many homeowners face. It can be quite frustrating, especially when you’re eager to get your gardening or cleaning tasks done. But fear not! There are a few reasons why this leak occurs, and understanding them can help you find a solution.
1. Loose or Damaged Washer
One possible culprit of your outdoor spigot leak is a loose or damaged washer. The washer, usually made of rubber or nylon, creates a tight seal between the spigot and the hose, preventing any water from escaping. Over time, this washer can wear out or become loose, leading to leaks. Luckily, replacing the washer is a simple and affordable fix.
2. Worn-Out O-Ring
Another common cause of leaks is a worn-out O-ring. The O-ring is a small rubber ring located inside the spigot, which helps create a watertight seal. If this ring becomes worn or cracked, water can seep through, causing leaks. Replacing the O-ring is usually an easy DIY task, but make sure to bring the old one to the store to find a suitable replacement.
3. Incorrect Hose Connection
Believe it or not, improper hose connection can also result in leaks. If you’re attaching the hose too tightly or at a wrong angle, it can put strain on the spigot and cause leaks. To avoid this, make sure to connect the hose firmly, but not overly tight, and keep it straight without any kinks or twists.
4. High Water Pressure
Sometimes, the culprit behind a spigot leak is high water pressure. When the water pressure is too intense, it can overwhelm the spigot’s sealing mechanism, leading to leaks. Consider installing a pressure regulator to control the water pressure and prevent future leaks.
Tackle the Leak and Enjoy a Leak-Free Outdoor Experience
Now that you know some common reasons why your outdoor spigot may leak when you connect the hose, it’s time to take action and fix the issue. Whether it’s replacing a washer, O-ring, or adjusting your hose connection, these simple solutions can help you enjoy a leak-free outdoor experience.
Remember, regular maintenance and inspections of your outdoor spigot can help prevent leaks and extend its lifespan. So, keep an eye out for any signs of wear and tear, and address them promptly. Happy gardening or car washing without any unexpected waterworks!