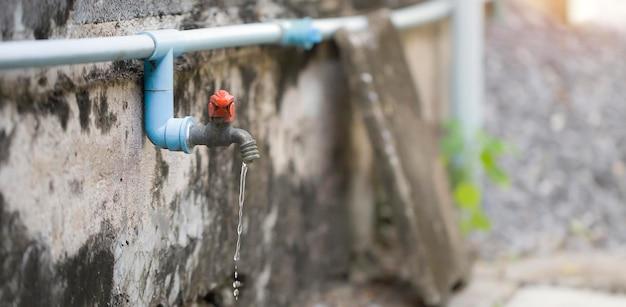
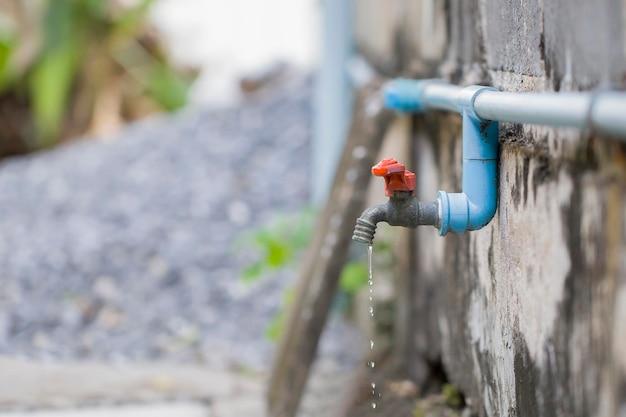
If you’ve ever experienced the frustration of turning on your outside faucet only to find a leak inside your house, you know how much of a headache it can be. Not only is it a nuisance to deal with, but it can also cause serious damage to your home if left unresolved.
In this blog post, we’ll explore the common causes of an outside faucet leaking inside the wall and provide practical solutions to fix the problem. Whether you’re dealing with a hose leaking inside the house, an outside tap leaking behind brick, or an outdoor faucet leaking into the basement, we’ve got you covered.
So, sit back, relax, and let’s dive into the world of outside faucet leaks!
Signs that your Outside Faucet is Leaking Inside the Wall
Have you ever noticed a wet spot on your wall that didn’t dry when you wiped it off? Or do you hear a constant sound of dripping water even though you’ve turned off all your faucets inside your house? These could be signs of an outside faucet leaking inside your wall, causing damage to your home’s interior. Here are some signs to look out for:
Discoloration or Peeling Paint
If you notice significant discoloration or peeling paint around your outside faucet, it could be a sign that water is leaking inside the wall. The water could be seeping into the drywall and causing damage, which is why the paint may start to bubble, peel, or change color.
Musty or Moldy Smell
Another sign that your outside faucet is leaking inside the wall is a musty or moldy smell emanating from the affected area. Water damage in walls can cause mold growth, which can be harmful to your health and can make your home smell bad.
Water Stains
The appearance of water stains could be an indication that water is leaking inside the wall from an outside faucet. These stains will usually be yellow or brownish in color.
Weird Sounds
Do you hear a dripping sound even when it’s not raining outside or have turned off all the water inside the house? This could be the sound of water dripping from an outside faucet and pooling inside your wall, causing damage to your home’s interior.
High Water Bill
If you have been experiencing a sudden increase in your water bills despite normal water usage, it could be due to an outside faucet leaking inside the wall. The continuous flow of water will cause an increase in water usage and ultimately reflect in your monthly water bills.
In conclusion, outside faucet leaks inside the wall can cause significant damage to your home’s interior. It’s essential to identify the signs early on to prevent further damage and prevent wastage of water. If you suspect that your outside faucet is leaking inside the wall, it is advisable to call a professional plumber to fix the problem as soon as possible.
Hose Leaking in House
If your outside faucet has leaked into your inside wall, you’re likely to have a hose leak into your house. Hose leaks are common and can occur for several reasons. Fortunately, fixing them is generally an easy task that you can handle on your own.
Causes of Hose Leaks
There are various reasons why your hose could be leaking into your house. The most common cause is wear and tear. Hoses can become damaged, split, or even crack after prolonged use. Additionally, chemicals such as pesticides or fertilizers can cause the hose to degrade over time.
Another possible cause of a hose leak is a loose or damaged connection. If the connection between the hose and the spigot is loose, water can leak out of the connection and into your home.
Fixing Hose Leaks
If you’ve discovered that your hose is leaking into your home, the first thing you need to do is turn off your water supply. This will prevent further leakage and damage until you fix the issue.
The easiest and most common way to fix a hose leak is to replace the damaged or worn-out hose. You can purchase a new hose at your local hardware store or online. You’ll need to choose one that is of the appropriate length and diameter for your needs.
Once you have the new hose, you should make sure to properly connect it to the spigot and tighten the connection. You may also want to consider using a hose clamp to ensure that the connection is tight and secure.
Preventing Hose Leaks
The best way to prevent hose leaks is to regularly check your hoses for wear and tear. You should inspect them at least once a season and immediately replace any hoses that show signs of damage.
Additionally, you should be careful when you’re using chemicals near your hoses. If possible, avoid using them on or near your hoses. If you must, make sure to rinse off your hose with water after using any chemicals.
In conclusion, hose leaks can be a nuisance, but they’re generally easy to fix. Regularly checking your hoses for damage and avoiding chemicals near your hoses can prevent leaks from happening in the future.
Signs of an Outside Faucet Leaking Inside Wall
If you have noticed water stains or puddles near your inside wall, it could be a sign of an outside faucet leaking inside the wall. An unnoticed leak can cause significant damage to your home’s foundation and lead to costly repairs. Here are some signs that your outside faucet may be leaking inside the wall.
Dampness on the Inside Wall
The most prominent sign of an outside faucet leaking inside a wall is dampness on the inside wall. If you notice that the wall is damp or moist, it could be a sign of water leaking from the outside.
Mold or Mildew Growth
When water remains undetected for a long time, it can lead to mold or mildew growth. If you notice mold or mildew growing on the inside wall, it could be an indication of water damage caused by a leaking outside faucet.
Water Stains on the Wall
Water stains on the wall can be a warning sign of a severe water leak. If you notice yellow or brown water stains on your wall, it’s time to call a professional to inspect your outside faucet and plumbing.
Musty Odor
A musty odor can be caused by water seeping through the wall. If you notice an unpleasant smell in your home, it could be due to water damage caused by a leaking outside faucet.
Water Pressure Drop
A drop in water pressure is a sign of a water leak. If you notice a sudden drop in water pressure in your home, it could be caused by a leaking outside faucet.
In conclusion, an outside faucet leaking inside a wall can cause significant damage to your home. If you notice any of these signs, it’s time to take action and call a professional. A plumber can detect and fix the leak before it causes any further damage.
Outside Faucet Leaking Behind Brick
If you have a brick wall surrounding the outside faucet, and it starts leaking, you may have a serious problem. Unless you resolve the issue immediately, the water may cause serious damage to your brick wall, which can be expensive to repair.
Signs of a Leaking Outside Faucet Behind Brick
If you have a brick wall surrounding your outside faucet, you may not notice a leak until significant damage has occurred. However, some signs indicate that your outside faucet is leaking behind the brick wall. These signs include:
- Water stains on the brick walls around the faucet
- Wet spots or pooled water around the faucet
- A musty odor, which may indicate mold growth behind the brick wall
- Increased water bills, which indicate that you may have a hidden leak in your plumbing system
Causes of a Leaking Outside Faucet Behind Brick
Several factors may cause an outside faucet to leak behind a brick wall. These factors include:
- Poor installation of the faucet
- Exposure to extreme weather conditions, such as freezing temperatures that can cause frozen pipes and subsequent leaks
- Age-related wear and tear, which can cause cracks or other damage to the faucet or plumbing system
- Damage caused by accidental impact, such as hitting the faucet with a lawnmower or other garden equipment
Steps to Fix a Leaking Outside Faucet Behind Brick
Fixing a leaking outside faucet behind a brick wall may require the assistance of a professional plumber. However, you can attempt some DIY fixes before you call an expert. Here are some steps you can follow:
- Turn off the water supply to the affected area to stop the leak.
- Dry the affected area around the faucet using a dry towel or cloth.
- For small leaks, use waterproof sealant or plumber’s tape to patch the leak temporarily.
- If the leak is extensive or you notice significant water damage to the brick wall, call a professional plumber to inspect and repair the faucet and any damaged plumbing.
Fixing a leaking outside faucet behind a brick wall requires immediate action. If you ignore the problem, it can cause serious damage to the faucet, plumbing system, and brick wall. By following the steps outlined above, you can avoid costly repairs and ensure the longevity of your outside faucet.
Outdoor Faucet Leaks When Turned On
If you’re like most homeowners, it’s not uncommon to see water leaking from your outdoor faucet when you turn it on. In most cases, the leak occurs because the stem washer inside the faucet has worn out over time. This little rubber washer sits at the bottom of the faucet’s handle and is responsible for preventing water from flowing out of the faucet when it’s turned off.
Signs Your Outdoor Faucet Is Leaking
One of the most common signs of a leaking outdoor faucet is water pooling around its base when the faucet is on. Another can be a sudden increase in your water bill, which is likely due to water going to waste through the leak. You might also notice that the faucet handle is difficult to turn, indicating that the stem washer has worn out and needs replacement.
Fixing the Leaking Outdoor Faucet
If your outdoor faucet is leaking when turned on, you need to fix it right away to prevent further damage. The good news is that fixing a leaking outdoor faucet is relatively easy and can be done with a few basic tools. You’ll need a pair of pliers, a screwdriver, and a replacement stem washer.
Start by turning off the water supply to the faucet, either by shutting off the main valve or by locating the valve that controls the faucet. Then, remove the faucet handle and loosen the packing nut with pliers. Once you’ve removed the stem, you should be able to see the rubber stem washer. Remove the old washer, replace it with the new one, and reassemble the faucet.
In conclusion, an outdoor faucet that leaks when turned on is a common problem that homeowners face. While it might seem like a minor annoyance, it can lead to more significant issues if left unaddressed. By following the steps outlined in this subsection, you can easily fix the leak and avoid any potential water damage. Make sure to regularly check your outdoor faucet for leaks and other signs of wear to keep it functioning properly.
Outdoor Faucet Leaking into Basement
A leaking outdoor faucet can be a headache, and if it’s leaking into your basement, it can be a nightmare. In this section, we’ll discuss what causes outdoor faucets to leak into the basement and how you can fix the problem.
Understanding the Problem
The first step to fixing a leaking outdoor faucet is to understand the problem. If water is leaking into your basement from the outdoor faucet, it’s likely that the faucet is not properly installed. The most common reason for this is a loose or damaged connection between the outdoor faucet and the pipe that delivers water to your home.
How to Fix It
To fix a leaking outdoor faucet, you’ll need to turn off the water supply to your home and then remove the faucet. Once the faucet is removed, inspect the surrounding area for any damage or worn out parts. If there are any damaged parts, replace them with new ones.
Before reinstalling the faucet, make sure the connection to the pipe is tight and secure. Test the connection by turning the water supply back on, and check for any leaks. If there are no leaks, you can reinstall the faucet.
Preventing Future Leaks
To prevent future leaks, it’s important to properly maintain your outdoor faucet. Make sure to turn off the faucet during colder months to prevent freezing, and regularly inspect the faucet and surrounding area for any signs of wear and tear. If you notice any issues, address them promptly to avoid more significant problems down the line.
In conclusion, a leaking outdoor faucet can be a significant problem, especially if it’s leaking into your basement. By understanding the problem, fixing it, and taking preventative measures, you can avoid significant damage and keep your home safe and dry.
What is my outdoor spigot leaking from
If you’ve noticed water dripping from your outdoor faucet, it could be a sign that something is wrong. Leaks can be caused by a variety of factors, including wear and tear on the faucet, damage from freezing temperatures during the winter months, or even problems with the plumbing system inside your home. Here are some potential causes of leaks in outdoor spigots.
Damaged or Worn Washers
One of the most common reasons for a leaking outdoor spigot is due to worn or damaged washers. Over time, the rubber washer inside your faucet can become compressed or torn, causing water to seep through the cracks. If you notice a slow drip coming from your faucet, this could be a sign that the washer needs to be replaced.
Loose or Broken Connections
Another possible cause of a leaking spigot is loose or broken connections within the faucet itself. If the connections between the spigot and the water line are loose or damaged, water can escape from the faucet and cause a leak. This type of problem can often be fixed by tightening the connections or replacing any broken parts.
Frozen Pipes
During the winter months, outdoor spigots can freeze and become damaged, leading to leaks. If you’ve noticed water leaking from your spigot after a severe cold spell, it could be a sign that the pipe has become damaged due to freezing temperatures. In this case, you’ll need to call a professional plumber to assess the damage and make any necessary repairs.
Cracked or Damaged Pipes
Finally, a leaking outdoor spigot could be caused by cracked or damaged pipes within your home’s plumbing system. If the leak is not coming from the faucet itself, but rather from the wall or ceiling surrounding the spigot, it could be a sign of a serious plumbing issue. In this case, you’ll need to contact a plumber right away to diagnose the problem and make any necessary repairs.
In conclusion, if you notice water leaking from your outdoor spigot, it’s essential to address the problem as soon as possible to prevent further damage to your home and plumbing system. By understanding the most common causes of leaks in outdoor spigots, you’ll be better prepared to identify and fix the problem quickly and effectively.
Outside Faucet Leaking When Hose Attached
If you have an outside faucet that leaks when you attach a hose, you’re not alone. This is a common problem that can be caused by a variety of things.
Check the Connection
The first thing to check is the connection between the hose and the faucet. Make sure it’s tight and secure. If it’s loose, water can seep out, causing the faucet to leak. You can tighten it by hand or use pliers for a stronger grip.
Examine the Washer
If the connection looks fine, the next thing to check is the washer. A worn-out or damaged washer can cause a leak. To fix this, turn off the water supply to the faucet and remove the washer. Take it to a hardware store and get a replacement that matches the size and shape. Then, reassemble the faucet, turn the water back on, and check for leaks.
Inspect the Hose
If neither the connection nor the washer is the culprit, the problem may lie with the hose. Check it for any cracks, holes, or kinks. Replace the hose if it’s damaged. You could also try loosening the hose and repositioning it, making sure that it’s not twisted or bent.
Avoid Over-Tightening
Sometimes, the faucet can leak due to over-tightening. Over-tightening can damage the faucet threads, causing it to leak. To avoid this, avoid using too much force when tightening the hose to the faucet. Don’t use any tools unless necessary.
If you’ve tried all these steps and your faucet still leaks, it’s time to call a professional plumber. They can diagnose and fix the issue for you. Remember to always turn off the water supply to the faucet before attempting any repairs. With proper maintenance and care, your outside faucet should work properly and not leak when you attach a hose.
Shut Off Valve for an Outside Faucet Leaking: What You Need to Know
If your outside faucet is leaking inside your wall, one potential culprit could be the shut-off valve. A shut-off valve is the device responsible for turning the water supply on and off to your outdoor faucet. When a shut-off valve starts to fail, it can cause leaks or other issues with your outdoor faucet.
Signs of a Failing Shut-Off Valve
There are a few warning signs to look out for that may indicate a failing shut-off valve:
- Difficulty turning the valve
- Water leaking from the valve
- Reduced water pressure
- Rattling sounds when turning the valve
If you notice any of these signs, it’s time to take action before the problem worsens.
Replacing a Shut-Off Valve
Replacing a shut-off valve can be a simple process, but it’s important to do it right to avoid causing further damage. Proper tools and knowledge are required to complete the task efficiently and correctly.
Before you start replacing the valve, turn off the water supply to your house. This will prevent water from flowing when you remove the valve and prevent further potential water damage. Next, drain the water remaining in the pipes to stop any residual water from leaking while working on the valve.
After the water supply is turned off and all residual water is drained, use a wrench to unscrew the old valve from the pipe. Keep in mind that you might need to use a lubricant if the valve is difficult to unscrew. Once you have the old shut-off valve removed, install a new valve and ensure that everything is tightened properly.
Hire a Professional
Overall, a broken or leaking shut-off valve can cause significant damage to your outdoor faucet or home. If you are not confident with your plumbing skills, it’s best to leave it to the professionals. Contact a licensed plumber to help you with any plumbing issues that you may have with regards to fixing an outside faucet leaking inside wall.
Conclusion
When it comes to a leak or an issue with your outside faucet, checking the shut-off valve is an important step. Knowing how to replace it can save you money and prevent further damage to your home. However, if you’re not confident in your plumbing skills, always opt for the help of a professional plumber to ensure everything is done correctly.
How to Fix a Leaky Outdoor Wall Faucet
If you find yourself with an outside faucet leaking inside the wall, it’s essential to fix it as soon as possible. A leaky faucet can cause significant damage to your home if left untreated for too long. In this subsection, we will discuss how to fix a leaky outdoor wall faucet and prevent water damage to your home.
Turn off the Water Supply
The first step in fixing an outdoor faucet leak is to turn off the water supply. Locate the shut-off valve that controls the water supply to the faucet and turn it off. This valve is usually located inside your home, near where the outdoor faucet connects to the water supply. Once you turn off the water supply, open the outdoor faucet to release any remaining water.
Remove the Faucet Handle
The next step is to remove the faucet handle. Check the manufacturer’s instructions for how to remove the handle. Some handles may require a screwdriver, while others may have a small set screw that needs to be loosened. Once the handle is removed, you should see the stem of the faucet.
Replace the Washer or O-Ring
The most common cause of an outdoor faucet leak is a worn-out washer or O-ring. Inspect the washer and O-ring for any damage or decay. If they appear worn or damaged, replace them with new ones. Be sure to use the correct size and type of washer or O-ring for your faucet.
Reassemble the Faucet
After replacing the washer or O-ring, reassemble the faucet. Replace the stem and handle, securing them tightly. Do not overtighten, as this can cause the handle to become difficult to turn.
Turn on the Water Supply
Once the faucet is reassembled, turn on the water supply and test the faucet for any leaks. If the faucet is still leaking, you may need to replace the entire faucet.
In conclusion, fixing a leaky outdoor wall faucet is a simple task that can save your home from significant water damage. Turn off the water supply, remove the faucet handle, replace the washer or O-ring, and reassemble the faucet. With these steps, you can have your outdoor faucet back to its original condition in no time.
Why Does My Outside Faucet Leak from the Top
Are you experiencing water leakage from the top of your outside faucet, leaving you wondering what might be causing it? There are several possible reasons why water might be coming out from the top of your outdoor faucet instead of the spout. In this section, we will be discussing the most common causes of this problem and how to fix them.
Worn-Out Washer
The washer inside your outside faucet is responsible for controlling the flow of water. Over time, constant use of the faucet can cause the washer to wear out or become damaged. When this happens, water may begin to leak from the top of the faucet instead of the spout. To fix this issue, turn off the water supply to the faucet and replace the washer with a new one.
Loose Packing Nut
A loose packing nut may cause water to leak from the top of your outdoor faucet. The packing nut is the hexagonal nut that secures the faucet handle stem to the faucet body. A loose packing nut can cause water to leak around the stem, resulting in a dripping faucet. Tightening the packing nut can help prevent this problem.
Cracked Stem
If you notice water dripping from the top of your faucet even after replacing the washer, it might be caused by a cracked stem. A cracked stem can cause water to leak from the top of the faucet instead of the spout. This issue requires a replacement of the faucet stem.
High Water Pressure
High water pressure can cause your outside faucet to leak from the top. Water pressure greater than 80 psi can put stress on your faucet’s internal components, making it more prone to leaks. If you suspect high water pressure is causing your faucet to leak, install a pressure regulator to reduce the water pressure.
In Conclusion
Water leakage from the top of your outdoor faucet can be caused by various reasons. From worn-out washers to high water pressure, these issues can cause significant water damage to your home. By understanding the causes and how to fix them, you can prevent further damages and save money on water bills.
How to Fix an Outside Faucet from Leaking
If you have a leaking outside faucet, it can be a real headache. Not only can it cause water damage to your property, but it can also drive up your water bill. Fortunately, fixing a leaky outside faucet is easy and doesn’t require any specialized skills.
Step 1: Turn off the Water Supply
Before you start working on your outside faucet, you need to turn off the water supply. Locate the shut-off valve and turn it clockwise until it’s fully closed. This will prevent any water from flowing through the pipe and allow you to work on the faucet without worrying about getting soaked.
Step 2: Disassemble the Faucet
To fix a leaky outside faucet, you need to disassemble it and replace the faulty parts. Start by removing the handle and loosening the packing nut with a wrench. Once you’ve removed the packing nut, you can remove the stem and inspect the washer and O-ring.
Step 3: Replace the Faulty Parts
If the washer or O-ring is worn out or damaged, you need to replace it with a new one. You can find replacement parts at your local hardware store or online. Make sure you get the right size and type of washer and O-ring for your faucet.
Step 4: Reassemble the Faucet
Once you have replaced the faulty parts, you can reassemble the faucet. Put the stem back in place and tighten the packing nut. Then, replace the handle and turn the water supply back on. Test the faucet to make sure it’s no longer leaking.
Fixing a leaky outside faucet is a simple task that you can do yourself. By following these steps, you can save money on your water bill and prevent water damage to your property. Remember to turn off the water supply before you start working on the faucet, and make sure you get the right replacement parts for your specific faucet. With a little bit of effort, you can have your outside faucet working like new in no time.
Why is my outside faucet leaking inside house
If you’ve ever had an outside faucet leak inside your house, you know how frustrating it can be. Not only does it make a mess, but it can also cause water damage and mold growth. Here are some common reasons why your outside faucet might be leaking inside, and what you can do about it.
Loose or Damaged Connections
One of the most common reasons for an outside faucet to leak inside is loose or damaged connections. Over time, the connections between the faucet and the pipes can become loose, causing water to leak into your walls. Additionally, if the connections are damaged, they can also cause leaks. If you suspect this is the case, try tightening the connections with a wrench. If that doesn’t fix the problem, you might need to replace the connections.
Frozen Pipes
Another common cause of outside faucet leaks is frozen pipes. If the temperature drops below freezing, the water inside the pipes can freeze, causing the pipes to expand and crack. When the ice thaws, the cracks can cause leaks. To prevent this from happening, make sure to winterize your outside faucet by turning off the water supply and draining the pipes.
Worn Out Washer
The washer inside your outside faucet can wear out over time and cause leaks. If you notice water dripping from the faucet even when it’s turned off, the washer might be the culprit. To fix this, you’ll need to replace the washer. This is a fairly simple and inexpensive fix that can be done with a few basic tools.
High Water Pressure
If your home has high water pressure, it can cause your outside faucet to leak inside. The excess pressure can cause the connections to fail or the pipes to burst, leading to leaks. To fix this, you’ll need to install a pressure reducing valve (PRV) on your main water supply line. This will help regulate the water pressure and prevent leaks.
If you’re dealing with an outside faucet leaking inside your house, there are several possible causes. By identifying the source of the problem, you can take steps to fix it and prevent further damage. Whether it’s loose connections, frozen pipes, a worn-out washer, or high water pressure, there’s usually a solution that doesn’t require calling a plumber. With a little bit of know-how, you can fix the problem and avoid costly repairs.
When I Turn on My Spigot It Leaks in the Wall
Are you experiencing a leak inside your wall every time you turn on your spigot? This can be a frustrating and costly problem, but don’t panic. There are a few possible causes for this issue, and we’re here to help you troubleshoot the problem.
Check for Loose Connections
One possible cause of a leak inside your wall is a loose connection in your outdoor faucet. Your faucet connects to a pipe that runs through your wall and into your home, and if that connection is loose, it can cause water to leak inside your wall. To check for a loose connection, turn off your water supply and remove the faucet handle. Look for any loose nuts, bolts, or screws, and tighten them if necessary.
Inspect the Faucet Washer
Another possible cause of a leak inside your wall is a worn-out washer. The faucet washer sits at the end of the faucet stem and creates a tight seal when the faucet is turned off. Over time, the washer can wear down, allowing water to seep through and leak inside your wall. To inspect the washer, turn off your water supply and remove the faucet handle. Unscrew the faucet stem and look for any signs of wear and tear. If the washer is worn out, replace it with a new one.
Look for Cracked Pipes
If your faucet connections are tight and your washer is in good condition, the problem may be a cracked pipe. Pipes can crack due to freezing temperatures or general wear and tear over time. If you suspect that you have a cracked pipe, you’ll need to call a professional plumber to fix the issue. A plumber can locate the source of the leak and repair or replace the damaged pipe.
In conclusion, a leak inside your wall when you turn on your spigot can be caused by several factors, including loose connections, worn-out washers, or cracked pipes. By following the steps outlined above, you can troubleshoot the problem and determine the best course of action. Remember to turn off your water supply before attempting any repairs, and if you’re not comfortable working on your faucet or pipes, don’t hesitate to call in a professional.