Are you tired of struggling with limited HDMI cable lengths or dealing with a broken HDMI port on your laptop? Look no further! In this blog post, we’ll dive into the world of HDMI cables and explore everything you need to know about splicing them.
From understanding the differences between HDMI and DisplayPort to learning how to join HDMI cables together, we’ll cover it all. Whether you’re curious about the maximum length of HDMI cables or the possibility of reducing their quality with splitters, we’ve got you covered.
So, get ready to unlock the secrets of splicing HDMI cables and discover how you can extend or repair them to suit your needs. Let’s jump right in and explore the wonderful world of HDMI splicing together!
How to Splice HDMI Cable: A Step-by-Step Guide
So you find yourself in a predicament. You’ve got this fancy HDMI cable that’s just a tad too short for your setup, and you’re left thinking, “What in the world do I do now?” Fear not, my friend! In this guide, we’ll show you how to splice an HDMI cable like a pro.
Gather Your Tools and Prepare for Adventure
Before you dive headfirst into this electrifying journey of cable splicing, let’s get our tools in order. Here’s what you’ll need:
1. Scalpel (aka Cable Surgeon’s Knife)
You’ll be needing a delicate tool to perform the cable surgery. And just like a surgeon, you must handle it with precision. Warning: don’t try using your kitchen knife—you’re not auditioning for a cooking show!
2. Soldering Iron (aka Soldering Sorcerer’s Wand)
Alright, so maybe it’s not exactly like a magic wand, but with a flick of the wrist, it’ll work wonders. It’s time to join those cable ends with the power of soldering.
3. Soldering Flux (aka Flux Capacitor)
No, we’re not time-traveling here. Flux is a magical substance that helps the solder flow smoothly, ensuring a strong bond between the cables. Emmett “Doc” Brown would approve.
4. Heat Shrink Tubing (aka Cable Magic Cape)
To give your cable a clean and professional finish, the heat shrink tubing is crucial. It wraps around the soldered area and shrinks when heated, making your cable splice look like it came straight from the factory.
Let the Splicing Begin!
1. Measure Twice, Cut Once
Before we get our hands dirty, measure the distance you need from end to end and mark the spot where you’ll be making the incision. Remember, there’s no going back once you’ve snipped!
2. Surgical Precision
Grab your scalpel (or cable surgeon’s knife, if you will) and make an even, clean cut at the marked spot. Don’t worry, it’s not brain surgery—it’s just cable surgery. Toss that excess cable aside; it’s time for the real magic to happen.
3. Strip it… the Cable, That Is
With a gentle touch, strip away the outer covering of both ends of the cable, revealing the inner wires waiting to be united. Carve off about an inch of the protective coating, exposing the delicate conductor within.
4. Twist and Shout (Or Maybe Just Twist)
Twist together the wires of corresponding colors. It’s like they’re dancing a tango of connection—so graceful, so rhythmic. Gently twist the copper wires from one end of the cable to the corresponding copper wires from the other. This union will make your devices sing!
5. Enter the Soldering Sorcerer
It’s time to fire up your soldering iron, my friend. Apply some soldering flux to the twisted copper wires, grab your soldering iron (or sorcerer’s wand, if you prefer), and melt a bit of solder onto the wires. This will ensure a solid bond that’ll withstand the test of time—no magic spells needed.
6. Cloak it in Heat Shrink Tubing
Now, the final touch to your cable masterpiece. Slide that heat shrink tubing over the soldered area, making sure it covers the exposed wires completely. Get out your heat gun (or maybe a hairdryer cranked up to its highest setting), and heat that tubing until it nicely wraps around the solder. Voila! The cables have officially joined forces.
Celebrate Your Victory!
Congrats, you’ve just become a cable-splicing hero! Go ahead and connect your newly spliced HDMI cable to your devices, and revel in the satisfaction of a successful DIY project. Take a moment to admire your handiwork and pat yourself on the back—you deserve it!
Remember, my friend, cable splicing may seem daunting at first, but with the right tools, a steady hand, and a sprinkle of humor, you’ve accomplished something truly remarkable. You’ve defied the very laws of cable length and made a connection that will last for years to come. Now go forth and embrace the world of cable customization with confidence!
Disclaimer: No cables were harmed during the making of this guide. Proceed with caution and at your own risk.
FAQs: How to Splice HDMI Cable
Are all HDMI connectors the same
Not all HDMI connectors are the same. There are different types of HDMI connectors, including Type A, Type B, Type C, and Type D. The most commonly used HDMI connector is Type A, which is the standard size for most home entertainment devices.
Do HDMI splitters work both ways
No, HDMI splitters do not work both ways. HDMI splitters take one HDMI signal and split it into multiple outputs, allowing you to connect multiple displays or devices. However, they do not combine multiple signals into one input.
How many wires does an HDMI cable have
An HDMI cable has 19 individual wires, which are used to transmit audio and video signals, as well as control signals.
What is DisplayPort vs HDMI
DisplayPort and HDMI are both digital video and audio interfaces used to connect devices such as computers, televisions, and monitors. However, HDMI is more commonly found in home entertainment devices, while DisplayPort is often used for computer monitors and laptops.
Do they make HDMI extensions
Yes, HDMI extensions are available. HDMI extensions allow you to extend the length of your HDMI cable, allowing for more flexibility in device placement.
What is the maximum length you can run HDMI cable
The maximum length you can run an HDMI cable without experiencing signal loss or degradation is typically around 50 feet. Beyond that, you may need to use HDMI repeaters or other signal boosting devices to maintain quality.
Is my laptop HDMI port broken
If you are experiencing issues with your laptop’s HDMI port, such as no signal or poor quality, it is possible that the port may be broken. However, it is also worth checking if there are any driver or software issues before assuming the port is at fault.
How do you fix a broken HDMI port on a laptop
Fixing a broken HDMI port on a laptop can be challenging and may require professional repairs or replacement of the port itself. It is advisable to consult with a technician to assess the damage and provide appropriate solutions.
Does HDMI splitter reduce quality
Using an HDMI splitter by itself does not typically reduce the quality of the signal. However, if the HDMI splitter is of low quality or if the connected devices do not support the same resolution, there may be a degradation in signal quality.
Can you split HDMI into two monitors
Yes, you can split an HDMI signal into two monitors using an HDMI splitter. This allows you to display the same content on both monitors simultaneously.
What is an HDMI repeater
An HDMI repeater is a device used to amplify and regenerate HDMI signals over long distances. It boosts the signal strength and ensures that the quality of the audio and video remains intact.
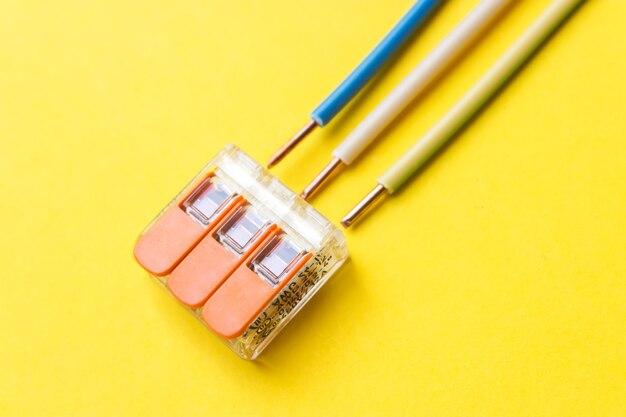
Can you shorten HDMI cable
Shortening an HDMI cable is possible, but it requires cutting the cable and soldering the wires back together. This process should only be done by someone with experience in cable splicing to prevent damage to the cable and ensure proper functionality.
Is it OK to hot swap HDMI cables
Hot swapping HDMI cables, or unplugging and plugging them back in while devices are powered on, is generally safe and does not cause any harm. However, it is recommended to power off the devices before making any cable changes to prevent potential signal disruptions.
How long can an HDMI cable be before it degrades
HDMI cables can degrade in signal quality over longer distances. For standard HDMI cables, it is recommended to keep the length within 50 feet to avoid significant signal loss. Beyond that, you may need to use signal amplifiers or fiber optic HDMI cables for longer runs.
How do I extend my HDMI cable myself
If you want to extend your HDMI cable yourself, you can use an HDMI extension cable or HDMI coupler. An HDMI coupler allows you to connect two HDMI cables together, effectively extending the length of the cable.
Can you join HDMI cables together
Yes, you can join HDMI cables together using an HDMI coupler or an HDMI extension cable. These devices allow you to connect multiple HDMI cables, effectively extending the overall length.
Do HDMI couplers reduce quality
HDMI couplers themselves generally do not reduce the quality of the signal. However, using low-quality HDMI couplers or connecting multiple couplers in a series can introduce some signal loss or degradation.
What is an HDMI splitter
An HDMI splitter is a device that allows you to split a single HDMI signal into multiple outputs. This allows you to connect multiple displays or devices to a single HDMI source.
How do you set up an HDMI splitter
Setting up an HDMI splitter is straightforward. Simply connect the HDMI source, such as a Blu-ray player or gaming console, to the input port of the splitter. Then, connect the output ports of the splitter to your desired displays or devices using HDMI cables.
Can an HDMI cable be spliced
Technically, an HDMI cable can be spliced, but it is not recommended. Splicing an HDMI cable requires cutting and reconnecting the wires, which can lead to signal loss or damage to the cable. It is generally better to use HDMI couplers or extension cables for extending HDMI connections.
Can you fix an HDMI port
Fixing an HDMI port can be challenging and may require professional repairs or even replacing the port itself. It is advisable to consult with a technician who specializes in electronics repairs to assess the damage and provide the necessary solutions.
What is an HDMI balun kit
An HDMI balun kit is a device used to extend HDMI signals over long distances using Category 5e or Category 6 Ethernet cables. It converts the HDMI signal into a format suitable for transmission over Ethernet cables, allowing for longer runs without significant signal loss.