Welcome to our blog where we’ll guide you on how to make your own micro USB to HDMI cable at home. With the increasing need to connect our devices to larger screens, a micro USB to HDMI cable comes in handy. Whether you want to connect your phone to your TV or display your laptop screen on a monitor, this DIY project will save you from purchasing an expensive cable.
In this blog post, we’ll answer common questions like “How do I connect my USB to my TV?” and “Can USB 2.0 convert to HDMI?” We’ll also provide step-by-step instructions, precautions, and tips to ensure you successfully create a functional micro USB to HDMI cable at home. So, let’s dive in and explore the world of DIY tech projects!
How to Create Your Own Micro USB to HDMI Cable at Home
Gathering the Materials
Before we delve into the step-by-step process of creating your own micro USB to HDMI cable at home, let’s gather all the materials you’ll need. Don’t worry; you won’t need a magician’s tool kit!
Materials you’ll need:
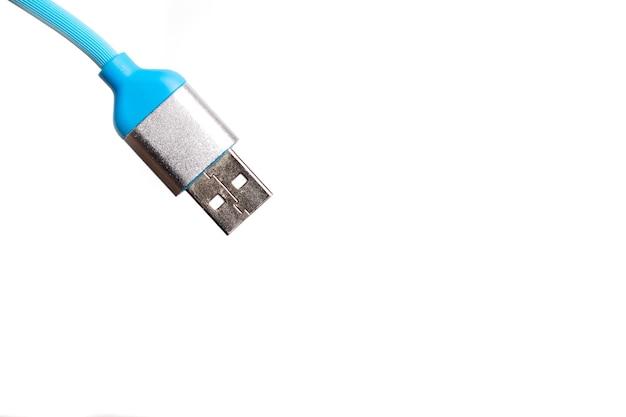
- USB cable – Preferably a micro USB cable, that’s the star of our DIY show!
- HDMI cable – Look for an HDMI cable with a male connector on one end and a female connector on the other. Let’s keep the ladies in charge for now!
- Wire stripper – Now don’t go stripping the insulation off every wire you find! A proper wire stripper tool will do the trick.
- Multimeter – For all the tech geeks out there, whip out your trusty multimeter to measure voltages and check connections.
- Electrical tape – Ah, the tape that holds everything together! Electrical tape will be your knight in shining armor throughout this process.
Understanding the Inner Workings
Now that we have our materials, let’s understand a bit about the magic behind the micro USB and HDMI connection. Don’t worry, I won’t bore you with mind-numbing technical jargon!
-
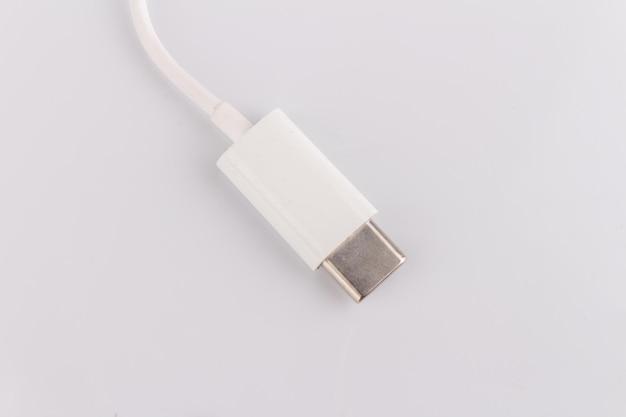
Micro USB Connector – This nifty little connector is commonly found on smartphones, tablets, and other portable devices. It transfers power and data, enabling us to charge our devices and transfer files seamlessly.
-
HDMI Connector – HDMI, which stands for High Definition Multimedia Interface, is the rockstar of connection standards. It delivers high-quality audio and video signals between your device and your display. It’s the reason you can binge-watch your favorite shows with stunning clarity!
Let the DIY begin!
Step 1: Preparing the USB Cable
- Take your USB cable and identify the micro USB end. This smaller end will fit into the charging port of your device.
- Using the wire stripper, carefully strip away about an inch of the cable’s insulation, exposing the inner wires. Remember, precision is key here, so strip away with grace!
- You will find four wires inside the cable: red, black, green, and white. Don’t get color blind now, these wires will determine the success of our DIY adventure!
Step 2: Identifying the Wires
Now that we have our wires out in the open, it’s time to give them individual identities. Let’s get to know them better!
- Red Wire – This wire is like the superstar of the show! It carries the power that charges your device. Treat it with the respect it deserves!
- Black Wire – Meet the black sheep of the cable family! It’s the ground wire, responsible for completing the electrical circuits. Don’t underestimate its importance!
- Green and White Wires – These are the data wires that transmit information between your device and other peripherals. They may seem like the quiet ones, but they play a vital role!
Step 3: Matching the Wires
- Take your HDMI cable and identify the female end. We’ll be utilizing this end for our DIY project.
- Locate the corresponding pins inside the female connector: +5V, Ground, D+, and D-. These connect with the wires of our USB cable.
Step 4: Making the Connections
Now, let’s bring our micro USB cable and HDMI cable together. It’s time to connect the dots!
- Connect the red wire from the micro USB cable to the +5V pin of the HDMI female connector. Remember, red is always positive!
- Connect the black wire from the micro USB cable to the Ground pin of the HDMI connector. Black completes the circuit!
- Connect the green wire from the micro USB cable to the D+ pin of the HDMI connector, and the white wire to the D- pin. These data wires ensure seamless communication between your device and the display.
Step 5: Secure and Insulate
- Once the connections are made, use electrical tape to secure them. Wrap each connection tightly, ensuring they don’t come loose during the cable’s usage.
- Insulation is key! Take electrical tape and wrap it around the entire exposed area, covering the connections. This will protect them and give your cable a neat, professional look.
The Magical Micro USB to HDMI Cable
Voila! You’ve just turned into a cable magician, creating your own micro USB to HDMI cable at home! It’s time to put your creation to the test. Connect your device to a compatible HDMI display, sit back, and let the magic unfold.
Remember, the DIY route is always fun, but please make sure to take necessary precautions while working with electronics. Safety first, folks!
So, why spend a fortune buying a ready-made cable when you can create your own? Get creative, have fun, and embrace your inner tech whiz with this micro USB to HDMI cable DIY project.
How to Connect Your USB to Your TV
Are you tired of watching videos or pictures on your small phone screen? Want to enjoy your favorite content on a bigger screen? Well, you’re in luck! Connecting your USB to your TV is easier than you think. Follow these simple steps to expand your entertainment experience:
Step 1: Check Your TV’s Ports
Before you get started, make sure your TV has a USB port. Most modern TVs come equipped with at least one USB port, often located on the side or back panel. Take a moment to locate it.
Step 2: Gather the Necessary Materials
To connect your USB to your TV, you’ll need a micro-USB to HDMI adapter. This handy little device allows you to bridge the gap between the USB and HDMI ports. You can find these adapters online or in tech stores.
Step 3: Connect the Adapter
Now that you have the adapter, it’s time to put it to use. Simply plug the micro-USB end into your phone or other device with a USB port. Then, connect the HDMI end of the adapter to an available HDMI port on your TV.
Step 4: Select the Correct Input
Next, grab your TV remote and navigate to the Input or Source button. Press it until you find the HDMI input corresponding to the port you connected the adapter to. This allows your TV to recognize the signal from your USB device.
Step 5: Enjoy the Show!
Congratulations! You’ve successfully connected your USB to your TV. Now, sit back, relax, and indulge in your favorite movies, photos, or videos on the big screen. It’s like having your own personal theater right in your living room!
How to Convert Micro-USB to HDMI
So, you want to turn your ordinary micro-USB into an HDMI connection? While it may sound like a wizardry challenge, fear not! We have a simple workaround so you can achieve the seemingly impossible.
Step 1: The Micro-USB to HDMI Adapter
To convert a micro-USB to HDMI, you need to rely on a trusty micro-USB to HDMI adapter. This magical adapter acts as a bridge, transforming the electrical signals from the micro-USB port to the digital brilliance of an HDMI connection.
Step 2: Connect the Adapter
Connect the micro-USB end of the adapter to the device with a micro-USB port. This could be a phone, tablet, or any other compatible device. Once it’s securely connected, plug the HDMI end of the adapter into an available HDMI port on your TV or monitor.
Step 3: Choose the Correct Input
As a wise wizard once said, “Input is key.” Use your TV remote to switch to the appropriate HDMI input that corresponds to the port where you connected the adapter. This way, your TV can recognize the signals from your micro-USB device.
Step 4: Prepare to Be Amazed!
Voila! You’ve successfully transformed your micro-USB into an HDMI connection. Prepare to be amazed as your humble micro-USB device now unleashes its potential on the big screen. Whether you’re streaming your favorite shows, engaging in a gaming session, or indulging in a slideshow of your wondrous vacation photos, the possibilities are endless!
Can You Splice Micro-USB to HDMI
Ah, the age-old question of splicing micro-USB to HDMI. While it may sound like a tempting shortcut, we must advise against it. You see, micro-USB and HDMI are entirely different creatures, each with its own unique set of powers.
Attempting to splice them together would be like trying to combine the magical abilities of a phoenix with the strength of a mighty dragon. It’s an endeavor that is simply not meant to be.
However, fear not, for the micro-USB to HDMI adapter comes to the rescue once again! This marvelous invention allows you to connect your micro-USB devices to an HDMI port without resorting to questionable splicing antics.
Embrace the power of the adapter and revel in its seamless ability to bridge the gap between these two distinct technologies. Your TV will thank you, and you’ll avoid a disastrous quest into the unknown realms of splicing.
Can I Connect My Phone to My TV with USB
Absolutely! Connecting your phone to your TV with a USB cable is a fantastic way to bring your multimedia experience to a whole new level. Forget squinting at your phone’s screen—embrace the large canvas of your TV for the ultimate viewing pleasure.
To connect your phone to your TV with USB, follow these simple steps:
- Retrieve a USB cable compatible with your phone.
- Plug one end of the USB cable into your phone’s USB port.
- Connect the other end of the USB cable into an available USB port on your TV.
- Switch your TV to the appropriate input to recognize the USB connection.
- Sit back and enjoy your phone’s content on the glorious big screen!
Now you can indulge in your favorite apps, videos, or even have a video call with friends and family on a TV-sized display. Say goodbye to squinting and hello to a whole new level of entertainment.
Can USB 2.0 Convert to HDMI
While USB 2.0 is a versatile technology with many uses, sadly, it cannot directly convert to HDMI. USB 2.0 and HDMI operate on different wavelengths, making a direct conversion impossible without the assistance of specialized adapters.
However, fear not, intrepid technology enthusiast! With the help of a USB 2.0 to HDMI adapter, you can bridge the gap between these two realms. This adapter acts as a conduit, allowing USB 2.0 devices to tap into the glory of HDMI.
So, if you have a USB 2.0 device and desire the wonders of HDMI, invest in a trusty adapter. It will be your faithful companion along this exciting technological journey.
What Is USB-C to HDMI Used For
Ah, the mystical USB-C to HDMI cable, a marvel of modern technology. But what is it used for? Well, prepare yourself for a revelation!
USB-C to HDMI cables serve as powerful conduits between your USB-C devices and the enchanting world of HDMI. With this cable in hand, you can connect your USB-C-enabled devices, such as laptops, tablets, or even phones, to HDMI-enabled screens or projectors.
Now, the realm of possibilities opens before you. Presentations become grand spectacles, movie nights turn into cinematic extravaganzas, and gaming sessions transform into epic battles on the silver screen.
So, should you find yourself in possession of a USB-C device yearning for the wonders of HDMI, fear not! Equip yourself with a trusty USB-C to HDMI cable, and let the magic unfold before your eyes.
What Format Does a USB Need to Be for TV
When it comes to USB formats for TVs, the most widely supported file system is FAT32. This format is like a universal translator, allowing your TV to understand and play nicely with your USB device.
Before you connect the USB to your TV, make sure it’s formatted in the FAT32 file system. If you’re not sure what format your USB is currently in, don’t worry! You can easily reformat it to FAT32 using your computer’s operating system.
Simply plug your USB into your computer, locate the USB drive, right-click on it, and select the Format option. In the format dialog, choose FAT32 as the file system, and let your computer work its magic.
Once your USB is formatted in the delightful language of FAT32, you’ll be able to navigate its contents on your TV screen with ease. Movies, music, and all your multimedia delights will be at your fingertips, ready to whisk you away to a world of entertainment.
Can USB-C Take Video
Oh, you bet it can! The versatile USB-C port is not content with just transferring data or charging your devices. It craves more—it yearns for the limelight, the glitz, and the glamour of video.
USB-C, with its magical abilities, can indeed take video and transmit it to compatible displays. From laptops to phones to tablets, USB-C allows you to connect your devices to external screens or projectors, bringing your videos to life.
So, whether you’re showcasing your latest YouTube masterpiece, binge-watching your favorite TV show, or engaging in an intense gaming session, USB-C has you covered. Its undeniable charm and video-taking prowess will leave you spellbound and immersed in vivid visuals.
Does USB to HDMI Reduce Quality
Ah, the great quality debate! It’s only natural to wonder if converting from USB to HDMI may result in a loss of picture or sound quality. After all, we don’t want our multimedia experiences to suffer, do we?
Fortunately, when it comes to USB to HDMI conversion, you’ve got nothing to fear. Quality loss is kept to a minimum, if any at all, thanks to the wonders of modern technology.
While it’s true that HDMI offers a superior audio and video experience, the USB to HDMI adapters ensure a seamless conversion, preserving the integrity of your content. So, rest assured that your favorite movies, TV shows, and cat videos will look and sound just as delightful on your TV screen as they did on your USB device.
Indulge in the captivating sights and sounds without worrying about dips in quality. USB to HDMI keeps the magic alive, so you can enjoy your multimedia adventures to the fullest.
Can I Make a USB to HDMI
Ah, the lure of DIY! While crafting your own USB to HDMI cable might sound like an exciting adventure, we must emphasize caution. Creating electronic connections is not for the faint of heart, and it requires a deep understanding of complex technologies.
The world of USB and HDMI is a realm of intricate wiring and precise engineering. Attempting to manufacture such a cable would be akin to embarking on a treacherous quest without a guide or map.
Moreover, certifying the homemade cable’s compliance with industry standards is a monumental task in itself. The last thing you want is a connection that goes haywire, causing unintended consequences or even damaging your beloved devices.
For the sake of your sanity and the safety of your gadgets, we highly recommend leaving the USB to HDMI cable manufacturing to the experts. Trust in the reputable brands and reliable adapters available on the market. Your devices will thank you, and your multimedia experiences will be nothing short of extraordinary.
Can USB-C Be Used for Display
Absolutely! USB-C is no ordinary port—it’s a portal to a world of boundless possibilities. Among its many talents, USB-C has the power to connect your devices to external displays, granting you a larger canvas for your visual pursuits.
With a compatible USB-C to DisplayPort or USB-C to HDMI adapter, you can connect your USB-C-enabled devices, such as laptops or tablets, to external displays or projectors. This enables you to embrace the immersive experience of a larger screen for presentations, entertainment, or simply expanding your workspace.
So, whether you’re showing off your latest designs, gaming like a pro, or indulging in a movie marathon, rest assured that USB-C has your back. With its versatility and knack for all things display-related, the possibilities become endless.
Can I Make a USB-C to HDMI Cable
Ah, the allure of being the master of your own cable creations! While DIY projects can be fun, crafting your own USB-C to HDMI cable may be a bit ambitious. It’s the equivalent of venturing into uncharted technological territories without a guide or a compass.
The intricate nature of USB-C and HDMI cables requires a level of precision and expertise that goes beyond basic DIY tinkering. Attempting to create a cable without the necessary technical knowledge could lead to unsatisfactory results, or worse, damage to your devices.
To ensure a seamless connection and the highest quality output, we recommend leaving the manufacturing of USB-C to HDMI cables to the professionals. With their expertise and advanced equipment, they can guarantee the reliability and performance you deserve.
So, as tempting as it may be to embark on a cable-making adventure, remember: Sometimes, it’s best to leave it to the experts and enjoy the fruits of their labor.
Can USB Be Used for Video
Indeed, it can! USB, the versatile jack-of-all-trades, is not limited to data transfers or charging duties. It yearns to entertain, to captivate, and to mesmerize with its video-playing abilities.
USB can be used to play video content from compatible devices on various screens. Simply connect your USB drive or device to a USB port on your TV, monitor, or even some projectors, and let the magic unfold.
Whether you have a collection of home videos, movies, or TV shows, USB is the key to unlocking their visual glory on the big screen. Navigate through folders, select your desired video, and sit back as USB delivers your chosen entertainment with finesse.
So, dust off those USB drives and let your videos shine! USB’s versatile nature ensures that your multimedia adventures know no bounds.
How Do I Connect a USB Cord to an HDMI Cable
Ah, the quest to connect a USB cord to an HDMI cable! While it may seem like mission impossible, fear not, brave adventurer, for there is a way. Though it may require a detour through the realms of adapters and gadgets, victory shall be yours!
To connect a USB cord to an HDMI cable, you’ll need the aid of a USB to HDMI adapter. This clever device acts as a bridge, allowing you to connect your USB cord to an HDMI port, unlocking a world of entertainment.
Simply plug one end of the USB cord into the USB port on the adapter and the other end into your device. Then, connect the HDMI end of the adapter to an available HDMI port on your TV, monitor, or projector.
Select the relevant HDMI input on your display device, and voila! Your USB cord now basks in the glory of HDMI, transforming into a conduit for your visual escapades. Movies, photos, and videos await, ready to captivate and immerse you in their magic.
Can I Splice a USB Cord with an HDMI Cord
Ah, the age-old quest to splice a USB cord with an HDMI cord! While the idea of merging these wondrous cords may seem intriguing, we must advise against it. The forces at play when it comes to USB and HDMI are as distinct as the sun and the moon.
Attempting to splice these cords together would be like trying to merge two celestial bodies on a cosmic level. It’s no small feat,