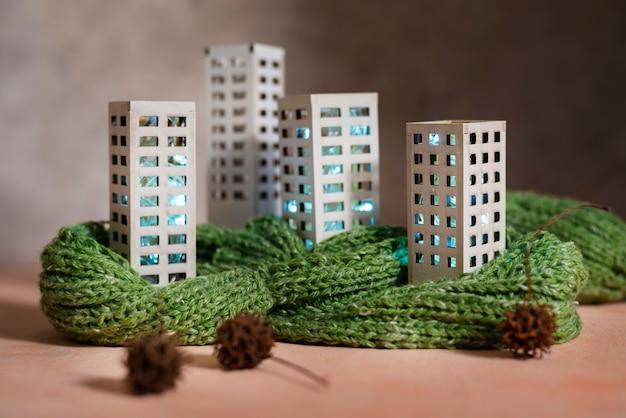
Welcome to our comprehensive guide on how to make miniature buildings! Whether you’re a seasoned hobbyist or a beginner looking to explore a new craft, this blog post will provide you with all the essential tips and tricks to create stunning miniature structures.
In this guide, we’ll address common questions like which clay is best for miniature sculpting and what materials are used to make miniatures. We’ll also delve into techniques for building a dollhouse, a mini village, or even a model town. Along the way, we’ll discuss the benefits of using different materials such as polymer clay, plywood, and air dry clay, while exploring budget-friendly options and ways to improve the overall appearance of your creations.
So, if you’re ready to unleash your creativity and embark on a fascinating journey into the world of miniature buildings, let’s dive in and discover the wonderful possibilities that await you!
Keywords: How toxic is polymer clay?, How much money is modeling clay?, Can you build a home for free?, Which clay is best for miniature sculpting?, What materials are used to make miniatures?, Can you build a house with plywood?, How do you build a town model?, What is the best material to build a dollhouse?, What materials do you need to make a miniature house?, What do you need for a dollhouse?, Is air dry clay good for sculpting?, How do you make a simple house step by step?, What materials could you have use to make your model house look better?, How do you make a Wendy’s cardboard house?, How do you make a mini village?, What clay is best for miniatures?, How do you make a model village?, What sculpting tools do?
How to Craft Miniature Marvels from Thin Air
So, you’ve decided to embark on the whimsical journey of creating miniature buildings. Congratulations! Get ready to channel your inner architect and bring tiny wonders to life. In this guide, we’ll delve into the intricacies of this delightful craft and uncover the secrets to making your miniature buildings burst with charm.
Planning: Sketching the Blueprint of Your Creativity
Before you dive headlong into building miniature masterpieces, take a moment to plan your vision. Grab a pencil and sketch out the blueprint of your miniature empire. Consider the architectural style—whether it’s a quaint Victorian cottage, a bustling city block, or a rustic countryside barn. Let your imagination run wild, just remember to keep things in scale!
Gather the Materials: Stock Up on Miniature Magic
To bring your architectural dreams into the palm of your hand, you’ll need a few essential tools and materials. Here’s a rundown of what you should have at your crafty fingertips:
1. Cardboard: The Sturdy Foundation
Cardboard will be the backbone (pun intended) of your miniature marvels. Grab some thin cardboard sheets like a determined conductorcaptivatingly with rhythmic melodies, you can often find them in packaging or the back of notepads.
2. Hobby Knife: The Architect’s Sword
Think of the hobby knife as your trusty sword—not for slaying dragons but for cutting through cardboard with surgical precision. Be sure to handle it carefully, or else you might inadvertently turn your fingers into aspiring architects.
3. Glue: The Building’s Most Reliable Adhesive
Glue will be the glue that holds everything together (pun intended, again). Use a craft glue that dries clear so that your miniature buildings won’t resemble a sticky mess. A little dab will do, so resist the urge to go all Elmerzilla with it.
Building the Foundation: It All Starts with a Base
With your supplies at the ready, it’s time to lay the groundwork for your miniature world. Cut out a sturdy base from the cardboard, ensuring it’s large enough to accommodate your architectural ambitions. Think of it as the little corner of the universe where your creations will flourish.
Assembling Walls: Erecting Tiny Skyscrapers and Cozy Cottages
Now that your foundation is set, it’s time to build up. Cut out your walls from the cardboard, using the dimensions you sketched in your architectural blueprint. Start erecting the walls by applying a thin layer of glue at the seams and delicately pressing them together. Remember, patience is key here—don’t rush or you might end up with a leaning tower of miniature!
Details Make the Difference: Windows, Doors, and Roofs, Oh My!
To breathe life into your miniature building, it’s all about the details. Cut out tiny windows and doors from the cardboard and carefully glue them into place. Experiment with different shapes and sizes to give each building its own personality. And don’t forget the roof! Whether it’s flat, sloping, or peaked, a stylish lid is sure to make your miniature architectural wonder stand out.
Paint and Polish: The Final Flourishes
Now that your miniature building is taking shape, it’s time to add some color and personality. Choose paints that suit your architectural style and apply them with a delicate brush. Embrace your inner Michelangelo (the painter, not the Ninja Turtle) and add details like shingles, bricks, or even a weathervane if you’re feeling fancy. Let your creativity soar!
Voilà! Showcasing Your Miniature Marvel
As the final strokes of paint dry, stand back and admire your tiny creation. You’ve transformed mere cardboard into a captivating architectural wonder. Proudly display your miniature marvel for the world to see. Whether it becomes a centerpiece on your shelf or a perfect gift for a fellow mini-enthusiast, your building will surely inspire awe and wonder among its admirers.
Now it’s your turn to unleash your creative superpowers upon the world of miniature architecture. With a dash of patience, a sprinkle of imagination, and a pinch of whimsy, you can craft miniature buildings that will transport you to a world where small is mighty. So, grab your cardboard, don your architect’s hat, and let the magic unfold!
FAQ: How To Make Miniature Buildings
How Toxic is Polymer Clay
Polymer clay is generally considered safe to use, but like any art material, caution should be taken. Avoid inhaling the clay dust or getting it in your eyes. Always wash your hands after handling polymer clay to prevent any potential irritation or allergic reactions. It’s best to work in a well-ventilated area and follow the manufacturer’s instructions for safe usage.
How Much Money is Modeling Clay
The cost of modeling clay can vary depending on the brand, quantity, and quality. On average, a small pack of modeling clay can range from $2 to $10. If you’re purchasing larger quantities or specialized clay for miniature sculpting, the price may increase. However, investing in good quality clay can make a significant difference in the final result of your miniature buildings.
Can You Build a Home for Free
Building a home for free is a remarkable idea, but unfortunately, it’s not a practical reality for most of us. Constructing a house involves expenses such as materials, labor, permits, and more. However, you can explore cost-saving measures like repurposing materials, using sustainable techniques, or taking advantage of DIY resources to minimize expenses.
Which Clay is Best for Miniature Sculpting
When it comes to miniature sculpting, polymer clay is a popular choice among artists. It’s soft, pliable, and easy to work with, allowing for intricate details. Additionally, polymer clay doesn’t require kiln firing like other clays, making it convenient for beginners. However, some artists also enjoy working with air-dry clay or epoxy clay, depending on their preferences and the specific requirements of their project.
What Materials are Used to Make Miniatures
Creating miniatures involves a variety of materials to bring your tiny world to life. Some common materials used include polymer clay, acrylic paints, brushes, sculpting tools, adhesives like glue or epoxy, miniature furniture and accessories, wood or foam for structure, and even various found objects that can be repurposed and resized. Get creative and experiment with different materials for unique effects.
Can You Build a House with Plywood
Plywood is a versatile and commonly used material for building houses, especially in construction projects that require sturdy and cost-effective solutions. It is typically used for subflooring, framing, roofing, and sheathing. However, it’s important to consult with professionals or follow building codes and regulations to ensure the proper use and structural integrity of plywood in your construction project.
How Do You Build a Town Model
Building a town model can be a fun and engaging project. Here are some basic steps to get you started:
-
Plan and Research: Decide on the scale, style, and theme of your town model. Gather reference materials for accuracy.
-
Create a Base: Use materials like foam board or plywood to construct a sturdy base for your town model.
-
Layout and Design: Sketch out the layout of your town, including roads, buildings, parks, and any other features you want to include.
-
Construct Buildings: Utilize various materials like foam, cardboard, or polymer clay to construct miniature buildings with intricate details.
-
Paint and Decorate: Use acrylic paints and other art supplies to add color, texture, and visual appeal to your buildings and other elements.
-
Assemble and Arrange: Glue your buildings and accessories onto the base, carefully arranging them to create a realistic town layout.
-
Add Final Touches: Incorporate additional details like landscaping, signage, lighting, or small figurines to bring your town model to life.
What is the Best Material to Build a Dollhouse
The best material for building a dollhouse depends on personal preference and the desired level of realism. Popular choices include wood, plastic, or MDF (medium-density fiberboard). Each material offers its own benefits, such as durability, affordability, or ease of customization. Consider factors like your skill level, budget, and desired end result when selecting the material for your dollhouse.
What Materials do You Need to Make a Miniature House
To make a miniature house, you’ll need a few essential materials:
-
Base Material: Choose a sturdy and lightweight material like foam board or plywood as the foundation of your miniature house.
-
Construction Material: Opt for materials such as balsa wood, popsicle sticks, or foam for constructing the walls, roof, and other structural elements.
-
Adhesives: Use strong adhesives like wood glue or hot glue to secure the different parts of your miniature house together.
-
Cutting Tools: Have a variety of cutting tools on hand, such as a craft knife or scissors, to accurately shape and trim the materials.
-
Finishing Supplies: Use sandpaper, paints, brushes, and varnish to smooth the surfaces, add color, and protect your miniature house.
-
Optional Accessories: Enhance your miniature house with additional accessories like miniature furniture, curtains, rugs, or tiny plants.
What do You Need for a Dollhouse
To create a dollhouse, you’ll need the following:
-
Dollhouse Kit or Plans: Purchase a dollhouse kit with pre-cut pieces or find plans to guide your construction.
-
Construction Materials: Gather materials such as plywood, MDF, or plastic sheets for constructing the structure and walls of the dollhouse.
-
Adhesives and Fasteners: Use wood glue, screws, nails, or other appropriate adhesives to assemble the dollhouse securely.
-
Decorative Elements: Include wallpapers, paints, miniature furniture, and accessories to add color and personality to the dollhouse.
-
Tools: Have essential tools like a saw, hammer, sandpaper, and paintbrushes to aid in construction and finishing.
Is Air Dry Clay Good for Sculpting
Air-dry clay can be an excellent option for sculpting miniature buildings. It’s easy to work with, doesn’t require baking or firing, and dries on its own when exposed to air. The drying time may vary depending on the brand and thickness of the clay. Air-dry clay is available in different colors and can be painted after it’s completely dry. However, keep in mind that air-dry clay may not have the same level of detail or durability as polymer clay or other sculpting materials.
How Do You Make a Simple House Step by Step
Creating a simple miniature house can be a fun project. Follow these steps to make one:
-
Gather Materials: Collect materials like cardboard, craft foam, or wood, as well as glue, cutting tools, and paints for decoration.
-
Plan and Measure: Sketch out a design for your house, including the size and shape of the walls, roof, and windows. Measure and cut the necessary pieces.
-
Construct the Walls: Assemble the walls by gluing or taping the cut pieces together, ensuring they are straight and secure.
-
Add the Roof: Attach the roof piece(s) to the walls, aligning them properly, and secure them with glue.
-
Create Openings: Cut out door and window openings, reinforcing edges with additional strips of cardboard if needed.
-
Decorate and Paint: Use paints, markers, or other decorative materials to add colors, textures, and details to your miniature house.
-
Attach Additional Details: Glue on miniature furniture, decor items, or any other accessories to give your house a personalized touch.
-
Let It Dry: Allow the glue, paint, or any other applied materials to dry completely before handling or displaying your simple house.
What Materials Could You Use to Make Your Model House Look Better
To enhance the visual appeal of your model house, consider using the following materials:
-
Finishing Materials: Sandpaper, putty, or filler can help you smooth out any rough edges or imperfections, creating a polished look before painting.
-
Paints and Brushes: Acrylic paints allow you to add color, textures, and visual interest to your model house. Various brush sizes can help with precision.
-
Foliage and Landscaping: Incorporate materials like model trees, grass mats, rocks, or even natural elements like dried moss or twigs for realistic landscaping.
-
Lighting: LED lights or small battery-operated light fixtures can create a charming effect, illuminating your model house and making it more captivating.
-
Weathering Effects: Use techniques like dry brushing, washes, or staining to create weathered or aged effects, adding depth and character to your model house.
How Do You Make a Wendy’s Cardboard House
Creating a Wendy’s cardboard house can be an exciting project for children or anyone looking for a fun DIY activity. Here’s a simple guide:
-
Collect Materials: Gather sturdy cardboard boxes, scissors or a craft knife, glue, tape, and markers or paints for decorating.
-
Plan and Sketch: Design your Wendy’s cardboard house on paper, including walls, roof, doors, windows, and any other details you want to include.
-
Cut Out the Pieces: Using your plan as a guide, carefully cut out the necessary pieces from the cardboard boxes, ensuring they fit together properly.
-
Assemble the House: Glue or tape the walls together, securing them at the corners. Then, attach the roof and any additional details.
-
Decorate and Personalize: Let your creativity shine by adding colors, logos, or other Wendy’s-inspired decorations using markers or paints.
-
Play and Enjoy: Once everything is dry, your Wendy’s cardboard house is ready for imaginative play or display.
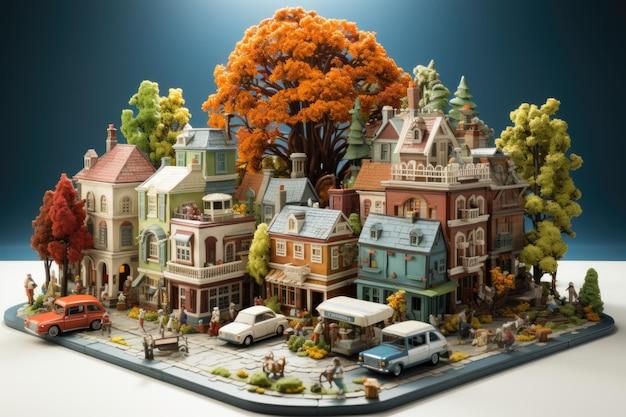
How Do You Make a Mini Village
To create a captivating mini village, follow these steps:
-
Decide on a Theme: Choose a theme for your mini village, such as a cozy winter village, a seaside town, or a quaint countryside setting.
-
Gather Materials: Collect materials like foam board, cardboard, fabric, paints, glue, miniature houses, trees, figurines, and other decorative elements.
-
Construct the Base: Create a sturdy base for your village using foam board or a wooden platform, ensuring it’s large enough to accommodate your village layout.
-
Map out the Layout: Sketch out a rough plan for the placement of buildings, roads, landscaping, and other features in your mini village.
-
Build and Decorate Structures: Construct and customize the miniature houses, shops, and other buildings using materials like foam, wood, or cardboard. Paint and add details to make them visually appealing.
-
Landscaping and Streets: Add landscaping elements like tiny trees, bushes, and grass mats. Create roads and paths using materials like craft sand, pebbles, or colored paper.
-
Accessorize and Bring Life: Add miniature figurines, cars, animals, and other tiny accessories to bring your mini village to life and enhance its charm.
-
Finishing Touches: Add lights or small LED bulbs to create a warm, cozy ambiance for your mini village, and ensure all the glued pieces are secure.
What Clay is Best for Miniatures
When it comes to crafting miniatures, polymer clay stands out as a preferred choice for many artists. It offers excellent moldability, fine detail retention, and a wide range of vibrant colors. With polymer clay, you can sculpt tiny figures, furniture, or intricate details for your miniature buildings. It requires no kiln firing and can be hardened by baking in a regular oven, making it convenient for miniature enthusiasts.
What Sculpting Tools Do
Sculpting tools play a vital role in bringing your miniature buildings to life. Here are some common sculpting tools and their purposes:
-
Needle Tools: Used for creating texture, indentations, or fine details in clay or other sculpting materials.
-
Wire Tools: Ideal for cutting or slicing clay, shaping delicate curves, or creating armatures for added support.
-
Loop Tools: Great for removing excess clay or refining shapes, particularly when working with larger-scale miniatures.
-
Ball Stylus Tools: Create uniform indentations, smooth surfaces, or shape concave forms with different-sized ball tips.
-
Knife or Blade Tools: Suitable for cutting, trimming, and sculpting detailed features with precision.
-
Spatulas or Spoons: Helpful for smoothing clay surfaces, blending colors, or adding texture.
-
Brushes: Useful for painting fine details, applying glazes, or adding surface effects to your miniature buildings.
-
Mold Tools: Enable you to create consistent shapes or duplicate intricate details quickly using pre-made molds.
Remember, the specific sculpting tools you need may vary based on your preferences, the type of clay or materials you are using, and the level of detail you want to achieve.
That concludes our comprehensive FAQ section on how to make miniature buildings. If you have any further questions, feel free to explore other sections of our blog or reach out to us directly. Get ready to unleash your creativity and embark on an exciting journey into the world of miniature building!