Cracks in joint compound can be frustrating and unsightly, especially after all the careful work put into finishing drywall. If you’ve ever experienced this issue, you’re not alone. Many homeowners and DIY enthusiasts often wonder why their joint compound is cracking and what they can do to prevent it.
In this blog post, we’ll explore the various reasons why joint compound might crack and provide tips on how to avoid this common problem. We’ll also address related questions such as the drying time of thin coats, the differences between drywall mud and joint compound, the need for primer, and how to fix cracking issues. So, let’s dive in and learn how to achieve a flawless finish for your walls without any cracks or hiccups!
Keywords: How long does it take for thin coat of joint compound to dry?, What is the difference between drywall mud and joint compound?, Does thick paint crack?, Are Wall Cracks serious?, Do you need primer over joint compound?, Can I paint over mud cracking?, How do you keep joint compound from cracking?, Will thick joint compound dry?, Can I dry joint compound with a hair dryer?, Should I sand between coats of joint compound?, How do you fix mud cracking?, Should I worry about hairline cracks?, Can I paint wet joint compound?, How can you tell if a crack is structural?, Why do my drywall seams keep cracking?, Can you rehydrate joint compound?, What happens if you paint over wet joint compound?, How thick can you apply joint compound?, What happens if joint compound is too thick?, How do you fix dry joint compound?
Note: This article was last updated in 2023.
Why is My Joint Compound Cracking
Common Causes and Solutions
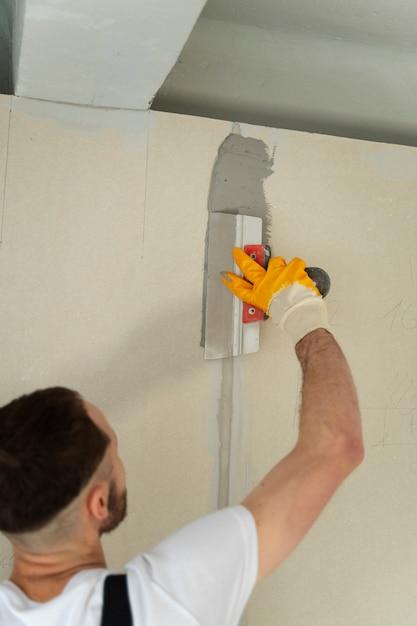
So, you’ve painstakingly applied joint compound to your walls, only to discover that it’s cracking like an old sidewalk. Frustrating, isn’t it? But fear not, dear reader, for I am here to shed some light on this perplexing problem and offer you practical solutions that will have your walls as smooth as a freshly churned milkshake. Let’s dive into the nitty-gritty of why your joint compound may be cracking and how you can fix it.
Insufficient Mixing: The Culprit Behind Patchy Walls
One possible reason for your joint compound cracking like a poorly executed magic trick is insufficient mixing. Now, I know what you’re thinking—mixing joint compound is about as exciting as watching paint dry. But trust me, dear reader, this crucial step is worth paying attention to. If the compound is not mixed thoroughly, it can result in inconsistent texture and poor adhesion, leading to those dreaded cracks. So, grab your mixing paddle and give that joint compound a good whirl—your walls will thank you!
Moisture Woes: Beware of the Damp Trap
Ah, moisture—the silent saboteur of your beautiful walls. Excess moisture can wreak havoc on your joint compound, causing it to crack and crumble like a delicate sugar cookie. But worry not, my friend, for I’m here to help you keep moisture at bay. Ensure your walls are dry before applying the compound, and be sure to address any underlying moisture issues in your home, such as leaks or poor ventilation. Don’t let dampness rain on your parade!
Temperature Extremes: The Hot and Cold Showdown
Oh, the eternal duel between hot and cold. Extreme temperature fluctuations can spell disaster for your joint compound, leading to unsightly cracks that would make even the fiercest Viking warrior cringe. If it’s too hot or too cold, the compound may dry too quickly or too slowly, causing stress on the surface. So, maintain a moderate temperature while your compound is drying, and keep those cracks where they belong—far, far away from your walls.
Layering Like a Cake: Patience is Key
We all know that good things come to those who wait, and the same rings true when it comes to layering joint compound. Applying thick layers of compound in one go may seem efficient, but it’s a recipe for cracking disaster. Instead, take a patient approach and apply thin layers, allowing each one to dry thoroughly before adding another. This gives the compound time to settle and ensures a seamless, crack-free finish that will make your walls sing with joy.
Now that we’ve unraveled the mysteries of why your joint compound may be cracking, you are armed with the knowledge and know-how to tackle this challenge head-on. Remember to mix thoroughly, keep moisture in check, avoid extreme temperatures, and approach layering with the calculated patience of a master painter. So go forth, dear reader, and banish those cracks from your walls. Your home deserves nothing less than flawlessness, and with these tips, you will achieve just that.
*Note: This blog post is purely educational and reflective of common experiences. If you encounter persistent cracking issues or require professional advice, it’s always best to consult a qualified contractor or expert in the field.
FAQ: Why Is My Joint Compound Cracking
How long does it take for a thin coat of joint compound to dry
A thin coat of joint compound typically takes around 24 to 48 hours to dry completely. However, the drying time can vary depending on factors such as humidity levels and temperature. It’s important to allow sufficient drying time before applying subsequent coats or painting over it.
What is the difference between drywall mud and joint compound
Drywall mud and joint compound are often used interchangeably, but technically, they are slightly different. Drywall mud is a colloquial term for joint compound. Joint compound, on the other hand, is a gypsum-based product used to cover seams, nail holes, and imperfections in drywall. So, you can consider them as two names for the same thing!
Does thick paint crack
Yes, thick paint can lead to cracking. When paint is applied too thickly, it takes longer to dry and may not adhere properly to the surface. As a result, once it does dry, it becomes brittle and prone to cracking. It’s best to follow the manufacturer’s guidelines for paint thickness and apply multiple thin coats if necessary.
Are wall cracks serious
Wall cracks can vary in severity. Some cracks might be minor cosmetic issues, while others may indicate underlying structural problems. If you notice large or widening cracks, especially accompanied by other signs like bulging or sagging walls, it’s recommended to consult a professional to assess the situation.
Do you need primer over joint compound
Yes, applying a layer of primer over joint compound is essential before painting. The primer helps create a smooth, uniform surface, enhances paint adhesion, and prevents the paint from being absorbed unevenly by the joint compound. Make sure to choose a primer specifically for drywall or bare surfaces.
Can I paint over mud cracking
If you notice cracking in the joint compound after it has been painted, it’s best to fix the issue before proceeding. Cracks in the mud can be repaired by applying a thin layer of joint compound over the affected area and then sanding it smooth once dry. Afterward, you can repaint the surface to achieve a flawless finish.
How do you keep joint compound from cracking
To prevent joint compound from cracking, there are a few key steps you can take:
- Prepare the surface: Ensure the surface is clean, dry, and free from debris before applying the joint compound.
- Apply thin layers: Applying multiple thin coats of joint compound is better than one thick layer. Each coat should be allowed to dry thoroughly before applying the next.
- Use proper tools: Use a wide putty knife or trowel to apply the joint compound evenly and smoothly.
- Avoid excessive sanding: Over-sanding can weaken the joint compound, so be mindful of how much you sand between coats.
Will thick joint compound dry
Yes, thick joint compound will eventually dry, but it will take significantly longer compared to thinner layers. Thick applications can result in extended drying times, and the compound may not dry uniformly, potentially leading to cracking or other issues. It’s advisable to apply joint compound in thin layers for optimal results.
Can I dry joint compound with a hairdryer
While it may be tempting to speed up the drying process with a hairdryer, it is not recommended. Directing heat onto joint compound can cause it to dry too quickly and unevenly, leading to cracking. It’s best to allow the compound to dry naturally or use proper ventilation to aid in the drying process.
Should I sand between coats of joint compound
Yes, it’s important to sand between coats of joint compound to achieve a smooth and even surface. Sanding helps remove any imperfections, ridges, or bumps that may have formed during the application. Use a fine-grit sandpaper or a sanding sponge to gently sand the dried compound before applying subsequent coats.
How do you fix mud cracking
To fix mud cracking, follow these steps:
- Identify the cracks: Examine the surface and locate the cracked areas.
- Prep the surface: Clean the area, remove any loose debris, and sand the cracked sections lightly.
- Apply joint compound: Using a putty knife, apply a thin layer of joint compound over the cracks, feathering the edges for a smooth transition.
- Let it dry: Allow the joint compound to dry thoroughly according to the manufacturer’s instructions.
- Sand and repeat: Once dry, sand the repaired area until it’s smooth. If necessary, apply another thin layer of joint compound and repeat the process.
- Prime and paint: Once the repaired area is smooth and dry, apply a coat of primer before painting the entire surface.
Should I worry about hairline cracks
Hairline cracks are generally not a cause for major concern. They often occur due to small shifts in the structure or settling of the building over time. If the cracks are stable and not widening, you can simply repair them with a thin layer of joint compound and paint over them for a seamless finish.
Can I paint wet joint compound
No, it’s crucial to let the joint compound dry completely before applying paint. Painting over wet or partially dry joint compound can lead to adhesion issues, uneven drying, and a poor finish. Patience is key! Wait until the joint compound is completely dry before moving on to the painting stage.
How can you tell if a crack is structural
Determining whether a crack is structural or cosmetic can be challenging. However, some signs may indicate a more serious issue. Structural cracks tend to be wider than hairline cracks, often exceed 1/8 inch in width, and may show signs of vertical or diagonal movement. If you suspect a structural crack, it’s essential to consult a professional to assess the situation.
Why do my drywall seams keep cracking
Drywall seams can crack due to various reasons, including:
- Improper installation: If the drywall panels weren’t secured correctly or if joint compound wasn’t applied correctly along the seams, it can lead to cracking.
- Moisture and temperature fluctuations: Changes in humidity and temperature can cause the drywall to expand and contract, leading to stress on the seams.
- Settling or shifting: Over time, buildings can settle or shift, causing stress on the drywall seams and resulting in cracks.
To prevent drywall seam cracking, ensure proper installation techniques, and allow for expansion and contraction by using flexible joint compounds or tape.
Can you rehydrate joint compound
Unfortunately, joint compound cannot be rehydrated once it has dried. Once the compound has completely cured, it becomes a hardened material that cannot be softened or restored to its original state. It’s always best to use fresh joint compound for optimal performance.
What happens if you paint over wet joint compound
Painting over wet joint compound can cause several issues. The moisture from the compound can affect the drying and adhesion of the paint, leading to uneven drying, paint peeling, or bubbling. Additionally, the trapped moisture may cause the joint compound to continue shrinking, resulting in visible cracks or imperfections once the paint dries.
How thick can you apply joint compound
It is recommended to apply joint compound in thin layers, typically no more than 1/8 to 1/4 inch thick. Thicker applications take longer to dry and are more prone to cracking. By applying multiple thin coats and allowing them to dry properly between applications, you can achieve a smoother and more durable finish.
What happens if joint compound is too thick
If joint compound is applied too thickly, it can result in extended drying times, uneven drying, and cracking. Thick applications of joint compound take longer to dry due to the moisture trapped within the layers. To avoid issues, it’s best to apply thin layers, allowing each coat to dry thoroughly before applying additional coats if necessary.
How do you fix dry joint compound
If the joint compound has dried but is not smooth or has imperfections, you can fix it by sanding the affected areas lightly. Gently sand the dry compound until it becomes smooth and even. If needed, you can reapply a thin layer of joint compound over the sanded area, ensuring it blends seamlessly with the surrounding surface. Once dry, sand again if required, and proceed with priming and painting.