Are you experiencing a damp patch on the wall next to your shower? Does the wall look bubbly, and you’re not quite sure why? Water damage around your shower can be a headache and can lead to costly repairs if left untreated.
In this comprehensive guide, we’ll discuss everything you need to know about water damage on walls next to showers. We’ll explore how to fix water damage around your shower, the signs to look out for, and how to prevent water damage from happening in the first place.
We’ll answer the common questions you might have, such as whether showers can cause water damage to walls and the cost to repair bathroom wall water damage.
By the end of this post, you’ll have a better understanding of what causes water damage on walls next to showers, how to assess if your walls have water damage, and what steps to take to fix it. So, grab your favorite beverage and let’s dive in!
Water Damage on Wall Next to Shower: Causes and Solutions
Are you seeing water damage on the wall next to your shower? Don’t panic – this is a common problem that many homeowners face. In this blog post, we will explore the causes of water damage on the wall next to the shower and provide some practical solutions to help you fix this issue.
Causes of Water Damage on Wall Next to Shower
The most common cause of water damage on the wall next to the shower is a leaky showerhead or valve. If water is continuously dripping down the wall, it can lead to mold growth and unsightly stains on the wall.
Another cause of water damage on the wall next to the shower is grout and caulk deterioration. Over time, the grout and caulk in your shower can start to crack, which can allow water to seep through the gaps and damage the wall.
Solutions for Water Damage on Wall Next to Shower
Fixing water damage on the wall next to the shower requires identifying the root cause of the problem. Here are some suggestions to help you fix the issue:
1. Fix Leaks
If you have a leaky showerhead or valve, it’s important to fix this issue before it causes more damage to your wall. You may need to replace the showerhead or valve to prevent water from continuously dripping down the wall. If you’re not sure how to do this, consider hiring a professional plumber to assist you.
2. Replace Grout and Caulk
If your grout or caulk is cracked or deteriorated, it’s important to replace it to prevent water from seeping through the gaps and damaging your wall. You can do this yourself with a grout saw, new grout, and caulk. Be sure to remove the old grout and caulk before applying the new product.
3. Install a Shower Niche
If you’re consistently seeing water damage on the wall next to your shower, it might be time to install a shower niche. A shower niche is a great way to keep your shower products organized and contained within the shower area, which can help reduce water splashes on the wall.
Water damage on the wall next to the shower can be frustrating, but it’s important to address this issue as soon as possible to prevent further damage. By identifying and fixing the root cause of the problem, such as leaks, deteriorated grout, or caulking, and installing a shower niche, you can prevent water damage on the wall next to your shower. If you’re unsure about how to fix the issue yourself, consider hiring a professional to get the job done right.
Water Damage Next to Tub
Just like the wall next to a shower, the wall next to a tub can also suffer water damage if not properly maintained. Here’s what to look out for:
Cracks and Holes
One common cause of water damage next to a tub is cracks or holes in the tub or the grout around it. These can allow water to seep through and damage the walls behind the tub. It’s essential to repair any cracks or holes immediately to prevent further damage.
Leaky Faucets
Another cause of water damage is a leaky faucet. A leaky faucet can release an enormous amount of water that can quickly damage your walls, flooring, and fixtures. A dripping faucet should be repaired immediately to prevent further damage to your bathroom.
Lack of Ventilation
Poor ventilation can trap moisture in the bathroom, leading to mold and mildew growth, which can damage not only the walls but also your health. Consider installing a ventilation fan to reduce moisture levels in your bathroom.
Prevention is Key
The best way to prevent water damage is to keep your bathroom dry and well-maintained. Be sure to wipe down the tub and walls after every use to prevent water from sitting on surfaces. Repair any leaks or cracks as soon as possible. Regularly inspect your bathroom for any signs of water damage to catch it early.
In conclusion, water damage next to a tub can be prevented by maintaining a dry and well-ventilated bathroom, repairing any leaks immediately, and regularly inspecting your bathroom for any signs of damage.
Damp Patch on Wall Next to Shower
If you ever find a damp or wet patch on the wall next to your shower, it’s a sure sign of water damage. This patch is usually caused by prolonged exposure to water, and if left unchecked, it can turn into a much bigger problem.
Find the Source of the Leak
The first thing you need to do is find the source of the leak. The leak could be coming from the showerhead, the plumbing behind the wall, or even the shower curtain or door. Start by checking the showerhead for any visible signs of water leakage. If you can’t find any leaks around the showerhead, the problem could be more severe and could be coming from the plumbing behind the wall. In this case, you should consider calling a professional plumber to come and identify the problem.
Repair the Leak
Once you’ve found the source of the leak, it’s time to repair it. If the leak is coming from the showerhead, the solution could be as simple as replacing the showerhead O-rings. If it’s a plumbing issue, you might need to replace some of the pipes.
Use a Dehumidifier
After repairing the leak, you need to make sure that the damp patch on the wall dries out completely. You can use a dehumidifier to remove any excess moisture from the air. This will help dry the patch out faster and prevent the growth of mold and mildew.
Paint Over the Patch
Once the patch has dried out completely, you can paint over it to cover up the damage. Make sure you choose a paint that is specifically designed for bathrooms.
A damp patch on the wall next to your shower is not something to take lightly. If left unchecked, it could lead to serious water damage and even compromise the structural integrity of your home. By identifying the source of the leak and repairing it promptly, you can prevent any further damage. Remember to use a dehumidifier and paint over the patch once it’s dry to ensure that the problem is completely resolved.
Can a Shower Really Cause Water Damage to Walls
Many homeowners often wonder if their shower can cause damage to the walls surrounding it. The answer is yes, definitely! A shower with leaking pipes or poor installation can result in water damage to the walls adjacent to it.
Why Does Water Damage Occur Around the Shower
Water damage can occur around the shower for several reasons. One of the most common reasons is a leaking showerhead or faucet, which can cause water to seep into the walls. Water damage can also occur due to poor installation, which allows water to seep through the grout and tiles.
How Can You Identify Water Damage Around Your Shower
Identifying water damage around your shower may not always be easy, especially if it’s hidden behind the walls. However, some signs can give it away. These include:
- Peeling or cracked paint around the shower
- A damp, musty smell
- Discolored or stained walls
- Spongy or soft feeling walls
If you notice any of these signs, it’s time to investigate further.
How to Prevent Water Damage Around Your Shower
Taking a few preventative measures can go a long way in preventing water damage around your shower. These include:
- Regularly inspecting the showerhead and faucet for leaks
- Ensuring proper installation of the shower and surrounding tiles
- Using water-resistant materials like waterproof cement board instead of plaster or drywall
- Sealing the grout between the tiles regularly
By taking these simple steps, you can avoid costly repairs and protect your home from water damage.
In conclusion, it’s crucial to be aware of the potential for water damage around your shower. By understanding the causes and taking preventative measures, you can avoid costly repairs and keep your home in top condition. If you suspect water damage, it’s best to call a professional to assess the situation and recommend the best course of action.
Repairing Bathroom Wall Water Damage Cost
If you’re dealing with water damage on your bathroom walls, it’s essential to act fast to avoid costly repairs later. Here’s a breakdown of the cost of repairing bathroom wall water damage.
Assessing the Damage
The first step to repairing bathroom wall water damage is to assess the extent of the damage. If it’s minor, you might consider repairing it yourself. However, if you’re not skilled in home repairs, you could exacerbate the problem. You can call in a professional to assess the damage and provide a cost estimate for repairs.
DIY Repairs
If the damage is minor, you can do the repairs yourself. You’ll need to remove the affected drywall and any water-damaged insulation behind it. Then, allow the wall to dry thoroughly before replacing the insulation and patching the wall with new drywall. The cost of supplies for a DIY job should run between $50 and $100.
Professional Repairs
When you need to call in a professional, the cost of repairs can range widely depending on the severity of the damage. For minor repairs, you can expect to pay between $200 and $300. For significant water damage, the cost could rise to over $1000.
Insurance Coverage
If the damage is due to a covered peril, like a leaking pipe or a burst sewer line, your homeowner’s insurance policy may cover the cost of the repair. Check your policy to see what is covered and what deductible you’ll need to pay.
Preventing Future Water Damage
To avoid having to deal with bathroom wall water damage repairs in the future, ensure that your shower and bathtub are adequately sealed and that the grout is in good condition. Keep the bathroom well ventilated, and attend to any water leaks as soon as you notice them.
In conclusion, while the cost of repairing bathroom wall water damage can be steep, it’s worth it to avoid more extensive, more costly repairs. If you’re not sure what to do, it’s always good to consult a professional to avoid further damage.
How to Get Rid of Water Damage on Walls
Water damage can be a significant problem in any home, especially in areas that encounter high levels of moisture such as around a shower. If you have noticed water damage on walls next to a shower, it is essential to address it right away. Failure to do so can lead to more significant problems, such as mold growth and structural damage. In this sub-section, we will discuss how to get rid of water damage on walls.
Identify the Source of the Water Damage
Before you can fix water damage on walls, you need to know the source of the water. It could be a leaky pipe, a damaged shower head, or even condensation. Identify the source of the water damage, and fix it immediately to prevent further damage.
Remove Damaged Wall Material
The next step is to remove the damaged wall material. Use a utility knife or a drywall saw to cut out the damaged area. Ensure that you cut a square or rectangular shape and remove all the damaged pieces. Be careful not to cut into the underlying structure, such as studs.
Dry the Area Thoroughly
After removing the damaged material, dry the area thoroughly. Use a fan or dehumidifier to help dry the area even faster. It is crucial to ensure the area is completely dry before you begin the repair process.
Repair the Wall
Once the area is dry, repair the wall. If the damage is minor, you can use a joint compound to fill in the gaps and smooth the surface. For more extensive damage, you may need to install new drywall. Sand the surface smooth after the repair is complete.
Prime and Paint
The final step is to prime and paint the repair area to match the rest of the wall. Use a high-quality primer and paint to ensure a long-lasting finish. After completing the repair, keep an eye on the area to ensure the water damage doesn’t return.
In conclusion, fixing water damage on walls next to a shower isn’t a difficult task, but it requires some effort and patience. Take the necessary steps to prevent further damage and ensure the area is thoroughly dry before beginning the repair. By following the above steps, you can fix water damage on walls and restore your home to its former glory.
What Happens If Water Gets in Your Walls
Water damage on wall next to shower can be a major issue for homeowners. It’s important to understand what happens if water gets in your walls. Water damage can be tricky because you may not notice it until it’s too late. Here are some of the things that can happen if water gets in your walls.
Mold and Mildew
One of the biggest problems with water damage in walls is mold and mildew. If water gets into your walls, it creates a damp environment that is perfect for mold and mildew to grow. This can lead to health problems for you and your family. If you notice a musty smell in your home, it’s important to call a professional to inspect your walls.
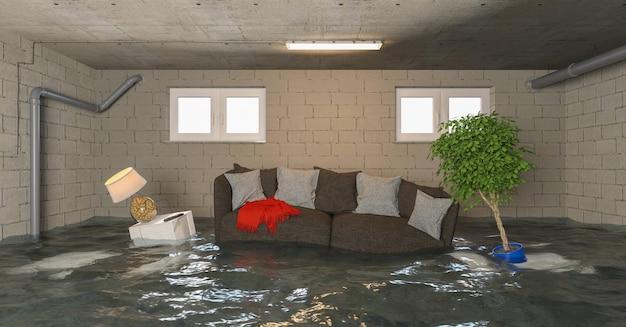
Structural Damage
Water damage can weaken the structure of your walls. If the damage is severe enough, the walls can collapse. This is dangerous and can cause serious injury or even death. If you notice any signs of structural damage, such as cracks in the walls or ceiling, it’s important to call a professional right away.
Electrical Damage
If water gets into your walls and comes into contact with electrical wiring, it can cause electrical damage. This can lead to a fire hazard and can be deadly. If you notice any signs of electrical damage, such as flickering lights or outlets that don’t work, it’s important to call an electrician right away.
Pest Infestations
Water damage can also attract pests like termites, ants, and rodents. These pests can cause damage to your home and can be difficult to get rid of once they’ve taken up residence. If you notice any signs of pest infestations, such as droppings or chewed wood, it’s important to call an exterminator right away.
In conclusion, water damage on wall next to shower can be a serious problem if not addressed promptly. If you notice any signs of water damage, it’s important to call a professional to inspect your walls. Mold and mildew, structural damage, electrical damage, and pest infestations are all potential problems that can arise if water gets into your walls. By being proactive and taking care of any water damage as soon as possible, you can keep your home safe and healthy.
How to Fix Water Damaged Wall in Bathroom
If you’ve noticed water damage on the wall next to your shower, it’s essential to address the problem promptly. Left unattended, water damage can lead to mold growth, structural problems, and a more extensive and costly repair. Here’s a step-by-step guide on how to fix water damaged wall in bathroom:
1. Identify the Source of the Water Damage
Before fixing the wall, it’s crucial to ensure that the source of the water damage has been identified and fixed. If there’s a leak, repairing the wall without addressing the source of the problem will only lead to recurrent water damage.
2. Remove any Mold or Damaged Drywall
If the water damage has caused mold growth or damage to the drywall, remove the affected areas. Cut out any wet or damaged drywall with a drywall saw or utility knife. It’s essential to wear protective gear while removing mold, such as a mask and gloves.
3. Dry the Area
Ensure that the area is entirely dry before repairing the wall. You can use a dehumidifier or a fan to dry out the space. Make sure to check the studs, insulation, and subflooring to ensure that they are dry.
4. Replace the Drywall
Measure the area that needs to be replaced and cut a piece of drywall to fit. Secure the new drywall to the studs with screws and joint compound. After drying, sand down the compound and paint.
5. Prevent Future Water Damage
Lastly, protect the newly repaired wall from future water damage by taking the following measures:
- Install a shower liner to prevent water from leaking into the wall
- Use a bathroom fan or open a window to reduce humidity levels
- Regularly inspect plumbing fixtures and repair or replace any leaks
In conclusion, fixing water damaged wall in bathroom is a straightforward process that requires identifying the source of the water damage, removing any mold or damaged drywall, drying the area, replacing the drywall, and preventing future water damage. With these steps, you can protect your wall from recurrent water damage and avoid costly repairs in the future.
Why is the Wall Bubbling Next to My Shower
If you notice bubbling or blistering on the wall next to your shower, it’s a clear indication that there’s water damage. Don’t ignore this problem as it can be a sign of an underlying issue, such as a leaky showerhead or a broken water pipe. Here are some reasons why the wall might be bubbling:
1. Excess Moisture
If the bubbling is near the bottom of the wall, then it could just be a case of excess moisture. If the bathroom doesn’t have proper ventilation, it can lead to mold and mildew growth, which can eat away at the wall and cause it to bubble. You can fix this issue by installing an exhaust fan or opening windows to improve air circulation.
2. Leaky Showerhead
A leaking showerhead is another possible cause of bubbling on the wall. Droplets of water from a leaking showerhead can find their way into the wall, causing it to become saturated and bubble. Check for any leaks around the showerhead and repair them immediately.
3. Broken Water Pipe
A broken water pipe can also cause the wall next to your shower to bubble. A burst pipe can cause water to seep into the surrounding walls and cause them to bubble. If left unchecked, the broken pipe can cause significant water damage, so it’s important to detect and repair the problem as soon as possible.
4. Improperly Installed Tile or Grout
If the bubbling is near the bottom of the shower wall, it might be due to improperly installed tile or grout. Water can seep through any gaps or cracks around the tiles and cause it to bubble. To fix this problem, you’ll need to remove the affected tiles, repair the substrate, and re-install the tiles.
The wall bubbling next to your shower can be a sign of an underlying problem that needs to be addressed immediately. Whether it’s due to excess moisture, a leaky showerhead, a broken water pipe, or improperly installed tile or grout, it’s essential to find and fix the issue to prevent further damage. Don’t leave this problem unattended since it can lead to mold growth, structural damage, or even health hazards.
How Can You Tell If a Wall Has Water Damage
Water damage on walls can be a difficult problem to solve. It can be caused by leaks in your plumbing, poor ventilation, or excess moisture in the air. Regardless of the cause, it’s important to identify water damage early to prevent costly repairs down the line. Here are some signs that a wall might have water damage:
Look for Discoloration or Stains
The most common sign of water damage is discoloration or stains on walls. These may appear as a dark or light ring around an area that has been affected by water. If the damage is severe, the wall may have a bubbled or peeling texture, making it look like the paint is separating from the wall.
Check for Musty or Damp Odors
If you notice a musty or damp odor in a room, it could be a sign of water damage. Water damage often leaves behind a lingering smell, even after the source of the damage has been fixed. If you can’t find any visual evidence of water damage, trust your nose to locate the culprit.
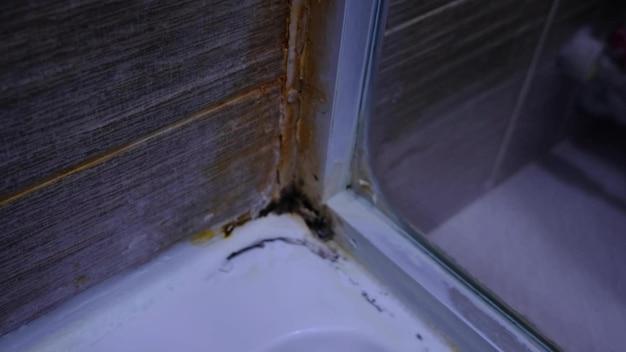
Look for Mold Growth
Mold thrives in damp environments, so if you see mold growing on your walls, it’s a sure sign of water damage. Mold can be black, green, or brown and spread quickly if it’s not removed promptly. When dealing with mold, safety should be your number one priority. Wear protective gear and contact a professional if you’re unsure how to proceed.
Inspect the Texture of the Wall
If you suspect water damage but can’t find any visible signs, try running your hands over the surface of the wall. If it feels damp or spongy, there’s a good chance that water has seeped into the wall.
Keeping an eye out for these signs can help you identify water damage early and prevent it from getting worse. If you notice any of these signs, it’s important to take action quickly to prevent further damage.
How to Fix Water Damaged Drywall Next to Shower
If you’ve noticed water damage on your drywall next to the shower, it’s essential to fix the problem before it gets worse. Here’s how to fix water-damaged drywall next to the shower.
Step 1: Assess the Extent of the Damage
Before you start fixing the drywall, you need to assess the extent of the damage. Check to see if the drywall is bulging or discolored, which are signs of water damage. If you notice mold growth, it’s a sign that the water damage has been going on for quite some time.
Step 2: Remove the Damaged Drywall
Once you’ve assessed the extent of the damage, the next step is to remove the damaged drywall. Use a utility knife to cut along the edges of the damaged drywall and carefully remove it. If the drywall is wet, use a fan or dehumidifier to dry the area completely before proceeding to the next step.
Step 3: Install New Drywall
After you’ve removed the damaged drywall, the next step is to install new drywall. Cut a piece of drywall to fit the hole, and attach it to the studs using drywall screws. Be sure to use a level to make sure the new piece of drywall is even with the rest of the wall.
Step 4: Tape and Mud the Seams
Once you’ve installed the new drywall, the next step is to tape and mud the seams. Use drywall tape to cover the seams and apply a thin layer of joint compound over the tape. Smooth out the joint compound with a trowel, and let it dry completely. Sand the joint compound lightly, and apply a second coat if necessary.
Step 5: Paint the Wall
Once the joint compound is completely dry, the final step is to paint the wall. Use a paintbrush or roller to apply a coat of primer to the wall and let it dry completely. Apply a coat of paint to match the rest of the wall, and let it dry completely before using the shower again.
In conclusion, fixing water-damaged drywall next to the shower isn’t a difficult task. With a few simple steps, you can have your wall looking as good as new in no time. Remember to assess the extent of the damage, remove the damaged drywall, install new drywall, tape and mud the seams, and paint the wall.
How to Prevent Water Damage on Walls Next to Showers
Water damage on walls next to showers is a common problem that homeowners face. However, there are several ways to prevent it from happening. In this section, we will discuss some helpful tips to keep your walls dry and free from water damage.
Use a Shower Curtain
One of the easiest ways to prevent water damage is by using a shower curtain. A shower curtain acts as a barrier, preventing water from splashing onto your walls. Make sure to use a shower curtain liner to keep the water from seeping through. You can also choose a colorful or patterned shower curtain to add some style to your bathroom.
Install a Shower Splash Guard
A shower splash guard is a handy tool that helps to keep water within the shower area. It is especially helpful if you have kids who tend to splash or if you have a high-pressure showerhead. Splash guards come in various materials and styles. You can choose a clip-on option or one that screws into the wall.
Ventilate Your Bathroom
Poor ventilation can lead to moisture buildup, which can cause mold and mildew growth. To prevent this, make sure to ventilate your bathroom properly. You can install an exhaust fan to remove excess moisture from the air. You can also keep a window open to allow fresh air to circulate.
Seal Your Grout and Caulking
Grout and caulking are prone to wear and tear, which can cause water to seep through. To prevent this, make sure to seal your grout and caulking periodically. This will help to keep the water out and prevent damage to your walls.
Wipe Down Your Walls
Finally, make it a habit to wipe down your walls after each shower. Use a squeegee or a towel to remove any excess water. This will help to keep your walls dry and prevent water damage.
By following these simple tips, you can prevent water damage on walls next to showers. Remember, prevention is the key to avoiding costly repairs down the line.