If you’ve ever needed to share a large file with someone, you know how frustrating it can be. Email attachments have size limitations, and if the recipient doesn’t use the same file-sharing platform as you, it can become a real headache. That’s where creating a file sharing website comes in handy. In this guide, we’ll walk you through the steps of creating your own website where users can easily upload, share, and access files.
From understanding the different types of file sharing to uploading files to a website, we’ll cover all the essential aspects of building a file sharing website. Whether you’re a web developer looking to expand your skillset or someone who wants to share files online, this blog post will provide you with a comprehensive guide. So let’s dive in and learn how to create a file sharing website using HTML and other necessary tools.
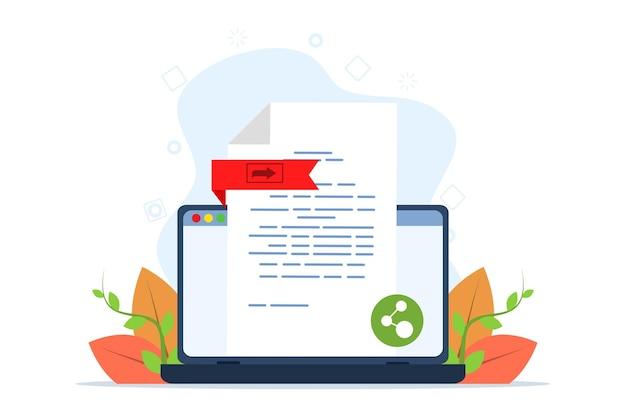
How to Create a File Sharing Website
Welcome to the ultimate guide on how to create a file sharing website! Whether you want to share documents with colleagues, exchange files with friends, or simply build the next big file sharing platform, we’ve got you covered. In this comprehensive tutorial, we’ll walk you through the process step by step, sharing some handy tips and tricks along the way. So grab your favorite beverage, put on your coding hat, and let’s get started!
Choosing the Right Platform
Before diving headfirst into the world of file sharing websites, you need to choose the right platform. Now, there are plenty of options out there, but we’re not going to settle for mediocrity, are we? No! We want the best of the best!
Step 1: Web Hosting
The first step is to find a reliable web hosting provider. Think of it as renting a space on the internet for your file sharing website. You want a host that offers ample storage space, fast server speeds, and top-notch security. Don’t worry, we’ve got a few recommendations up our sleeves!
Step 2: Content Management System
Next up, you need a content management system (CMS) to build your website. Gone are the days of coding everything from scratch. With a CMS like WordPress, you can create a stunning file sharing website without pulling your hair out. It’s like having a personal assistant who takes care of all the technical stuff while you focus on the fun parts!
Creating a Seamless User Experience
Now that you have your platform sorted, let’s focus on creating a file sharing website that users will love. After all, we want those folks coming back for more, don’t we?
Step 3: Intuitive Interface
When it comes to file sharing, simplicity is key. Nobody likes a convoluted mess of buttons and menus. Your website should have a clean and intuitive interface that even your technologically-challenged grandma can navigate with ease. Trust us, Grandma knows best!
Step 4: Organizational Wizardry
Imagine you’re searching for an important document in a sea of files named “Untitled.” Nightmare, right? Avoid this chaos by implementing an organizational system that would make Marie Kondo proud. Let users create folders, tag files, and easily search for specific documents. Keep it organized, and your users will thank you!
Sharing is Caring, and So is Security
A file sharing website without proper security is like leaving your front door wide open without a care in the world. Let’s make sure your users’ documents are safe and sound!
Step 5: Fort Knox Security
Implement top-notch security measures to protect your users’ files from prying eyes. Encryption, user authentication, and SSL certificates are all friends you want in your corner. Show those cybercriminals who’s boss!
Step 6: Prevention over Cure
You know what they say: “Prevention is better than cure.” Stay one step ahead of potential threats by regularly updating your website’s software and plugins. Patch those vulnerabilities like a diligent seamstress, and keep your website safe and sound.
Monetize, Monetize, Monetize!
Now that you have a fantastic file sharing website up and running, why not make some money while you’re at it? Cha-ching!
Step 7: Premium Features
Offer premium features or subscription plans to supercharge your users’ file sharing experience. Need extra storage? Upgrade to premium! Want faster download speeds? Premium has got your back! Give your users that little extra something and watch the dollars roll in.
Step 8: Ad Revenue
If premium features aren’t your cup of tea, you can always turn to good ol’ advertising. Display relevant ads on your website and make some moolah. Just remember, nobody likes an ad-heavy website. Keep it classy and don’t annoy your users with all the flashy stuff.
Congratulations! You’ve come a long way, my friend. With these steps, you now have the wisdom and know-how to create your very own file sharing website. So why wait? Go out there and build the next big thing in file sharing! Good luck, and remember, sharing is caring!
Disclaimer: The information provided in this article is for educational purposes only. We do not endorse or promote any illegal sharing of copyrighted materials. Always respect the intellectual property rights of others and use file sharing websites responsibly.

FAQ: How To Create A File Sharing Website
Welcome to our comprehensive FAQ guide on how to create a file sharing website! In this article, we will address some of the most frequently asked questions about web hosting, file sharing, HTML, and more. Whether you’re a tech-savvy individual or a curious beginner, we’ve got you covered. So, let’s dive right in!
How do I create a Web hosting file
When it comes to web hosting, creating files is an essential step. To create a web hosting file, follow these simple steps:
-
Start by choosing a reliable web hosting service provider. They will provide you with the necessary tools and resources to create your hosting file.
-
Next, access your hosting account’s control panel or use a file transfer protocol (FTP) client to connect to your server.
-
Once connected, navigate to the designated location where you want to create your file.
-
Right-click and select “Create New File” or use the provided command to create a new file.
-
Give your file a meaningful name and ensure it has the appropriate file extension (.html, .php, etc.) for the type of file you wish to create.
-
Open the file with a text editor, such as Notepad or Sublime Text, and start coding your website using HTML, CSS, and JavaScript.
-
Save the file and upload it to your web hosting server. Congratulations, you’ve just created your web hosting file!
How do I share files
Sharing files is a breeze once you have your file hosting website up and running. Here’s how you can do it:
-
On your file hosting website, create an account or login if you already have one. This will enable you to manage and share your files.
-
Navigate to the file you wish to share and select the “Share” or “Generate Link” option.
-
A unique link will be generated for your file. Copy this link and share it with the people you want to give access to the file.
-
You can also set permissions or passwords for added security. This way, only authorized individuals can access your shared files.
-
Share the link via email, messaging apps, social media, or any preferred communication channel. Your recipients can now access and download the file with ease.
How do I create a file sharing website in HTML
Creating a file sharing website using HTML can be an exciting venture. Here’s a step-by-step guide:
-
Start by designing the layout and structure of your website using HTML and CSS. Use HTML tags to define headings, paragraphs, images, and links.
-
Incorporate a user-friendly interface for file uploading and sharing. You can use HTML forms and JavaScript to create dynamic elements.
-
Implement server-side scripts, such as PHP, to handle file uploads and storage. These scripts will enable you to securely save and manage files on your website.
-
Ensure you have a robust backend infrastructure with adequate storage space to accommodate file uploads and user accounts.
-
Add additional features like user authentication, file search functionality, and customizable settings to enhance the user experience.
-
Test your website extensively to ensure all functionalities work correctly. Don’t forget to handle potential security vulnerabilities to protect your users’ sensitive data.
-
Once you’re satisfied with the final result, deploy your HTML file sharing website to a reliable web hosting platform. And voila! You’re now ready to share files with the world.
How can I share files online for free
Looking for ways to share files online without breaking the bank? Here are some foolproof methods to share files for free:
-
Utilize cloud storage services like Google Drive, Dropbox, or OneDrive. These platforms offer a generous amount of free storage and allow easy sharing with others.
-
Leverage file transfer websites like WeTransfer, which offer a straightforward and user-friendly interface for sharing larger files.
-
Make use of email attachments. Most email providers allow you to attach files up to a certain size limit, enabling you to send files directly to recipients’ inboxes.
How do I share a PDF link
Sharing a PDF link is straightforward, and here’s how you can do it:
-
Upload your PDF file to a file hosting or cloud storage service of your choice.
-
Once uploaded, locate the file in your storage service and locate the “Share” option.
-
Click on the share option, and a unique link will be generated for your PDF file.
-
Copy the provided link and share it with anyone you want to grant access to the PDF document.
-
You can also customize the sharing settings to limit permissions or add passwords for extra security.
Is WeTransfer free
Absolutely! WeTransfer offers both free and paid plans. The free plan allows you to share files up to a specific size limit without any charge. However, they also offer premium plans with additional features and larger file size limits for those with more extensive file sharing needs.
How do I convert a PDF to a shared link
Converting a PDF file to a shared link is easier than you think! Just follow these steps:
-
Upload your PDF file to a file hosting or cloud storage service that supports PDFs.
-
Once uploaded, select the PDF file and locate the “Share” or “Generate Link” option.
-
Click on the share option, and a unique link will be generated specifically for your PDF document.
-
Copy the generated link and share it with the intended recipients. Now they can access and download your PDF with ease.
How do you upload a file to a website
To upload a file to a website, you’ll need to follow these steps:
-
Access your website’s content management system (CMS) or use a file transfer protocol (FTP) client to connect to your server.
-
Navigate to the designated location on your website where you want to upload your file.
-
Look for the “Upload” or “Add File” button or option within the CMS or FTP client.
-
Click on the upload button and select the file from your device that you want to upload.
-
Wait for the upload to complete, and voila! Your file is now successfully uploaded to your website.
What are the types of file sharing
File sharing comes in different forms, including:
-
Peer-to-peer (P2P) file sharing, where individuals directly exchange files with one another using software like BitTorrent.
-
Cloud storage or online file sharing services such as Google Drive, Dropbox, or OneDrive.
-
File transfer protocol (FTP) for transferring files between a client and a server.
-
Email attachments, allowing users to send files to others via email.
-
Local network file sharing, which enables file sharing between computers connected within the same network.
How do I put a PDF file on my website
To put a PDF file on your website, follow these steps:
-
Upload the PDF file to your web hosting server using an FTP client or the file manager provided by your hosting service.
-
Once uploaded, link the PDF file to your website using an HTML anchor tag. For example:
html
Click here to view the PDF file
-
Replace “path/to/your/file.pdf” with the actual file path on your server.
-
Save the changes to your website files, and the PDF file will now be accessible to your website visitors.
How do you publish an HTML file
Publishing an HTML file is the final step to make your website accessible to the public. Here’s what you need to do:
-
Upload all your HTML, CSS, and JavaScript files along with any other assets (like images or videos) to your web hosting server using FTP or the file manager provided by your hosting service.
-
Ensure that your main HTML file is named “index.html”. This ensures that when someone visits your website’s domain, the index.html file will be loaded by default.
-
Once you’ve uploaded all your files, navigate to your website’s domain in a web browser. If everything is set up correctly, you should now see your website live on the internet.
-
Congratulations! You have successfully published your HTML file and made your website accessible to the world.
How do I share files on the same network
Sharing files on the same network can be done using various methods. Here are two common approaches:
-
Use shared network drives or folders: Set up a shared drive or folder on your local network, and grant access to other devices or users in your network. This allows files to be easily shared and accessed by anyone connected to the same network.
-
Enable file sharing in your operating system: Depending on your operating system (Windows, macOS, Linux), you can enable file sharing settings that allow other devices on the same network to discover and access shared files.
What is the best online file sharing site
While many online file sharing sites are available, determining the “best” one depends on your specific needs. However, some popular and widely used online file sharing sites include:
-
Google Drive: Offers a large amount of free storage and seamless integration with other Google services.
-
Dropbox: Known for its user-friendly interface and easy file sharing capabilities.
-
OneDrive: Microsoft’s cloud storage solution with tight integration into Windows and Office applications.
Ultimately, the best online file sharing site for you will depend on factors such as storage capacity, ease of use, collaborative features, and any specific requirements you may have.
How can I make a website like Google Drive
Creating a website like Google Drive can be a complex undertaking. To simplify the process, consider following these steps:
-
Plan your website’s features and functionalities. Determine whether you’ll focus solely on file storage and sharing or include additional collaborative features.
-
Design the layout and user interface using HTML, CSS, and JavaScript. Consider utilizing frameworks or libraries like Bootstrap or React to speed up development.
-
Develop the server-side components using programming languages and frameworks like PHP, Ruby on Rails, or Node.js. These will handle file uploading, storage, and user authentication.
-
Integrate a cloud storage solution that suits your needs. Popular choices include Amazon S3, Microsoft Azure, or OpenStack Swift.
-
Implement additional features such as user management, permission settings, file versioning, and search functionality to enhance the user experience.
-
Thoroughly test your website for performance, security, and usability. Address any bugs or vulnerabilities to ensure a smooth user experience.
-
Once all testing is completed, deploy your website to a web hosting provider and make it available to the public.
Keep in mind that creating a website like Google Drive requires advanced programming knowledge and a solid understanding of web development principles. Consider collaborating with experienced developers or leveraging existing platforms if you’re new to coding.
Is file sharing free
File sharing can be both free and paid, depending on the platform and features you require. Many cloud storage providers offer free plans with limited storage capacity and basic sharing capabilities. However, if you need additional storage or advanced features such as increased security or collaboration tools, you may need to upgrade to a paid subscription.
How do you create a file sharing system
Creating a file sharing system involves several key steps. Here’s a general overview:
-
Define the scope and objectives of your file sharing system. Determine the purpose, target audience, and specific features you want to include.
-
Design the system’s architecture, including the user interface, database structure, and file storage mechanisms. Consider scalability and security during this stage.
-
Develop the front-end components using HTML, CSS, and JavaScript, ensuring a user-friendly and intuitive interface for file sharing.
-
Build the back-end infrastructure using programming languages like PHP, Python, or Node.js. This includes creating the file upload mechanism, user management, and database connectivity.
-
Implement robust security measures to protect user data, such as encryption, secure login systems, and data access controls.
-
Test the system extensively to ensure all features work as intended. Perform both functional and security testing to uncover any potential issues.
-
Once testing is complete, deploy the system to a reliable web hosting provider or in-house server for users to access.
-
Monitor and maintain the file sharing system, regularly updating security patches and addressing any user feedback or reported issues.
How do you share a PDF
Sharing a PDF is a simple process that you can follow in these easy steps:
-
Upload your PDF file to a file hosting or cloud storage service of your choice.
-
Once uploaded, locate the PDF file and look for the “Share” or “Generate Link” option.
-
Click on the share option, and a unique URL will be generated for your PDF file.
-
Copy the provided URL and share it with anyone you want to share the PDF with.
-
You can also adjust the sharing settings to control permission levels or implement password protection for additional security.
How do I send files to a server
To send files to a server, you can use various methods such as FTP, SFTP, or SCP. Here’s a general guide:
-
Connect to your server using an FTP client, such as FileZilla, by entering the server’s hostname, username, password, and port.
-
Once connected, navigate to the desired directory or folder on the server where you want to send your files.
-
Locate the files on your local machine that you wish to send to the server.
-
Select the files and drag them into the FTP client’s file transfer pane to initiate the upload process.
-
Wait for the upload to complete. Once finished, the files will be transferred to the specified location on the server.
Congratulations! You’ve successfully sent files to the server using FTP or a similar file transfer method.
We hope this FAQ guide has helped demystify the process of creating a file sharing website. From understanding web hosting and HTML to sharing files online and sending files to servers, we’ve covered a wide range of topics. Remember to choose the right tools, prioritize security, and offer a user-friendly experience for your visitors. Good luck with your file sharing website adventure!
Disclaimer: This article is for informational purposes only and should not be considered legal, financial, or professional advice. Please consult with a qualified professional before making any decisions.