Are you frustrated with a leaky hose spigot inside your wall? Worry not, because you’ve stumbled upon the right blog post! Dealing with this issue can be a hassle, but with a little understanding and some simple solutions, you can bid farewell to those unwanted indoor leaks.
Picture this: you turn on your outdoor faucet, hoping to water your garden or wash your car, only to find a surprise pool of water forming inside your home. What could be causing this unexpected indoor flooding?
Leaky outdoor spigots can stem from various factors, including faulty installations, freezing temperatures, worn-out washers, or even hidden cracks behind bricks. Whether the water is leaking into your basement or coming out from the weep hole in the stem, it’s crucial to address the problem promptly to prevent further damage.
But fear not! In this comprehensive guide, we’ll not only explore the why behind these leaks but also provide practical solutions to fix them. We’ll dive into topics like frost-free hose bib issues, leaks when the hose is attached, and even uncover the mysteries of why your spigot might leak when it’s turned off.
So, grab your favorite beverage, put on your DIY cap, and let’s start solving the mystery of that pesky hose spigot leaking inside your wall. By the end of this blog post, you’ll not only have the knowledge to fix the issue but also the confidence to tackle any leaky faucet situation that comes your way.
Now, let’s get started on this adventure of understanding and resolving the challenges of a leaky outdoor spigot lurking behind your walls.
Hose Spigot Leaking Inside Wall
Signs of a Leaking Hose Spigot Inside Your Wall
Is your water bill mysteriously rising? Are there unexplained water stains on your walls? If so, you might be dealing with a hose spigot that’s leaking inside your wall. But how can you be sure? Well, here are some telltale signs to watch out for:
1. Damp or Moldy Smell
If there’s a funky, damp odor in the vicinity of your hose spigot, chances are, water is leaking somewhere within your wall. Mold and mildew thrive in damp environments, so that musty smell could indicate hidden water damage.
2. Water Stains on Walls
Take a closer look at your walls. Do you spot any discolored patches or water stains? These unsightly marks could be a clear sign that water is seeping out from your hose spigot and onto your drywall. Ignoring them could lead to even more costly repairs down the line.
3. Peeling Paint or Wallpaper
Is the paint on your walls starting to bubble or peel? Does your wallpaper seem to be coming off in certain areas? These issues can be caused by excess moisture, which likely originates from a leaking hose spigot. Don’t let your house turn into a peeling art project — address the problem promptly.
4. Water Pressure Fluctuations
Have you noticed changes in water pressure in your home? If your shower turns from a gentle drizzle to a thunderous downpour, it could be a sign that your hose spigot is feeding water where it shouldn’t. Keep an eye on those pressure gauges and monitor any shifts.
Fixing a Leaking Hose Spigot Inside Your Wall
Okay, so you’ve confirmed that your hose spigot is, indeed, leaking inside your wall. What’s next? Here are a few steps to take in order to fix the problem:
1. Shut Off the Water Supply
Before you rush into any repairs, locate the shut-off valve for your outdoor water supply and turn it off. This will prevent any further water damage while you work on the leak. Safety first, folks!
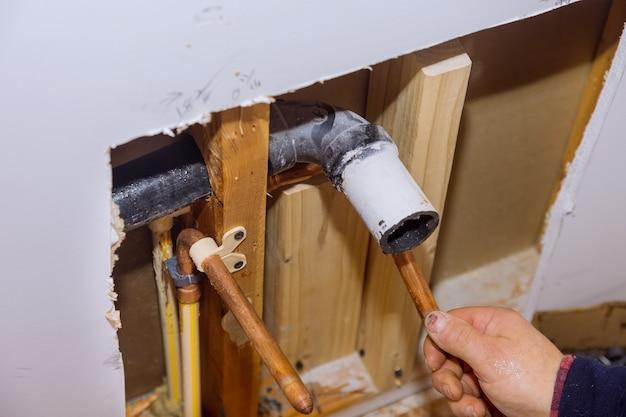
2. Cut Open the Wall
Grab your trusty drywall saw and carefully cut open the wall near the spigot. Remember to wear safety goggles and gloves to protect yourself from flying debris and sharp edges. Once you’ve opened up the wall, you should be able to access the leaking pipe.
3. Repair the Leak
Using a pipe cutter or a reciprocating saw, remove the damaged section of the pipe. Depending on the extent of the damage, you may need to replace the whole section or simply patch it up with a coupling. Don’t forget to use plumber’s tape or pipe sealant to ensure a watertight connection.
4. Patch Up the Wall
Once the leak is fixed, it’s time to put your DIY skills to the test and patch up the wall. Grab some drywall mud, a putty knife, and sandpaper to smooth out the area. Apply multiple thin coats of mud, sanding between each layer, until the wall is smooth and ready for a fresh coat of paint.
Dealing with a hose spigot leaking inside your wall can be a hassle, but with the right information and a little elbow grease, you can fix the problem yourself. Remember to keep an eye out for signs of a leaking spigot, like water stains or peeling paint, and take immediate action to prevent further damage. By following the steps outlined here, you’ll have that leaky spigot fixed in no time, and your walls will be thankful for it!
Hose Leaking in the House
No one likes a leaky hose wreaking havoc in their home. The constant drip-drip-drip is not only annoying but can also lead to potential water damage and a hefty repair bill. If you’re dealing with a hose leaking in your house, fear not! We’ve got you covered with some helpful tips to fix the issue and avoid any water-related disaster.
1. Identify the Source of the Leak
The first step in tackling a hose leak is to locate the exact point of trouble. Is it a small hole in the hose itself or a loose connection at the spigot? Grab a towel and dry off the hose, then turn on the water. Look closely for any signs of water spraying, dripping, or pooling. Once you’ve pinpointed the problem area, you can move on to the next step.
2. Patch It Up with Duct Tape
In some instances, a quick and temporary fix is all you need. If the leak is minor and the hose is still in good condition, reach for the trusty duct tape. Wrap the tape tightly around the affected area, ensuring a secure seal. However, keep in mind that this is just a stopgap measure and you’ll eventually need to consider a more permanent solution.
3. Repair or Replace the Hose
If the leak is more severe or the hose is showing signs of wear and tear, it’s time for a repair or replacement. If you’re handy with tools, you can try patching up the hole with a hose repair kit. This typically involves cutting out the damaged section and attaching a coupling. If the hose is beyond repair, it’s best to invest in a new one to prevent future leaks.
4. Check the Hose Bibb
Sometimes, the problem isn’t with the hose itself but with the spigot it’s attached to. Inspect the hose bibb carefully for any cracks, loose fittings, or corrosion. If you notice any issues, you may need to replace the entire hose bibb or tighten the connections with a wrench. Remember to turn off the water supply before attempting any repairs.
5. Prevention is Key
To minimize the chances of a hose leak in the future, it’s essential to take preventive measures. During colder months, remember to drain and store your hose indoors to prevent freezing and cracking. Regularly inspect your hoses for signs of wear and replace them as needed. Additionally, be mindful of how much pressure you’re applying when using the hose, as excessive force can contribute to leaks over time.
By following these simple steps, you can bid farewell to the pesky hose leak and enjoy a dry and hassle-free home. Remember, it’s always best to address the issue promptly to avoid any further damage. Happy hose handling!
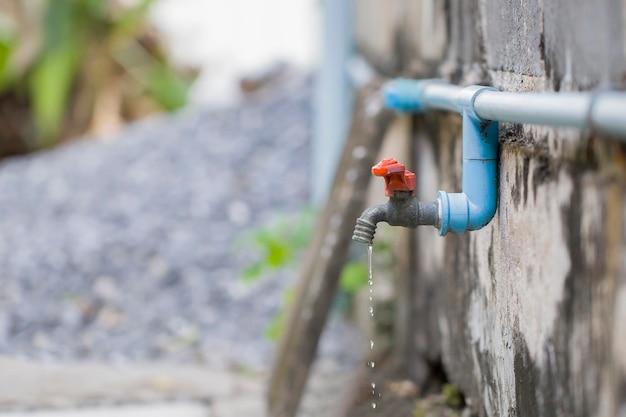
Outdoor Spigot Leaking in Wall
Signs of Trouble
If you’ve noticed water stains on your wall, a persistent musty smell, or even a sudden increase in your water bill, it’s possible that you have an outdoor spigot leaking in the wall. This can be a tricky issue to tackle, as it’s hidden from view and can cause significant damage if left unchecked.
The Cause
Outdoor spigots can start leaking in the wall due to a variety of reasons: old, worn-out washers, a loose connection, or even damage to the pipe behind the wall. The constant exposure to the elements can also contribute to the wear and tear, allowing water to seep into your home.
DIY or Call a Pro
While some handy folks may be tempted to tackle this problem themselves, we highly recommend calling a professional plumber. Trying to fix a leaking outdoor spigot in the wall without the proper knowledge and tools can lead to further damage and costly repairs down the line. Leave it to the experts!
Steps for Fixing the Issue
-
Turn off the main water supply: Before any work can commence, make sure to shut off the main water supply to avoid any further leaking or damage.
-
Locate the leaking spigot: Sometimes, the signs of a leaking outdoor spigot in the wall may not be immediately evident. Inspect your walls for any tell-tale signs like damp patches or discoloration, and you may need to cut a small hole in the wall to access the problem area.
-
Call a plumber: Once you’ve identified the issue, reach out to a trusted plumber who specializes in outdoor spigot repairs. They will have the expertise to fix the leak without causing further damage to your wall.
-
Repair or replace the spigot: Depending on the extent of the damage, the plumber will repair or replace the faulty spigot and ensure it’s installed correctly to prevent future leaks.
-
Restore the wall: After the necessary repairs have been made, the plumber will take care of restoring your wall, ensuring it looks as good as new.
Preventative Measures
To avoid encountering this issue in the future, it’s important to take preventative measures:
-

Insulate your pipes: In colder climates, insulating outdoor pipes can help protect them from freezing and potentially leaking in the wall.
-
Disconnect hoses during winter: Before the chilly temperatures arrive, don’t forget to disconnect and drain all outdoor hoses to prevent any water from freezing and causing damage.
-
Regular inspections: Periodically check your spigots for any signs of wear and tear or leaks. Identifying and addressing these issues early on can save you from extensive repairs in the future.
By following these steps and proactive maintenance, you can reduce the chances of experiencing an outdoor spigot leaking in the wall. Remember, when in doubt, it’s always best to contact a professional who can ensure a thorough and lasting fix.
Outside Faucet Leaking Behind Brick
If you’ve noticed water seeping out from behind the brick near your outside faucet, it’s time to roll up your sleeves and take care of this leak before it becomes a bigger problem. Leaks behind brick can cause damage to the surrounding structure and might even lead to mold issues if left unchecked. But don’t fret! With a little bit of guidance and a touch of determination, you’ll have that leak fixed in no time.
Locating the Source of the Leak
The first step in tackling this leak is to identify where it’s coming from. Grab a flashlight and inspect the area around your outside faucet for any visible signs of water dripping or pooling behind the brick. Look for damp spots, moss growth, or discoloration that might indicate a leak.
Once you’ve found the general area, remove any loose bricks to get a better view of the situation. Be careful not to dislodge any structural bricks! Look for any obvious issues like cracks or gaps in the mortar that may be allowing water to penetrate.
Repairing the Leak
If you’re dealing with a small crack or gap, you can easily fix it yourself using exterior-grade caulk. Make sure to choose a caulk that is specifically designed for brick and masonry repairs. Clean the affected area thoroughly, removing any loose mortar or debris, then carefully apply the caulk into the crack or gap. Smooth it out with your finger or a putty knife, and let it dry according to the manufacturer’s instructions.
For larger cracks or gaps, it’s best to consult a professional who specializes in masonry repairs. They have the knowledge and tools to ensure a proper fix that will stand the test of time.
Preventing Future Leaks
To avoid future leaks behind your brick, it’s important to take some preventive measures. Consider installing a brick lintel above your outside faucet to divert water away from the brickwork. Lintels act as a shield, protecting the bricks from direct exposure to moisture.
Regularly inspect the area around your faucet for any signs of damage or deterioration. Catching problems early can save you from costly repairs down the line. And remember, always winterize your outside faucets before the cold weather sets in to prevent freezing and potential leaks.
In conclusion, while an outside faucet leaking behind brick can be a nuisance, it’s a problem that can be fixed with a little know-how and some elbow grease. By locating the source of the leak, repairing it promptly, and taking preventive measures, you’ll ensure the longevity of your bricks and the integrity of your home. So, put on your DIY hat and get that leak under control!
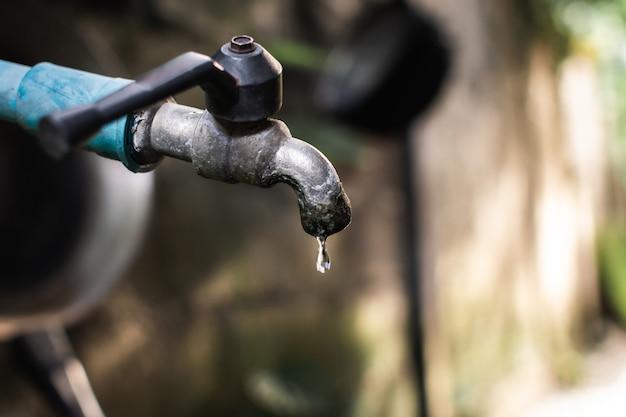
Outdoor Faucet Leaks When Turned On
One of the most frustrating things for homeowners is dealing with a leaking outdoor faucet. Not only does it waste water and increase your utility bill, but it can also lead to more serious problems if left unaddressed. In this section, we’ll explore some common causes of outdoor faucet leaks and provide you with practical solutions to fix them.
The Dreaded Drip: Why Your Outdoor Faucet Leaks
-
Worn-out Washer: Sometimes, a simple rubber washer can be the culprit behind your leaking faucet. Over time, the washer can wear out or become damaged, causing water to escape through tiny gaps. Replacing the washer is a quick and inexpensive fix that could save you from future headaches.
-
Loose Connection: Outdoor faucets are subjected to frequent use and exposure to the elements. As a result, the connection between the faucet and the pipe can become loose, leading to leaks. Tightening the connection with a wrench and applying some plumber’s tape can often solve this issue.
-
Cracked Pipe: When the temperature drops below freezing, the water trapped inside the faucet can expand, causing the pipe to crack. This can result in leaks when you turn on the faucet. If you suspect a cracked pipe, it’s best to call a professional plumber to assess and fix the problem.
Solutions for Your Leaky Outdoor Faucet
-
Check and Replace the Washer: Start by turning off the water supply to the faucet. Remove the handle and locate the washer inside the faucet assembly. Inspect it for any signs of wear or damage. If necessary, take the washer to a hardware store to find a suitable replacement. Reassemble the faucet carefully, ensuring a snug fit.
-
Tighten the Connections: Using a wrench, gently tighten the connection between the faucet and the pipe. Apply plumber’s tape to create a waterproof seal. Be careful not to overtighten, as this could lead to other issues. Turn the water supply back on and check for leaks.
-
Consider Frost-Proof Faucets: If you live in an area with freezing temperatures, investing in a frost-proof faucet can help prevent future leaks. These faucets are designed to push the water source further into your home, reducing the risk of freezing and cracking.
By addressing outdoor faucet leaks promptly, you can save yourself from costly repairs, conserve water, and maintain the structural integrity of your home. Remember, if the problem persists or seems beyond your DIY capabilities, don’t hesitate to seek professional help.
Outdoor Faucet Leaking into Basement
There’s nothing worse than discovering a leak in your outdoor faucet, especially when it’s seeping into your basement. Not only can this cause water damage and mold growth, but it can also be a real headache to fix. But fear not, because I’m here to guide you through this watery dilemma.
Identifying the Problem
The first step in tackling the issue of an outdoor faucet leaking into your basement is to pinpoint the source of the problem. Is the leak originating from the faucet itself, or is there a bigger issue lurking behind the scenes? It’s essential to determine whether it’s a simple fix or if you need professional assistance.
Fixing a Faulty Faucet
If the leak is coming directly from the outdoor faucet, it’s time to roll up your sleeves and get to work. Start by turning off the water supply to the faucet. Then, grab your trusty wrench and attempt to tighten any loose connections. If that doesn’t solve the problem, you may need to replace the washer or even the entire faucet mechanism. Don’t worry, though – there are plenty of DIY tutorials online to guide you through the process.
Taking a Deeper Dive
If the outdoor faucet seems to be in good shape, the culprit of the leak may be hiding deeper within your plumbing system. In this case, it’s wise to call in the experts. A professional plumber will have the knowledge and tools to locate and fix the issue, whether it’s a cracked pipe, a faulty valve, or a loose connection somewhere in the walls of your basement.
Prevention Is Key
Once you’ve successfully resolved the leak, it’s important to take preventative measures to avoid future water-related headaches. Regularly inspect your outdoor faucet for signs of wear and tear, and promptly address any small issues before they escalate into major problems. Remember, a little maintenance can go a long way in saving you time, money, and a whole lot of frustration.
Wrapping Up
Dealing with an outdoor faucet leaking into your basement is undoubtedly an unwelcome surprise. However, with a little patience, know-how, and possibly some professional assistance, you can conquer this soggy situation. By identifying and fixing the problem, taking preventative measures, and staying vigilant, you’ll be able to enjoy a leak-free outdoor faucet for years to come. So roll up those sleeves, grab your wrench, and let’s bid farewell to that pesky leak once and for all!
Water Spigot Leaks When Hose is Attached
Why is My Water Spigot Leaking When I Connect a Hose
If you’ve noticed water seeping out of your spigot when you attach a hose, don’t panic – you’re not the only one facing this issue. There are a few common reasons why water spigot leaks occur when a hose is connected, and luckily, most of them can be easily fixed.
Loose Connection
One possible culprit behind the leak is a loose connection between the spigot and the hose. Over time, the threads on the spigot may become worn or damaged, preventing a proper seal. This can lead to water leakage when pressure is applied through the hose. It’s a good idea to check the connection and tighten it if necessary. Wrapping some plumbing tape around the threaded ends can also provide a tighter seal.
Faulty Washer
Inside the spigot, there’s typically a rubber washer that helps create a watertight seal when the spigot is turned off. If this washer gets worn out or damaged, it can cause leaks. Replacing the washer is a relatively simple and inexpensive fix. Just make sure to turn off the water supply and remove the old washer before installing a new one.
Backflow Preventer Issues
Some spigots have built-in backflow preventers, which are designed to keep water from flowing backward into the main water supply. If this valve becomes faulty or gets clogged with debris, it can lead to leaks. In such cases, cleaning or replacing the backflow preventer may be necessary. Consult the manufacturer’s instructions or seek professional help for a safe and effective solution.
Cracked or Damaged Pipe
In rare cases, a leaking spigot may be a sign of a cracked or damaged pipe within the wall. If you’ve ruled out other possible causes and the leak persists, it’s best to contact a professional plumber. They will be able to diagnose the issue accurately and provide the appropriate repair or replacement.
Remember, addressing a leaking water spigot when a hose is attached is crucial not only to conserve water but also to prevent further damage to your plumbing system. By taking timely action and understanding the common causes, you can wave goodbye to those unwanted drips and enjoy hassle-free outdoor watering.
Why Does My Hose Spigot Leak When Off
Is Your Hose Spigot Dripping Even When Turned Off? Here’s Why!
You may have experienced this frustrating situation before: you turn off your hose spigot, only to find it still leaking water. What gives? Why does your hose spigot continue to drip when it’s supposed to be off? Let’s delve into this common issue and explore the possible reasons behind it.
The Worn-Out Washer Woes
One of the most common culprits for a leaking hose spigot is a worn-out washer. Over time, the rubber washer that creates a seal between the spigot and the pipe becomes cracked or damaged, leading to leaks. Fortunately, replacing the washer is usually a simple and inexpensive fix.
The Seductive Sediments
If your hose spigot is constantly dripping, mineral sediments may be to blame. Over time, these tiny particles can build up on the spigot’s internal components, preventing the valve from closing properly. The result? A leaky spigot that refuses to quit. A thorough cleaning of the spigot and its internal parts should do the trick.
The Seductive Sediments (Yes, Again!)
We all know that sediments can wreak havoc on your hose spigot, but did you know they can also cause leaks inside your wall? If mineral deposits find their way into the pipe connecting the spigot to your home’s plumbing system, they can create blockages and ultimately damage the pipe. In these cases, it’s essential to address the issue promptly and seek professional help if needed.
The Not-So-Perfect Shut-Off Valve
Sometimes, the culprit behind a leaking hose spigot isn’t the spigot itself but the shut-off valve located inside your home. This valve controls the flow of water to the spigot, and if it becomes faulty, it can lead to leaks. To determine if the shut-off valve is the issue, try turning it off and see if the spigot continues to leak. If it does, you may need to replace the shut-off valve.
The Mischievous Water Pressure
High water pressure can also wreak havoc on your hose spigot. Excessive pressure can cause the valve to fail to close properly, resulting in annoying leaks. Consider installing a pressure regulator to keep your water pressure in check and prevent any further spigot-related mishaps.
Now that we’ve explored some possible reasons why your hose spigot is leaking even when turned off, you can take steps to resolve the issue. Whether it’s a worn-out washer, mineral sediments, a faulty shut-off valve, or high water pressure – addressing the root cause will lead to a happy, leak-free hose spigot experience.
Frost Free Hose Bib Leaking Inside Wall
If you’re experiencing a leak from your hose spigot inside the wall, it could be due to a common plumbing issue known as a frost free hose bib leaking. These outdoor faucets are designed to prevent freezing during cold weather, but over time, they can develop leaks that require attention.
Understanding Frost Free Hose Bibs
Frost free hose bibs, also known as exterior faucets, are designed to prevent freezing by positioning the water supply valve deep within the wall. This design allows the shut-off valve to be located in a warmer indoor area. The added length of the faucet also helps to minimize the risk of freezing.
Signs of a Leaking Frost Free Hose Bib
A leaking frost free hose bib might not be immediately noticeable, as the water can seep into the wall cavity. However, there are a few signs you can look out for. First, check for any water stains or dampness on your wall near the hose spigot. You might also notice a decrease in water pressure, or even hear a faint dripping sound behind the wall.
Causes of Leaks
Leaky frost free hose bibs can be caused by a few factors. One common culprit is a damaged rubber washer, which can wear out over time and allow water to escape. Another possibility is a cracked or split pipe, which can occur due to freezing and thawing cycles or excessive pressure. Finally, improper installation or aging fixtures can also contribute to leaks.
How to Fix the Issue
Fixing a leaking frost free hose bib inside the wall typically requires the expertise of a professional plumber. They will need to remove the faucet, inspect the pipe connection, and replace any damaged components. Repairing the wall may also be necessary if there is water damage present.
Preventative Measures
To avoid future issues with your frost free hose bib, it’s important to take preventative measures. Disconnect your hoses during the winter to prevent freezing. Insulate the hose bib properly, and consider installing a frost-free cover for added protection. Regularly inspect your hose bib for any signs of damage or wear and tear, and promptly address any leaks to prevent further damage.
A leaking frost free hose bib inside the wall can lead to water damage and other issues if left unattended. By understanding the signs, causes, and preventative measures, you can take the necessary steps to address the problem and ensure that your hose spigot functions properly. If you’re unsure or uncomfortable with DIY repairs, it’s always best to consult a professional plumber to handle the issue promptly and effectively.
Outside Faucet Leaking When Hose Attached
Leaky faucets are a nuisance, but when you discover that your outside faucet is leaking with the hose attached, it can turn into a real waterworks drama. Don’t worry, though; we’ve got your back! In this section, we’ll dive into the common causes of an outside faucet leaking when a hose is attached and provide some helpful tips on how to fix the issue.
Check the Washer
The first thing to inspect when your outside faucet is leaking is the rubber washer inside the hose connection. Over time, this washer can wear out or become damaged, leading to leaks. Thankfully, fixing it is as simple as replacing the washer. Swing by your local hardware store and grab a new washer that matches the size of your faucet. Unscrew the hose and replace the old washer with the new one, making sure it’s snugly in place. Voila! Your leaky faucet might just say, “Goodbye, drama!”
Tighten the Connection
Sometimes, all it takes to fix a leaking outside faucet is a little muscle. Over time, the connection between the faucet and the hose can loosen, causing leaks. Grab a wrench (or a strong grip) and give the connection a gentle but firm twist to tighten it up. Be careful not to overtighten, though, as it can cause damage. Once you’re done, give it a test and marvel at your newfound faucet-fixing skills.
Don’t Overextend the Hose
Ah, the classic case of the overly stretched hose. If you leave your hose in a permanent state of extreme extension, it can put strain on the faucet and cause leaks. Remember to stretch the hose just enough to reach your desired destination without pulling it tight. This simple adjustment can save you from those pesky leaks and potentially extend the life of your faucet.
Replace Faulty O-Rings
If you’ve tried troubleshooting the washer and tightening the connection to no avail, the culprit might be a faulty O-ring. O-rings are small rubber rings that provide a watertight seal in the faucet mechanism. Over time, they can deteriorate or become damaged, leading to leaks. Head to the hardware store, grab a replacement O-ring, and follow the manufacturer’s instructions to install it properly. You’ll be amazed at how this tiny fix can banish the leaks.
Leaky faucets can put a damper on your watering plans, but with these simple fixes, you’ll have your outside faucet leak-free and ready for action in no time. So grab your tools and get ready to tackle those leaks like a DIY superhero!
Why is My Outside Faucet Leaking Inside the House
So, you’ve encountered the frustrating scenario of your outside faucet leaking inside your house. It’s quite a bummer, I know. But fear not! In this section, we’ll dive into the possible reasons behind this pesky problem and provide you with some insights on how to fix it.
Faulty Hose Spigot: The Culprit
Ah, the hose spigot, the unsung hero of outdoor water supply. But, unfortunately, it can also be the sneaky villain causing your inside-the-house faucet leakage. Over time, these spigots can wear out due to regular use and exposure to various weather conditions.
The Dreaded Freeze and Burst
Now, brace yourself for a chilling revelation. If you live in an area with cold winters, there’s a good chance your outside faucet leakage is a consequence of freezing temperatures. When water freezes inside the hose spigot, it expands and can result in a cracked or burst pipe. As the ice thaws, water escapes through those minuscule cracks and voilà – you have yourself an inside-the-house fountain!
Watch Out for Loose Connections

Sometimes, the issue might not lie with the faucet itself, but rather with loose connections. Over time, those connections between the faucet and the plumbing system can become loose, causing water to seep and create a messy situation indoors. It’s like a surprise party, but nobody wants to attend.
Pesky Water Pressure Problems
Water pressure is a fickle thing. If it’s too high, it can strain your plumbing system, causing leaks to sprout like weeds in your garden. Check your water pressure regulator to ensure it’s properly adjusted within the recommended range.
Time for Some DIY Solutions
Now that you have a better understanding of why your outside faucet is leaking inside the house, it’s time to roll up those sleeves and get fixing! Depending on the specific issue you’re facing, you might need to replace the hose spigot, tighten connections, or adjust the water pressure regulator.
Remember, it’s always a great idea to consult with a professional plumber if you’re unsure about the extent of the problem or if your DIY attempts hit a brick wall. They have the knowledge and expertise to handle any leaks and put your home’s plumbing system back on track.
So, don’t let that outside faucet leak dampen your spirits. With a little know-how and some elbow grease, you’ll soon bid farewell to those indoor waterworks!
Why is my outdoor faucet leaking from the weep hole in the stem
If you’ve noticed your outdoor faucet leaking from the weep hole in the stem, don’t panic! This is a common issue that many homeowners face. In this section, we’ll explore the reasons behind this type of leak and discuss what you can do to fix it.
The Purpose of the Weep Hole
Before we dive into the possible causes of the leak, let’s first understand the purpose of the weep hole. The weep hole is a small opening located on the stem of your outdoor faucet near the handle. Its function is to allow excess water to drain out when the faucet is shut off, preventing freezing during colder months. So, it’s actually a beneficial feature rather than a sign of a major problem.
Loose Packing Nut
One possible cause of the leak could be a loose packing nut. The packing nut is the part that holds the stem in place and prevents water from seeping out. Over time, the packing nut can become loose due to regular use or wear and tear. If this happens, water can escape through the weep hole. To fix this, simply tighten the packing nut using a wrench, making sure not to overtighten.
Worn-out Washer
Another culprit for the leak could be a worn-out washer. The washer, located at the end of the stem, creates a watertight seal when the faucet is turned off. If the washer becomes damaged or worn out, it can cause water to leak through the weep hole. To resolve this issue, you’ll need to replace the washer. Make sure to shut off the water supply before attempting this repair.
High Water Pressure
Excessive water pressure can also lead to a leak from the weep hole. When the water pressure is too high, it can put strain on the faucet and cause water to escape through any available opening, including the weep hole. Installing a pressure regulator can help alleviate this issue and prevent further leaks. It’s a relatively simple fix that can save you from future headaches.
In conclusion, a leak from the weep hole in your outdoor faucet stem is often a minor problem that can be easily fixed. It may be due to a loose packing nut, a worn-out washer, or high water pressure. By tightening the packing nut, replacing the washer, or installing a pressure regulator, you can eliminate the leak and ensure the proper functioning of your outdoor faucet. Remember, regular maintenance and periodic checks can help prevent such issues in the first place. So, don’t let a little leak dampen your spirits – tackle it head-on and enjoy a leak-free outdoor watering experience!