Is your outdoor spigot leaking behind the siding of your house? Don’t worry, you’re not alone. A leaking water spigot can cause not only a headache but also potential damage to your home. In this blog post, we will discuss why your spigot may be leaking behind the siding, what you can do to fix it, and how much it may cost to replace a leaking spigot. So, let’s dive in and get your outdoor spigot back in working order!
Water Spigot Leaking Behind Siding
Water spigot leaking behind the siding of your house can be a frustrating and potentially damaging issue. Not only can it waste water and increase your water bill, but it can also lead to moisture problems and mold growth if left unattended. In this section, we will discuss the common causes of water spigot leaks behind siding and provide you with some tips on how to fix and prevent them.
Common Causes of Water Spigot Leaks
-
Worn-out Washer: One of the most common causes of water spigot leaks is a worn-out washer. Over time, the washer that creates a seal between the spigot and the pipe can deteriorate, leading to leaks. Thankfully, replacing the washer is a simple fix that can solve the issue.
-
Loose Connections: Another common cause of water spigot leaks is loose connections. If the connections between the spigot and the pipe are not properly tightened, water can seep out and leak behind the siding. Tightening the connections with a wrench can usually resolve this problem.
-
Cracked or Damaged Pipe: A cracked or damaged pipe can also be the culprit behind a water spigot leak. Inspect the pipe carefully for any signs of damage, such as rust, corrosion, or visible cracks. If you find any, it’s best to replace the damaged section of the pipe or call a professional plumber for assistance.
-
Freezing Temperatures: If you live in an area with freezing temperatures, ice can form inside the spigot and cause leaks. This occurs when water gets trapped inside the spigot and expands as it freezes, leading to cracks or burst pipes. To prevent this, it’s essential to properly winterize your spigot by turning off the water supply and draining any remaining water.
Fixing and Preventing Water Spigot Leaks
To fix a water spigot leak behind siding, you can follow these steps:
-
Turn off the water supply to the spigot to avoid further leaking.
-
Disconnect the spigot from the pipe by loosening the connections with a wrench.
-
Inspect the washer for any signs of wear and tear. If needed, replace it with a new one.
-
Check for any cracks or damage to the pipe. If necessary, replace the damaged section of the pipe.
-
Reconnect the spigot to the pipe, ensuring the connections are tight and secure.
To prevent water spigot leaks in the future:
-
Regularly inspect the spigot for any signs of damage or wear. Address any issues promptly to prevent leaks.
-
Properly winterize your spigot before freezing temperatures set in to prevent ice-related damage.
-
Consider installing a frost-free spigot, which is designed to prevent freezing and leaks.
By following these simple tips, you can fix existing water spigot leaks and take preventive measures to avoid future leaks behind your house’s siding. Remember, addressing leaks promptly can save you from potential water damage and costly repairs. Stay vigilant and keep your spigot in good working condition to enjoy a leak-free watering experience!
Leak Behind Siding
Understanding the Trouble
If you’ve noticed water seeping out from behind your siding, you might be dealing with a sneaky little leak. A leak behind the siding can be quite a nuisance, causing water damage and potentially leading to more serious issues. But fear not! This subsection will walk you through everything you need to know about dealing with a water spigot leak hidden behind your siding.
Signs of Trouble
So, how do you know if you’ve got a leak behind your siding? Well, there are a few telltale signs to watch out for. Firstly, if you spot water stains or discoloration on your siding or notice a musty odor around your spigot, it’s a clear indication that water is making its way where it shouldn’t be. Another red flag is the presence of mold or mildew around the affected area. If you’ve noticed any of these signs, it’s time to investigate further.
Investigating the Leak
To get to the bottom of the sneaky leak, you’ll need to roll up your sleeves and get a little investigative. Start by carefully examining the area around the water spigot. Look for any cracks or gaps in the siding that may allow water to seep through. Keep in mind that the leak might not always be directly behind the spigot, so be thorough in your inspection. Check for any loose or damaged siding as well, as this can also contribute to water infiltration.
Fixing the Issue
Once you’ve located the source of the leak, it’s time to take action. Depending on the severity of the problem, you may need to enlist the help of a professional plumber or contractor. They can expertly repair any damaged or faulty parts, ensuring a watertight seal and preventing any further leaks. If the issue is minor, you might be able to tackle it yourself by using caulk to seal any gaps or cracks in the siding. Just make sure to choose a high-quality exterior caulk that is suitable for your siding material.
Preventing Future Leaks
To avoid dealing with future leaks behind your siding, prevention is key. Regularly inspect your siding for any signs of damage, such as cracks, gaps, or loose pieces. Maintain a good seal around your water spigot by periodically checking and reapplying caulking if necessary. Additionally, consider installing a rain diverter or splash block to help direct water away from the spigot area. A little maintenance and proactive measures can go a long way in keeping your siding leak-free.
Wrap Up
Dealing with a leak behind your siding can be a hassle, but armed with the right knowledge and a little elbow grease, you can fix the issue and prevent it from happening again. Remember to stay vigilant for any signs of trouble, investigate thoroughly to find the source of the leak, and take appropriate measures to remedy the situation. By being proactive and taking preventative steps, you’ll be able to keep your siding dry and your worries at bay.
Why Is My Spigot Leaking
If you have noticed a water spigot leaking behind your siding, it’s important to address the issue promptly to prevent further damage and water wastage. Understanding why your spigot is leaking can help you determine the appropriate solution and get it fixed without any hassle. Here are a few common reasons why your spigot might be leaking:
Worn-Out Washer or O-Ring
An aging washer or O-ring within the spigot handle can often be the culprit behind a leaky spigot. Over time, these small rubber components can deteriorate, causing water to seep out. Fortunately, this is an easy fix! Simply replace the worn-out washer or O-ring, and your spigot should be good as new.
Loose Connections
Another possible cause of a leaking spigot is loose connections. If the connections between the spigot and the pipe are not tightened properly, water can escape through the gaps. Grab your trusty wrench and make sure all connections are snugly secured. A small twist can go a long way in stopping the leak.
Frost Damage
In colder climates, frost damage can wreak havoc on spigots. When water freezes inside the spigot, it can cause cracks or ruptures, leading to leaks once the ice thaws. To prevent this, consider installing a frost-free spigot or insulating the existing one. It’s the perfect excuse to bundle up your spigot for the winter!
Excessive Pressure
High water pressure can put strain on your spigot, resulting in leaks over time. Consider installing a pressure regulator to keep the pressure at a safe level. Your spigot will thank you, and you’ll avoid any sudden surprise showers while watering your plants.
Age and Wear
Sometimes, a leaking spigot is simply a sign of old age. As the years go by, parts can deteriorate, seals can weaken, and leaks can occur. If your spigot has seen better days and multiple repairs have proven futile, it might be time to retire it and get a new one. It’s an opportunity to welcome a shiny, leak-free spigot into your life!
Now that you have a better understanding of why your spigot might be leaking, you can take the necessary steps to fix the issue. Whether it’s replacing a worn-out washer, tightening connections, insulating for frost, regulating pressure, or upgrading to a new spigot altogether, you’ll soon be enjoying a leak-free outdoor experience. Say goodbye to wasted water and hello to a dry, happy siding!
Water Spigot Leaks When On
Identify the Problem
If you’ve noticed a water spigot leaking when turned on, it’s important to address the issue promptly to prevent further damage and excessive water waste. Leaky spigots can lead to higher water bills and even structural damage if left unattended. Here are a few steps to help you identify the problem and find a solution.
Check the Washer
One common cause of a leaking water spigot is a worn-out washer. Over time, the washer can loosen or deteriorate, causing water to seep out. To check if the washer is the culprit, turn off the water supply and unscrew the spigot handle. Look for a rubber washer inside the spigot’s valve assembly. If the washer appears flattened, cracked, or damaged, it’s time for a replacement.
Inspect the Spout or Pipe
Another possible cause of a leaky water spigot is a cracked or damaged spout or pipe. Inspect the spout for any visible cracks or fractures. If you find any, it may be necessary to replace the entire spigot. Additionally, check the connecting pipes for any signs of damage or corrosion. If there are leaks at the connection points, tightening the fittings may solve the issue. However, in cases of significant damage, a professional plumber might need to intervene.
Verify the Water Pressure
Excessive water pressure can also lead to leaks in water spigots. High pressure places a strain on the spigot’s internal components, causing them to weaken and eventually leak. You can use a pressure gauge to check the water pressure. If it exceeds the recommended range (usually between 40-80 psi), consider installing a pressure regulator to alleviate the strain on your plumbing system.
Consider a Replacement
Sometimes, despite your best efforts, repairs might not suffice, especially with older or heavily damaged spigots. In such cases, it’s advisable to replace the water spigot entirely. Upgrading to a newer model can increase efficiency and prevent future leakage issues. Remember to turn off the water supply before removing and installing the new spigot to avoid any mishaps!
Addressing a leaking water spigot when turned on is crucial for both environmental and financial reasons. By inspecting the washer, spout, and pipes, considering the water pressure, and potentially opting for a replacement, you can resolve the issue and avoid further complications. Remember, if you’re unsure or uncomfortable handling the repairs yourself, don’t hesitate to contact a professional plumber to assist you.
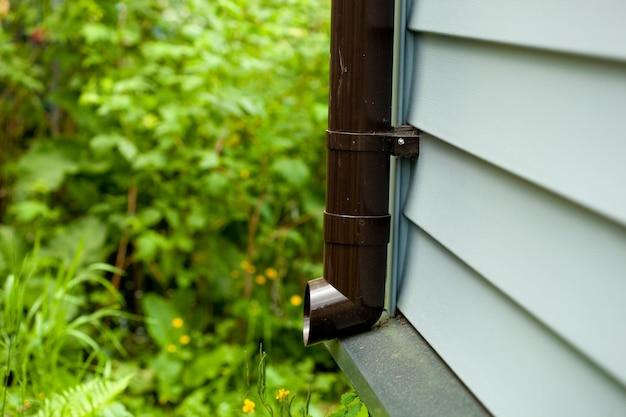
Vinyl Siding Water Spigot Box
What is a vinyl siding water spigot box
A vinyl siding water spigot box, also known as an exterior faucet box, is a protective enclosure that houses the water spigot on the outside of a house. It is typically installed behind the vinyl siding to keep the spigot safe from the elements and provide a neat and seamless appearance.
Why is a water spigot box important
The water spigot box serves an essential purpose in protecting the water supply and maintaining the longevity of the spigot. By keeping the spigot hidden behind the vinyl siding, it shields it from various weather conditions, preventing the formation of rust and potential damage. Additionally, the box helps to prevent water leaks and keeps the overall appearance of the house tidy.
Signs of a vinyl siding water spigot box issue
-
Leaking Water: If you notice water stains or dripping behind the vinyl siding, it may indicate a leak in the water spigot box. This issue should be addressed promptly to prevent any further damage.
-
Mold or Mildew: Excessive moisture caused by a leaking spigot box can lead to the growth of mold or mildew. Keep an eye out for any musty odors or discoloration on the siding.
-
Cracks or Breaks: Inspect the vinyl siding around the spigot box for any visible cracks or breaks. These can occur over time due to exposure to harsh weather conditions and may require repairs or replacement.
How to fix a water spigot box issue
-

Identify the problem: Determine the exact cause of the issue, such as a loose connection, a damaged spigot, or a cracked box. Understanding the root cause will help determine the most effective solution.
-
Turn off the water supply: Before attempting any repairs, always turn off the water supply to avoid any accidents or further leaks.
-
Tighten connections: If the issue is a loose connection, use a wrench to tighten the bolts or nuts. Ensure that the connections are secure and free from any leaks.
-
Seal cracks or gaps: If there are cracks or gaps in the spigot box, use exterior-grade caulk or sealant to fill them. This will prevent water from seeping through and causing additional damage.
-

Replace damaged parts: If the spigot or the box itself is damaged beyond repair, it may be necessary to replace the faulty components. Consult with a professional plumber or handyman for assistance if needed.

Remember, if you’re unsure about tackling the repair yourself, it’s always best to seek the help of a professional to avoid any further complications or potential water damage to your home.
A vinyl siding water spigot box is a crucial component of your home’s exterior, ensuring the protection and proper functioning of the water supply. Taking care of any issues promptly will help prevent water leaks and maintain the integrity of your siding. By following the steps outlined above, you can address common problems associated with a water spigot box and keep your home in tip-top shape.
Outdoor Spigot Leaking in Wall
Signs of a Leaking Outdoor Spigot in Your Wall
When it comes to outdoor spigots, a leaking one hidden behind your siding can be quite a sneaky culprit. But fear not! There are some telltale signs that can help you identify whether you have an outdoor spigot leaking within your wall.
-
Dampness or Water Stains
If you notice dampness or water stains on your exterior walls near the spigot, it’s a good indicator that something is amiss. Keep an eye out for any discoloration or peeling paint as well. -
Mold or Mildew Growth
A leaking outdoor spigot can create the perfect breeding ground for mold and mildew. If you spot these unsightly organisms on your walls, it’s time to grab your detective hat and investigate further. -
Increased Water Bills
Have you noticed a sudden spike in your water bills? A leaking outdoor spigot may be to blame. Keep a close eye on your usage and if it unexpectedly shoots up, it’s time to get curious about that hidden wall spigot.
Causes of an Outdoor Spigot Leaking in the Wall
Now that we’ve identified the signs of a leaking outdoor spigot, let’s dive into the possible causes behind this sneaky plumbing predicament.
-
Loose Connections
Over time, the connections between your outdoor spigot and the plumbing system can become loose. This can result in water seeping through the gap, finding its way into your wall. -
Freezing Temperatures
If your area experiences freezing temperatures, your outdoor spigot may be at risk. When water freezes inside the pipe, it can lead to cracks or even burst pipes. This can cause leaks in the wall, a headache you definitely want to avoid. -
Poor Installation
Improper installation of the outdoor spigot, such as insufficient sealing or ineffective waterproofing, can leave room for water to penetrate into your wall. It’s important to ensure that proper measures are taken during installation to prevent future leaks.
Fixing an Outdoor Spigot Leaking in the Wall
You’ve identified the problem, but how do you go about fixing an outdoor spigot leaking behind your wall? Here are a few simple steps to get you started:
-
Turn Off the Water Supply
First things first, shut off the water supply to prevent any further leakage. Locate the main shut-off valve and give it a gentle twist to the right. This will stop water flow to the spigot. -
Inspect and Tighten Connections
With the water supply turned off, inspect the connections between the spigot and the pipe. Tighten any loose connections using an adjustable wrench. Ensure the connections are snug, but be mindful not to overtighten and cause damage. -
Repair Any Cracks or Damage
If you discover cracks or damage in the pipes or spigot itself, it’s best to call a professional plumber to assess and repair the issue. They have the expertise and tools to resolve the problem efficiently and effectively.
Remember, tackling a leaking outdoor spigot behind your wall can be quite the adventure, but with these handy tips, you’ll be well on your way to solving the mystery and bidding farewell to those unwanted drips. Happy plumbing!
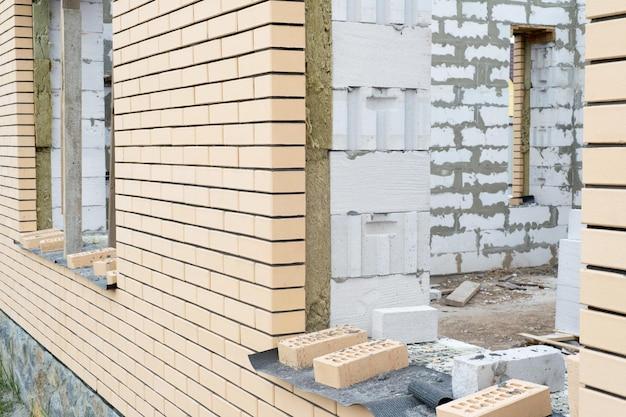
Outside Faucet Leaking Behind Brick
If you’ve noticed water pooling around your outside faucet, but can’t find the source of the leak, there’s a good chance it might be coming from behind the brick. This can be a tricky issue to tackle, but fear not! We’ve got you covered with some helpful tips and tricks to solve this pesky problem.
Signs of a Leak
Before we dive into the solutions, let’s first identify some common signs that you may have a leaking faucet behind your brick. Look out for damp spots or water stains near the faucet, cracking or crumbling mortar between the bricks, or even a musty odor indicating water damage. These signs are usually a good indicator that there’s an issue lurking behind your wall.
The Leak Stoppers
Now that we’ve established the symptoms, let’s move on to the cures. Here are a few methods you can try to fix that sneaky leak:
1. Inspect and Replace the Washer
The humble washer in your faucet can often be the culprit behind leaks. Over time, it can wear out or become damaged, causing water to seep through. Inspect the washer and, if necessary, replace it with a new one readily available at your local hardware store. This simple fix might just do the trick!
2. Tighten Loose Connections
Sometimes, a loose connection is all it takes for a leak to occur. Check all the connections between the faucet, the pipe, and the brick wall. Using a wrench, gently tighten any loose fittings to ensure a snug and watertight connection. Don’t go overboard though, as overtightening can cause more harm than good!
3. Apply Waterproof Sealant
In cases where the leak persists despite your best efforts, it’s time to bring in the big guns – waterproof sealant. Liberally apply a generous amount of sealant around the faucet and the brick wall, ensuring complete coverage. This will create a watertight barrier, preventing any further leaks.
Don’t Be Afraid to Seek Help
While these methods can often resolve the issue, remember that plumbing can be a tricky business. If you don’t feel confident or comfortable tackling the problem on your own, it’s always best to call in a professional plumber. They have the expertise and experience to tackle any leak, no matter how hidden or challenging it may be.
So, the next time you spot water appearing mysteriously around your outside faucet, don’t panic. With these helpful tips, you’ll soon have your leaky faucet behind the brick fixed, and you can go back to enjoying a dry and worry-free outdoor space.
Outdoor Faucet Leaks When Turned On
Is your outdoor faucet leaking only when you turn it on? Don’t worry, I’ve got you covered! In this section, we’ll explore why your outdoor faucet might be leaking when it’s turned on and what you can do to fix it.
Possible Causes of Outdoor Faucet Leaks
1. Loose Connection
One common cause of a leaking outdoor faucet is a loose connection. Over time, the fittings that connect the faucet to the water supply may become loose, causing water to seep out. To fix this, simply tighten the fittings using a wrench, and voilà – no more leaky faucet!
2. Worn-Out Washer
Another culprit behind a leaky outdoor faucet is a worn-out washer. The washer creates a seal between the faucet and the water supply, but it can wear down over time, resulting in leaks. Thankfully, replacing the washer is a quick and inexpensive fix. Just make sure to turn off the water supply before you start!
3. Cracked Pipe
If you’re still facing a leak even after tightening the fittings and replacing the washer, the issue might lie in a cracked pipe. Cold winter temperatures or accidental damage can cause pipes to crack, resulting in leaks when the faucet is turned on. In this case, it’s best to call a professional plumber to assess the situation and make the necessary repairs.
4. High Water Pressure
Sometimes, high water pressure can also lead to a leaky outdoor faucet. Excessive pressure can cause the seals and fittings to break down, resulting in leaks. Installing a pressure regulator can help control the water pressure and prevent future leaks.
Prevention and Maintenance
To avoid dealing with a leaky outdoor faucet in the future, here are some tips for prevention and maintenance:
Regular Inspections
Make it a habit to inspect your outdoor faucet for any signs of damage or leaks. Early detection can save you from larger problems down the line.
Winterize Your Faucet
Before winter arrives, don’t forget to winterize your outdoor faucet to protect it from freezing temperatures. Shut off the water supply, drain any remaining water, and insulate the faucet with a cover or towel.
Be Mindful of Usage
Avoid putting excessive strain on your outdoor faucet by using it with care. Yanking on the handle or forcing it can cause damage and leaks.
A leaking outdoor faucet when turned on can be a frustrating problem, but with some troubleshooting and maintenance, you can get it fixed in no time. Whether it’s a loose connection, worn-out washer, cracked pipe, or high water pressure, understanding the possible causes will help you identify and resolve the issue. Remember, regular inspections and proper maintenance are key to preventing future leaks. So, go ahead, fix that leak, and enjoy hassle-free outdoor water usage!
How to Stop a Leaking Water Spigot
Have you noticed water spilling behind your siding every time you use your outdoor water spigot? A leaking water spigot not only wastes water but can also cause damage to your siding if left unaddressed. The good news is, you don’t have to be a plumbing expert to fix this issue. With a few simple steps, you can stop your water spigot from leaking and save yourself from potential headaches down the line. Here’s what you need to do:
1. Shut Off the Water Supply
Before you start any repairs, make sure to shut off the water supply to the spigot. This will prevent any accidents and allow you to work on the spigot without water flowing. Locate the shut-off valve inside your house, often found in the basement or crawl space. Turn it clockwise to close the valve and stop the water flow.
2. Remove the Handle and Stem
To access the inner workings of the water spigot, you’ll need to remove the handle and stem. Start by unscrewing the handle counterclockwise. Once the handle is off, use pliers to carefully loosen the packing nut and remove it. With the packing nut off, you can now unscrew the stem from the spigot housing.
3. Replace the O-Ring or Washer
The most common cause of a leaking water spigot is a worn-out o-ring or washer. Examine the o-ring or washer for any signs of damage, such as cracks or tears. If you spot any issues, it’s time to replace them. Take the old o-ring or washer to your local hardware store to ensure you get the correct size and type for your spigot. Install the new o-ring or washer onto the stem, making sure it fits snugly.
4. Reassemble and Test
Now that you have replaced the o-ring or washer, it’s time to reassemble the spigot. Screw the stem back into the spigot housing and tighten the packing nut with pliers. Finally, attach the handle and screw it on clockwise. Once everything is securely in place, turn on the water supply and check for any leaks. If all looks good, congratulations – you’ve successfully stopped your water spigot from leaking!
5. Ongoing Maintenance and Prevention
To ensure your fixed water spigot stays leak-free, it’s essential to perform regular maintenance. Check for any signs of wear and tear, and replace o-rings or washers as needed. Additionally, during cold winter months, remember to disconnect and drain your outdoor spigot to prevent freezing and potential leaks.
By following these simple steps, you can bid farewell to your leaking water spigot and enjoy a hassle-free outdoor watering experience once again. Remember, proper maintenance and timely repairs are the key to keeping your water spigot in optimal condition. Happy fixing and say goodbye to those unwanted leaks!
Outside Faucet Leaking When Hose Attached
Does your outdoor faucet leak every time you attach a hose? Don’t worry; you’re not alone. Many homeowners face this common issue, but rest assured, there are simple solutions to fix it. Let’s dive in and explore the reasons behind this problem and how you can resolve it.
Inspect the Washer
The culprit behind an outside faucet leaking when a hose is attached is often a worn-out washer. Over time, the constant twisting and turning of the hose can cause the washer to deteriorate, leading to leaks. Luckily, fixing this issue is as easy as replacing the washer.
Start by shutting off the water supply to the faucet, then remove the handle and valve stem. Inside, you’ll find the old washer. Take it out and replace it with a new one of the same size. Reassemble the faucet, turn the water back on, and voila! Your leak should be history.
Check for Loose Connections
Another reason for a leaky outdoor faucet is loose connections. Occasionally, the connection between the faucet and the hose can become loose due to repeated use or improper attachment. When this happens, water can escape through the gaps, resulting in a pesky leak.
To fix this, ensure that the connection is secure and tightened properly. If you notice any loose parts, tighten them or consider using a hose repair kit to ensure a watertight connection. Don’t over-tighten, though, as this can cause damage. A snug fit should do the trick!
Consider a New Hose Washer
Sometimes, the problem lies not with the faucet but with the washer inside the hose. If you’ve tried replacing the washer in the faucet but still experience leaks, it might be time to inspect the hose washer.
Similar to the faucet washer, the washer in the hose can wear out over time. Inspect it for any signs of damage or deterioration. If it looks worn or cracked, replacing it with a new washer might resolve the issue and make your outdoor faucet leak-free again.
Upgrade to a Hose with a Better Seal
If you’ve tried all the above solutions without success, it could be time to consider upgrading your hose altogether. Some hoses are designed with better sealing mechanisms that prevent leaks when attached to an outdoor faucet.
Look for hoses with high-quality materials and advanced features such as O-ring seals or double gaskets. These enhanced sealing techniques can help ensure a tight and leak-free connection, putting an end to your outside faucet troubles.
With these solutions at your disposal, you can bid farewell to the bothersome leaks that mar your watering sessions. By addressing the issue promptly and taking the necessary steps to fix it, you’ll once again enjoy hassle-free gardening and watering tasks. So go ahead, grab your watering can or hose, and let your green thumb work its magic!
What to do if your outdoor spigot is leaking
Assess the situation
If you notice that your outdoor spigot is leaking, don’t panic! Start by turning off the water supply to the spigot. This will help prevent any further damage or wasted water.
Determine the cause
Next, inspect the spigot to determine the cause of the leak. Common culprits include worn-out washers, loose connections, or a damaged spigot handle. Identifying the cause will help you decide on the appropriate solution.
Tighten connections
If the leak is caused by loose connections, try tightening them with a wrench. Be careful not to overtighten, as this may cause further damage.
Replace the washer
If the washer is worn out, it’s time for a replacement. This is a relatively simple fix. First, turn off the water supply completely. Then, remove the spigot handle and check for any screws or bolts holding the washer in place. Remove the old washer and replace it with a new one of the same size. Put everything back together, turn on the water supply, and check for any leaks.
Consider professional help
If you’ve tried the above steps and the leak persists, it may be time to call in the experts. A professional plumber will have the knowledge and experience to tackle more complex issues with your outdoor spigot. Don’t hesitate to seek their assistance, as they can save you time, money, and frustration in the long run.
Prevent future leaks
To prevent future leaks, it’s important to take proper care of your outdoor spigot. Insulate it during the winter months to prevent freezing and cracking. Avoid turning the handle too forcefully to reduce wear and tear on the washer. Regularly inspect the spigot for any signs of damage or leaks, and address them promptly.
Remember, dealing with a leaking outdoor spigot is a common issue that many homeowners face. By following these simple steps, you can resolve the problem efficiently and effectively. And if all else fails, don’t hesitate to call in the professionals. Happy fixing!
Why is my outside faucet leaking inside the house
If you’ve ever experienced the unfortunate situation of finding water leaking inside your house from an outside faucet, you might be wondering what could be causing this seemingly bizarre occurrence. Don’t panic! In this subsection, we will explore some possible reasons why your outside faucet is leaking inside your house and how you can fix it.
Age and wear:
Over time, outdoor faucets can deteriorate due to age and wear. The constant exposure to the elements, such as rain, heat, and freezing temperatures, can take a toll on the faucet’s structure, leading to leaks. Additionally, if the faucet was poorly installed or made of subpar materials, it could be more prone to leaks. So, if you’ve had your faucet for a while or noticed signs of deterioration, it might be time for a replacement.
Faulty connections:
Sometimes, the issue lies not with the faucet itself but with the connections surrounding it. Loose or damaged pipes, fittings, or washers can cause leaks to occur. Check the connections behind the siding to ensure they are tight and in good condition. If you spot any issues, such as loose fittings or damaged washers, a quick fix might be all it takes to stop the leak.
Freezing temperatures:
If you live in an area with cold winters, freezing temperatures can wreak havoc on your outdoor faucet. When water freezes inside the faucet or pipes, it can expand and cause cracks, leading to leaks. To prevent this from happening, it’s crucial to winterize your outdoor faucet by disconnecting hoses, draining excess water, and insulating the faucet or pipes. Taking these proactive measures can save you from potential leaks inside your house.
High water pressure:
Having excessively high water pressure can also contribute to faucet leaks. The force of the water rushing through the pipes can put strain on the faucet, causing it to develop leaks over time. Consider installing a pressure regulator to ensure the water pressure remains at an optimal level and protect your faucet from unnecessary stress.
Improper installation:
Lastly, if your outside faucet was not installed properly, it could be a breeding ground for leaks. Faulty or incomplete installation can lead to gaps and misalignment, allowing water to seep into your house. In this case, it’s best to consult a professional plumber to assess the situation and provide a solution.
Now that you have a better understanding of the possible reasons behind your outside faucet leaking inside your house, you can take the necessary steps to address the issue. Remember, if you’re unsure about any repairs, it’s always wise to seek professional help to avoid exacerbating the problem. Don’t let a leaking outside faucet dampen your mood, take action and say goodbye to those pesky indoor water leaks!
Why is my outdoor spigot leaking when turned off
Have you noticed that your outdoor spigot is leaking even when you’ve turned it off? Don’t worry, you’re not alone! This common problem can be caused by a few different factors. In this section, we’ll explore some of the reasons why your outdoor spigot might be leaking when it’s supposed to be off.
Worn-out Washer
One of the most common causes of a leaking outdoor spigot is a worn-out washer. Over time, the washer that seals the connection between the spigot and the water pipe can deteriorate, causing water to leak out. If you’ve had your outdoor spigot for a while and haven’t replaced the washer, this could be the culprit. Thankfully, replacing the washer is a simple fix that doesn’t require any special tools.
Loose Connections
Another possible cause of a leaking outdoor spigot is loose connections. If the connections between the spigot and the water pipe are not tightened properly, water can seep out. This can happen if the spigot was not installed correctly or if it has become loose over time. Luckily, tightening the connections is an easy DIY task that can usually be done with just a wrench.
High Water Pressure
High water pressure can also lead to a leaking outdoor spigot. When the water pressure is too high, it puts extra strain on the spigot and can cause it to leak. If you suspect that high water pressure might be the issue, you can install a pressure regulator to help control the water flow and prevent leaks. Don’t worry, you don’t need to be a plumber to install a pressure regulator!
Freeze Damage
If you live in an area with cold winters, freeze damage could be the culprit behind your leaking outdoor spigot. When water freezes inside the spigot, it expands and can cause cracks or damage that results in leaks. To prevent freeze damage, it’s important to properly winterize your outdoor spigot by turning off the water supply and draining any remaining water. You can also consider installing a frost-free spigot that prevents water from pooling and freezing.
Time for a Professional
If you’ve tried the DIY fixes mentioned above and your outdoor spigot is still leaking when turned off, it might be time to call in a professional plumber. They have the expertise to diagnose the issue and recommend the best course of action. While it may be an additional expense, it’s worth it to ensure your outdoor spigot is working properly and to prevent any further damage.
In conclusion, a leaking outdoor spigot when turned off can be caused by various factors such as a worn-out washer, loose connections, high water pressure, or freeze damage. Simple repairs like replacing the washer or tightening connections can often solve the problem. If those DIY fixes don’t work, it’s best to consult a professional plumber for further assistance. Don’t let a leaking spigot dampen your outdoor experience!
How Much Does It Cost to Replace a Leaking Spigot
If you’ve got a water spigot leaking behind your siding, it’s not just a nuisance but can also lead to bigger problems like water damage and mold growth. So, it’s essential to address the issue promptly. One common question homeowners have when faced with such a situation is, “How much does it cost to replace a leaking spigot?” Well, I’m here to give you the lowdown on the costs involved in fixing this plumbing predicament.
The Cost Breakdown
1. Hiring a Professional Plumber
Bringing in a professional plumber is a wise choice to ensure the job is done right. On average, the cost of hiring a plumber to replace a leaking spigot ranges from $150 to $500. However, keep in mind that factors like the complexity of the job, your location, and the plumber’s experience can affect the final cost.
2. Cost of the Replacement Spigot
The cost of the replacement spigot itself can vary depending on the brand, quality, and design. Basic models typically range from $15 to $50, whereas more high-end options can cost anywhere from $50 to $150. Remember, investing in a quality spigot now can save you from future leaks and repairs.
3. Additional Materials and Tools
You may also need to factor in the cost of any additional materials and tools required for the job, such as pipe wrenches, Teflon tape, pipe sealant, and plumbing putty. These items can typically be purchased for around $20 to $50, depending on the quantity and quality.
4. Permit Fees (If Applicable)
In some areas, obtaining a permit for plumbing work may be necessary. The cost of permits can vary depending on your location and the extent of the project. It’s best to check with your local authorities to determine if any permits are required and how much they’ll set you back.
DIY vs. Professional Help
While replacing a spigot may seem like a simple task, it’s important to weigh the pros and cons of tackling it yourself versus hiring a professional. Unless you have experience in plumbing repairs, it’s often wiser to leave it to the experts to avoid any potential mishaps and costly mistakes down the line.
In conclusion, the cost to replace a leaking spigot can vary depending on various factors such as hiring a plumber, the cost of the replacement spigot, additional materials and tools, and any required permits. By understanding these costs, you can plan your budget accordingly and ensure the proper repair of your leaking spigot, giving you peace of mind and a well-functioning outdoor faucet.