Are you considering laying new tiles but not sure if you should remove all the old mortar first? It’s a common question that many homeowners face when planning a tile project. In this blog post, we will explore the topic in detail and provide you with all the information you need to make an informed decision.
When it comes to laying tile, the condition of the existing mortar plays a crucial role in the success of your project. Removing all the old mortar might seem like a logical step, but is it always necessary? We’ll discuss the different factors to consider, such as the type of mortar used for repointing and whether you need to remove dried thinset. We’ll also delve into alternative methods for updating your floor tiles without removing them, as well as techniques for removing mortar residue effectively.
So, if you’re ready to learn more about whether you need to remove old mortar before laying tile and explore some handy tips and tricks along the way, let’s dive right in!
Do I Need to Remove All Old Mortar Before Laying Tile
So, you’re ready to embark on a tiling adventure and transform your space into a stunning masterpiece. But before you break out the tile adhesive and get to work, there’s an important question to be answered: do you need to remove all that old mortar before laying tile? Let’s dive into the nitty-gritty of it all and find out!
Removing Old Mortar: A Mortifying Prospect
You might be tempted to skip the hassle and simply lay your new tiles right on top of the old mortar. After all, it’s already there, and who needs the extra work? Well, my friend, let me tell you this: sometimes, it’s best to face the music and go the extra mile.
The Benefits of Removing Old Mortar
Trust me, taking the time and effort to remove old mortar will pay off in the long run. Here’s why:
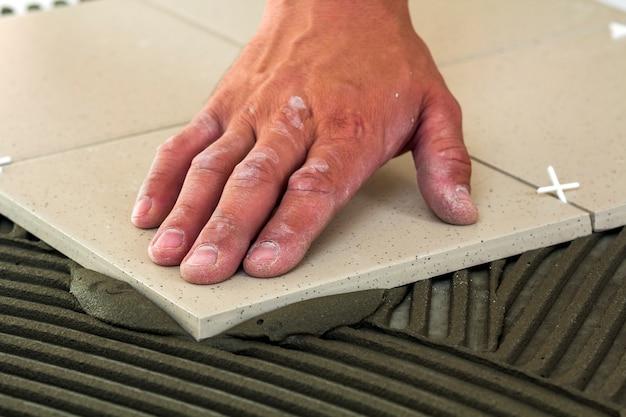
1. A Smooth Foundation
Old mortar can be uneven, cracked, or simply not conducive to providing a solid base for your new tiles. By removing the old mortar, you ensure a level playing field (pun intended!) for your tiles, allowing them to adhere properly.
2. Better Adhesion
Speaking of adhesion, removing old mortar increases the chances of your tiles sticking around for the long haul. Think about it: would you want to build a house on a shaky foundation? The same principle applies to tiling. The stronger the bond between the tiles and the surface, the less likely you are to encounter any loose or broken tiles down the line.
3. Seamless Appearance
If you’ve invested in new tiles, you probably want them to shine and take center stage. Leaving old mortar in place can affect the overall appearance of your newly tiled area. Thin-set adhesive, the go-to product for laying tiles, is typically applied in a thin layer. If the old mortar is too thick, it may lead to an uneven surface that’s not exactly a sight for sore eyes.
When Can You Get Away Without Removing All Old Mortar
Now, before you grab your chisel and start hacking away, let’s address the exceptions. In some cases, you may be able to avoid removing all the old mortar. Here are a couple of scenarios:
1. Minimal Mortar Buildup
If the layer of old mortar is minimal and doesn’t present any major irregularities or cracks, you may be able to get away without removing it all. However, keep in mind that a thin, even layer is the key here. If it’s bumpy or uneven, it’s still best to go ahead and remove it.
2. Thinset Over Thinset
If you’re dealing with a small area and the existing mortar is already thinset (a specific type of mortar), you can usually apply a new layer of thinset on top without any issues. However, make sure the existing layer is in good condition and well-bonded to the substrate to prevent any future problems.
The Great Mortar Removal Game
Removing old mortar may sound intimidating, but fear not! With the right tools and a bit of elbow grease, you’ll be well on your way to a smooth and solid foundation for your tiles. Here’s a quick overview of the steps involved:
1. Gear Up
To tackle the mortar, you’ll need some heavy-duty tools. Think chisels, angle grinders, and perhaps even a jackhammer if you’re dealing with a thick layer. Don’t forget your safety gear, like goggles and gloves. Safety first, my friend!
2. Chip Away
Start by chipping away at the old mortar using a chisel or an angle grinder with a mortar removal attachment. Take it slow, be careful not to damage the substrate, and aim for a smooth and level surface.
3. Clean Up
Once you’ve removed the majority of the old mortar, it’s time to clean up the mess. Use a vacuum or a broom to get rid of all the debris and ensure a clean surface before proceeding with the tile installation.
4. Assess and Repair
While you’re at it, take this opportunity to assess the condition of the substrate. If you notice any cracks or damage, it’s best to tackle those issues before moving forward. Remember, a solid foundation is crucial for a successful tiling project.
While the prospect of removing all that old mortar may seem daunting, trust me when I say it’s worth the effort. By starting with a clean slate, you’ll ensure a smoother, more durable, and visually appealing tile installation. So, roll up your sleeves, channel your inner DIY warrior, and let the mortar removal games begin!
FAQ: Do I Need To Remove All Old Mortar Before Laying Tile
In the world of home improvement, tiling is a popular choice for adding style and functionality to your space. However, before you embark on your tiling journey, it’s important to address the question of whether or not you need to remove all old mortar before laying tile. In this FAQ-style guide, we’ll delve into the nitty-gritty details and provide you with expert insights, tips, and tricks to help you make the right decision. So, without further ado, let’s dive in!
What type of mortar is used for repointing
When it comes to repointing, a process that involves filling in the gaps between existing tiles or bricks, it’s crucial to choose the right type of mortar. In this case, you’ll want to opt for a mortar mix specifically formulated for repointing, such as a Type O or a Type N mortar. These types of mortars offer a good balance of strength and flexibility, ensuring a durable and long-lasting bond between your tiles.
How do you remove hardened cement from tiles
Accidents happen, and sometimes cement or mortar can find its way onto your tiles during a tiling project. Don’t worry, though – there’s a solution! To remove hardened cement from tiles, you can use a mixture of water and vinegar. Simply apply the mixture to the affected area, let it sit for a few minutes, and then gently scrub away the residue with a non-abrasive brush. Voila! Your tiles will be free from unwanted cement clingers.
What sand should I use for pointing
When it comes to pointing, the sand you choose plays a vital role in the overall quality and appearance of your finished project. To ensure a professional and aesthetically pleasing result, opt for a fine-grade sand, such as washed masonry sand or polymer-modified sand. These types of sand are specifically designed for pointing, offering excellent workability and durability. Remember, the sand you use can make all the difference!
What tool removes thinset
Ah, thinset – the stubborn adhesive used to bond tiles to surfaces. If you find yourself needing to remove thinset, fear not, for there is a mighty tool that can come to your rescue: the trusty angle grinder. Equipped with a diamond blade attachment, an angle grinder can effortlessly grind away thinset, leaving you with a clean and smooth surface. Just be sure to exercise caution and wear protective gear when operating this powerful tool!
Does mineral spirits remove mortar
Ahoy there, matey! If you’re dealing with pesky mortar stains, mineral spirits can be your trusty first mate in the quest for clean tiles. By applying a small amount of mineral spirits to a soft cloth or sponge and gently rubbing the affected area, you can effectively break down the mortar residue. Just remember to rinse the tiles thoroughly with water after using mineral spirits to ensure a pristine finish. Arr, goodbye, mortar, ye scallywag!
Can you mortar over old mortar
Arrr, matey! While it may be tempting to take the easy way out and mortar over old mortar, it’s generally not the best course of action. Old mortar can deteriorate over time, leading to an unstable foundation for your new tiles. It’s always recommended to remove the old mortar completely before proceeding with your tiling project. This ensures a solid base and helps prevent future issues like tile cracking or loosening. So, hoist the anchor and prepare to bid adieu to that old mortar, me hearties!
Is there a difference between thinset and mortar
Ah, the age-old question – what’s the difference between thinset and mortar? Well, my curious friend, the answer lies in their composition. While both thinset and mortar are used for tiling, they have distinct characteristics. Thinset is a type of mortar that contains a fine sand, while mortar typically uses a coarser sand. Thinset is also specifically designed to create a strong bond between tiles and surfaces, making it the go-to choice for most tiling projects. So, remember, when in doubt, reach for the mighty thinset!
Will vinegar loosen thinset
Ah, the power of vinegar! While vinegar may work wonders for removing various stains and residues, when it comes to loosening thinset, it may not be the most effective solution. Thinset is a formidable foe, known for its strong adhesive properties. While vinegar can help soften the thinset slightly, you’ll likely need something more robust, like a chisel or an angle grinder, to completely remove it. Perhaps save the vinegar for your next salad dressing instead!
How do you remove dried thinset
Dried thinset got you feeling stuck? It’s time to break free! To remove dried thinset, you’ll want to arm yourself with a trusty chisel and a hammer. Carefully position the chisel along the edge of the dried thinset and tap it gently with the hammer. Gradually work your way across the surface, chiseling away the dried adhesive. Be patient and persistent, and soon enough, you’ll be liberated from the clutches of dried thinset. Freedom awaits!
Do you need to remove mortar to replace floor tile
Ah, the great tile replacement conundrum! When it comes to replacing floor tiles, the need to remove mortar depends on a few factors. If the existing mortar is in good condition and provides a stable base, you may be able to tile over it. However, if the mortar has deteriorated or is uneven, it’s best to remove it entirely and start fresh. This ensures a level surface and reduces the risk of future tile issues. Always assess the condition of the mortar and make an informed decision before embarking on your tile replacement adventure!
Do I have to remove old thinset
Ah, thinset, that sneaky fellow. While removing old thinset can be a tedious task, it is generally recommended for the best tiling results. Old thinset can affect the levelness of the surface and compromise the bond between your new tiles and the substrate. By removing the old thinset, you create a clean canvas for your tiling masterpiece, ensuring a solid and durable foundation. So grab your tools, embrace the challenge, and bid farewell to that old, crusty thinset!
What is the easiest floor tile to install
Ah, the quest for the perfect tile! If you’re seeking the easiest floor tile to install, look no further than the magnificent luxury vinyl tile (LVT). With its straightforward installation process, LVT provides a great alternative to traditional ceramic or porcelain tiles. LVT comes in various styles and designs, mimicking the look of real wood or stone, giving your space a touch of elegance without the hassle. So, put on your DIY boots and waltz your way into a stress-free tiling experience!
How can I update my floor tiles without removing them
Ah, the desire for a fresh look without all the labor-intensive tile removal. Fear not, for there are ways to update your floor tiles without removing them! One popular option is to use tile paint. With a little bit of elbow grease and a paintbrush, you can completely transform the appearance of your tiles. Just be sure to thoroughly clean and prepare the surface before applying the paint to ensure a smooth and long-lasting finish. A simple update, a world of difference!
Does vinegar remove mortar
Ah, vinegar, the magical elixir of household remedies! While vinegar can be an effective cleaning agent for various purposes, it may not be a match made in heaven for removing dried mortar. Mortar is a tough adversary, known for its durability and strong bond. To remove mortar, you’ll likely need to rely on more robust methods, such as chiseling or grinding. So, save the vinegar for your fish and chips and let the mortar meet its match!
Can I remove tile myself
Ah, the intrepid adventurer seeking to conquer the art of tile removal! If you’re equipped with patience, determination, and a handy set of tools, removing tile yourself is indeed possible. However, it’s essential to proceed with caution and take the proper safety precautions. Ensure you have the necessary tools, such as a hammer, chisel, and protective gear. Take your time, work in small sections, and be prepared for some elbow grease. Remember, my brave friend, you can do it – one tile at a time!
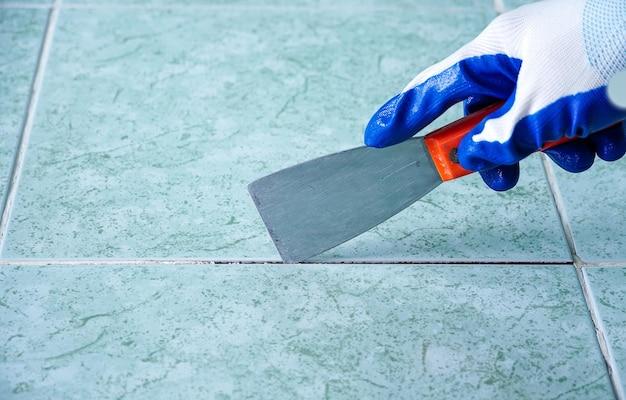
How do you remove old mortar before repointing
Ahoy, captain! To prepare for the noble task of repointing, you’ll need to bid farewell to the old mortar. Fear not, for there is a treasure trove of tools at your disposal! To remove old mortar before repointing, you can use a trusty chisel or a small handheld grinder with a diamond blade. Carefully chip away at the old mortar, being mindful not to damage the underlying tiles. Clean out the joints, and soon you’ll be ready to embark on your repointing adventure. Aye aye, matey!
What is the best mortar mix for pointing
Ah, the mortar mix – the secret recipe for successful pointing endeavors! When it comes to choosing the best mortar mix for pointing, versatility is key. One popular choice is a Type O mortar mix, which offers a good balance of strength and workability. Another option is a Type N mortar, known for its durability and versatility. Whichever mix you choose, take time to ensure the right consistency and follow the manufacturer’s instructions. With the best mortar mix by your side, your pointing project is destined for greatness!
How do you remove mortar residue
Oh, the sneaky residue left behind by stubborn mortar! To banish it from your tiles, you’ll need a trusty companion: a soft-bristle brush or a damp sponge. Gently scrub the area with the brush or sponge, using a mild detergent diluted in water if necessary. Rinse the tiles thoroughly with clean water to remove any leftover residue. Remember, a little scrubbing goes a long way in the quest for mortar-free tiles. So roll up your sleeves and say goodbye to that lingering residue!
Will water soften thinset
Ah, the power of H2O! While water can work wonders in many situations, when it comes to thinset, it may not have the desired softening effect. Thinset is a resilient adhesive designed to withstand moisture. However, applying water to thinset can help loosen the bond slightly, making it easier to remove. So, arm yourself with water, a sponge, and a bit of tenacity, and watch as the mighty thinset relinquishes its grip. Onward to victory!
In conclusion, whether you choose to remove all old mortar before laying tile depends on various factors, including the condition of the existing mortar, the type of tile project, and personal preference. While it may require some extra effort and time, starting with a clean slate by removing the old mortar can provide a solid foundation for your tiling masterpiece, ensuring long-lasting beauty and functionality. Remember, my fellow DIY enthusiasts, there’s always a solution to every tiling challenge. With the right tools, techniques, and a dash of humor, you’re well on your way to becoming a tiling maestro. Happy tiling, and may your floors be forever flawless!