Are you tired of dealing with leaky and rusty galvanized pipes in your home? Do you want to upgrade to a more durable and efficient plumbing system? If so, converting your galvanized pipes to PEX can be the solution you’ve been looking for.
PEX is a flexible plastic pipe that is easy to install, highly resistant to corrosion, and has a long lifespan. However, before you start the conversion process, you may have some questions, such as “Can I go from galvanized pipe to PEX?” or “How do you connect galvanized pipes without threads to PEX?” Don’t worry; we’ve got you covered.
In this blog post, we’ll walk you through the steps of converting galvanized pipe to PEX and answer some common questions about the process. We’ll also discuss various connectors and fittings that you can use, including SharkBite fittings and dielectric unions, to make the transition easy and seamless.
But first, let’s address one of the most common questions homeowners have: How much does it cost to replace galvanized pipes with PEX? The cost can vary depending on the size of your home, the extent of the plumbing system, and the complexity of the installation. However, on average, it can cost between $4,000 to $10,000 to replace galvanized pipes with PEX.
Now that we’ve covered some basics let’s dive in and learn how you can convert your galvanized pipes to PEX and enjoy a more efficient and durable plumbing system.
Converting Galvanized Pipe to PEX: A Comprehensive Guide
If you’re tired of dealing with rusty, leaky galvanized pipes in your home, it’s time to consider converting to PEX. PEX, or crosslinked polyethylene, is a flexible, durable, and leak-resistant alternative to traditional metals like copper and galvanized steel. In this guide, we’ll walk you through the process of converting your galvanized pipes to PEX.
Step 1: Assess your Current Plumbing System
Before you start any renovation project, it’s essential to know what kind of plumbing system you have. Check for galvanized pipes in areas such as your basement, crawl space, or utility room. These areas are typically where the pipes come together, and you can locate them near the water main.
Step 2: Plan the Conversion Process
Once you’ve identified where your galvanized pipes are located, it’s time to plan the conversion process. This process involves choosing the right PEX tubing size, determining the fitting type, and deciding on the appropriate installation method. You can either install PEX tubing using a crimping tool or a compression fitting.
Step 3: Prepare the Work Area
Since converting galvanized pipes to PEX requires cutting and connecting pipes, you’ll need to prepare the work area. Ensure that you have all the necessary tools on hand, such as a pipe cutter, a deburring tool, and a PEX crimper. Shut off the water supply to your home and drain the pipes before starting any work.
Step 4: Remove the Galvanized Pipes
Cut the galvanized pipes using a pipe cutter, from the area where you plan to install the PEX tubing. Clean the cut ends of the pipes using a deburring tool to ensure a smooth surface for the PEX fittings.
Step 5: Install the PEX Tubing
Measure and cut the PEX tubing to the appropriate length and attach the fittings using either a crimping tool or a compression fitting. Ensure that you connect the PEX fittings to the copper or brass fittings in your home.
Step 6: Test the System
Once you’ve installed the PEX tubing, it’s time to test the system to check for leaks. Turn on the home’s main water supply and monitor the pipes for any signs of leaks.
Converting galvanized pipes to PEX is a reliable and cost-effective process that will help you avoid future plumbing headaches. With proper planning, preparation, and installation, your new PEX plumbing system will provide worry-free service for years to come. So why wait? Upgrade your plumbing system today!
Galvanized Pipe Transition
If you have an older home, chances are high that it is fitted with galvanized pipes. While this material may be suitable for water transport, it is not the most efficient one. This is where PEX comes in. The transition from galvanized pipes to PEX, however, may require some finesse. In this section, we explain the necessary steps to convert galvanized pipe to PEX without any hitches.
Step 1: Turn off the Water Supply
Before beginning any plumbing project, including the transition from galvanized pipe to PEX, you must first turn off the water supply. This step ensures that no water flows through the pipes while you work on them, reducing the risk of flooding.
Step 2: Mark the Galvanized Pipe
With the water supply off, mark the galvanized pipe where you intend to cut it. Be precise with the mark as a deviation of an inch could impact the fitting of the PEX.
Step 3: Cut the Galvanized Pipe
Using a pipe cutter, slice the galvanized pipe at the marked point. Once you have cut all the necessary parts, smooth the edges down with a file to ensure they do not harm the PEX.
Step 4: Clean the Pipes
To ensure that the transition from galvanized pipe to PEX is successful, wipe the pipes using a clean cloth that has been dampened with alcohol. This step helps remove any dirt or impurities that could prevent a tight seal during the fitting.
Step 5: Install the PEX Fittings
Now that you have all the necessary parts ready, install the PEX fittings. This is where you need to exercise caution and precision to ensure that everything fits snugly and securely.
Step 6: Connect the PEX to the Fittings
The final step in transitioning from galvanized pipe to PEX is attaching the PEX to the fittings. Begin by inserting the PEX tubing onto the fitting, followed by crimping it using a crimping tool. Ensure that the crimps are tightly secured to avoid any water leakage.
By taking these six steps, you can successfully transition from galvanized pipe to PEX without any hitches.
Does SharkBite work on galvanized
If you’re planning on converting your old galvanized pipes to new PEX, you may be wondering if SharkBite fittings will work with galvanized pipes. The answer is yes, SharkBite fittings can be used to convert galvanized pipes to PEX. However, there are a few things you should be aware of before you start your project.
Using SharkBite Fittings with Galvanized Pipes
SharkBite fittings are designed to work with copper, CPVC, and PEX pipes. However, they can also be used with galvanized pipes as long as the pipe is not severely corroded or damaged. If your galvanized pipes have been in use for a long time, it’s recommended to inspect them for any damage or corrosion before using SharkBite fittings.
Preparing Your Galvanized Pipes
Before you can use SharkBite fittings on your galvanized pipes, you’ll need to prepare the pipes. First, you’ll need to cut the galvanized pipe to the desired length. Next, you’ll need to remove any burrs or rough edges from the cut end of the pipe. Finally, you’ll need to use a wire brush to clean the inside of the galvanized pipe.
Using the SharkBite Fittings
Once your galvanized pipes are prepared, you can begin using the SharkBite fittings. Simply insert the SharkBite fitting onto the end of the galvanized pipe and press it into place. The SharkBite fitting will grip onto the pipe and create a secure, watertight connection.
SharkBite fittings can be used to convert galvanized pipes to PEX, but it’s important to inspect the pipes for damage or corrosion before using the fittings. With a little bit of preparation, you can easily use SharkBite fittings on your galvanized pipes and enjoy the benefits of PEX.
Dielectric Union Galvanized to Pex
When converting galvanized pipes to PEX, it’s important to address the issue of galvanic corrosion that can occur when two dissimilar metals come in contact with each other. The solution to this problem is a dielectric union, which is a special type of fitting that separates the galvanized and PEX pipes to prevent corrosion.
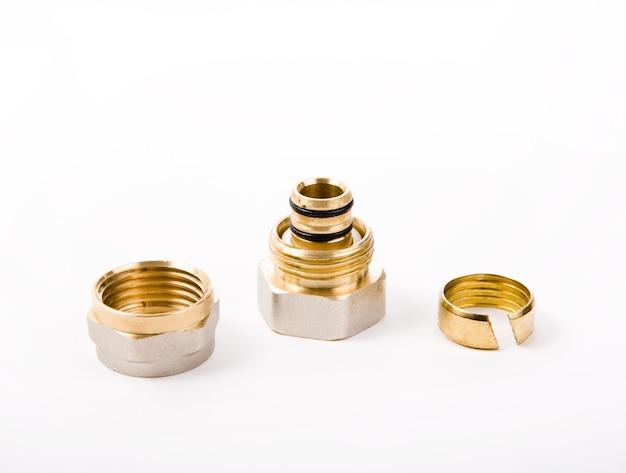
What is a Dielectric Union
A dielectric union is a plumbing fitting that is used to join two pipes made of different metals, such as copper and steel. It consists of two parts: a threaded nut that attaches to the steel or galvanized pipe, and a sleeve that fits over the PEX pipe. The two parts are separated by a rubber gasket or plastic insulator that prevents direct contact between the two metals.
How Does a Dielectric Union Work
Galvanic corrosion occurs when two dissimilar metals are in contact with each other in the presence of an electrolyte, such as water. The metal that is more reactive (i.e., less noble) corrodes faster than the other metal. In the case of galvanized pipes and PEX pipes, the galvanized steel is more reactive than the brass or copper fittings used in the PEX system.
A dielectric union prevents galvanic corrosion by creating an insulating barrier between the two metals. By separating the galvanized steel from the PEX pipe with a non-conductive material, it prevents the flow of electrons that causes corrosion. This ensures that the PEX system remains corrosion-free and lasts for many years.
Why is a Dielectric Union Important
Without a dielectric union, galvanic corrosion can cause leaks, reduced water pressure, and other plumbing problems. It can also shorten the lifespan of the PEX system, leading to costly repairs or replacements. By using a dielectric union, you can prevent these issues and ensure that your PEX system functions properly for many years.
Converting galvanized pipes to PEX is a smart choice for many homeowners, but it’s important to address the issue of galvanic corrosion that can occur. A dielectric union is an essential component of any PEX system that is connected to galvanized pipes. By providing an insulating barrier between the two metals, it prevents galvanic corrosion and ensures that your system functions properly for many years to come.
Can I Convert My Galvanized Pipe to PEX
If you have an old house with galvanized plumbing, you might be wondering if it’s possible to convert it to PEX. The short answer is yes, but there are a few things you need to consider before embarking on such a project.
What is Galvanized Pipe
Galvanized pipe is a steel pipe coated in zinc to prevent rust and corrosion. It was commonly used in homes built before the 1960s.
Why Convert to PEX
PEX is a flexible plastic tubing that is easy to install and doesn’t corrode like galvanized pipe. It’s also more affordable than copper piping, making it an excellent option for homeowners on a budget.
What are the Benefits of PEX
PEX provides a number of benefits over galvanized pipe. Here are a few reasons why you might consider converting:
- PEX doesn’t corrode like galvanized pipe, which means you won’t have to worry about leaks caused by rust.
- PEX is more flexible than galvanized pipe, which means it can be installed around corners and in tight spaces with ease.
- PEX is more affordable than copper piping, making it an excellent option for homeowners on a budget.
- PEX doesn’t require any special tools or training to install, which means you can do it yourself if you’re handy.
How Do You Convert to PEX
Converting from galvanized pipe to PEX isn’t a difficult process, but it does require a bit of work. Here are the basic steps:
- Turn off the water supply to your house and drain the pipes.
- Use a pipe cutter to cut the galvanized pipe where you want to make the conversion.
- Install a transition fitting that connects the PEX tubing to the galvanized pipe.
- Use brackets to secure the PEX tubing to the studs in your walls.
- Install a PEX manifold or individual shut-off valves for each fixture in your house.
- Connect the PEX tubing to each fixture using the appropriate fittings.
Conclusion:
Converting from galvanized pipe to PEX is a great way to improve the plumbing in your old house. While it may require some work to make the transition, the benefits are well worth it. Just be sure to plan carefully, follow the proper steps, and consult a professional if you need assistance.
How to Connect Non-Threaded Galvanized Pipe to PEX
If you’re converting galvanized pipes to PEX, you might encounter some non-threaded galvanized pipes that you need to connect to PEX pipes. But don’t worry, we’ve got you covered. In this section, we’ll show you how to connect non-threaded galvanized pipes to PEX pipes.
Step 1: Cut the Galvanized Pipe
The first step is to cut the galvanized pipe using a reciprocating saw or a hacksaw. You may use a pipe cutter or a wheel cutter if you have one. Make sure that the cut is straight and even, and remove any burrs with a deburring tool or sandpaper.
Step 2: Clean and Sand the Pipe
Before proceeding, clean the pipe with a brush to remove any dirt or debris. Sand the cut ends of the galvanized pipe with emery cloth to remove any roughness or imperfections. This will help the connector grip the pipe and prevent any leaks.
Step 3: Choose the Connector
Next, choose the connector that will join the galvanized pipe to the PEX pipe. There are several types of connectors available, such as push-fit connectors, crimp connectors, and compression fittings. You can choose the connector that suits your needs and preferences.
Step 4: Insert the Connector
Insert the connector into the PEX pipe. Some connectors have a barb that grips the PEX pipe securely, while others have a compression ring that presses against the pipe. Follow the manufacturer’s instructions carefully to ensure a proper fit.
Step 5: Connect the Galvanized Pipe
Now, slide the connector onto the cut end of the galvanized pipe. Make sure that the pipe is fully inserted into the connector, and tighten the connector using pliers or a wrench.
Step 6: Test for Leaks
Finally, turn on the water supply and check for any leaks. If you notice any leaks, tighten the connection with pliers or a wrench until the leak stops.
That’s it! You’ve successfully connected a non-threaded galvanized pipe to a PEX pipe. Repeat the steps for any remaining pipes, and you’ll have a fully functional PEX plumbing system in no time.
How to Connect Galvanized Pipes Without Threads to PEX
When it comes to replacing galvanized pipes with PEX, one of the most challenging tasks is connecting the old pipes to PEX without threads. Luckily, there are a few solutions to this problem.
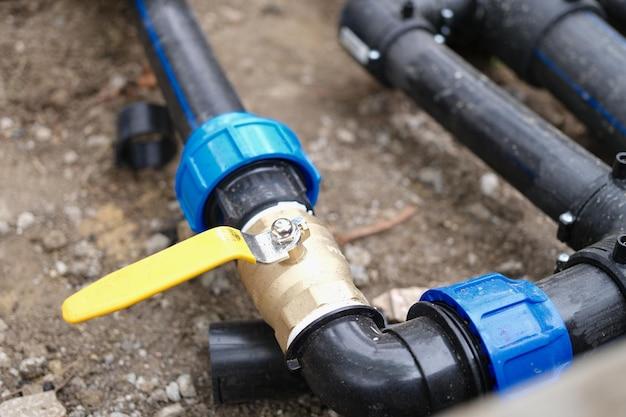
Option 1: Compression Fittings
One option is to use compression fittings, which work by tightening a brass compression nut over a sleeve onto the pipe. This creates a seal that prevents leaks. While compression fittings can be a bit more expensive than other solutions, they are a reliable option for connecting galvanized pipes without threads to PEX.
Option 2: Push-Fit Fittings
Another option is to use push-fit fittings, which are also known as quick-connect fittings. These fittings are designed with a locking mechanism that makes it easy to push the PEX tubing into the fitting. Push-fit fittings are affordable, easy to install, and reliable.
Option 3: SharkBite Fittings
SharkBite fittings are a type of push-fit fittings designed to make plumbing installations quick and easy. They work by using a unique push-to-connect design that does not require any tools or soldering. This makes them an excellent choice for DIYers who don’t want to hire a plumber.
Option 4: Welding
If you have access to a welding machine, you can use it to connect the galvanized pipes to PEX. This method involves using a special dielectric union that prevents the two different metals from touching and corroding. However, welding requires some expertise and may not be the best option for DIYers.
Option 5: Threaded Adapters
If none of the above options work for you, you can use threaded adapters to connect the galvanized pipes to PEX. Threaded adapters are affordable, easy to install, and available in various sizes. This option is one of the simplest and cost-effective methods to connect galvanized pipes to PEX.
In conclusion, converting galvanized pipes to PEX can be a challenging task, especially when dealing with pipes without threads. However, there are several options available to homeowners, including compression fittings, push-fit fittings, SharkBite fittings, welding, and threaded adapters. Pick the method that works best for you and enjoy your new PEX plumbing system!
How Much Does It Cost to Replace Galvanized Pipes with PEX
Are you tired of dealing with the rusty, leaky pipes in your home? The good news is that you can upgrade to PEX (cross-linked polyethylene) pipes, which are more durable and resistant to corrosion. But what about the cost? Let’s take a closer look.
Factors that Affect the Cost of Replacing Galvanized Pipes with PEX
The cost of replacing galvanized pipes with PEX pipes depends on several factors, including:
- Size of the pipes: Larger pipes will cost more to replace.
- Length of the pipes: Longer pipes will cost more to replace.
- Accessibility of the pipes: Pipes that are harder to reach will cost more to replace.
- Number of fixtures: More fixtures (such as sinks, toilets, and showers) will increase the cost of the project.

Average Cost of Replacing Galvanized Pipes with PEX
According to HomeAdvisor, the average cost to replace galvanized pipes with PEX pipes ranges from $1,500 to $8,000, with the national average being $4,000. This cost includes both the materials and labor.
DIY vs. Hiring a Professional
While some homeowners may be tempted to DIY this project to save money, it’s important to note that replacing pipes can be a complex task. Hiring a professional plumber will ensure that the job is done correctly and meets all building codes.
Other Cost Considerations
In addition to the cost of the pipes and labor, there may be additional costs to consider. For example, if the existing pipes are in poor condition, there may be more extensive repairs needed, such as fixing drywall or replacing flooring. It’s also important to factor in any permits or inspections that may be required.
Replacing galvanized pipes with PEX pipes can be a worthwhile investment in the long-term health of your home’s plumbing system. While the cost of replacement can vary based on several factors, hiring a professional is generally recommended to ensure the job is done correctly. With proper installation and regular maintenance, PEX pipes can last for decades, providing reliable and leak-free plumbing for your home.