Silicone sealant is a versatile and widely-used product that comes in handy for a variety of home improvement projects. Whether you’re sealing gaps in windows, installing a new shower enclosure, or resealing your kitchen sink, silicone sealant is often the go-to option. But what happens if you need to apply a second coat? Can you layer silicone sealant on top of existing sealant? In this blog post, we’ll delve into this topic and answer some commonly asked questions about silicone sealant. So, let’s dive in and explore whether applying a second coat of silicone sealant is a good idea or not.
Does White Spirit Remove Silicone Sealant? Will 100% Silicone Stick to Itself
Before we delve into the topic of applying a second coat, let’s address a couple of related questions. Does white spirit remove silicone sealant? And will 100% silicone stick to itself? These questions often arise when it comes to working with silicone sealant. In this blog post, we’ll provide you with the answers you’re looking for and offer some helpful tips and suggestions to ensure a successful silicone sealant application. Whether you’re a DIY enthusiast or a professional, this blog post will equip you with the knowledge you need to achieve a perfect finish every time.
Can I Apply a Second Coat of Silicone Sealant
If you’ve ever dealt with household repairs or renovations, chances are you’re familiar with silicone sealant. It’s the magical substance that keeps water out of unwanted places, like your shower or windows. But what happens when one coat isn’t enough? Can you apply a second coat of silicone sealant? Let’s dive in and find out!
The Beauty of Silicone Sealant
Silicone sealant is like the superhero of the sealing world. It’s flexible, durable, and highly resistant to water. Not only does it prevent leaks and drafts, but it also helps keep your home cozy and comfortable. And let’s not forget its ability to withstand extreme temperature changes without cracking or shrinking. It’s pretty much a DIYer’s dream come true!
The First Coat Conundrum
So, you’ve applied your first coat of silicone sealant, and you’re not quite satisfied. Maybe the sealant didn’t spread evenly, or you missed a spot or two. Don’t worry; we’ve all been there! But the burning question remains: can you add a second coat to fix those imperfections?
The Double-Coat Dilemma
Here’s the deal: applying a second coat of silicone sealant is not recommended in most cases. Why, you might ask? Well, it all comes down to adhesion. You see, silicone sealant adheres to surfaces by creating a bond. If you add a second coat before the first one has fully cured, the new layer won’t stick properly, resulting in a weakened seal.
Cure Time Conundrum
Ah, the cure time – a DIYer’s worst enemy. Most silicone sealants take anywhere from 24 to 48 hours to fully cure. During this time, it’s crucial to resist the temptation of applying a second coat. Sure, waiting is hard, but trust us, it’s worth it in the long run. Patience, dear reader, is truly a virtue when it comes to silicone sealant.
Perfection at First Coat
Now, we know what you’re thinking – what if I nail it on the first coat? Is a second coat necessary then? Well, if you’ve achieved a flawless application on the first go, there’s really no need for a second coat. Silicone sealant is designed to do its job effectively with just one layer. So, go ahead and bask in the glory of a job well done!
DIY Tips and Tricks
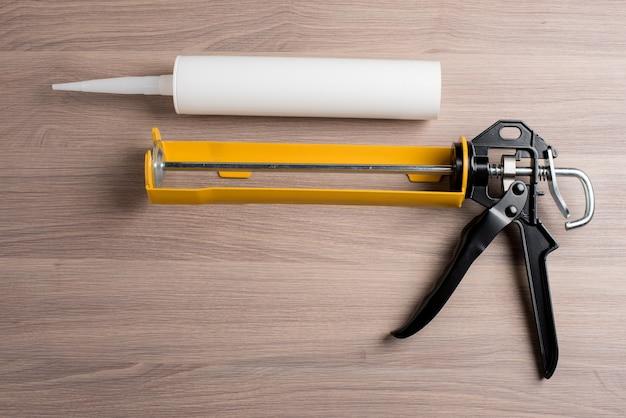
While a second coat of silicone sealant might not be advisable, there are a few tips and tricks to ensure your first coat goes smoothly. First and foremost, make sure the surface is clean and dry before applying the sealant. Any dirt or moisture can compromise adhesion. Secondly, use a caulking gun for precise application and nice, even lines. And lastly, smooth the sealant with a wet finger or a caulking tool for a professional finish.
In conclusion, while a second coat of silicone sealant might seem like a quick fix for imperfections, it’s best to resist the urge. Let the first coat cure fully before determining if any touch-ups are necessary. Follow the proper application techniques, and you’ll have a beautifully sealed and leak-free space in no time. So, remember, when it comes to silicone sealant, one coat is usually enough to save the day!
FAQ: Can I Apply A Second Coat Of Silicone Sealant
Welcome to our comprehensive FAQ-style guide on applying a second coat of silicone sealant! If you’re wondering whether it’s possible, how to do it properly, or have any related questions, you’ve come to the right place. We’ve gathered the most common queries about applying a second coat of silicone sealant and answered them for you below. So, let’s dive right in!
Does White Spirit Remove Silicone Sealant
No, white spirit doesn’t effectively remove silicone sealant. While white spirit or other solvents can help soften and loosen the sealant, they won’t completely dissolve or remove it. To properly remove silicone sealant, you’ll need a dedicated silicone sealant remover or a silicone sealant tool kit.
Will 100% Silicone Stick to Itself
Absolutely! 100% silicone sealant has excellent adhesive properties and can stick to itself with no issues. This feature makes it ideal for applying a second coat over an existing layer. Just ensure that the first coat is clean, dry, and properly cured before applying the second coat for a strong and durable bond.
Is It Better to Grout or Silicone
The choice between grouting and using silicone sealant depends on the specific application. Grout is generally used for filling gaps between tiles, while silicone sealant is perfect for sealing joints and preventing water penetration. If you need water resistance, flexibility, or a seamless finish, silicone sealant is the way to go.
What Happens If Silicone Sealant Gets Wet Before It Cures
If silicone sealant gets wet before it fully cures, it can compromise its effectiveness. The moisture may prevent the sealant from adhering properly, leading to reduced durability and potential leakage. It’s crucial to ensure that the sealant is kept dry for the recommended curing time, usually between 24 and 48 hours, depending on the product.
Does WD-40 Remove Old Silicone
Although WD-40 is a fantastic multipurpose lubricant and solvent, it’s not the best option for removing old silicone. For effective removal, it’s better to use a specialized silicone sealant remover or a silicone sealant tool kit designed for the task. These tools will make the removal process smoother and more efficient.
Does Vinegar Dissolve Silicone
While vinegar has many household uses, dissolving silicone isn’t one of them. Vinegar is not potent enough to effectively break down silicone sealant. To remove silicone sealant, it’s best to use a silicone sealant remover or a silicone sealant tool kit for optimal results.
Can You Put Sealer on Top of Sealer
Yes, you can apply another layer of sealer on top of an existing one. However, it’s crucial to ensure that the existing sealer is clean, dry, and properly cured before applying the second layer. This will ensure better adhesion and a more durable overall finish.
Can You Apply Silicone Over New Silicone
Certainly! Applying silicone over new silicone is perfectly acceptable, as long as the new layer is applied to a clean, dry, and properly cured surface. Just make sure to follow the manufacturer’s instructions and recommendations for the best results.
How Do You Get a Good Finish with Silicone Sealant
To achieve a smooth and professional-looking finish with silicone sealant, follow these tips:
- Use masking tape to create clean edges and prevent excess sealant from smudging.
- Cut the tip of the silicone tube at a 45-degree angle for a more precise application.
- Apply even pressure on the silicone gun, maintaining a steady flow of sealant.
- Use a silicone profiling tool or a wet finger to smooth and shape the sealant.
- Remove the masking tape immediately after applying the sealant to achieve clean lines.
How Do You Get Perfect Sealant Lines
Getting perfect sealant lines requires some practice, but with these steps, you’ll be on your way to achieving flawless results:
- Prepare the surface by cleaning and removing any old sealant or debris.
- Apply masking tape along the desired edges, leaving a small gap for the sealant.
- Apply the silicone sealant evenly along the gap, using a smooth and continuous motion.
- Immediately remove the masking tape while the sealant is still fresh.
- Smooth and shape the sealant with a wet finger or silicone profiling tool for a neat finish.
How Long Does Silicone Adhesive Take to Dry
The drying time for silicone adhesive depends on various factors, such as humidity, temperature, and the thickness of the application. On average, it takes silicone adhesive about 24 to 48 hours to fully dry and cure. However, it’s essential to consult the manufacturer’s instructions for the specific product you are using, as drying times can vary.
How Do You Remove Dried Silicone
To remove dried silicone, follow these steps:
- Use a silicone sealant remover or a silicone sealant tool kit to soften the dried sealant.
- Carefully scrape off the softened silicone using a plastic scraper or putty knife.
- Clean the surface with warm soapy water to remove any residue.
Avoid using sharp or metal tools that may damage the surface. Be patient and cautious during the removal process to achieve the best results.
Can You Grout Over Silicone
Grouting over silicone is generally not recommended. Silicone is flexible and provides a better seal against moisture than grout. If you need to fill gaps between tiles, it’s advisable to remove the silicone sealant first and then proceed with grouting for a more durable and aesthetically pleasing finish.
Should I Grout or Silicone First
It’s typically recommended to silicone first and then grout. Silicone provides a flexible and water-resistant seal around joints and edges, preventing water penetration. After allowing the silicone to cure properly, apply grout to fill the gaps between tiles, completing the overall finish.
What’s the Difference Between Caulk and Silicone
Caulk and silicone are both sealants used to fill gaps and joints, but they differ in composition. Caulk is generally water-based and contains acrylic or latex, making it easier to apply and clean up. Silicone, on the other hand, is a rubber-like material that provides superior adhesion, flexibility, and water resistance. When a waterproof and long-lasting seal is required, silicone is the preferred choice.
What Can Dissolve Silicone
Silicone is a resilient material that cannot be easily dissolved. However, certain solvents like xylene, acetone, or specialized silicone sealant removers can help soften and remove it. It’s important to handle these substances with caution and follow the manufacturer’s instructions to ensure safe and effective removal.
Can You Build Up Layers of Silicone Sealant
Yes, you can build up layers of silicone sealant to achieve a thicker or more robust seal. However, bear in mind that silicone generally works best in thinner layers. For large gaps or deeper joints, it might be more effective to use a backer rod or filler material before applying the silicone sealant.
Can You Silicone Sealer Over Silicone Sealer
Yes, it’s possible to apply a new layer of silicone sealer over an existing one, provided the surface is clean, dry, and properly cured. This can be an effective method for improving the appearance, flexibility, or water resistance of the seal. Just make sure to follow the manufacturer’s guidelines for compatibility and optimal bonding.
Can You Do 2 Coats of Silicone Sealant
While it’s possible to apply a second coat of silicone sealant, it’s generally not necessary. A single properly applied layer of silicone sealant is typically sufficient to achieve an effective seal. However, if you feel that an additional coat is needed for extra durability or aesthetics, ensure that the first coat is clean, dry, and fully cured before applying the second.
How Long Before I Can Shower After Silicone
To ensure the best results and durability, it’s generally recommended to wait at least 24 to 48 hours before using the shower after applying silicone sealant. This timeframe allows the sealant to properly cure and achieve its maximum water resistance. Always refer to the manufacturer’s instructions for the specific product you are using.
How Long Will Silicone Last
The lifespan of silicone sealant can vary based on several factors, including the quality of the product, environment, and maintenance. On average, silicone sealant can last anywhere from 10 to 20 years. However, it’s essential to keep an eye on its condition and regularly inspect and replace it if signs of deterioration or damage are present.
That wraps up our comprehensive FAQ-style guide on applying a second coat of silicone sealant. We hope this article has answered all your questions and provided you with valuable insights. Remember, proper application, curing, and maintenance are key to achieving a long-lasting, effective seal. Feel free to refer back to this guide whenever you need a refresher. Happy sealing!