Wood paneling has long been a popular choice for adding warmth and character to homes. Whether it’s in the form of wall paneling or a bath panel, wood brings a touch of natural beauty to any space. However, water damage is a common issue that can wreak havoc on these wooden surfaces. From peeling and separating paneling to unsightly water stains, this blog post will explore the causes of water damage and provide tips on repairing and recovering your beloved wood paneling. So, let’s dive in and discover how to revive your water-damaged wood paneling!
Wood Paneling Water Damage: How to Deal with this Pesky Problem
The Culprit Behind Wood Paneling Water Damage
Picture this: you’re sitting in your cozy living room, enjoying a cup of tea and basking in the beauty of your wood-paneled walls, when suddenly you notice a suspicious damp spot. Uh-oh, it looks like wood paneling water damage has struck! But before you panic, let’s explore the main causes behind this pesky problem.
Faulty Plumbing: A Water Damage Culprit in Disguise
One of the leading causes of wood paneling water damage is none other than faulty plumbing. Those hidden pipes behind your walls can suddenly spring a leak and wreak havoc on your pristine wood paneling. From burst pipes to cracked fixtures, the damage can quickly spread and leave you in a soggy, water-drenched mess.
Moisture’s Sneaky Infiltration Tactics
Moisture is a sneaky little devil that can find its way into your wood paneling through various means. It can seep in from leaky roofs, windows, or even condensation buildup. As it infiltrates your cherished walls, it starts to cause swelling, warping, and discoloration, leaving you with a not-so-pretty sight.
Battling Wood Paneling Water Damage: Your Knight in Shiny Armor
Fear not, intrepid homeowner! There are ways to tackle this unwanted water damage and restore your wood paneling to its former glory.
Identifying the Extent of the Damage
The first step in battling wood paneling water damage is to assess the extent of the problem. Is it limited to a small area, or has it spread like wildfire? By identifying the affected areas, you can determine the best course of action and prevent further damage.
Drying Out and Dehumidifying
Next up, it’s time to dry out those soggy panels! Grab your trusty fans, open those windows, and let the air work its magic. If the moisture level is high, employing a dehumidifier can speed up the process and prevent potential mold growth. Remember, moisture is the enemy here!
Repairing and Restoring
Once your wood paneling is dry as a desert, it’s time to tackle the repairs. If the damage is minimal, sanding and refinishing might do the trick. However, if the water has caused severe warping or discoloration, it might be necessary to replace the affected panels altogether. Don’t worry, though – with a little patience and determination, your wood paneling can be restored to its former glory.
Wood paneling water damage may seem like a formidable foe, but armed with the right knowledge and techniques, you can combat this common household problem. By addressing the issue promptly and following the steps outlined above, you’ll be well on your way to restoring your wood paneling to its original splendor. So, don’t let water damage rain on your parade – take action and reclaim your beautiful wood-paneled sanctuary!
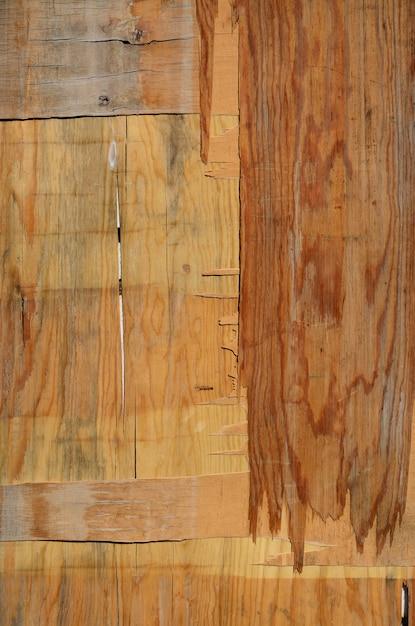
Wood Paneling Separating
Signs of Wood Paneling Separating
If you have wood paneling in your home, you may have noticed some troubling signs of separation. It can be a frustrating problem, but don’t worry, we’re here to help! Here are some common signs to look out for:
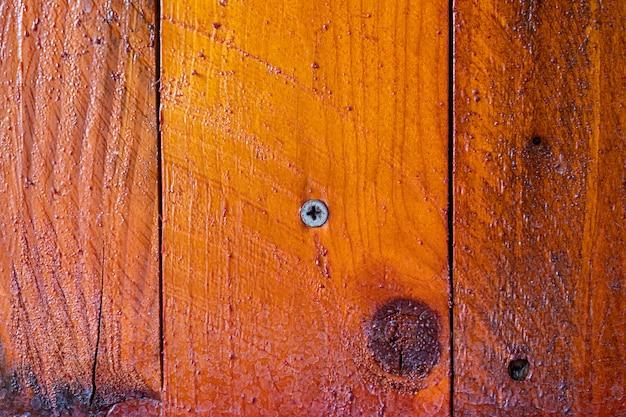
Gaps and Cracks
One of the most obvious signs of wood paneling separating is the presence of gaps and cracks between the panels. These gaps can vary in size, from small hairline cracks to larger openings. They can appear anywhere the panels meet, including the vertical edges and the corners. So, if you’re spotting gaps in your paneling, it’s time to take action!
Buckling or Warping
Another indication of wood paneling separating is when the panels start to buckle or warp. This typically occurs when moisture seeps into the wood, causing it to expand and deform. You might notice the panels bulging outwards or curving inwards, giving your walls a wavy or uneven appearance. Not only does this look unsightly, but it can also indicate a deeper issue with water damage.
Causes of Wood Paneling Separating
Now that we’ve identified the signs of wood paneling separating, let’s dive into the causes. Understanding the underlying reasons for this problem will help you address the issue effectively. Here are a few common culprits:
Humidity and Moisture
Wood is highly sensitive to changes in humidity and moisture levels. Excessive humidity in your home can cause the wood paneling to absorb moisture, leading to swelling and separation. Similarly, water leaks or condensation buildup can infiltrate the panels, causing them to warp and separate over time. Keeping an eye on the humidity levels and addressing any water leaks promptly can help prevent this issue.
Age and Poor Installation
Wood paneling, like anything else, can deteriorate with age. Over time, the adhesive or nails used to install the panels may weaken or fail, resulting in separation. Additionally, if the panels were not properly installed in the first place, they may be more prone to separating. So, if your wood paneling is on the older side or wasn’t installed by professionals, it’s worth inspecting for separation.
How to Prevent and Repair Wood Paneling Separating
Now that we’ve covered the signs and causes of wood paneling separating, let’s talk about prevention and repair. Here are some tips to help you maintain your wood paneling and prevent separation:
Maintain Optimal Humidity Levels
To prevent excess moisture and humidity from damaging your wood paneling, it’s essential to maintain optimal humidity levels in your home. Use a dehumidifier in areas prone to high humidity, and ensure proper ventilation in rooms like bathrooms and kitchens.
Address Water Leaks Promptly
If you notice any water leaks or signs of condensation near your wood paneling, address them promptly. Repair any leaks, improve insulation, or install exhaust fans to control moisture buildup.
Reinforce and Replace
If you’re dealing with wood paneling separation, you’ll likely need to reinforce the existing panels or replace them altogether. Consult a professional to assess the extent of the damage and provide the most suitable solution.
Remember, taking proactive steps to prevent and address wood paneling separating will help preserve the beauty and integrity of your walls. So, keep an eye out for the signs, address the causes, and take necessary action to maintain your wood paneling in top condition.
Repairing Damaged Paneling
Assess the Damage
Before you start repairing damaged paneling, it’s important to assess the extent of the damage. Is it a small dent or scratch, or is the paneling severely warped or waterlogged? Understanding the level of damage will help you determine the best course of action for repairs.
Gather Your Tools
Once you’ve assessed the damage, it’s time to gather your tools. You’ll need a few items to fix the paneling, such as wood filler, sandpaper, a putty knife, and paint or stain to match the existing paneling. Make sure you have everything you need before you begin.
Smooth Out Surface Imperfections
To repair small dents or scratches, start by smoothing out the surface imperfections. Use the putty knife to apply wood filler to the damaged areas, filling them in and ensuring a smooth finish. Once the filler is dry, use sandpaper to gently sand down the repaired spots until they blend in with the rest of the paneling.
Address Warped or Waterlogged Paneling
If your paneling is severely warped or waterlogged, it may require more extensive repairs. In some cases, you may need to replace entire sections of the paneling. Start by removing the damaged sections, being careful not to cause further damage to the surrounding areas. Once removed, assess whether the underlying structure is also damaged and make any necessary repairs.
Replace Damaged Paneling
When replacing damaged paneling, it’s important to find a match that closely resembles the existing paneling. This can be a challenge, especially if your paneling is older or has a unique finish. Take a small piece of the existing paneling to a home improvement store and ask for assistance in finding a close match.
Once you have the replacement paneling, carefully install it in place of the damaged section. Use adhesive or nails to secure it, ensuring a seamless fit with the surrounding paneling. If necessary, sand down the edges and apply paint or stain to match the rest of the paneling.
Final Touch-Ups
After the repairs are complete, take the time to give your paneling some final touch-ups. Sand down any rough spots or uneven surfaces, and apply a fresh coat of paint or stain to the entire paneling for a uniform look. Stand back and admire your handiwork – your once-damaged paneling now looks as good as new!
In conclusion, repairing damaged paneling is a manageable task with the right tools and a bit of patience. Whether you’re dealing with small dents or more extensive damage, taking the time to assess, repair, and replace damaged paneling will help restore the beauty and functionality of your space. Remember to always take safety precautions and consult a professional if you’re unsure about any aspect of the repair process. Happy paneling repair journey!
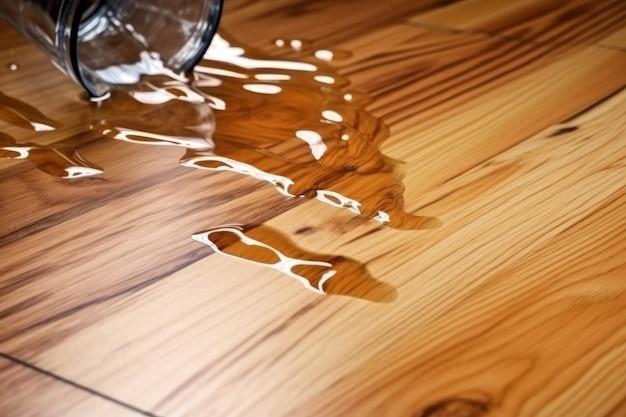
Water Stains on Wood Paneling
Wood paneling can bring a warm and cozy feeling to any room. However, when water stains appear on this beautiful feature, it can dampen the overall aesthetic. In this section, we will discuss the causes of water stains on wood paneling and explore some effective ways to remove them.
Understanding the Causes
Water stains on wood paneling can be caused by various factors. One common cause is moisture infiltration from a leaky roof or plumbing issue, which can result in unsightly discoloration on the surface. Additionally, condensation can form on the cold surface of the paneling, leading to water droplets that leave behind stains over time.
Removing Water Stains
The good news is that there are several methods you can try to remove those pesky water stains from your wood paneling. Here are a few effective techniques:
1. Light Sanding
For mild water stains, try lightly sanding the affected area with fine-grit sandpaper. This can help remove the top layer of the stained wood, revealing a fresh surface underneath. Remember to sand gently and in the direction of the wood grain to avoid creating further damage.
2. Stain Removers
There are a variety of commercial stain removers available that are specifically formulated to tackle water stains on wood. Before using any product, ensure that it is safe for use on your particular type of wood paneling. Always follow the instructions provided by the manufacturer for best results.
3. Bleaching
For more stubborn water stains, you may need to consider using a wood bleach. This powerful solution can effectively lighten or remove the stain. However, be cautious when using bleach, as it can potentially damage the wood if not used correctly. It’s always a good idea to test the bleach on a small, inconspicuous area first.
Prevention is Key
Preventing water stains on wood paneling is essential for maintaining its beauty and longevity. Here are a few preventative measures you can take:
1. Address any leaks
If you notice any signs of water damage, such as water spots or discoloration, be sure to investigate the source of the leak and address it promptly. Fixing the underlying issue will prevent future water stains from forming.
2. Control humidity levels
To minimize condensation and moisture buildup, consider using a dehumidifier or running a fan in rooms with wood paneling. This helps to maintain optimal humidity levels and prevent water stains.
3. Apply a protective sealant
Applying a protective sealant to your wood paneling can create a barrier against moisture. This can help prevent water stains and make cleaning spills or stains easier in the future.
By understanding the causes and employing preventative measures, you can keep your wood paneling free from unsightly water stains. And if you ever encounter a stain, now you have some effective techniques to remove it and restore the natural beauty of your wood paneling.
How to Repair Peeling Paneling
Assess the Damage
Before diving into the repair process, it’s important to assess the extent of the peeling on your wood paneling. Take a close look at the affected areas and determine if it’s a small section or if the damage extends to larger areas. This will help you gather the necessary materials and plan your repair strategy accordingly.
Gather Your Tools and Materials
To fix the peeling paneling, you’ll need a few tools and materials. Grab a putty knife, sandpaper, wood glue, a paintbrush, wood filler, and a paint or stain that matches your existing paneling. Having these items ready will make the repair process smooth sailing.
Remove the Peeling Sections
Using the putty knife, gently pry away the peeling sections of the paneling. Be careful not to damage the surrounding areas, as you want the repair to blend seamlessly. Once the loose pieces are removed, use sandpaper to smooth out the edges and create a clean surface for the next steps.
Apply Wood Glue and Wood Filler
Apply wood glue to the back of the peeled pieces and press them firmly back into place. Wipe off any excess glue with a damp cloth. For any gaps or cracks, use wood filler to fill them in. After the filler has dried, sand it down until it’s flush with the paneling surface.
Touch up with Paint or Stain
Now that the damaged areas are secure and smooth, it’s time to touch up the paneling with paint or stain. Using a paintbrush, carefully apply the paint or stain that matches your existing paneling. Apply thin, even coats and allow each coat to dry before applying another. This will ensure a consistent and well-blended look.
Enjoy Your Refurbished Paneling
Once the paint or stain has dried thoroughly, step back and admire your handy work. Your peeling paneling is now repaired and ready to shine once again. Whether it’s in your living room, kitchen, or bedroom, you can now enjoy your refurbished paneling in all its glory.
Remember, repairing peeling paneling doesn’t have to be a daunting task. With the right tools, materials, and a little bit of patience, you can revive your wood paneling and add a touch of beauty back to your space. So, roll up your sleeves and give your paneling some TLC – you’ll be amazed at the transformation!
What Causes Wood Paneling to Bubble
Moisture, moisture, moisture!
Wood paneling can be an excellent addition to any home, providing a warm and cozy feel. However, when it comes to water damage, this popular material is not invincible. One common issue with wood paneling is bubbling, which can occur for several reasons. Let’s take a closer look at what causes this frustrating problem.
Pesky Water Intrusion
One of the primary perpetrators behind wood paneling bubbling is water intrusion. When moisture seeps into the wood, it can disrupt the binding agents within the paneling. As a result, bubbles start to form, causing the surface to become uneven and unsightly.
Leaky Pipes and Unseen Drips
Leaky pipes or unidentified dripping sources can be a major headache. Not only do they waste water, but they can also lead to bubbling in your wood paneling. Even a small, slow leak can gradually saturate the wood over time, causing it to swell and bulge. So, be on the lookout for any dripping faucets or hidden pipe leaks to nip the problem in the bud.
Bathroom Blues
Bathrooms are notorious for their humidity levels, and wood paneling placed in these spaces is particularly susceptible to bubbling. The constant moisture and high humidity in bathrooms can penetrate the wood, causing it to expand and create those dreaded bubbles. Consider using alternative materials, such as tile or waterproof paints, in these damp areas.
Excessive Moisture in the Air
Apart from bathrooms, high humidity levels throughout the house can also contribute to paneling bubbling. Moisture-laden air from excessive cooking, inadequate ventilation, or humid climates can wreak havoc on your beautiful wood paneling. To combat this issue, ensure proper ventilation and use dehumidifiers if needed to maintain a healthy moisture balance.
The Wrath of Flooding
Lastly, wood paneling can suffer severe bubbling when exposed to floods or substantial water damage. Flooding can saturate the wood and leave it vulnerable to expansion and warping, resulting in unsightly bubbles. If your home experiences a flood, it’s crucial to address the water damage promptly to prevent further harm to your cherished wood paneling.
In summary, bubbling in wood paneling is often caused by moisture intrusion, whether from leaky pipes, high humidity, or bathroom moisture. By understanding these causes, you can take preventive measures to protect your wood paneling from unwanted bubbles. Stay vigilant, keep those pipes in check, and say goodbye to bubbling woes!
Wooden Bath Panel Water Damage
Recognizing the Signs
If you have a wooden bath panel, you might be familiar with the dreaded issue of water damage. It’s quite a common problem that many people face, but fear not, because we’re here to arm you with the knowledge you need to tackle it head-on! The first step is to recognize the signs of water damage before it escalates into a costly nightmare.
Raised or Warped Panels
One of the most obvious indications of water damage on your wooden bath panel is when you notice that it has become raised or warped. This happens when water constantly drips or splashes onto the panel, causing it to swell and lose its shape. So, if you find that your bath panel has developed a not-so-stylish bulge or bend, it’s a clear signal of water damage.
Mold and Mildew Growth
Another telltale sign of water damage is the presence of mold and mildew. These pesky intruders thrive in damp environments, and your wooden bath panel, when exposed to excessive moisture, becomes the perfect breeding ground. If you notice black spots or a musty smell emanating from your bath panel, it’s time to take action and address the water damage issue.
Preventive Measures
Prevention is always better than cure, so why not take some time to implement preventive measures that can save you from the misery of dealing with water damage to your wooden bath panel?
Waterproof Sealing
Applying a waterproof sealant to your wooden bath panel is a great way to protect it from water damage. This sealant creates a barrier that prevents water from seeping into the wood, keeping it dry and safe from any potential harm. So, before you even encounter any water damage, consider giving your bath panel a preemptive coating of waterproof sealant.
Regular Inspection and Maintenance
Keeping a close eye on your wooden bath panel is crucial in catching any signs of water damage early on. Regularly inspect the panel for any raised or warped areas and promptly address them. Additionally, ensure that there are no leaks or drips from the bath fixtures that could be causing water damage to the panel. A little preventive maintenance can go a long way in preserving the integrity of your wooden bath panel.
Taking Action
If, despite your best efforts, you find yourself faced with water-damaged wooden bath panel, it’s time to take action to rectify the situation.
Drying and Restoration
The first step is to dry out the affected area. Remove the panel from its position to allow air circulation and expedite the drying process. You can use a fan or a dehumidifier to speed things up. Once the panel is dry, assess the extent of the damage. In some cases, sanding and refinishing might be sufficient, while in severe situations, you may need to consider replacing the panel altogether.
Applying Waterproof Coating
As a preventive measure, once you’ve restored your wooden bath panel, consider applying a waterproof coating to provide an extra layer of protection. This will not only help prolong the life of your panel but also minimize the chances of water damage occurring in the future.
Water damage can be a real headache when it comes to wooden bath panels. However, armed with the knowledge of how to recognize the signs, employ preventive measures, and take action when necessary, you can stay one step ahead of the game. So, don’t let water damage dampen your spirits – tackle it head-on and keep your wooden bath panel looking fabulous for years to come!
How to Fix Water-Damaged Paneling
When water damages wooden paneling, it can be a real headache. But fear not, because here are some handy tips to help you fix that water damage and restore your paneling to its former glory!
Assess the Damage
Before diving into any repairs, take a good look at the extent of the water damage. Is it just a small area or has it spread across the entire paneling? Understanding the scope of the damage will help you determine the best course of action.
Dry It Out
The first step in fixing water-damaged paneling is to ensure it is thoroughly dried out. Use fans or dehumidifiers to help speed up the drying process. If the damage is severe, you may even need to remove the paneling to allow for proper airflow and drying.
Remove Damaged Sections
If the water damage is localized to certain areas, it’s best to remove those sections to prevent further spread. Use a saw to carefully cut out the damaged parts, making sure to follow the natural lines and patterns of the paneling.
Replace with Matching Paneling
After removing the damaged sections, it’s time to replace them with new paneling. Make sure you find a matching type and finish to maintain a seamless look. Measure the dimensions of the area that needs replacing and cut the new paneling accordingly. Attach it securely using nails or adhesive, making sure it aligns perfectly with the surrounding paneling.
Sand and Finish
Once the new paneling is in place, it’s important to sand it down to ensure a smooth surface. Use sandpaper or a sanding block to gently smooth out any rough edges or imperfections. After sanding, finish off the paneling with a suitable wood stain or paint that matches the rest of the wall. This will help blend the new paneling with the existing one.
Prevent Future Water Damage
To avoid future water damage to your paneling, it’s crucial to address any underlying issues. Check for leaky pipes, damaged seals, or areas prone to moisture buildup. Fixing these issues will help protect your paneling from future water damage.
Water damage to wood paneling can be a real bummer, but with the right approach, you can bring it back to life. Assess the damage, dry it out, replace damaged sections, sand and finish, and take measures to prevent future water damage. Following these steps will ensure your paneling looks as good as new, and you can bid farewell to water damage woes!
Can Wood be Recovered from Water Damage
When it comes to wood paneling, water damage is the last thing you want to deal with. Whether it’s due to a leak, flooding, or a spill gone wrong, water can wreak havoc on your beautiful wooden surfaces. But fear not! In this section, we’ll explore whether wood can be recovered from water damage and what steps you can take to salvage your beloved paneling.
Assessing the Damage
The first thing you’ll need to do is assess the extent of the water damage. Is it just a small area that got wet? Or has the entire wall been a victim of a watery disaster? Knowing the scale of the damage will help you determine the best course of action.
Drying it Out
Before you start any recovery process, you need to ensure that the wood is thoroughly dry. This might involve using fans, dehumidifiers, or even opening windows to let fresh air circulate. Just remember, patience is key here. Rushing the drying process could lead to more harm than good.
Sanding and Refinishing
Once the wood is dry, you can begin the restoration process. Start by sanding down the affected areas to remove any warped or damaged sections. This will not only help you achieve a smooth surface but also allow the new finish to adhere properly. After sanding, you can apply a fresh coat of stain or paint to revitalize your wood paneling.
Seeking Professional Help
If the damage is extensive or you’re not confident in your DIY skills, it might be worth calling in the professionals. Water damage can sometimes lead to mold growth, which can be harmful to both your health and the structural integrity of your home. A professional restoration service will have the expertise and tools to handle the situation effectively and ensure your wood is properly restored.
Prevention is Better than Cure
While it’s good to know how to recover from water damage, it’s even better to avoid it altogether. To protect your wood paneling, make sure you address any leaks or plumbing issues promptly. Additionally, consider applying a waterproof sealant to your wood surfaces to create a barrier against potential water damage.
So, can wood be recovered from water damage? Absolutely! With the right approach and a little elbow grease, you can restore your wood paneling back to its former glory. Just remember to be patient, take the necessary steps to dry out the wood, and don’t hesitate to seek professional help if needed. And of course, prevention will always be your best friend.
How to Fix Water Damaged Wall Paneling
Assess the Damage
Before diving into the process of fixing water-damaged wall paneling, it’s important to assess the extent of the damage. Take a close look at the affected area and identify any signs of water infiltration, such as discoloration, warping, or mold growth. This initial inspection will help determine the best approach for fixing the damage.
Remove Damaged Panels
Once you’ve identified the damaged panels, it’s time to remove them. Start by removing any trim or molding that may be covering the edges of the panels. Then, carefully pry away the damaged panels from the wall using a pry bar or a claw hammer. Take your time to avoid causing further damage to the surrounding area.
Dry the Wall
After removing the water-damaged panels, it’s essential to thoroughly dry the wall to prevent mold growth or further structural issues. Use a dehumidifier or fans to circulate air and speed up the drying process. If necessary, you can also use a moisture meter to ensure the wall is completely dry before proceeding.
Repair the Underlying Issue
Fixing the water-damaged wall paneling goes beyond replacing the damaged panels. It’s crucial to address the underlying issue that caused the damage in the first place. Whether it’s a plumbing leak, roof issue, or poor insulation, make sure to identify and fix the root cause to prevent future damage.
Replace with New Panels
With the wall thoroughly dried and the underlying issue resolved, it’s time to replace the water-damaged panels with new ones. Cut the new panels to the appropriate size and attach them to the wall using construction adhesive or nails, following the manufacturer’s instructions. Take care to align the panels properly for a seamless finish.
Sand and Paint
To achieve a smooth and polished look, sand the newly installed panels lightly. This step helps to blend the repaired area with the surrounding wall. After sanding, apply a primer to the repaired area to promote better adhesion of the paint. Finally, apply a coat or two of paint that matches the rest of the wall, ensuring a seamless and attractive finish.
Fixing water-damaged wall paneling doesn’t have to be a daunting task. By carefully assessing the damage, removing the damaged panels, addressing the underlying issue, and replacing with new panels, you can successfully restore the beauty and functionality of your walls. Remember to take your time and follow the necessary steps for a quality repair job.
What Happens to Wood Paneling When It Gets Wet
Wood paneling can add a touch of warmth and elegance to any space. Whether you have it in your living room, bedroom, or even bathroom, it’s important to understand what happens to wood paneling when it gets wet. In this section, we’ll take a closer look at how moisture affects wood paneling and discuss the potential issues you might encounter.
Swelling and Warping
When wood paneling comes into contact with water, it absorbs the moisture, which leads to swelling and warping. It’s like when you eat your favorite snack, and suddenly your pants feel a little too tight. The wood fibers expand due to the water, causing the panels to bulge and warp. This can result in an uneven and unsightly appearance.
Mold and Mildew Formation
Moisture can create the perfect breeding ground for mold and mildew, turning your beloved wood paneling into an unwelcome habitat for these unsightly intruders. Just like unwanted house guests, mold and mildew can quickly take over, causing discoloration, unpleasant odors, and even health issues. Nobody wants to deal with that!
Rot and Decay
Wood and water usually don’t mix well, just like trying to mix oil and water in a salad dressing. When wood paneling is consistently exposed to moisture, it becomes susceptible to rot and decay. This can weaken the structure of the panels, compromising their integrity and potentially leading to costly repairs or replacements. Nobody wants weak walls that crumble like a cookie!
Staining and Discoloration
Water can also leave its mark on wood paneling with stains and discoloration. It’s like when you spill your morning coffee on your favorite white shirt. The water can carry dirt, debris, or even chemicals, leaving behind unsightly marks and blemishes. Your once-gorgeous wood paneling can quickly lose its charm and turn into an eyesore.
Buckling and Separation
Excessive moisture can cause wood paneling to buckle and separate. It’s like when you’re sitting in a sauna for too long and you start to feel a little lightheaded. As the panels swell and warp, they can detach from the wall or even from each other. This not only affects the aesthetic appeal but also compromises the structural integrity.
In conclusion, when wood paneling gets wet, it can lead to swelling, warping, mold and mildew formation, rot and decay, staining, discoloration, buckling, and separation. Nobody wants their beautiful wood paneling to suffer such unfortunate fates. So, be sure to take precautions to prevent water damage, such as sealing the panels or fixing any leaks. After all, a little extra care can go a long way in preserving the beauty and durability of your wood paneling.