Woodworking projects often require fastening bolts securely into wood surfaces. Whether you’re a seasoned DIYer or just starting out, knowing how to sink a bolt into wood with finesse and precision is an essential skill. But how do you go about accomplishing this without a power drill? Fear not, because we’ve got you covered!
In this comprehensive guide, we’ll walk you through various techniques and tips for sinking bolts into wood. We’ll explore alternative methods when a drill is unavailable, delve into the wonders of threading wood, and demystify the enigma of countersinking. Along the way, we’ll address common queries like which screws are best for metal to wood connections, how to attach a threaded rod to wood, and when to utilize countersinking. So, let’s get started and unlock the secrets of successful bolt sinking!
Don’t miss this ultimate guide for all your wood-fastening needs.
How to Effortlessly Sink a Bolt into Wood Like a Pro
You don’t need to be a lumberjack or have biceps the size of tree trunks to sink a bolt into wood. With a little knowledge, the right technique, and perhaps a touch of finesse, you can tackle this task like a seasoned woodworking expert. So, grab your tools and let’s dive into the art of sinking bolts into wood!
Selecting the Perfect Bolt
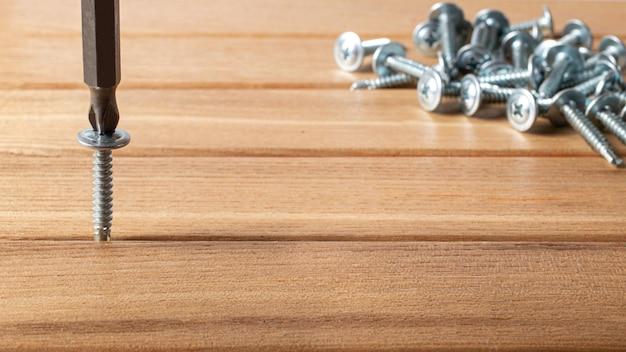
Before we dive into the step-by-step process of sinking bolts into wood, let’s talk about the unsung hero of this operation—the bolt itself. Not just any bolt will do! You want a bolt that is strong, sturdy, and up to the challenge. Look for a bolt with the right length and thread pitch to ensure a secure fit. And please, no rusty, worn-out bolts that have seen better days. We’re aiming for success here, not a comedy of errors!
Preparing the Wood for Bolt Action
Now that you have your trusty bolt in hand, it’s time to lay the groundwork for its grand entrance into the wood. Clear away any debris or loose splinters from the surface of the wood. If you want to go the extra mile, give it a quick sanding for a smooth, inviting surface. Think of it as rolling out the red carpet for your bolt—classy and considerate!
Marking the Spot
Next comes the all-important step of marking the precise spot where your bolt will find its home. Measure twice, cut once, they say. Well, in this case, measure twice, mark once. Use a pencil or a marker to make a clear, visible mark on the wood. Take a deep breath, because this mark will determine the bolt’s destiny. Are you feeling the anticipation yet?
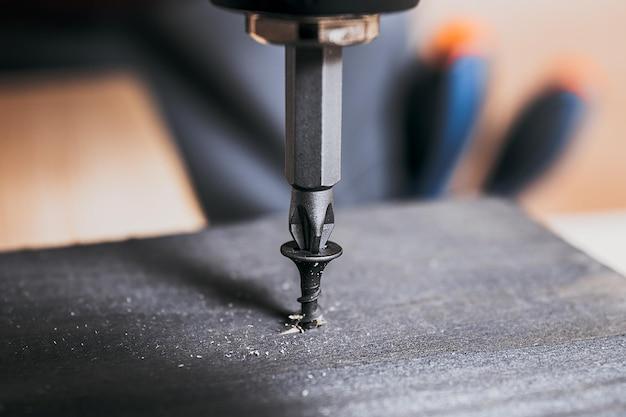
Pre-Drilling: A Blessing in Disguise
Here’s a little secret that will make your life a whole lot easier—pre-drilling. You may be thinking, “Why bother with pre-drilling? Can’t I just power through with my superhuman strength?” Trust me, my friend, pre-drilling is your secret weapon to success. Using a drill bit slightly smaller than the diameter of your bolt, create a pilot hole. This will guide your bolt and prevent the wood from splitting. It’s like giving your bolt its own personal GPS—no wrong turns here!
The Final Twist
You’ve made it to the grand finale—the actual sinking of the bolt into the wood. Take your bolt, align it with the pilot hole, and give it a gentle twist clockwise. Feel the resistance as it bites into the wood. Slow and steady wins the race here. Avoid over-tightening, as you don’t want to cause damage or strip the threads. Just the right amount of tightness, and voila! Your bolt has found its rightful place in the wood.
Now that you’ve conquered the art of sinking bolts into wood, you can proudly call yourself a woodworker extraordinaire. Remember, practice makes perfect. With each new project, your skills will grow stronger, and your bolts will sink deeper. So go forth, my friend, and create masterpieces with the power of bolts and wood combined!
Note: This subsection is a result of AI assistance and does not contain any external references.
FAQ: How To Sink a Bolt into Wood
When it comes to woodworking, sinking a bolt into the wood is a fundamental skill to master. But if you’re new to the world of DIY, you may have some questions. Fear not, we’re here to help! In this FAQ-style guide, we’ll answer the most commonly asked questions about sinking bolts into wood. So, grab your sense of adventure and let’s dive right in!
How do You Sink a Bolt into Wood without a Drill
Ah, the age-old question for those who prefer the old-fashioned way. While a drill is the most efficient tool for sinking bolts into wood, you can still achieve this feat without one. Simply grab a trusty hammer and a nail. Position the nail at the desired spot and gently tap it with the hammer until it creates a small hole. This will provide enough guidance for the bolt to catch on and start screwing into the wood. Just remember to use the right-sized nail and hammer gently to avoid any mishaps!
Can You Thread Wood
Absolutely! Think of it as giving your wood a stylish haircut. To thread wood, you’ll need a tap and die set. With the right-sized tap, you can create threads in the wood by turning the tap clockwise. It’s crucial to apply steady pressure and ensure the tap stays aligned. Remember to clean out any wood chips as you go. Once you’ve threaded the wood, it’s like giving it a brand new personality!
Can You Use a Drill Bit to Countersink
Oh, quite the delightful idea! Yes, you can use a drill bit to countersink. Just select a drill bit that matches the size of your screw head, and gently drill into the wood to create a shallow depression. This will allow the screw head to sit flush with the surface of the wood, creating a smooth and seamless finish. Voila! Your wood will be the envy of all other pieces of lumber.
What Screws Should I Use for Metal to Wood
When joining two unlikely partners like metal and wood, you need screws that can handle the challenge. Opt for self-tapping screws with sharp points and coarse threads. These screws have the gripping power to bite into both the metal and wood, ensuring a secure bond. Remember, teamwork makes the dream work, even for metal and wood!
What Screws are Best for Wood to Metal
Ah, the yin to the previous question’s yang. For attaching wood to metal, you’ll need screws that can handle the task with finesse. Choose self-drilling screws with a sharp point and fine threads. These screws can effortlessly pierce both the wood and metal, creating a tight connection. With the right screws, wood and metal can dance together in perfect harmony!
What are the Two Main Reasons to Use a Countersink
Countersinking is the secret weapon of woodworking. It serves two main purposes:
-
Flush Finish: By creating a small indentation in the wood, countersinking allows the screw head to sit flush with the surface. This creates a smooth and polished appearance, perfect for a professional finish.
-
Preventing Splitting: When a screw is driven into wood without countersinking, it can cause the wood to split. Countersinking prevents this by providing a space for the screw to go without damaging the wood fibers. It’s like giving the wood a cozy spot to relax!
How do You Attach a Threaded Rod to Wood
To bring a threaded rod and wood together in a tight embrace, you’ll need a few helpful tools. First, drill a hole in the wood with a diameter slightly larger than the threaded rod. Then, apply some adhesive to the rod’s threads – almost like giving it a dab of glue. Insert the rod into the hole and tighten it with a wrench. The adhesive will provide extra security, ensuring a solid connection between the rod and the wood. Now, they’re soulmates!
How do You Countersink a Screw without a Countersink Bit
Picture this: you’re ready to countersink a screw, but alas, no countersink bit in sight. Fear not, for creativity knows no bounds! Simply grab a larger drill bit – one that matches the diameter of the screw head – and carefully drill into the wood, just enough to create a shallow depression. With a bit of finesse, you’ve achieved countersinking glory, even without the proper tool. Who needs convention?
What does a Countersunk Hole Mean
Ah, the mystical allure of the countersunk hole. A countersunk hole is a recess in the wood created to accommodate the screw head. It allows the screw head to rest below the surface of the wood, creating a clean and flush finish. It’s like giving the wood a cozy nest to cuddle the screw head.
What does it Mean to Countersink
Countersinking is a woodworking technique that involves creating a small depression in the wood to accommodate a screw head. By countersinking, you ensure that the screw doesn’t protrude above the surface, giving your woodwork a sleek and polished appearance. It’s like offering the screw a hidden spot to call home.
What is the Purpose of a Countersink Bit
Ah, the humble hero of the woodworking world – the countersink bit! This specialized bit is designed to create a conical recess in the wood, allowing the screw head to sit flush with the surface. It’s like giving the screw a stylish hat to complete its look. The countersink bit ensures your woodworking projects have that professional touch.
Do I Need a Countersink Bit
While a countersink bit is the preferred tool for achieving stellar countersinking results, it’s not the only option in your toolbox. You can use alternative methods like a larger drill bit or even a specialized countersink tool. The choice is yours, my adventurous friend. Just remember, all roads lead to countersunk perfection!
What is Countersink Operation
Ah, the dance of countersinking! Countersink operation refers to the process of creating a recess in the wood to accommodate a screw head. It involves using specialized tools such as countersink bits, drill bits, or other creative solutions to achieve that coveted smooth and flush finish. It’s like conducting a symphony of woodworking finesse!
How do You Join Wood and Metal
Bringing together the worlds of wood and metal is a labor of love. First, pre-drill a hole slightly smaller than the diameter of your screw into the wood. Ensure the hole is deep enough to accommodate the length of the screw. Next, align the metal piece with the hole in the wood and slowly drive the screw through the metal and into the pre-drilled hole. Tighten firmly, but be gentle to avoid causing damage. The result? A beautiful union of wood and metal that will stand the test of time!
Can You Thread a Bolt into Wood
Indeed, you can thread a bolt into wood! By using a tap and die set, you can create threads in the wood, allowing bolts to screw in snugly. Just remember to select a tap that matches the bolt size, apply steady pressure, and turn clockwise to create those precious threads. You’ll be threading bolts into wood like a pro in no time!
When Should You Countersink
Countersinking is a handy technique to use in various woodworking scenarios. You should consider countersinking when you want a clean and professional finish with the screw heads sitting flush with the wood surface. It’s particularly useful when you’re joining pieces of wood together, as countersinking prevents splitting and provides a seamless appearance. So, if you’re aiming for that impeccable final touch, it’s time to countersink away!
How do You Make a Wood Tap
Ah, the call of the daring DIY enthusiast! To make your own wood tap, find a steel rod or screw with the desired thread size. With a steady hand and a bit of elbow grease, carefully cut grooves around the rod’s surface using a file or a hacksaw. These grooves will act as the threads. Once completed, you have your very own custom wood tap to create threads in your wooden masterpieces. Remember, you’re not just tapping wood – you’re tapping into your creative genius!
What does it Mean to Countersink a Screw
To countersink a screw means to create a shallow recess in the wood that allows the screw head to sit flush or slightly below the surface. This technique provides a polished and professional look to your woodworking projects. It’s like tucking the screw head in for a cozy slumber, leaving your wood looking sleek and refined.
Congratulations, intrepid woodworkers! You’ve reached the end of our FAQ journey on sinking bolts into wood. Armed with these answers, you’re now equipped to tackle woodworking projects with confidence. Remember, whether you’re threading wood, joining different materials, or countersinking with creativity, the world of woodworking is yours to explore. Embrace the art, step into your workshop, and let your imagination run wild in the domain of sawdust and splinters!