Are you tired of dealing with leaks and water damage caused by a faulty downspout drain? Look no further, because we’ve got you covered! In this blog post, we will walk you through everything you need to know about sealing your downspout drain. From understanding where downspouts drain to finding the right repair kit, we’ve got all the answers. Say goodbye to those pesky leaks and hello to a dry and well-maintained downspout system. So let’s dive in and find out how you can seal your downspout drain like a pro!
Seal downspout drain
Why you need to seal your downspout drain
Having a properly functioning downspout drain is essential for the overall health of your home’s foundation. It helps to redirect rainwater away from the foundation, preventing any potential water damage or flooding. However, just having a downspout drain isn’t enough – it’s equally important to make sure it is properly sealed.
The benefits of sealing your downspout drain
Sealing your downspout drain offers several benefits. Firstly, it helps to prevent any leaks or water seepage that could lead to water damage inside your home or basement. It also helps to keep pests like rodents and insects from entering your home through the drain. Additionally, a properly sealed downspout drain ensures that the water is efficiently diverted away from your foundation, reducing the risk of structural damage.
How to seal your downspout drain
-
Find any cracks or gaps in your downspout drain. These are common areas where water can leak through, so it’s important to seal them properly.
-
Clean the drain thoroughly to remove any dirt or debris that may hinder the sealing process.
-
Use an appropriate sealant, such as silicone caulk or waterproof epoxy, to seal the cracks and gaps. Apply the sealant generously and make sure to cover all the affected areas.
-
Allow the sealant to dry completely before testing the drain for any potential leaks. This ensures that the sealant has enough time to create a tight and secure seal.
Regular maintenance tips for your downspout drain
To ensure your downspout drain remains properly sealed and functional, it’s important to perform regular maintenance. Here are some tips to keep in mind:
-
Clear any debris or leaves that may accumulate in the drain regularly. This prevents blockages and allows the water to flow freely.
-
Check the sealant periodically for any signs of wear or damage. If you notice any cracks or gaps, reapply the sealant promptly.
-
Inspect the entire downspout drain system for any potential issues, such as loose connections or clogs. Address these problems as soon as possible to prevent further damage.
By following these simple steps and performing regular maintenance, you can ensure your downspout drain remains effectively sealed, protecting your home from water damage and other potential issues. So don’t delay! Take the necessary steps to seal your downspout drain and keep your home safe and dry.
Downspout Repair Kit
Whether due to age or damage, downspouts can sometimes develop leaks or cracks. While it might seem like a daunting task to fix them, with the help of a downspout repair kit, you can handle the job with ease. These handy kits are designed to provide everything you need to seal and repair your downspout, ensuring it functions properly once again. In this section, we’ll explore the benefits of using a downspout repair kit and guide you through the simple steps to get your downspout back in tip-top shape.
Why Use a Downspout Repair Kit
A downspout repair kit is a cost-effective solution that saves you from the hassle of replacing the entire downspout. By fixing the problem early on, you can prevent further damage to your home’s foundation and landscaping, ultimately saving you money. Plus, it’s a DIY-friendly option that allows you to take matters into your own hands—no need to hire expensive professionals!
Getting Started
Before you begin, make sure you have a downspout repair kit handy. These kits usually include sealants, repair tape, and possibly additional components like elbows or connectors. Once you have your kit, gather some basic tools like a utility knife, a ladder, and gloves to protect your hands. Now, let’s dive into the repair process step-by-step.
Step 1: Assessing the Damage
Carefully inspect your downspout to identify the leaks or cracks. Start at the top and work your way down, checking for any visible signs of damage or weaknesses. Once you’ve located the problem areas, mark them for easy reference.
Step 2: Cleaning and Preparing
To ensure a proper seal, clean the damaged portions of the downspout thoroughly. Remove any debris or dirt using a brush or rag. Once clean, wipe the area with a damp cloth to ensure a clean surface for the repair materials.
Step 3: Applying the Sealant
Using the provided sealant from your repair kit, carefully apply it to the damaged areas as per the manufacturer’s instructions. Depending on the type of sealant, you might need to squeeze it from a tube or brush it on. Apply a sufficient amount of sealant to cover the cracks and create a watertight barrier.
Step 4: Applying the Repair Tape
For added reinforcement, use the repair tape provided in the kit. Apply the tape over the sealed areas, ensuring complete coverage. The repair tape acts as an extra layer of protection, helping to prevent future leaks and strengthening the integrity of the downspout.
Step 5: Let It Cure
Allow the sealant and repair tape to cure according to the manufacturer’s instructions. This might involve letting it sit for a specific duration or exposing it to sunlight. During the curing process, avoid any contact with the repaired area to ensure optimal results.
By following these simple steps and using a downspout repair kit, you can fix your downspout in no time. Say goodbye to leaks and cracks, and enjoy a properly functioning downspout that protects your home from water damage. So, why wait? Give your downspout the attention it deserves and enjoy the peace of mind that comes with a sturdy, sealed drainage system.
How to Seal a Downspout Drain to Prevent Water Damage
Introduction
Having a properly functioning downspout drain is essential for protecting your home from water damage. However, over time, these drains can develop leaks or become loose, leading to water seepage and potential harm to your foundation. In this guide, we’ll show you how to seal a downspout drain effectively, ensuring that your home remains safe and dry.
Locating the Problem
The first step in sealing a downspout drain is identifying the specific areas where leaks or loose connections may be occurring. Check the downspout for any visible gaps or cracks that could potentially allow water to escape. If you spot any issues, make a note of them before moving on to the next step.
Gathering Your Tools
To seal your downspout drain, you’ll need a few tools and materials. These include a caulk gun, waterproof caulk, a putty knife, and possibly a wire brush for cleaning the area before applying the caulk. Ensure that you have everything at hand before proceeding with the next steps.
Preparing the Drain
Before sealing the downspout drain, it’s essential to clean the area thoroughly. Use a wire brush to remove any debris or old caulk, ensuring that the surface is clean and ready for application. This step is crucial as it allows the caulk to adhere firmly, providing a long-lasting seal.
Applying the Caulk
Once the area is clean, load the caulk gun with waterproof caulk and carefully apply it along the gaps or cracks in the downspout drain. Use the putty knife to smooth out the caulk and remove any excess. Remember, a neat and tidy application will not only be more visually appealing but will also provide a more effective seal.
Ensuring a Tight Connection
In some cases, the issue may not be with gaps or cracks but with loose connections between the downspout and the drainage system. To fix this, consider using hose clamps to secure the connections tightly. This will prevent any water from escaping and ensure smooth and efficient drainage.
Regular Maintenance
Sealing your downspout drain is a preventive measure, but it’s equally important to perform regular maintenance to keep it in top shape. Check for any signs of damage or wear and tear periodically. Cleaning the drain and applying a fresh layer of caulk when necessary will help extend the lifespan of the seal and keep your home protected.
Sealing a downspout drain is a simple and effective way to prevent water damage to your home. By identifying and addressing any leaks or loose connections, you can ensure that rainwater is directed safely away from your foundation. Remember to perform regular maintenance to keep your seal intact, and enjoy the peace of mind that comes from knowing your home is protected from water damage.
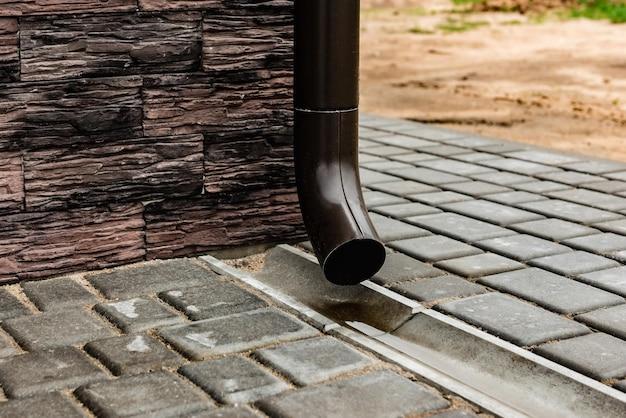
Where do Downspouts Drain
Introduction
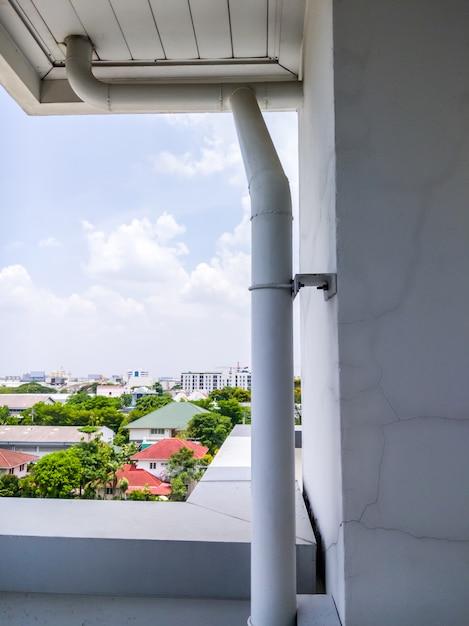
When it comes to managing rainwater around your property, downspouts are an essential component. These long, narrow pipes are designed to efficiently redirect rainwater from your roof and away from the foundation of your home. But have you ever wondered where all that water ends up? In this section, we’ll explore the common routes that downspouts take and the potential impacts they can have on your property.
Directing Water Away
One common path for downspouts to drain is to simply extend them away from the house, ensuring that the water doesn’t pool near the foundation. This method is often the most straightforward solution, as it avoids any potential complications that could come with directing the water elsewhere. By creating a sloping extension, the water is encouraged to flow away from the house, preventing damage to the foundation and potential flooding issues.
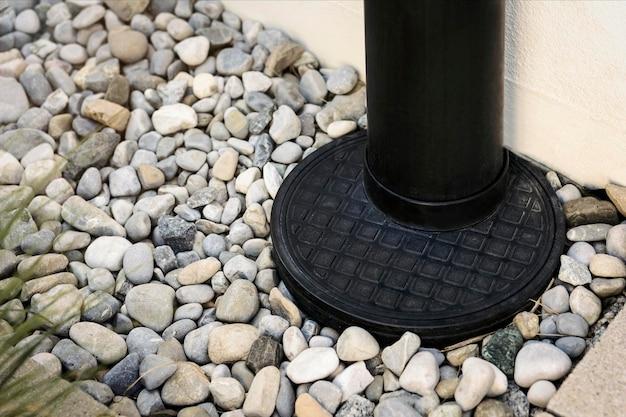
Utilizing Underground Systems
To maintain a neat and clean exterior while effectively managing rainwater, some homeowners opt for underground drainage systems connected to their downspouts. These systems are designed to direct the water underground, usually through a network of pipes that lead to a designated drainage area. The concept is simple yet effective, allowing the water to be seamlessly carried away without creating any eyesores on the surface.
Rain Barrels and Collection Tanks
In recent years, the trend of harvesting rainwater has gained popularity due to its eco-friendly benefits and potential cost savings. When it comes to downspouts, one way to make the most of the rainwater is by redirecting it into rain barrels or collection tanks. These containers collect the water for later use, such as watering plants or even for non-potable uses like cleaning. It’s a sustainable alternative that not only helps conserve water but also reduces the strain on conventional water sources.
Storm Drains and Sewer Systems
In urban areas, downspouts are often connected to storm drains or the local sewer system. While this is a convenient solution, it’s important to note that excess rainwater can put a strain on these systems, potentially leading to overwhelmed drainage infrastructure or even sewer backups. As a responsible homeowner, it’s worth considering the impact your downspouts may have on these systems and exploring alternative drainage options if needed.
Now that you know where downspouts can drain, you have a better understanding of the various options available to manage rainwater around your property. Whether you choose to extend the downspouts away from your home, utilize underground systems, collect rainwater in barrels, or connect to the municipal drainage infrastructure, the ultimate goal is to prevent water damage and maintain the integrity of your property. So next time it rains, take a look at your downspouts and appreciate their role in keeping your home dry and secure.
How Do You Seal Downspouts
If you’re experiencing issues with water leaking from your downspouts, it’s important to address the problem before it causes further damage. The good news is that sealing downspouts is a relatively simple process that can be done by just about anyone. In this section, we’ll walk you through the steps of how to seal downspouts effectively.
Gather the necessary materials
To start, you’ll need a few basic materials: a tube of silicone caulk, a caulking gun, a ladder, and some cleaning supplies. It’s important to choose a high-quality silicone caulk that is specifically designed for outdoor use. Being water-resistant and durable, silicone caulk is ideal for sealing downspouts.
Clean the downspout

Before you begin sealing, it’s crucial to clean the downspout thoroughly. Remove any debris such as leaves, twigs, or dirt that may be clogging the pipe. A simple brush or pipe cleaner can be helpful for this task. Make sure the downspout is clear and ready for sealing.
Apply the caulk
Now comes the fun part: sealing the downspout. Start by applying a generous amount of caulk around the joints and connections of the downspout. Make sure to cover any cracks or gaps where water can potentially leak through. Smooth the caulk out with your finger or a caulk finishing tool for a neat and professional look.
Let it dry
After applying the caulk, give it ample time to dry before testing it. Read the instructions on the caulk tube for specific drying times, but as a general rule, allow at least 24 hours for the caulk to fully set. This will ensure a proper seal and prevent any water from seeping through.
Test for leaks
Once the caulk has dried, it’s time to test your handiwork. Get a hose or bucket of water and pour it into the gutters. Pay close attention to the downspouts and check for any leaks or signs of water escaping. If you notice any issues, repeat the sealing process and make sure that all areas are properly sealed.
Ongoing maintenance
While sealing your downspouts is a great way to prevent water damage, it’s essential to perform regular maintenance to ensure they stay in optimal condition. Clear out any debris regularly, especially during the fall when leaves tend to accumulate. Inspect the seals for cracks or wear and reapply caulk as necessary.
Sealing your downspouts is a DIY task that anyone can tackle. By following these simple steps, you can prevent water leaks and keep your home safe from potential water damage. So, grab your caulk gun and get to sealing!
Downspout Drain Replacement
Signs You May Need to Replace Your Downspout Drain
If you’ve noticed water pooling around your foundation, overflowing gutters, or an unpleasant smell lingering in your yard, it might be time to consider replacing your downspout drain. Here are a few signs that indicate a replacement might be in order:
Inspect for Cracks and Blockages
Over time, downspout drains can develop cracks or become clogged with debris, causing water to back up and create issues. Inspect your downspout drain for any visible cracks or blockages. If you notice these signs, it’s time to consider a replacement.
Watch Out for Frequent Overflow
If your gutters are constantly overflowing, even during light rain, it could be a sign that your downspout drain is not functioning properly. This may indicate a blockage or damage that requires replacement.
How to Replace a Downspout Drain
Replacing a downspout drain might sound daunting, but with a few handy tools and a little patience, you can do it yourself. Here’s a step-by-step guide to help you through the process:
Step 1: Gather Your Materials
You’ll need a few things before you begin. Grab a shovel, a new downspout drainpipe, a hacksaw, some PVC cement, and a tape measure. Having these essentials ready will save you time and frustration.
Step 2: Digging the Trench
Using your shovel, dig a trench along the path where the old downspout drain is located. Make sure the trench slopes away from your home to ensure proper drainage.
Step 3: Remove the Old Downspout Drain
Carefully disconnect the old downspout drain from your gutter system and remove it from the trench. Dispose of it properly.
Step 4: Measure and Cut the New Downspout Drainpipe
Measure the length of the trench and cut your new downspout drainpipe to size using a hacksaw. Ensure that it fits snugly within the trench.
Step 5: Install the New Downspout Drainpipe
Apply PVC cement to both ends of the new downspout drainpipe and connect it to your gutter system and the drain at the end of the trench. Double-check that the pipe is securely in place.
Step 6: Backfill the Trench
Fill the trench with soil, packing it down firmly to prevent any shifting or settling. This will ensure that the downspout drainpipe remains in its proper position.
Replacing a downspout drain may seem like a daunting task, but with a little know-how and some basic tools, you can tackle it yourself. By keeping an eye out for signs of damage or blockages and following a simple step-by-step process, you’ll have a new downspout drain in no time. Don’t hesitate to seek professional help if you’re unsure about any step along the way. Happy replacing!
How to End a Downspout Drain
Ensuring Proper Drainage for Your Home
When it comes to maintaining your home, one important aspect to consider is proper drainage. A downspout drain plays a crucial role in directing water away from your house and preventing water damage. In this section, we will guide you on how to effectively end a downspout drain.
Step 1: Locate the Downspout
First things first, you need to identify the location of the downspout on the exterior of your home. It is typically attached to the corner of your house, near the roofline. Once you have located it, you’re ready to move on to the next step.
Step 2: Determine the Placement of the Drain
Now that you have located the downspout, it’s time to decide where the drain should end. Ideally, you want the drain to direct the water away from your house, preferably towards an area that slopes away from the foundation. This will help prevent any water from seeping into your basement or causing structural damage.
Step 3: Digging the Trench
Once you have determined the ideal placement for the drain, it’s time to start digging. Grab a shovel and dig a trench that slopes downward from the end of the downspout. The trench should be about 6-8 inches wide and deep enough to accommodate the PVC pipe that will be used as the drain.
Step 4: Installing the PVC Pipe
Next, it’s time to install the PVC pipe. Start by attaching a 90-degree elbow to the end of the downspout. This will allow the water to flow smoothly into the pipe. Then, lay the pipe in the trench, making sure it follows the desired slope. Use PVC connectors to join the different sections of the pipe as needed.
Step 5: Covering the Pipe
To ensure the pipe remains securely in place, cover it with gravel or small rocks. This will help prevent it from shifting or becoming dislodged over time. Additionally, covering the pipe with gravel allows water to flow more freely and prevents debris from clogging the drain.
Step 6: Testing and Maintenance
Lastly, it’s important to test the functionality of your newly installed downspout drain. Turn on the hose or wait for rain to observe how the water flows through the drain and away from your house. Regularly inspect and clean the drain to prevent any blockages or obstructions.
By following these simple steps, you can effectively end a downspout drain and ensure proper drainage for your home. Remember, a well-maintained downspout drain can help protect your house from water damage and prolong its lifespan. So grab your tools and get ready to tackle this home improvement project!
Downspout Drain Repair Near Me
Importance of Regular Downspout Drain Repair
Keeping your downspout drains in good working condition is essential for a well-functioning and well-maintained home. However, when it comes to downspout drain repair, many homeowners find themselves asking, “Where can I find a reputable downspout drain repair service near me?” In this section, we will explore the importance of regular downspout drain repair and provide you with some helpful tips on finding the best professionals nearby.
Signs Your Downspout Drain Needs Repair
Regular maintenance and early detection of downspout drain issues can save you from hefty repair bills down the line. But how can you tell if your downspout drain is in need of repair? Look out for these telltale signs:
- Pooling Water: If you notice water pooling around the base of your downspout or near your foundation, it could be a sign of a clogged or damaged drain.
- Gutters Overflowing: When your gutters overflow, it could indicate a blockage in your downspout drain. This can lead to water damage and other costly problems if left unaddressed.
- Unpleasant Odors: Foul smells emanating from your drains might signal a clog or build-up. It’s important to address this issue promptly to prevent further damage and health hazards.
- Insect Infestations: If you notice an increase in pests, such as mosquitoes or cockroaches, it could be due to stagnant water caused by a malfunctioning downspout drain.
Finding a Reliable Downspout Drain Repair Service Near You
Now that you know the importance of downspout drain repair, it’s time to find a reliable service provider in your area. Here are some tips to help you with your search:
1. Ask Your Neighbors and Friends
Word-of-mouth recommendations can be incredibly valuable when seeking out reliable services. Ask your neighbors, friends, and colleagues if they have any recommendations for reputable downspout drain repair professionals in your area.
2. Check Online Directories
Online directories can be a great resource for finding local service providers specializing in downspout drain repairs. Look for directories that provide honest reviews and ratings from previous customers to help you make an informed decision.
3. Research and Compare
Once you have a list of potential service providers, take some time to research their qualifications, experience, and customer reviews. Compare their prices and services offered to ensure you’re getting the best value for your money.
Trust the Experts for Hassle-Free Repairs
Remember, when it comes to downspout drain repair, it’s best to leave it to the experts. Attempting to fix the problem yourself may lead to further damage or costly mistakes. By finding a reliable downspout drain repair service near you, you can rest easy knowing that your drainage system is in good hands.
So, when your downspout drain is in need of repair, don’t hesitate to reach out to a reputable professional nearby. They’ll have the expertise and tools necessary to fix the issue efficiently and effectively. Your home and wallet will thank you!
Fixing a Downspout Extension: A DIY Guide
Introduction
Whether you’re dealing with heavy rainfall or melting snow, a properly functioning downspout extension is crucial for redirecting water away from your home’s foundation. If you’ve noticed water pooling near the base of your downspout or if it’s simply not performing as it should, it’s time to take action. In this guide, we’ll walk you through the steps to fix your downspout extension and ensure it’s working flawlessly.
1. Start with a Visual Inspection
Take a close look at your downspout extension to identify any obvious issues. Is it sagging or disconnected from the downspout itself? Are there any visible leaks or cracks? Make note of these problems as they will determine your next course of action.
2. Repairing Sagging or Detached Extensions
If your downspout extension is sagging or disconnected, it will be unable to effectively redirect water away from your home. Start by straightening out the extension and reattaching it securely to the downspout. In some cases, it may be necessary to replace damaged brackets or fasteners.
3. Fixing Leaks and Cracks
Leaky downspout extensions can lead to water seeping into your foundation, causing costly damage. To fix these issues, begin by thoroughly cleaning and drying the affected area. Once dry, apply a waterproof sealant or adhesive, ensuring complete coverage over the leaks or cracks. Allow the sealant to dry according to the manufacturer’s instructions before testing its effectiveness.
4. Preventing Clogs and Blockages
Regular debris accumulation can lead to clogged downspout extensions, preventing water from flowing freely. Install a mesh screen or leaf guard at the top of your downspout to catch leaves, twigs, and other debris before they have a chance to clog the system. Additionally, make it a habit to clear any obstructions from the extension regularly, particularly during the fall when leaves are abundant.
5. Extending the Lifespan of Your Downspout Extension
To ensure your downspout extension remains in good working condition over time, consider addressing a few preventive maintenance tips. Regularly inspect and clean out your gutters to minimize debris build-up. Trim overhanging tree branches to prevent them from falling onto the extension during storms. Lastly, during winter months, disconnect the downspout extension to prevent freezing and potential damage.
By taking the time to fix your downspout extension, you’re protecting your home’s foundation from water damage and ensuring proper drainage. Remember to address sagging or detached extensions, seal any leaks or cracks, and implement preventive measures to keep your downspout extension functioning optimally. With these simple DIY steps, you’ll be well-equipped to handle any downspout extension issue that comes your way. Stay dry and safeguard your home from water woes!
Gutter Drain Pipe Replacement Cost
How Much Should You Expect to Pay for Gutter Drain Pipe Replacement
Replacing a gutter drain pipe might not be the most exciting task, but it’s an essential part of maintaining a well-functioning drainage system. However, before you delve into this project, it’s important to understand the potential costs involved. Here’s a breakdown of what you should expect when it comes to the gutter drain pipe replacement cost.
Factors Affecting the Cost
Several factors can influence the overall cost of replacing your gutter drain pipe. These factors may include the length and diameter of the pipe, the material it’s made of, and the extent of any damage or blockage. Additionally, the complexity of the installation process and the labor rates in your area will also impact the final price tag.
Material Options
When it comes to gutter drain pipe replacement, you have a few material options to choose from, each with its own cost range. PVC (polyvinyl chloride), for instance, is a popular and affordable option, while stainless steel provides durability but at a higher price point. Copper, known for its aesthetic appeal, is the most expensive choice. Consider your budget and preferences when selecting the material for your new gutter drain pipe.
Average Costs
On average, gutter drain pipe replacement can cost anywhere from $300 to $1000. However, it’s important to note that this pricing can vary significantly depending on the factors mentioned earlier. It’s always best to get multiple quotes from reputable contractors or handypersons to ensure you’re getting the best value for your money.
DIY vs. Hiring a Professional
While some homeowners may attempt a DIY gutter drain pipe replacement to save money, it’s generally recommended to hire a professional for this task. Proper installation is crucial to prevent leaks, blockages, and costly repairs down the line. A professional will have the necessary expertise and tools to ensure a seamless and long-lasting gutter drain pipe replacement.
Conclusion
As with any home improvement project, it’s important to weigh the benefits, costs, and potential risks. Gutter drain pipe replacement is no exception. By understanding the factors that influence the cost and considering your specific needs, you can make an informed decision, ensuring your gutter system functions efficiently and effectively for years to come.
How to Seal Underground Drain Pipe
Introduction
When it comes to keeping your home’s foundation safe from water damage, a properly sealed underground drain pipe is crucial. If left unchecked, leaks and cracks in the pipe can lead to a host of issues, including basement flooding and structural damage. In this section, we will explore how to effectively seal your underground drain pipe to ensure maximum protection against water infiltration.
Locate the Problem Areas
The first step in sealing your underground drain pipe is to identify any problem areas. Look for signs of water damage, such as mold, dampness, or standing water in your basement or yard. Once you’ve pinpointed the issue, use a shovel to carefully excavate the area around the pipe.
Clean and Prepare the Pipe
Before applying any sealant, it’s essential to clean and prepare the surface of the drain pipe. Use a wire brush to remove any dirt, debris, or loose concrete from the pipe’s exterior. This will ensure that the sealant adheres properly and provides a long-lasting solution.
Choose the Right Sealant
When selecting a sealant for your underground drain pipe, opt for one specifically designed for this purpose. Look for a sealant that is waterproof, durable, and compatible with the material of your pipe, whether it’s PVC, clay, or another type. Additionally, ensure the sealant is suitable for underground applications and can withstand the pressure of water flow.
Apply the Sealant
Once you have the right sealant, it’s time to apply it to the problem areas. Start by generously coating the surface of the drain pipe, making sure to cover any cracks or joints thoroughly. Use a brush or gloved hand to spread the sealant evenly, ensuring complete coverage.
Allow for Curing Time
After applying the sealant, it’s important to allow sufficient time for it to cure. Check the manufacturer’s instructions for the recommended drying time, and make sure the area is dry and free from moisture during this period. Avoid any additional digging or heavy water flow during the curing process to prevent unwanted damage.
Test the Sealed Pipe
Once the curing time has passed, it’s crucial to test the effectiveness of the sealant. Pour water into the pipe and observe if there are any signs of leaks or water seepage. If the sealant has been applied correctly, the water should flow smoothly through the pipe without any leakage.
Sealing your underground drain pipe is a vital step in protecting your home’s foundation from water damage. By following the steps outlined above, you can ensure that your underground drain pipe remains watertight and dependable. Remember to regularly inspect and maintain your seal to address any potential issues promptly. With a properly sealed underground drain pipe, you can have peace of mind knowing that your home is safeguarded against the damaging effects of water infiltration.
How to Stop Your Downpipe from Dripping
It can be quite annoying when your downpipe starts to drip, especially during heavy rain showers. But fear not! There are a few easy and effective solutions to seal your downspout drain and put a stop to those persistent drips. Here are some tried and tested methods to keep your downpipe nice and dry:
Check for Leaks and Cracks
Before trying any fancy fixes, it’s important to assess the condition of your downpipe. Start by inspecting it closely for any leaks or cracks. These can often be the primary cause of dripping. If you spot any damage, don’t worry, it’s usually an easy fix!
Patch it Up with Sealant
Sealant is your best friend when it comes to fixing leaks and cracks. Make sure you choose a high-quality sealant that is specifically designed for outdoor use. Apply the sealant generously to the affected areas, ensuring that you cover all the cracks. Let it dry thoroughly before testing it out with some water. Voila! No more drips!
Install a Downpipe Diverter
If your downpipe is dripping due to excess water flow, installing a downpipe diverter can help alleviate the issue. This nifty device diverts the water away from your downspout and prevents it from overflowing. It’s a simple and effective solution that can save you from the hassle of constantly dealing with drips.
Clean Your Gutters Regularly
A clogged or blocked gutter can often lead to water overflowing and causing drips in your downpipe. To prevent this, make sure to regularly clean out your gutters. Remove any leaves, debris, or other obstructions that might be causing a backup. This will ensure smooth and uninterrupted water flow, minimizing the chances of dripping.
Consider Installing a Rain Chain
If you’re looking for a more aesthetically pleasing solution, a rain chain might be just the thing for you. Rain chains are decorative alternatives to traditional downpipes. They guide the water down in a cascading fashion, adding a touch of elegance to your home while preventing drips. It’s a win-win situation!
Dripping downpipes can be a real nuisance, but with a bit of know-how, you can easily put an end to the constant drips. From patching up cracks with sealant to installing diverters or rain chains, there are various options available to suit your needs. Remember to maintain regular gutter cleaning to ensure smooth water flow. With these tips in mind, you’ll have a dry downpipe in no time!