Welcome to our blog post all about warping images in Illustrator! If you’ve ever wondered how to change the angle, shape, or distortion of an image in this powerful graphic design software, you’re in the right place. Whether you’re a beginner or an experienced user, we’ve got you covered with step-by-step instructions and helpful tips.
In this guide, we’ll answer common questions like how to find the warp tool, warp text to fit a shape, and even warp a jpeg image. We’ll also explore shortcuts, such as Ctrl-D for duplicating objects, and Ctrl-H for hiding and showing guides. Plus, we’ll delve into the free transform tool, puppet warp, and how to make objects curve.
Stay tuned for a wealth of knowledge on creating captivating designs with the warp effect in Illustrator. Let’s dive in and unleash your creativity!
How to Warp an Image in Illustrator
So, you want to learn the art of warping images in Adobe Illustrator, huh? Well, you’ve come to the right place! In this handy guide, we’ll walk you through the steps to transform your images into mind-bending masterpieces. Get ready to unleash your creativity and take your design game to the next level!
Understanding the Basics of Image Warping
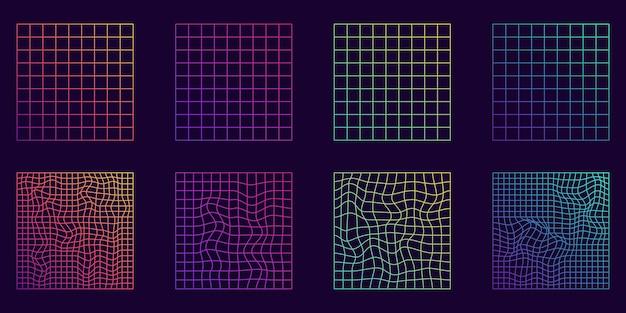
Before we dive into the nitty-gritty, let’s start with the basics. Image warping is like giving your picture a little stretch and twist. It allows you to reshape and distort the elements within an image, creating all sorts of cool effects. Whether you want to give your logo a dynamic twist or add a whimsical touch to your illustrations, warping is the way to go.
Starting Off – Opening Illustrator and Importing an Image
To get this party started, fire up Adobe Illustrator on your trusty computer and create a new document. Once you have a blank canvas waiting for your artistic touch, go ahead and import the image you want to warp. Simply click on “File” > “Place” and select the image from your computer. Easy peasy, right?
Enter the Warp Tool
Now that we have our image ready, it’s time to unleash the power of the Warp tool. Locate the toolbar on the left side of your Illustrator screen and look for the little icon that resembles a finger bending something. That’s your ticket to warping glory! Click on it and prepare to work your digital magic.
Choosing the Right Warp Style
Alright, let’s talk about the different warp styles you can choose from. Illustrator offers a range of options to suit your creative vision. From classic warps like “Arc” and “Flag” to more peculiar ones like “Fish” and “Ribbon”, these styles will give your image that extra oomph. Play around with them to see which one tickles your fancy.
The Art of Warp Mapping
Now comes the fun part – warp mapping! Think of it as the bread and butter of image warping. By placing anchor points on your image and manipulating them, you can bend, stretch, and warp it to your heart’s content. Get a feel for the different tools at your disposal – the Warp Point tool, the Convert Anchor Point tool, and the Direct Selection tool. They’ll be your trusty sidekicks on this adventure.
Fine-Tuning and Refining Your Warp
Once you’re done shaping your image, it’s time to fine-tune it like a maestro tuning an instrument. Use the various controls and options available to adjust the intensity, angle, and distortion of your warp. Experiment with different settings until you achieve the desired effect. Remember, the sky’s the limit when it comes to unleashing your creativity!
Saving and Sharing Your Warped Creation
Congratulations, you’ve successfully warped an image in Illustrator! Now it’s time to show off your masterpiece to the world. Save your creation by clicking on “File” > “Save As” and choose your preferred file format. Whether you want to display it on your website, share it on social media, or even print it as a poster, your warped image is ready to make a statement.
So, there you have it – a crash course on how to warp images in Illustrator. With a little practice and a touch of imagination, you’ll be bending and morphing images like a pro in no time. So go forth, dear reader, and let your creativity soar as you warp away into digital bliss. May your designs be as flexible as a contortionist and as captivating as a magician’s trick! Keep creating, keep innovating, and most importantly, keep warping!
FAQ: How to Warp an Image in Illustrator
So you want to learn how to warp images in Illustrator? Look no further! We’ve compiled a comprehensive list of frequently asked questions about warping images in Illustrator. Get ready to dive in and discover the answers you’ve been searching for.
How do you change the angle of an image in Illustrator
To change the angle of an image in Illustrator, follow these simple steps:
- Select the image you want to rotate.
- Click on the “Free Transform” tool, which can be found in the toolbar.
- Hover your cursor near the edge of the image until the rotate icon appears.
- Click and drag to rotate the image to your desired angle.
Where is the Warp tool
Ah, the elusive Warp tool! Look no further, my friend. You can find the Warp tool in Illustrator by following these steps:
- Select the object or text you want to warp.
- Navigate to the “Effect” menu.
- From the drop-down menu, select “Warp.”
- A dialog box will appear, allowing you to choose from various warp options. Have fun warping to your heart’s content!
What does Ctrl D do in Illustrator
Ah, the magic of keyboard shortcuts! In Illustrator, Ctrl D (or Command D on a Mac) is the shortcut for Transform Again, allowing you to repeat the last transformation you made. It’s like having a digital wizard at your fingertips!
How do you warp text to fit a shape in Illustrator
Warping text to fit a shape in Illustrator is a breeze. Just follow these steps:
- Create a shape using the shape tools or draw a custom shape.
- Select the text you want to warp.
- Go to the “Object” menu and choose “Envelope Distort.”
- From the drop-down menu, select “Make with Top Object.”
- Voila! Your text is now beautifully warped to fit the shape.
What does Ctrl H do in Illustrator
Ah, another handy keyboard shortcut to add to your repertoire. In Illustrator, Ctrl H (or Command H) toggles the Hide Edges feature. It’s like playing hide and seek with your artwork, but without the frustration of not finding it!
Where is the Free Transform tool in Illustrator
The Free Transform tool is a powerful ally in Illustrator. To find it, simply follow these steps:
- Look no further than the toolbar on the left-hand side of your screen.
- The Free Transform tool can be found by clicking on the icon that looks like a little arrow pointing in four directions. It’s like a digital superhero ready to save the day!
How do I free warp an image in Illustrator
Ah, the joy of free warping! To free warp an image in Illustrator, just perform these simple steps:
- Select the image you want to warp.
- Go to the “Object” menu and choose “Transform.”
- From the drop-down menu, select “Free Distort.”
- Drag the anchor points and handles to your heart’s content to achieve the desired warp effect.
- Release the mouse button when you’re satisfied with your creation.
Can you distort an image in Illustrator
Absolutely! Distorting images in Illustrator is a piece of cake. Here’s how you do it:
- Select the image you want to distort.
- Go to the “Object” menu and choose “Envelope Distort.”
- From the options, select “Make with Mesh.”
- A mesh grid will appear over your image, allowing you to manipulate and distort it to your heart’s desire.
- Have fun creating mind-bending visual masterpieces!
What is the Warp Effect in Illustrator
The Warp Effect in Illustrator is a powerful tool that allows you to bend, twist, and distort objects and text. It’s like a virtual funhouse for your artwork! To access the Warp Effect, follow these steps:
- Select the object or text you want to warp.
- Go to the “Effect” menu and choose “Warp.”
- A world of warp options will open up before your eyes, with various settings to explore and unleash your creativity.
How do you warp a JPEG in Illustrator
Warping a JPEG in Illustrator is as easy as pie. Just follow these simple steps:
- Open the JPEG image in Illustrator.
- Select the image you want to warp.
- Go to the “Object” menu and choose “Envelope Distort.”
- From the drop-down menu, select “Make with Warp.”
- A dialog box will appear, allowing you to choose from various warp options.
- Once you’re satisfied with your warp, click “OK” and marvel at your transformed image.
How do you warp text in Illustrator 2023
Ah, the joy of warping text! To warp text in Illustrator 2023, follow these steps:
- Select the text you want to warp.
- Go to the “Effect” menu and choose “Warp.”
- From the drop-down menu, select the desired warp style that tickles your fancy.
- Adjust the settings to achieve the perfect warp effect.
- Embrace the whimsical world of twisted text and let your creativity run wild!
What is the shortcut for Free Transform
Get ready to embrace the power of efficiency with this handy keyboard shortcut! In Illustrator, the shortcut for Free Transform is Ctrl + T (or Command + T on a Mac). Feel the power at your fingertips as you swiftly and effortlessly transform your artwork.
Does Illustrator have Puppet Warp
Oh, yes! Illustrator does have its own little puppet show called Puppet Warp. This nifty feature allows you to bend, twist, and manipulate selected parts of an image or object. To find Puppet Warp in Illustrator, follow these steps:
- Select the image or object you want to puppeteer.
- Go to the “Edit” menu and choose “Puppet Warp.”
- A mesh will appear, allowing you to place pins and bend your artwork to your heart’s content. Let the puppet show begin!
Where is the Warp tool in Illustrator 2023
Fear not, intrepid warper! The Warp tool is within your grasp. To find it in Illustrator 2023:
- Select the object or text you want to warp.
- Navigate to the “Effect” menu.
- From the drop-down menu, select “Warp.”
- A delightful array of warp options will beckon you to explore and create remarkable distortions. Warp away, my friend!
How do you warp a logo in Illustrator
Warping a logo in Illustrator is a task worthy of a skillful artist like yourself. Here’s how you can achieve this magical feat:
- Select the logo you want to warp.
- Go to the “Object” menu and choose “Envelope Distort.”
- From the drop-down menu, select “Make with Warp.”
- A dialog box will pop up, allowing you to customize the warp options to fit your artistic vision.
- Admire your warped logo masterpiece and prepare for a standing ovation!
How do I make an object curve in Illustrator
Ah, the allure of curving objects in Illustrator! To make an object curve:
- Select the object you want to curve.
- Go to the “Effect” menu and choose “Warp.”
- From the drop-down menu, select “Arc.”
- Adjust the settings to achieve the perfect curve for your object.
- Behold the mesmerizing curvature of your artwork and let it take center stage.
Is there a Warp tool in Illustrator
You betcha! Illustrator has a nifty Warp tool that lets you bend, twist, and contort your artwork. To find the Warp tool:
- Select the object or text you want to warp.
- Look no further than the toolbar on the left-hand side of your screen.
- The Warp tool can be found by clicking on the icon that looks like a little swirl. Get ready to let your creativity warp to new heights!
Where is the Free Transform tool
The Free Transform tool is your trusty companion in Illustrator. To find it:
- Look no further than the toolbar on the left-hand side of your screen.
- The Free Transform tool can be found by clicking on the icon that looks like a little arrow pointing in four directions. It’s like having a digital magician to transform your artwork with a flick of the wrist!
What does Ctrl Shift D do in Illustrator
Ah, the wonders of keyboard shortcuts! In Illustrator, Ctrl Shift D (or Command Shift D on a Mac) is the shortcut for Transform Again and Duplicate. It’s like cloning your artwork at the snap of your fingers, allowing you to effortlessly populate your canvas with duplicates. Magic, right?
What is the shortcut key of the Warp tool in Illustrator
Prepare to embrace efficiency with this handy keyboard shortcut! In Illustrator, the shortcut key for the Warp tool is W. It’s like an express route to artistic distortion, at your fingertips whenever you desire.
How do you warp an image in Photoshop
Ah, Photoshop, the cousin of Illustrator! To warp an image in Photoshop, follow these simple steps:
- Open the image you want to warp in Photoshop.
- Go to the “Edit” menu and choose “Transform.”
- From the drop-down menu, select “Warp.”
- A mesh grid will appear over your image, allowing you to move and distort it as your heart desires.
- Adjust the anchor points and handles until you achieve the desired warp effect.
- Once you’re satisfied, hit Enter and revel in your marvelously warped creation.
How do I wrap a circle around a shape in Illustrator
To wrap a circle around a shape in Illustrator and achieve a harmonious embrace, follow these steps:
- Create the shape you want to wrap the circle around.
- Draw a circle that is slightly larger than the shape you created.
- Arrange the circle and the shape so that they overlap.
- Select both the circle and the shape.
- Go to the “Object” menu and choose “Blend.”
- In the Blend dialog box, choose “Specified Steps” and enter a number that suits your artistic vision.
- Click “OK” and watch as Illustrator magically wraps the circle around your shape.
There you have it! An FAQ-style guide to warping images in Illustrator that will have you bending reality with style and finesse. Now go forth, oh creative one, and warp the world to your heart’s content. Happy warping!
Note: The instructions and shortcuts mentioned in this article are based on Illustrator 2023. Please ensure you have the latest version to avail of all the features mentioned.