Are you an aspiring astronomer or a photography enthusiast looking to explore the wonders of the night sky? Combining the power of a telescope with the capabilities of a camera can open up a whole new realm of possibilities. Whether you want to capture stunning images of distant galaxies or simply observe the planets up close, attaching a camera to your telescope is the way to go.
In this blog post, we will guide you through the process of attaching your camera to a telescope, explaining the various methods and equipment you will need to get started. We will also answer some common questions like, “Can I use my iPhone with a telescope?” and “How do I photograph the planets?”. So, grab your gear and get ready to embark on an exciting astronomical journey!
The Power of Capturing the Cosmos: A Beginner’s Guide to Attaching Your Camera to a Telescope
How to Attach Your Camera to a Telescope: A Stellar Photography Guide
So, you want to capture the celestial wonders of the night sky through your telescope? Well, my astronomically-minded amigo, you’ve come to the right place! In this guide, we’ll delve into the mystical world of connecting your camera to a telescope. Strap on your space helmet, adjust your telescope’s focus, and get ready for an intergalactic photography adventure!
The Celestial Connection: Selecting the Right Adapters
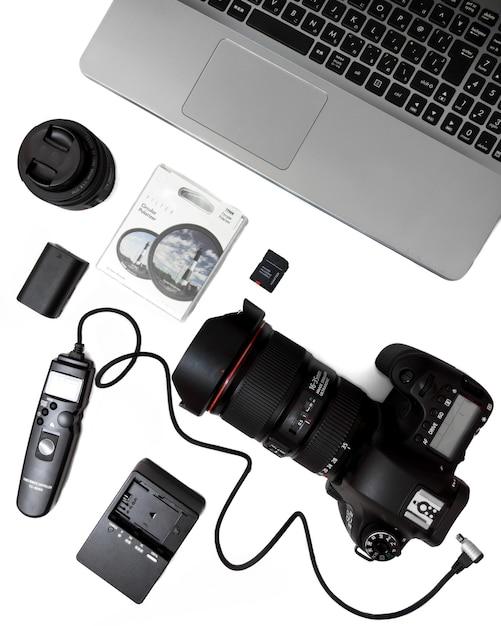
Before we embark on this cosmic journey, you’ll need a few essential tools to connect your camera to your telescope. The first thing to check is whether your telescope is equipped with a camera adapter—a little port that allows you to attach a camera. If your telescope lacks this feature, don’t fret! There are various aftermarket camera adapters available that can work wonders.
Aligning the Stars: Step-by-Step Guide
Now that you’ve acquired the necessary adapters, it’s time to bring together the forces of your trusty camera and majestic telescope. Follow these steps with the precision of an astronaut navigating through the vastness of space:
Step 1: Prepare for Launch
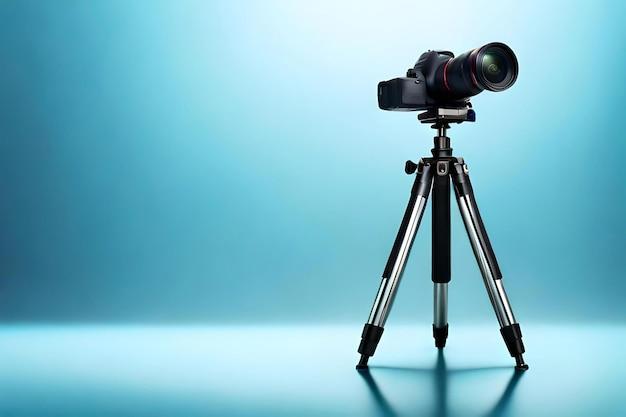
Ensure your telescope is secure on a stable mount while keeping its focus pointed skywards. You don’t want your precious equipment to wobble like a jellyfish at a cosmic rave!
Step 2: Attach the Adapter
With the finesse of an alien diplomat, carefully attach the camera adapter to the telescope’s camera port. Twist it gently but firmly, making sure it’s securely fastened. We don’t want any mid-shoot mishaps that send your camera plummeting back to Earth!
Step 3: Camera Connection Countdown
Now, it’s time to prepare your camera for its moment in the astronomical limelight. Remove any lens from your camera and attach it to the adapter. Ensure a snug fit, giving your camera a cozy abode atop your telescope.
Step 4: Fine-Tune Your Focus
With the skill of a seasoned astronomer, gently adjust your telescope’s focus to achieve a crisp image. Remember, patience is key here—like waiting for that last slice of pizza to cool down before devouring it.
Step 5: Blast Off into the Photographic Cosmos
With all the pieces in place, it’s time to let your photographic creativity soar to infinity and beyond! Experiment with different camera settings, exposure times, and celestial objects. Capture the moon’s craters, the dazzling rings of Saturn, or even distant galaxies—they’re all waiting to be immortalized through your lens.
Troubleshooting: When the Universe Doesn’t Align
Alas, even in the cosmos, not everything goes as planned. If you encounter any hiccups along your photographic voyage, here are a few tips to bring your stellar setup back on track:
Issue 1: Focusing Fiasco
If you find it difficult to achieve a sharp focus, double-check your telescope’s eyepiece focus and your camera’s settings. You might also want to consult your telescope’s manual for specific guidance. Remember, we’re aiming for astronomical awesomeness, not blurry blobs resembling space guacamole.
Issue 2: Telescope Tugs
Some telescopes may exert a bit of pull on the camera, causing misalignment or discomfort for your camera’s delicate internals. A gentle solution is attaching a counterweight to your telescope’s mount to balance the forces at play. Think of it as the cosmic equivalent of a zen garden’s harmony.
Issue 3: Dark Side of Noise
In low-light conditions, noise can creep into your images like a pesky alien invasion. Combat this cosmic culprit by using lower ISO settings or longer exposures. And remember, don’t fear the darkness—the universe is full of shimmering wonders, waiting for your camera to capture them in all their glory.
Pioneering a New Frontier: Unleash Your Creativity
Congratulations, intrepid astrophotographer! You’ve successfully unlocked the celestial secrets of attaching your camera to a telescope. Now, it’s time to embark on your own personal odyssey through the vast expanse of space. Embrace the limitless possibilities, capture breathtaking images, and let your creativity soar to astronomical levels. May your lens be forever filled with the wonders of the cosmos!
So, gear up, adjust your tripod, and embark on this interstellar photographic quest. The universe eagerly awaits your lens’ unique perspective, ready to grace your camera sensor with mesmerizing cosmic beauty. Whether you desire stunning close-ups of our planetary neighbors or wish to chase distant galaxies, this guide has equipped you with the knowledge needed to unveil the celestial treasures that lie beyond our blue home planet. Happy stargazing, dear adventurers of the cosmos!
Note: This content is meant for informational purposes only and does not constitute professional advice. Always refer to the specific instructions provided by the manufacturer of your telescope and camera equipment.
FAQ: How to Attach a Camera to a Telescope
In the vast universe of stargazing and astrophotography, attaching a camera to a telescope is a game-changer. It opens up a whole new world of possibilities, allowing you to capture the beauty of celestial objects and share them with the world. Whether you’re a seasoned astronomer or a curious newbie, you might have some burning questions about this fascinating topic. Fret not, dear reader! We’ve got you covered with this comprehensive FAQ section that will illuminate your path to telescopic photography mastery.
How Do Planets Look Through Telescopes
When you peer through a telescope, planets reveal themselves as mesmerizing orbs of wonder. With their distinct features like swirling storms on Jupiter or the splendid rings of Saturn, planets never fail to astonish. Telescopes provide enhanced clarity and magnification, allowing you to witness the intricate details of these celestial neighbors. So buckle up, bring your sense of awe, and get ready to embark on a planetary journey like no other.
Is There a Telescope App
You bet there is! In this era of technological marvels, we have at our fingertips a plethora of apps to aid us in our celestial adventures. From stargazing apps that help you navigate the night sky to telescope control apps that assist you in locating and tracking astronomical objects, there’s something for everyone. Simply download these apps on your smartphone or tablet, and you’ll be on your way to unraveling the secrets of the cosmos.
Can You Use an iPhone With a Telescope
Absolutely! Your trusty iPhone can become your astrophotography companion. With the right equipment and adaptors, you can easily connect your iPhone to a telescope, turning it into a powerful tool for capturing stunning celestial images. Now you have no excuse to miss out on capturing those breathtaking moments when the heavens unveil their wonders.
How Do I Attach a CCD Camera to My Telescope
Attaching a Charge-Coupled Device (CCD) camera to your telescope is a science in itself. Fear not, intrepid explorer! The process is simpler than you might think. You’ll need a T-adapter compatible with your specific camera model, which acts as a bridge between the camera and the telescope. By connecting the T-adapter to the camera and then securing it to the telescope’s eyepiece holder, you’ll be ready to capture awe-inspiring images of the cosmos.
How Do You Use a Digital Camera With a Telescope
Using a digital camera with a telescope allows you to go beyond the limits of your eyes and capture celestial wonders in all their glory. To embark on this photographic endeavor, you’ll need a camera adapter that connects your camera to the telescope. By positioning the camera adapter where the eyepiece would normally go, you’ll align the camera lens with the telescope’s optics, unlocking a whole new level of astronomical exploration.
How Do You Photograph the Planets
Photographing planets requires more than just a steady hand and a good lens. Patience, precision, and a keen eye for detail are essential. To capture the awe-inspiring beauty of planets, start by attaching your camera to the telescope. Then, fine-tune the focus using a high-powered eyepiece or a specialized planetary camera. With the perfect settings, you’ll be able to seize those moments when Mars, Venus, or any other planet graces your viewfinder.
What is a Camera T Mount
Ah, the elusive T Mount. Fear not, for it is not a mythical creature but a crucial piece of equipment for connecting your camera to a telescope. The T Mount is essentially an adapter that bridges the gap between your camera’s lens mount and the telescope’s eyepiece holder. It allows for a secure connection and ensures that you’re ready to capture the cosmic ballet occurring above our heads.
How Saturn Looks Through a Telescope
Saturn, the majestic ringed giant, is a sight to behold. When you take a peek at Saturn through a telescope, its iconic rings come into view with breathtaking clarity. You might even catch a glimpse of its moons, like Titan, keeping Saturn company on its cosmic journey. So get ready to be captivated as the beauty of Saturn unfolds before your eyes, leaving you in awe of the wonders of the cosmos.
How Do You Photograph Planets With a Digital Camera
Photographing planets with a digital camera is a thrilling experience that requires precision and technique. Start by attaching your camera to the telescope using an adapter, ensuring it’s securely fastened. Then, take advantage of your camera’s manual settings to adjust the exposure, ISO, and shutter speed. With steady hands and a little practice, you’ll be immortalizing the planets in stunning detail, forever capturing their celestial allure.
What is a Good Telescope to See Planets
Ah, the quest for the perfect telescope to unveil the secrets of the planets! To witness the wonders of the planets, you’ll need a telescope that excels in high-resolution views. Look for telescopes with a larger aperture, which allows for greater light-gathering capabilities and thus sharper planetary images. Schmidt-Cassegrain and Maksutov-Cassegrain telescopes are popular choices among astronomers, offering impressive views of our planetary neighbors.
How Do You Take Pictures Through a Telescope
Taking pictures through a telescope requires the right equipment, a steady hand, and a dash of patience. Begin by attaching your camera to the telescope using a camera adapter, ensuring a secure connection. Set your camera to manual mode and experiment with various exposure settings to find the perfect balance. Once you’ve refined your technique, the stars and planets will become your celestial models, ready to grace the digital canvas of your images.
How Do You Focus a Camera Attached to a Telescope
Achieving precise focus is crucial when capturing the wonders of the universe through a camera attached to a telescope. Start by utilizing the telescope’s focus knobs to achieve a sharp focus on the object you wish to capture. Once the scene is clear in your telescope’s viewfinder, fine-tune the focus using your camera’s Live View or manual focusing options. Remember, practice makes perfect, and with time, you’ll master the art of pinpoint focus.
What Telescope is Best for Viewing Galaxies
Ah, the enchanting allure of distant galaxies! To witness these cosmic marvels, you’ll need a telescope with exceptional light-gathering capabilities. Look for telescopes with a larger aperture and a long focal length, such as a Dobsonian or a reflecting telescope. These instruments will unveil the intricate details of galaxies, allowing you to immerse yourself in the vastness of the cosmos.
Can You Attach a Phone Camera to a Telescope
Indeed, you can transform your trusty phone camera into a powerful tool for capturing the mysteries of the universe. To attach your phone camera to a telescope, you’ll need a smartphone adapter that aligns the camera’s lens with the telescope’s eyepiece. Once connected, the cosmos will be at your fingertips, ready to be captured and shared with the world at the tap of a screen.
How Do You Attach a DSLR to a Telescope
Attaching a DSLR camera to a telescope is a rewarding endeavor that requires a specific set of tools. Begin by connecting a T-ring to your camera, which adapts the camera to a T-adapter. Insert the T-adapter into the telescope’s eyepiece holder, ensuring it’s securely fixed. Now, with your DSLR camera in tandem with the telescope, you’re poised to capture awe-inspiring celestial images like a seasoned astrophotographer.
How Do You Attach a DSLR to a Reflector Telescope
To attach a DSLR camera to a reflector telescope, the process follows a similar path as other telescope types. Begin by mounting your DSLR camera on a sturdy tripod. Next, insert a T-ring into the camera’s lens mount, followed by a T-adapter. Attach the T-adapter to the reflector telescope’s focuser, and boom! You’re primed to capture the wonders of the universe through the impressive optics of a reflector telescope.
What is a Barlow Lens for a Telescope
Ah, the Barlow lens, the magician of the telescope world! A Barlow lens is a versatile accessory that increases the effective focal length of your telescope, resulting in increased magnification of celestial objects. By placing the Barlow lens between your telescope’s focuser and the eyepiece, you’ll unleash the power to observe and photograph the cosmos with extraordinary detail and clarity.
What is a Visual Back on a Telescope
A visual back on a telescope is a handy accessory that connects the eyepiece holder to the telescope’s focuser. It acts as an intermediary, ensuring a secure and adaptable connection between the telescope and eyepiece. With a visual back in place, you’ll be able to effortlessly attach various accessories, such as cameras and Barlow lenses, expanding the capabilities of your beloved telescope.
How Does a Camera Work With a Telescope
The harmonious dance between a camera and a telescope allows us to capture celestial wonders like never before. When you attach a camera to a telescope, the telescope acts as your cosmic lens, gathering and magnifying the light from distant objects. The camera, in turn, captures this amplified light, turning it into tangible images that unveil the mysteries and beauty of the universe. Together, they open gateways to realms beyond our imagination, inviting us to explore the wonders of the cosmos.
And with that, fellow starry-eyed adventurers, you’re now armed with knowledge to embark on your telescopic photography journey. As you connect your camera to the telescope, the universe becomes your canvas, waiting to be painted with awe-inspiring images. So go forth, capture the cosmos, and share the wonders of the stars with the world! Happy shooting, and may the cosmic winds guide your path toward celestial brilliance.