Perler beads have been a beloved crafting material for decades, captivating both kids and adults with their endless creative possibilities. But what if you don’t have a pegboard? Can you still enjoy the fun and satisfaction of working with these colorful beads? The answer is a resounding yes! In this guide, we’ll explore various techniques and alternatives that allow you to use Perler beads without a traditional pegboard.
From melting Perler beads in the microwave to fusing them in the oven, we’ll cover all the methods you need to know. We’ll also address common questions like whether Perler beads are toxic, who invented them, and how to prevent a Perler board from warping. So, whether you’re a seasoned Perler bead enthusiast or a complete beginner, get ready to let your creativity flow and discover new ways to bring your designs to life, even without a pegboard. Let’s dive in!
How to Master the Art of Perler Bead Fusion Without a Pegboard
Have you ever found yourself itching to create something beautiful with Perler beads, only to realize you don’t have a pegboard? Don’t worry, my friend! In this guide, I’ll show you some clever tricks to use Perler beads without a pegboard and still achieve fantastic results. So put on your creative hat and let’s dive in!
The Ingenious Freehand Method
Who needs a pegboard when you have your imagination? The freehand method allows you to unleash your artistic prowess and create unique patterns without the constraints of a pegboard. Start by envisioning your design, whether it’s a cute flower or a pixelated dinosaur. Then, grab a flat surface like a table or a countertop and cover it with parchment paper or ironing paper to protect it from the inevitable bead spillage.
Sorting Beads: Embrace the Chaos
Before we begin, let’s talk about bead sorting. Now, some folks might cringe at the thought of sorting beads without a pegboard, but fear not, my friend! Embrace the chaos and take a laid-back approach. Spread your beads out and give them a quick shuffle with your fingers, feeling like a magnificent bead wizard. Trust your intuition, and let the colors guide you as you pluck the beads for your masterpiece.
Creative Alternatives to Pegboards
So, you’re ready to start crafting without a pegboard, but what will you use instead? Here are a few creative alternatives:
1. Cookie Cutters: Shape Your Destiny
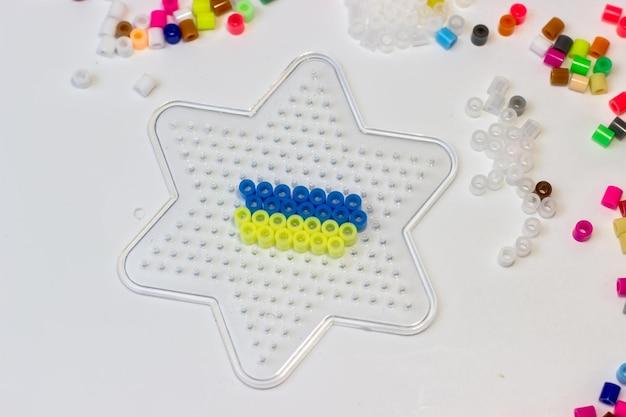
Cookie cutters aren’t just for baking! Place them on your parchment paper and fill them with beads to create unique, well-defined shapes. Whether it’s a star, heart, or a gingerbread person, let your inner artist shine through. Just remember to remove the cookie cutter gently to avoid any bead chaos.
2. Stencil the Way: Unlock Your Precision
If you fancy clean lines and precise designs, stencils will be your new best friend. Grab a stencil of your choice, lay it on the parchment paper, and fill in the design with your carefully selected beads. Make sure to hold the stencil in place while adding the beads, so your artwork stays true to your vision.
3. Tape It Up: Shape the Unshapable
For those who seek ultimate flexibility, tape is the answer. Create an outline of your desired shape using masking tape directly on the parchment paper. Then, carefully place the beads inside the tape boundary, following your pattern. Once you’ve completed your masterpiece, gently peel off the tape, revealing a beautifully formed creation that defies the need for a pegboard.
Perler Bead Fusion: Ironing with Finesse
Now that your design is complete, it’s time to fuse those beads together with a hot iron. Place a sheet of parchment paper or ironing paper over your design to protect both your beads and your iron. Set your iron to medium heat and apply gentle pressure, moving it in a circular motion for about 10-20 seconds to ensure the beads melt together. Pro tip: Avoid rushing the process, as patience will reward you with a more durable and polished artwork.
Celebrate Your Bead-tastic Creation
Congratulations, you Perler bead virtuoso! You’ve just conquered the art of using Perler beads without a pegboard. Take a moment to admire your masterpiece and share it with the world. Whether you gift it to a friend or proudly display it on your creative shrine, you can now revel in the glory of your bead-tastic creation.
So go forth, my friend, and unleash your imagination. Let the beads be your guide as you create awe-inspiring artwork without the confines of a pegboard. Have fun and happy beading!
P.S. No pegboards were harmed in the making of this guide, but they did witness some astonishing bead wizardry!
FAQ: How To Use Perler Beads Without A Pegboard
Can you melt Perler beads in the microwave
No, microwaving Perler beads is not recommended. Heat from the microwave can cause the beads to melt unevenly or even create a mess. Stick to using an iron or oven for best results.
Can you bake Perler beads in the oven
Yes, baking Perler beads in the oven is a great alternative to using an iron. Simply place your bead design on a parchment paper-lined baking sheet and bake them in a preheated oven at 350°F for about 10-15 minutes. Let them cool before removing them from the paper.
How do you remove wax paper from Perler beads
To remove wax paper from Perler beads, gently peel it away from the beads after they have cooled down and solidified. If any residue remains, you can remove it by lightly rubbing the beads with a cotton swab dipped in rubbing alcohol.
Do you need an ironing board for Perler beads
While an ironing board is the traditional choice, you don’t necessarily need one. A flat, heat-resistant surface like a table covered with a towel or a heat-resistant mat works just as well. Get creative with your setup!
How do you fuse Perler beads in the oven
To fuse Perler beads in the oven, follow these simple steps:
1. Create your bead design on a parchment paper-lined baking sheet.
2. Preheat your oven to 350°F.
3. Place the baking sheet with the bead design in the oven.
4. Bake for about 10-15 minutes until the beads have melted and fused together.
5. Allow the beads to cool completely before handling or removing them from the parchment paper.
Can you iron Perler beads with aluminum foil
Yes, you can use aluminum foil as an alternative to ironing paper. Place the foil over your bead design and use the iron on a low heat setting to melt the beads. Remember to keep the iron moving to avoid scorching the foil.
How do you make a bowl out of Perler beads
To make a bowl out of Perler beads, you will need a heat-resistant bowl or container as a mold. Follow these steps:
1. Preheat your oven to 350°F.
2. Arrange the beads in a single layer inside the bowl, making sure they are tightly packed.
3. Place the bowl with the beads on a parchment paper-lined baking sheet.
4. Bake for about 10-15 minutes until the beads have melted and fused together.
5. Carefully remove the bowl from the oven and let it cool completely before gently separating the bead bowl from the mold.
Can you do Perler beads without a pegboard
Absolutely! If you don’t have a pegboard on hand, you can use a flat, heat-resistant surface like a table covered with a towel or a heat-resistant mat. Arrange the beads directly on this surface to create your design. Just make sure to be extra careful when ironing or baking your beads to prevent them from shifting.
How do you melt large Perler beads
Melt large Perler beads the same way you would melt regular-sized beads. The key is to use a moderate heat setting on your iron or oven, ensuring that the beads melt and fuse together evenly. Keep a close eye on them to avoid over-melting or scorching.
What else can you use to melt Perler beads
Besides using an iron or oven, you can experiment with a heat gun or a blow torch. However, exercise caution when using these methods as they can generate high temperatures and may require additional safety precautions. Always follow the manufacturer’s instructions and remember safety first!
How do you stick Perler beads together without an iron
If you don’t have an iron, you can try using a hot glue gun. Apply a small amount of hot glue to each bead, then carefully press them together. Keep in mind that this method may alter the appearance of your design, and the beads won’t fuse together as they would with traditional Perler bead melting techniques.
Are Perler beads toxic
No, Perler beads are not toxic. They are made from low-density polyethylene, which is a safe and non-toxic plastic. However, it’s important to use them as intended and avoid ingesting them. Keep Perler beads away from young children and always supervise their craft activities.
Who invented Perler beads
Perler beads were invented by a Swedish company called Perler in the 1960s. The company developed a method to melt low-density polyethylene beads together, creating the iconic craft beads we know and love today.
Can you reuse Perler bead ironing paper
While you can reuse Perler bead ironing paper, it is not recommended. Over time, the paper may become stained or warped from the heat, which can affect the quality of your bead designs. To ensure the best results, it’s best to use fresh ironing paper for each project.
Is melting beads in the oven toxic
No, melting Perler beads in the oven is not toxic as long as you follow the recommended instructions. The melting process releases fumes that are generally harmless. However, it is always a good idea to ensure proper ventilation in the room and avoid direct inhalation of the fumes.
What temperature do you bake Perler beads
When baking Perler beads, preheat your oven to 350°F (175°C). This temperature allows the beads to melt and fuse together without causing them to warp or burn. Remember to monitor the beads closely during the baking process to achieve the desired consistency.
Can you hot glue Perler beads
Yes, you can use hot glue to adhere Perler beads together, especially if you want a design to be more permanent. Apply a small amount of hot glue to each bead and stick them together. Just keep in mind that the hot glue may alter the appearance of your design and will not provide the same fused effect as melting.
How much do you melt Perler beads
When melting Perler beads, it’s important to apply enough heat to fuse them together, but not too much to avoid charring or deforming the beads. Follow the recommended heat settings for your iron or oven and check the beads frequently until they have a smooth, even appearance.
What were Perler beads called in the 90s
In the 90s, Perler beads were also known as Hama beads. They were, and still are, beloved by crafters of all ages for their endless creative possibilities.
How do I keep my Perler board from warping
To prevent your Perler board from warping, you can try the following tips:
– Avoid excessive heat when melting the beads. Use a moderate heat setting on your iron or set your oven to the recommended temperature.
– Remove the bead design from the board while the beads are still warm, but not fully cooled. This helps prevent them from sticking to the board and causing warping.
– Place a heavy object on the completed bead design while it cools to help keep it flat and prevent any potential warping.
Remember, crafting with Perler beads should be enjoyable and worry-free. Have fun exploring the endless possibilities while creating unique designs with your favorite colorful beads!