Have you ever wondered how to transform a plain glass surface into a dazzling work of art? Look no further than Mod Podge and vinyl! Whether you want to create personalized glassware, decorate windows, or add a unique touch to picture frames, Mod Podge can be your secret weapon. In this comprehensive guide, we will explore the answers to all your burning questions, from “Can Mod Podge be used on glass?” to “How do you Mod Podge without streaks on glass?” So, let’s dive in and unlock the secrets of using Mod Podge on glass with vinyl.
Using Mod Podge on glass opens up a world of possibilities. You might be wondering if Mod Podge can be used on glass at all. The answer is yes! Mod Podge is a versatile crafting medium that works wonders on glass surfaces. From sealing acrylic paint to bonding vinyl adhesive, Mod Podge can help you achieve the perfect finish. Plus, it dries clear, ensuring that your beautiful creations shine through. So, say goodbye to boring glass and hello to a whole new level of creativity.
How to Rock Your Glass Crafts with Mod Podge and Vinyl
Vinyl crafting has taken the DIY world by storm, and if you’re itching to unleash your creativity on those plain glass surfaces, you’re in luck! In this guide, we’ll show you how to use Mod Podge on glass with vinyl like a pro. Get ready to turn your glassware into customized works of art that will have everyone asking, “Where did you get that?”
Gather Your Supplies
Before diving headfirst into your glass crafting extravaganza, make sure you have all the necessary supplies on hand. Here’s what you’ll need:
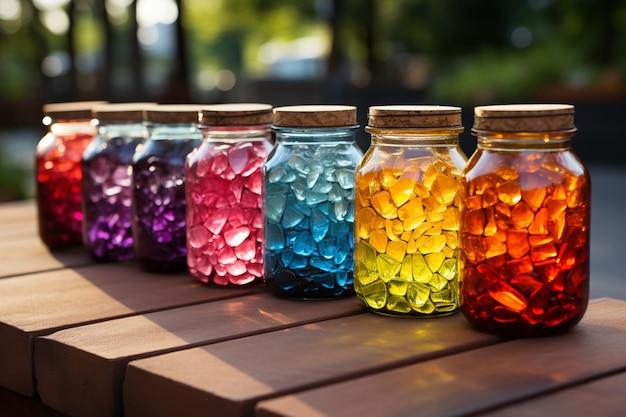
- Glass objects: It can be anything from mason jars, vases, or even picture frames. Let your imagination run wild!
- Vinyl stickers or decals: Choose designs that speak to your personality and style. Whether it’s monograms, quotes, or intricate patterns, there’s a vinyl decal for everyone.
- Mod Podge: This magical adhesive will be your best friend throughout the crafting process. Opt for the glossy version to add that extra sheen to your glass creations.
- Foam brushes: These little wonders are perfect for applying Mod Podge smoothly and evenly onto your glass surface.
- Scissors: A trusty pair of scissors is essential for trimming any excess vinyl and achieving clean lines.
- Painter’s tape: When it comes to creating crisp edges, painter’s tape is your secret weapon. It will help you achieve professional-looking results.
- A well-ventilated workspace: Mod Podge may not be the scent of a field of flowers, so make sure you’re in a well-ventilated area or crack open a window.
Clean and Prep Your Glass Surface
Now that you have all your supplies on hand, it’s time to get down and dirty. Well, maybe not dirty, but definitely clean! Before applying any Mod Podge or vinyl, you’ll want to ensure your glass surface is squeaky clean. Use soap and water to wash off any dust or fingerprints and let it dry completely. This step is crucial for achieving a flawless finish.
Apply the Vinyl Decal
With your glass surface all prepped and ready, it’s time to get crafty! Peel off the backing of your vinyl decal and carefully position it onto the glass. Smooth it out with your fingers to prevent any air bubbles. If you’re into precision, a handy tool like a credit card can help you achieve a super smooth finish. Once you’re satisfied with the placement, give it a good press to make sure it adheres securely.
Seal the Deal with Mod Podge
Now comes the magic part – the Mod Podge! Using a foam brush, apply a thin, even layer of Mod Podge over the entire surface, covering the vinyl decal completely. Be sure to stroke in one direction to avoid any streaks or brush marks. The Mod Podge will dry clear, so don’t worry if it looks a little cloudy at first. Let it dry for about 15-20 minutes before moving on to the next step.
Adding Some Extra Sparkle (Optional)
If you’re feeling fancy and want to take your glass crafting game to the next level, you can add some extra pizzazz by incorporating glitter or metallic accents. Simply sprinkle some glitter or dab on metallic paint over the Mod Podge while it’s still wet. Let your inner sparkle shine!
Finishing Touches and Cure Time
After you’ve added any extra embellishments, let your creation sit undisturbed in a safe spot for about 24 hours to allow the Mod Podge to fully cure. This curing time ensures that your glassware will be hand-washable, durable, and ready to withstand the test of time. Once the 24-hour mark hits, your glass masterpiece is officially ready to show off to the world!
So there you have it – a beginner-friendly guide on how to use Mod Podge on glass with vinyl. Now go forth, my crafty friend, and let those creative juices flow. Transform ordinary glass items into personalized treasures or thoughtful gifts that will leave everyone in awe of your DIY skills. Remember to experiment, have fun, and embrace your inner artist. Happy crafting!
FAQ: How To Use Mod Podge On Glass With Vinyl
Can Mod Podge be used on glass?
Yes, Mod Podge can be used on glass! It’s a versatile adhesive and sealer that works well on a variety of surfaces, including glass. So, whether you want to create personalized wine glasses or spruce up your old mason jars, Mod Podge has got your back!
What can I use adhesive vinyl on?
The beauty of adhesive vinyl is that it can stick to almost anything! From glass and plastic to wood and metal, adhesive vinyl is like a makeover superhero. So, go ahead and get creative with your projects. Just remember to clean the surface well before applying the vinyl to ensure a strong bond.
Can I use Mod Podge to seal acrylic paint on glass?
Absolutely! Mod Podge is an excellent way to seal acrylic paint on glass. Once you’ve finished painting your masterpiece on glass, let it dry completely. Then, apply a layer of Mod Podge over the painted area to seal and protect it. Your artwork will be safe from smudges and scratches!
Does Mod Podge dry clear?
Yes, Mod Podge dries clear! When you use Mod Podge on your glass projects, it dries to a transparent finish. This means you can enjoy the beauty of your glass creation without any cloudy or hazy effects. So, go ahead and let your creativity shine through!
Can I use Mod Podge instead of Polycrylic?
While Mod Podge can be used as a sealer, it’s not the same as Polycrylic. Mod Podge is an adhesive and sealer combo, while Polycrylic is a water-based protective finish. So, if you’re looking for a more durable and long-lasting solution, it’s best to use Polycrylic on your glass projects.
Can you use Mod Podge as glue?
You bet! Mod Podge makes a fantastic glue. With its strong adhesive properties, Mod Podge can bond various materials together, including paper, fabric, and even lightweight objects. So, the next time you’re sticking something together, give Mod Podge a whirl!
What is the best way to apply Mod Podge?
When it comes to applying Mod Podge on glass, it’s best to use a foam brush or a soft bristle brush. Start by applying a thin, even layer of Mod Podge to the surface. Avoid overbrushing, as it may cause streaks or bubbles. Allow the first layer to dry completely before applying additional coats for a smooth and flawless finish.
How do you apply vinyl adhesive?
Applying vinyl adhesive is a breeze! First, clean the surface thoroughly to ensure a strong bond. Next, peel off the backing paper from the adhesive vinyl and carefully place it on your glass project, smoothing out any air bubbles as you go. Finally, use a squeegee or a credit card to firmly press the vinyl onto the surface. Voila! Your vinyl adhesive is securely in place.
Which Mod Podge dries clear on glass?
If you want your Mod Podge to dry crystal clear on glass projects, look for the Mod Podge Clear Acrylic Sealer. This specific formula ensures a transparent finish, allowing your glass artwork to shine through without any cloudy or yellowing effects. Time to let your creativity take center stage!
How long does Mod Podge take to dry before vinyl?
To ensure a strong and smooth application of vinyl on Mod Podge, it’s best to let the Mod Podge dry for at least 24 hours. This allows the adhesive to set and creates a solid foundation for your vinyl. Patience is key when it comes to crafting masterpieces!
How long does Mod Podge take to dry on glass?
The drying time of Mod Podge on glass can vary depending on factors such as humidity and thickness of application. Generally, it takes around 15-20 minutes for Mod Podge to dry to the touch, but it’s best to let it cure for at least 24 hours to ensure a strong and durable finish. So, sit back, relax, and let your Mod Podge work its magic!
Is Mod Podge waterproof?
Unfortunately, Mod Podge is not fully waterproof. While it provides a protective barrier, it’s not designed to withstand prolonged exposure to water. So, if you’re working on a project that will come into contact with water frequently, such as a mug or a glass vase, it’s best to use a waterproof sealant specifically made for glass.
How do you seal a cup after vinyl?
To seal a cup after applying vinyl, you’ll want to use a food-safe sealant such as FDA-compliant epoxy. This type of epoxy creates a strong and waterproof barrier, protecting the vinyl from peeling or damage. Make sure to follow the manufacturer’s instructions for proper application and curing. Now you can sip in style, worry-free!
How can I make my vinyl stick better?
If you’re having trouble getting your vinyl to stick, try these tips and tricks:
- Clean the surface thoroughly to remove any dirt, oils, or residue.
- Warm up the vinyl with a hairdryer or heat gun before applying it; this makes it more pliable and easier to conform to the surface.
- Use a squeegee or credit card to firmly press the vinyl onto the surface, ensuring good adhesion.
- Allow the vinyl adhesive to cure undisturbed for at least 24 hours before handling or exposing it to moisture. Patience pays off!
How do you make Mod Podge smooth on glass?
To achieve a smooth finish with Mod Podge on glass, follow these steps:
- Start with a clean and dry glass surface.
- Apply a thin, even layer of Mod Podge using a foam brush or a soft bristle brush.
- Avoid overbrushing, as it may cause streaks or bubbles.
- Let the first layer dry completely before applying additional coats. Two to three coats should be sufficient for a smooth and glossy finish.
- Allow the final coat to cure for 24 hours, then admire your sleek and professional-looking glass masterpiece!
Which side of adhesive vinyl goes down?
When applying adhesive vinyl, the adhesive side should go down onto the surface. The adhesive side is usually the side with a glossy or slightly textured finish, while the other side is the smooth and colored side. So, remember, sticky side down for a successful vinyl application!
How do you Mod Podge without streaks on glass?
To achieve a streak-free finish when using Mod Podge on glass, keep these tips in mind:
- Use a high-quality foam brush or a soft bristle brush specifically designed for Mod Podge application.
- Apply a thin, even layer of Mod Podge, avoiding overbrushing that can cause streaks or bubbles.
- Work in long, smooth strokes to cover the glass surface evenly.
- If streaks do appear, use a clean, dry brush or a foam pouncer to gently blend them out while the Mod Podge is still wet.
- Allow each layer to dry completely before applying additional coats for a flawless finish. Glass projects never looked so good!
Does heat make stickers stick better?
Yes, heat can help stickers stick better! Applying a gentle heat source, such as a hairdryer or a heat gun, can make the adhesive on stickers more pliable, allowing them to adhere more securely to the surface. Just be careful not to overheat the stickers or the surface, as it may cause damage. A little warmth goes a long way in sticker success!
Will vinyl stick to Mod Podge?
Vinyl can stick to Mod Podge, but it’s important to note that Mod Podge is not specifically designed as an adhesive for vinyl. While it may work for certain projects, it’s generally best to use a vinyl adhesive or transfer tape for optimal results. So, for long-lasting stickiness and smooth application, stick with vinyl adhesives made for vinyl!