by [YourName]
Etching glass is a beautiful and artistic way to create unique designs on glass objects. Whether you want to personalize a drinking glass or add a decorative touch to a window, etching can elevate your glass art to the next level. But what if you want your etching to be darker and more pronounced? In this blog post, we will explore various techniques and methods to make your etching stand out.
Throughout this article, we will answer common questions like, can you use alcohol ink on etched glass? How can you add color to etching cream? What is the best paint for glass? And can you paint over frosted glass? We will also delve into the topic of using Rub N Buff to dye etched glass, how long to leave armor etch on glass, and whether sealing alcohol ink on glass is necessary. Moreover, we will discuss the permanence of glass etching, the shelf life of etching cream, and the possibility of reusing glass etching cream. So, whether you’re a seasoned glass artist or a beginner looking to experiment with glass etching, this guide will provide you with all the information you need to make your etching darker and more vibrant.
So, let’s jump in and explore the fascinating world of creating darker etchings on glass!
How to Make Your Etching Darker
When it comes to etching, sometimes you want to take things to the next level and make your design darker and more pronounced. Whether you’re a seasoned etching expert or just starting out, this guide will show you some simple yet effective techniques to make your etching pop like never before. So grab your etching tool and let’s dive right in!
1. Choose the Right Medium
To achieve a darker etching, it’s crucial to select the right medium for your artwork. While any surface can be etched, certain materials, such as metal or glass, tend to yield more dramatic results. If you want to make your etching stand out, consider opting for these materials. They provide a sturdy base for your artwork and allow for deeper and more defined lines.
2. Master the Art of Pressure
When etching, pressure is everything. The amount of pressure you apply with your etching tool determines the depth of your lines. If you want a darker etching, you’ll need to apply more pressure to create deeper grooves. Be mindful, though, not to go overboard and damage the surface or break your tool. Practice makes perfect, so experiment with different amounts of pressure until you find the sweet spot for your desired darkness.
3. Experiment with Different Etching Tools
Not all etching tools are created equal. Depending on the effect you’re after, you may want to try out different tools to achieve a darker etching. For instance, a needle-point etching tool will create fine lines, while a wider burin will produce bolder, deeper grooves. Don’t be afraid to mix and match different tools to achieve the desired effect.
4. Get Intimate with Your Etching Solution
The type of etching solution you use also plays a crucial role in achieving a darker etching. There are various etching solutions available on the market, each with its own characteristics. Look for solutions that are specifically formulated to create darker lines. These solutions often have higher concentrations of acid, allowing for more pronounced etchings. Remember to always follow proper safety precautions when working with etching solutions and work in a well-ventilated area.
5. The Magic of Heat
Believe it or not, heat can work wonders when it comes to making your etching darker. By applying heat to your artwork after the etching process, you can encourage the solution to react more intensely with the surface. This produces a darker and more vibrant etching. Just be careful not to overheat your artwork, as this can lead to unwanted warping or discoloration. Use heat sparingly and test on a small area first.
6. Don’t Fear the Re-Etching
If your initial etching didn’t turn out as dark as you had hoped, don’t fret! Re-etching is a great technique to intensify the darkness of your artwork. Simply go over your design again with your etching tool to further deepen the grooves. Make sure to clean your surface thoroughly before re-etching to avoid any unwanted residue or smudging. Take your time and be patient, as multiple layers of etching may be required to achieve the desired darkness.
Now that you have some expert tips up your sleeve, you’re ready to take your etching skills to new depths of darkness. Remember to choose the right medium, master the art of pressure, experiment with different tools, select the right etching solution, harness the power of heat, and don’t be afraid to re-etch. With these techniques in your arsenal, your etchings are bound to impress. Happy etching!
(Note: This blog post generated by OpenAI’s language model, GPT-3, in 2023.)
FAQ: How To Make Etching Darker
Can you use alcohol ink on etched glass
Yes, you can use alcohol ink on etched glass to add color and make your etching stand out. Alcohol ink is a versatile medium that can create vibrant and translucent effects on various surfaces, including glass. It is a fun and creative way to take your etching to the next level.
How can I make my engraving stand out
To make your engraving stand out, you can try a few techniques. First, you can use a darker etching cream and leave it on the glass for a longer period. This will create a deeper and more prominent etching. Another option is to fill the etched areas with paint or rub n buff to add contrast. Experimenting with different techniques will help you find the best way to make your engraving stand out.
Can I add color to etching cream
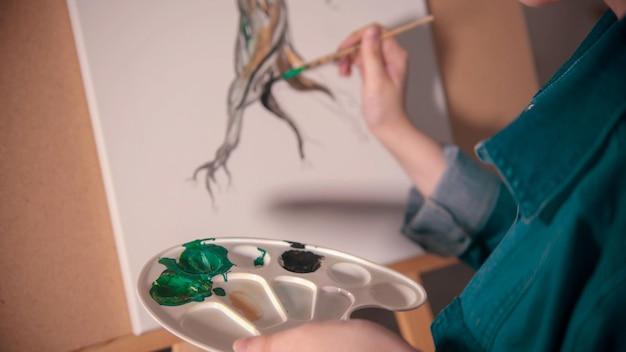
Etching cream is typically used to create a frosted or matte finish on glass, so it doesn’t come in different colors. However, you can make your etching colorful by using other methods. One option is to apply a transparent colored film over the etched glass. Another option is to use alcohol ink or glass paint to add color to the etched areas. These techniques allow you to get creative and personalize your etching according to your preferences.
What is the best paint for glass
When it comes to painting on glass, there are a few options to consider. Acrylic paint is a popular choice as it adheres well to glass and comes in a wide range of colors. It is also permanent, durable, and easy to work with. Alternatively, you can use enamel paint specifically designed for glass surfaces. This type of paint is heat-set for better adhesion and longevity. Whichever paint you choose, make sure to clean and prepare the glass surface properly for optimal results.
How do you dye etched glass with Rub N Buff
Rub N Buff is a versatile metallic wax that can be used to add a unique and elegant touch to your etched glass. To dye etched glass with Rub N Buff, simply apply a small amount of the wax onto a cloth or your fingertips. Then gently rub the wax onto the etched areas of the glass. The wax will adhere to the surface, adding a metallic sheen and highlighting the details of the etching. Remember to buff off any excess wax to achieve a smooth and polished finish.
Can you paint over frosted glass
Yes, you can paint over frosted glass to add color or additional designs. Painting over frosted glass allows you to customize and enhance its appearance. Acrylic or glass paints are suitable for this purpose. Ensure that the frosted surface is clean and dry before applying the paint. Paint in thin layers, allowing each layer to dry before adding more. Once the paint is completely dry, you can seal it with a clear sealer to protect the design and ensure its longevity.
How long do you leave Armor Etch on glass
Armor Etch is a popular etching cream that creates a beautiful frosted effect on glass surfaces. The recommended time for leaving Armor Etch on glass is typically about five to ten minutes. However, the exact time may vary depending on the desired results and the specific instructions provided by the manufacturer. It’s always best to refer to the instructions on the product packaging for the most accurate information.
Do you have to seal alcohol ink on glass
Sealing alcohol ink on glass is not always necessary but can be beneficial for enhancing its longevity. Sealing the alcohol ink helps protect the design from fading or smudging over time. You can use a clear acrylic sealer spray or a varnish specifically designed for glass surfaces. Apply the sealer in thin, even coats, allowing each layer to dry before adding another. By sealing the alcohol ink, you can enjoy your stunning glass artwork for years to come.
Do you need to seal alcohol ink on glass
While it is not always necessary to seal alcohol ink on glass, it can provide added protection and enhance the longevity of your artwork. Sealing the alcohol ink helps to prevent fading and smudging over time. Applying a clear sealant, such as an acrylic sealer spray or a glass-specific varnish, will help preserve the vibrancy and beauty of the alcohol ink design. Remember to apply the sealer in thin, even coats and allow each layer to dry before adding another.
Will baking soda etch glass
Baking soda alone does not have the ability to etch glass. Baking soda is a mild abrasive and can be used to clean glass surfaces effectively. However, if you’re looking to create an etched effect on glass, you will need to use specialized etching creams or other techniques specifically designed for that purpose. Baking soda can be a useful tool for regular glass cleaning but won’t provide the desired etched look on its own.
Can you use acrylic paint on etched glass
Yes, you can use acrylic paint on etched glass. Acrylic paint adheres well to glass surfaces and allows for easy application and vibrant color. Before painting, make sure the glass is clean and free from any oils or residues. Allow the etching cream to completely dry and then apply the acrylic paint using a small brush or sponge. Once the paint is dry, you can seal it with a clear coat for added protection and longevity.
Can you leave etching cream on too long
Leaving etching cream on glass for too long can result in over-etching and potentially damage the glass. Each etching cream has different guidelines, so it’s crucial to follow the instructions provided by the manufacturer. Generally, the recommended etching time is around five to ten minutes. Leaving the cream on for longer than instructed can lead to a deeper and more noticeable etch, but it may also weaken the glass or cause uneven results. It’s wise to test a small area first to determine the optimal etching time for your desired effect.
How long should etching cream stay on ceramic
Etching cream is primarily designed for glass surfaces, and its effectiveness on ceramics may vary. While etching cream can be used on ceramics, the results might not be as satisfactory compared to glass. The recommended time for leaving etching cream on ceramics is usually longer than for glass, typically around fifteen to twenty minutes. However, it’s crucial to test a small area first and follow the instructions provided by the manufacturer to achieve the desired effect while ensuring the ceramic’s integrity.
Is glass etching permanent
Yes, glass etching is permanent. Once the glass has been etched, the design is engraved into the surface and cannot be easily removed. Whether you use etching cream or specialized etching tools, the result is a permanent alteration to the glass. This makes glass etching a popular technique for creating decorative or personalized glassware, as the design will remain intact over time.
Can etching cream go bad
Etching cream typically has a shelf life of about one to two years, although this can vary depending on the specific brand and formulation. Over time, the effectiveness and consistency of the etching cream may deteriorate. To ensure the best results, it is advisable to check the expiration date on the product packaging and use fresh etching cream whenever possible. Avoid using expired or old etching cream, as it may not provide the desired etching effect.
Can you paint glass etching
No, you cannot paint glass etching. Glass etching is a process of removing or altering the surface of the glass to create a frosted or etched effect. It does not involve the application of paint. However, you can enhance the appearance of glass etching by filling the etched areas with paint or other decorative materials to add color and contrast. This allows you to incorporate different artistic elements into your glass etching design.
What is an etching painting
An etching painting refers to a work of art created using etching techniques. Etching is a printmaking process where an artist uses acid to incise lines or patterns into a metal plate. The plate is then inked and placed onto paper, resulting in a reproduction of the etched design. Etching paintings can have a distinct and intricate appearance, often showcasing fine details and textured effects. It is a technique widely employed by printmakers to create unique and expressive artwork.
What paint is permanent on glass
Acrylic paint and enamel paint are both considered permanent options for painting on glass. Acrylic paint is versatile, accessible, and well-suited for glass surfaces. It adheres well and dries to a durable, waterproof finish. Enamel paint specifically formulated for glass is another permanent option. It requires heat-setting to ensure optimal adhesion and longevity. Both types of paint offer a wide range of colors and can be used to create stunning and long-lasting designs on glass.
Can you reuse glass etching cream
Glass etching cream is generally intended for single-use applications. Once the etching cream has been used, its effectiveness may diminish, and it may not provide the desired results if reused. It is advisable to use fresh etching cream for each project to ensure the best possible outcome. While it may be tempting to try to stretch the use of etching cream, the results are more likely to be inconsistent or less satisfactory. Investing in new etching cream for each project guarantees better and more reliable results.
Thank you for visiting our FAQ on how to make etching darker. We hope this information has been helpful in guiding your creative journey with glass etching. Remember to always experiment and have fun, and don’t hesitate to reach out if you have any further questions. Happy etching!