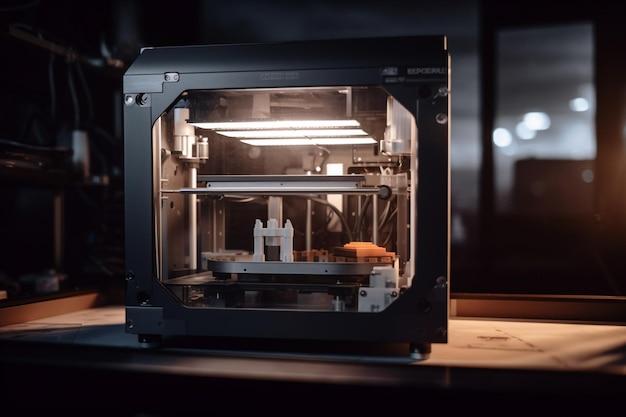
Welcome to our comprehensive guide on how to set the Z offset on the Ender 3 3D printer. Whether you’re a beginner or an experienced enthusiast, understanding and adjusting the Z offset is crucial for achieving precise prints. In this blog post, we will walk you through the step-by-step process of setting the Z offset, troubleshooting common issues, and providing useful tips to enhance your 3D printing experience.
Adjusting the Z offset allows you to fine-tune the distance between the nozzle and the print bed, ensuring optimal first layer adhesion and print quality. We’ll cover various methods, including using the Ender 3’s built-in firmware settings, utilizing software like OctoPrint, and making adjustments in popular slicing programs such as Cura. By the end of this guide, you’ll have a thorough understanding of Z offset and the tools and techniques to optimize it for your specific setup.
So, let’s dive in and learn how to perfect your Z offset on the Ender 3 for outstanding 3D prints in 2023.
Setting the Z Offset on your Ender 3: Fine-Tuning Your 3D Prints
So, you’ve got an Ender 3, huh? Pretty neat. Now, let’s talk about something that can truly level up your 3D printing game – the Z Offset. Don’t worry if you’re not sure what that means; I’m here to guide you through it with some friendly wit and wisdom.
What the Z Offset actually is
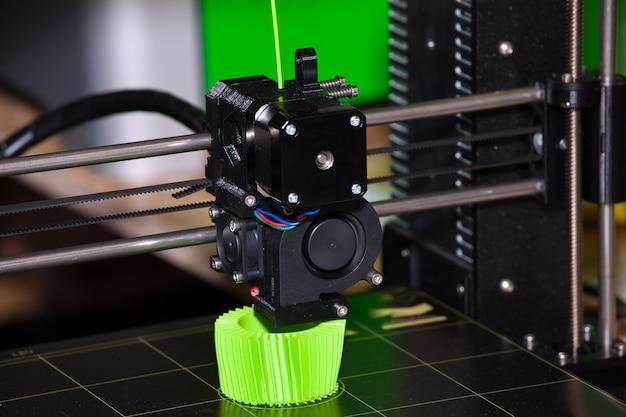
Okay, bear with me, because we’re about to get a bit technical here. The Z Offset on your Ender 3 is the magical number that determines the gap between your printer’s nozzle and the print bed. It basically tells your printer where to start printing in relation to the bed. And that, my friend, is pretty crucial for getting those prints just right.
Why is the Z Offset important
Well, imagine this: you’re all excited to start printing your favorite dinosaur model, but your printer decides to work its magic in thin air instead of on the bed. Bummer, right? That’s where the Z Offset comes in. By setting it correctly, you ensure that your printer knows exactly where to start printing, resulting in those crisp, precise layers you’re after.
Step 1: Gather your gear
Before we dive into the nitty-gritty, let’s make sure we’re all set. Here’s what you’ll need:
1. Your Ender 3 – a trusty companion for all your 3D printing adventures.
2. Some filament – pick your favorite color or go wild with a rainbow assortment.
3. A piece of paper – don’t worry; we’re not doing arts and crafts (well, maybe a little).
4. Patience – setting the perfect Z Offset takes a bit of tinkering, but trust me, it’s worth it.
Step 2: Home sweet home
Time to get your printer in its happy place – the homing position. Use your printer’s menu or the “G28” command if you’re feeling fancy. This ensures that the nozzle is at its starting point, ready to take on the world of 3D printing.
Step 3: The paper method
Now, grab that piece of paper I mentioned earlier. Slide it gently beneath your nozzle, making sure there’s a little resistance when you move it back and forth. We’re looking for that sweet spot where the paper moves, but not too easily. It’s like a first date – comfortable, but not too clingy.
Step 4: Z Offset adjustment
With your paper in position, it’s time to dive into your printer’s settings. Scroll through the menu until you find “Motion”. Oh, don’t worry, we won’t break a sweat – just a few clicks here and there.
Step 5: Blazing a trail
Now that we’re in the Motion menu, look for “Z Offset” – it’s our golden ticket to printing goodness. Adjust the value in teeny-tiny increments – we’re talking 0.05mm at a time. Printers are sensitive creatures, you know?
Step 6: Testing, testing, 1-2-3
With each adjustment, it’s time to put our printer to the test. Print a small calibration model and keep a close eye on the first layer. Is it sticking to the bed like it’s best friends with glue? Or is it floating in the air like a wannabe astronaut?
Step 7: Rinse and repeat
If the first layer isn’t quite hitting the mark, don’t fret! Go back to Step 5 and make those tiny adjustments until you strike the perfect balance. Remember, Rome (and your 3D printer) wasn’t built in a day.
Step 8: Celebrate your success
Congratulations, my friend! You’ve just leveled up your 3D printing game by setting the Z Offset on your Ender 3. Now sit back, relax, and enjoy the magic of watching your printer bring your creations to life, one layer at a time.
Wrapping It Up
Setting the Z Offset on your Ender 3 may feel like delving into the realm of dark magic, but with a little patience and the right know-how, you’ll be well on your way to printing perfection. So go forth, adventurer, and conquer those 3D printing challenges. Your next masterpiece awaits!
FAQ: How to Set Z Offset on Ender 3
In the world of 3D printing, the quest for perfection never ends. One crucial element that can make or break your print quality is the Z offset. If you’re scratching your head and wondering how to set the Z offset on your trusty Ender 3, you’re in luck. We’ve compiled a comprehensive list of frequently asked questions to help you navigate this sometimes puzzling process with ease. So, let’s dive in and demystify the wonders of Z offset adjustment!
How do you raise the Prusa’s Z axis
Ah, the Prusa! While not an Ender 3-specific question, we’re happy to help. To raise the Z axis on your Prusa, locate the Z-axis adjustment screw and give it a gentle clockwise turn. Keep an eye on your printer’s display or use a piece of paper to gauge the distance between the nozzle and the print bed. Repeat the adjustment until you achieve the desired height. Easy peasy!
How do you adjust the Z offset on your Ender 3
Tweaking the Z offset on your Ender 3 is a breeze. First, access your printer’s menu by navigating to the Control section. Find the Bed Leveling option and select it. Look for the Z Offset setting and adjust it to your heart’s content. It may take a bit of trial and error, but hey, that’s what makes 3D printing an adventure!
How do you adjust the Z probe offset
To adjust the Z probe offset, you’ll need to get cozy with your printer’s firmware. Connect your Ender 3 to your computer and dive into your printer’s settings. Locate the Probe Z Offset parameter and make the necessary adjustments. Just remember, use caution and don’t go too crazy, or your prints might start defying gravity!
How do I fine-tune my Z offset
Ahhh, the eternal quest for perfection! To fine-tune your Z offset, you’ll want to use the Live Z adjust feature. Start a test print and keep a close eye on the first few layers. Using your printer’s controls, tweak the Z offset ever so slightly until you achieve that sweet spot of beautiful adhesion without squishing your layers too much. It’s a delicate dance, my friend.
How do I change the G offset to Zcode
Changing your G offset to Zcode is a cinch. Simply open your favorite slicer software, like Cura or PrusaSlicer, and locate the printer settings. Look for the G-code flavor option and switch it to Zcode. This change ensures that your printer’s language is understood loud and clear. Say goodbye to communication breakdowns and hello to seamlessly sliced prints!
What causes Z binding
Z binding, oh the bane of every 3D printer enthusiast’s existence. Several factors can contribute to this annoyance, such as misaligned lead screws, bent Z rods, or even excess friction. Check for any obstructions or irregularities along the Z axis, ensure everything is properly aligned, and make any necessary adjustments. Remember, a smooth Z axis makes for smoother prints and happier you!
How do you lower the Z axis on your Ender 3
If you find yourself needing to lower the Z axis on your Ender 3, it’s a relatively straightforward process. Look for the Z-axis adjustment screw and give it a gentle counterclockwise turn. Keep an eye on your printer’s display or use a piece of paper to gauge the distance between the nozzle and the print bed. Keep adjusting until you reach your desired height. Low and behold, the Z axis is under control!
How do you set the Z offset on OctoPrint
OctoPrint enthusiasts, rejoice! Setting the Z offset is possible directly within OctoPrint’s interface. First, ensure that you have the OctoPrint Connection plugin installed. Once set up, navigate to the “Control” tab and find the “Z Probe Offset” section. Fine-tune the offset to your heart’s desire, and OctoPrint will obediently relay your commands to your Ender 3. It’s like magic, but with a side of technology!
What is Live Z adjust
Ah, the mystical Live Z adjust. This feature allows you to tweak the Z offset on the fly during a print. Accessing Live Z adjust, also known as Babystepping, relies on your printer’s firmware capabilities or dedicated software like OctoPrint. With this power at your fingertips, you can make precise adjustments mid-print to achieve those picture-perfect first layers. It’s time to level up your printing game!
How do I reset the probe Z offset
Oops! If you find yourself in need of resetting your probe Z offset, fear not, it’s a simple fix. Access your printer’s menu, navigate to the Bed Leveling section, and locate the Probe Z Offset setting. Set it to zero or return it to your printer’s default value. Voila! You’re back to square one, ready to conquer the 3D printing world with renewed confidence.
How does Z offset work
Are you ready for a little technical tidbit? The Z offset essentially dictates the starting point of your print. By adjusting this parameter, you’re telling your printer where it should begin its masterful creation. Whether it’s a tad closer to the bed or a hair’s breadth away, this adjustment can mean the difference between a flawless print or a frustrating failure. Remember, the devil is in the details, or in this case, the offset!
How do you offset Z in Cura
Cura enthusiasts, we haven’t forgotten about you! To offset the Z in Cura, you’ll want to dive into your printer settings. Under the “Printer” tab, find the “Manage Printers” section. Locate your Ender 3 printer profile and click “Machine Settings.” Ta-da! You’ve unlocked a world of Z offset possibilities. Tweak the offset value to your heart’s content, save your changes, and let the slicing begin!
Can you adjust the Z offset while the printer is running
Ah, the allure of adjusting the Z offset mid-print! While it may sound intriguing, unfortunately, it’s not possible to adjust the Z offset while your printer is in action. This is one of those situations where you’ll need to pause the print, make the desired adjustments, and then resume the print. Remember, patience is a virtue, especially in the world of 3D printing!
How do I lower my Pinda probe
Lowering your Pinda probe is a delicate operation that requires precision and a steady hand. Locate the locking screw for your Pinda probe and gently loosen it. With caution, lower the probe until it reaches your desired height. Once satisfied, tighten the locking screw to secure it in place. Now your Pinda probe is ready to probe, poke, and prod with the utmost accuracy.
What is Live Z in 3D printing
Live Z, the hero of first layers! In the realm of 3D printing, Live Z refers to the ability to adjust your Z offset during a print. Using firmware features, dedicated software, or plugins, you can make real-time adjustments to perfect your first layer adhesion. It’s like having a personal assistant fine-tuning your prints on the fly. Ah, the magic of technology never ceases to amaze!
How do you fix the Ender 3 Z Band
Ah, the dreaded Ender 3 Z banding issue, a thorn in the side of many printers. To fix this pesky problem, there are a few steps you can take. Ensure that your Z screw is lubricated and properly aligned. Double-check the tightness of your Z-axis bearings. And lastly, make sure your lead screw is straight and free of any bends. A little TLC can go a long way in banishing those unsightly bands!
What are printhead settings in Cura
Ah, the printhead, the guiding light of your 3D printer. In Cura, the printhead settings allow you to specify crucial details about your printer’s extrusion system. You can adjust parameters such as the number of extruders, their dimensions, and other factors that influence your print’s outcome. Mastering these settings will give you the power to unleash your printer’s full potential. Get ready to print like a boss!
How do you change the Z offset on the Ender 3 with Bltouch
For those lucky Ender 3 owners with a Bltouch, changing the Z offset is a breeze. On your printer’s display, navigate to the Bed Leveling menu. Find the option to adjust the Z offset and give it a tap. From there, simply rotate the control knob or press the corresponding buttons to modify the Z offset value. A touch here, a tap there, and your Ender 3 is fine-tuned and ready to bring your creations to life!
That concludes our Z offset extravaganza! Now armed with a wealth of knowledge about how to set the Z offset on your Ender 3, you’re equipped to tackle any printing challenge that comes your way. Remember, perfection may be elusive, but with a little persistence and a touch of humor, your 3D prints will be a sight to behold. Happy printing, my fellow adventurers!