So, you have a beautiful wood table that has seen better days. Maybe it’s got water damage, scratches, or a dull and worn finish. Don’t worry, we’ve got you covered! In this comprehensive guide, we’ll walk you through the process of restoring the finish on your wood table, bringing it back to its former glory.
Whether your table is made of solid wood or has a polyurethane finish, we’ll address common issues such as haze, cloudiness, white spots, and alligatored finishes. We’ll also tackle questions like why sanding between coats of polyurethane is necessary and whether you can recoat polyurethane without sanding. With our step-by-step instructions and handy tips, you’ll be able to give your wood table a fresh and polished look in no time!
So, grab your tools and let’s dive into the world of wood table restoration. Get ready to impress your friends and family with a rejuvenated piece of furniture that shines like new!
How to Bring Your Wood Table Back to Life: A Step-by-Step Guide
Has your beloved wood table lost its luster over the years? Fret not, my friend! In this guide, we’ll walk you through the process of restoring the finish on your wood table, and bring back its former glory. So roll up those sleeves (and maybe put on some old-timey blues music for ambiance), because we’re about to dive into the world of wood restoration.
Get Your Materials Ready, Each Screaming “I’m Here to Save the Day!”
Before we begin this epic journey of table rejuvenation, let’s gather our trusty companions—the materials that will assist us in this noble endeavor. Here’s what you’ll need:
1. Sandpaper: The Gentle Scratcher
Fear not, we’re not building sandcastles here. We just need sandpaper in varying grits—a fine one like 320, a medium one like 150, and a slightly rough one like 80. Consider it a spa day for your table, with these different grits acting as masseuses to buff out imperfections.
2. Finishing Stripper: The Secret Sauce
Just like a good barbecue needs a secret sauce, your wood table restoration project needs a finishing stripper. Look for one that’s gentle on wood and environmentally friendly, so you can save the planet while bringing life back to your table.
3. Stain: The Magic Color Blender
Think of stain as the hair dye for your table (without the questionable fashion choices). When choosing a stain, go for a color that matches your personal style and complements the wood’s natural beauty. It’s like choosing the perfect shade to bring out the twinkle in your table’s eyes.
4. Varnish: The Protective Shield
Varnish is like the superhero cape that protects your table from stains, spills, and scratches. Opt for a clear, water-based varnish to preserve the wood’s natural aesthetics while providing a shield against the perils of everyday usage. Think of it as your table’s personal bodyguard.
Let the Restoration Show Begin!
Step 1: Prepare the Operation Theater (a.k.a. Your Workspace)
First things first, prepare your workspace for this grand restoration performance. Clear the area, cover the floor with old newspapers or a drop cloth, and make sure there’s ample ventilation. We don’t want any unwanted “artistic” contributions from dust or fumes.
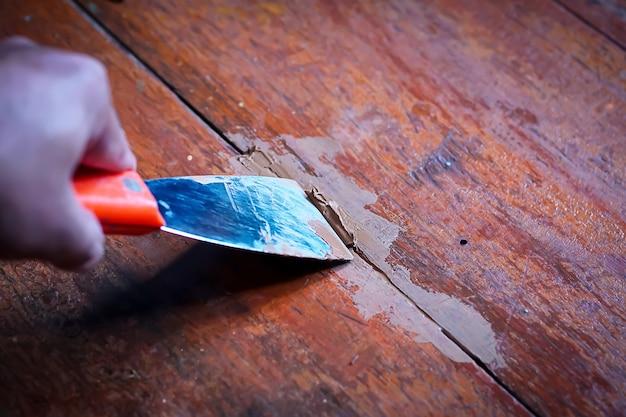
Step 2: Strip Away the Old Finish (Cue the Dramatic Music)
Apply the finishing stripper onto a clean cloth and gently rub it onto the table’s surface. Think of it as giving your table a well-deserved exfoliation treatment. Let the stripper work its magic for the recommended duration, then scrape off the old finish with a plastic scraper. Remember to go with the grain—your table deserves the utmost respect.
Step 3: Smooth Things Over (Enter the Sandpaper Brigade)
Now it’s time to bring out the sandpaper troops! Start with the rough grit, gradually moving to finer grits, and lovingly sand the entire table surface in the direction of the wood grain. This will ensure a smooth, harmonious finish that will make your table proud.
Step 4: Wipe the Tears Away (Don’t Worry, They’re Happy Tears)
Grab a clean, damp cloth and wipe away the sandpaper dust and any residual stripper. Give your table a gentle, encouraging pat to let it know that the worst is behind us.
Step 5: Stain Like Picasso (Well, Maybe Not Exactly Like Picasso)
Now comes the fun part—staining! Stir the stain well and apply it onto the table’s surface using a clean cloth or brush, following the direction of the grain. Be generous, but not excessive—just like Grandma’s secret recipe, the key is in finding the perfect balance.
Step 6: The Ancient Art of Drying (Patience, Young Grasshopper)
Allow the stain to dry for the recommended amount of time. This is the moment when you grab a cup of your favorite beverage, sit back, and let the anticipation build. Patience is a virtue, and your table will thank you for it.
Step 7: The Finishing Touch (Cue the Heroic Music)
Now it’s time to add the protective shield—varnish! Grab a clean brush and coat your table’s surface with the clear varnish, once again following the direction of the wood grain. Let it dry, then lightly sand with a fine-grit sandpaper to smoothen out any imperfections. Apply a second coat and revel in the transformation.
Your Table’s Transformation: A Tale of Love and Self-Discovery
Congratulations, my friend! You’ve successfully restored the finish on your wood table, breathing new life into a forgotten piece of furniture. Now, sit back, admire your handiwork, and rejoice in the fact that you’ve saved both money and memories. And remember, should your table ever lose its shine again, you now possess the knowledge and skills to bring it back to life. Happy restoring, and may your wood tables forever sparkle in the annals of furniture history!
FAQ: How To Restore Finish On Wood Table
How do you remove haze from polyurethane
Haze on polyurethane can be unsightly, but fear not, there are ways to fix it. One simple trick is to mix equal parts vinegar and water, then gently wipe the surface with a soft cloth. The acidity of vinegar helps dissolve the haze and restore the shine. Just be sure to dry the area thoroughly afterward.
Why do I have to sand between coats of polyurethane
Sanding between coats of polyurethane may seem like an unnecessary chore, but it’s a crucial step in achieving a smooth, flawless finish. By sanding lightly, you not only remove any imperfections but also provide a better surface for the next coat to adhere to. Think of it as giving your wood table a little spa treatment to ensure it looks its best!
How do you remove cloudiness from a wood table
Cloudiness on a wood table can be a real buzzkill, but don’t fret! One quick fix is to grab a hairdryer and set it to the lowest heat setting. Gently warm the affected area, using a soft cloth to rub away the cloudiness as it disappears. Pro tip: If using a hairdryer doesn’t work, try using a cloth dampened with a mixture of equal parts mineral spirits and lemon juice. Voila, cloudiness be gone!
How do you fix a milky finish on wood
A milky finish on wood can be frustrating, but here’s a neat trick to fix it. Grab yourself a hairdryer and set it to the lowest heat setting. Slowly heat the affected area, moving the hairdryer in circular motions. As the heat evaporates the moisture trapped beneath the surface, the milky appearance should disappear like magic. Remember to take breaks and let the wood cool down intermittently to avoid any damage.
How do you repair a water damaged wooden tabletop
Oops, water damage on a wooden tabletop happens to the best of us! To repair it, start by lightly sanding the damaged area to remove any raised grain. Next, apply a wood bleach to lighten any dark spots caused by the water. Once dry, fill any cracks or gouges with wood filler, sand again for a smooth surface, and finally, apply a matching finish to restore your tabletop’s glory.
How do you fix worn finish on furniture
If your furniture’s finish is looking worn and tired, fear not, for it can be revived! Start by cleaning the surface with a gentle wood cleaner to remove any dirt or grime. Then, lightly sand the worn areas to smooth out any imperfections. Once sanded, apply a fresh coat of the same finish used originally, such as polyurethane or varnish, to give your furniture that delightful rejuvenation it deserves.
How do I get white marks off my wood table with iron
Oh, those pesky white marks caused by a hot iron! But fret not, there’s a nifty trick to banish them. Grab a clean, non-abrasive cloth and lay it over the white marks. Set your iron to the lowest heat setting, then iron over the cloth in circular motions for a few seconds. Lift the cloth and check your progress. Repeat if necessary until those white marks are forever vanquished!
How do you fix an alligatored finish
An alligatored finish can make your wood table resemble the rough skin of an alligator, but fear not! To fix this, you’ll need some sandpaper and a lot of patience. Gently sand the alligatored surface until it becomes smooth. Clean away any dust, then apply a new layer of finish. Be sure to follow the manufacturer’s instructions and apply multiple thin coats for a beautiful, smooth finish that’s all yours!
How do you fix a dull finish
A dull finish on a wood table can be a real downer, but don’t fret! There’s a simple solution. Start by cleaning the surface with a mixture of mild dish soap and warm water. Rinse well and pat dry. Next, apply a quality furniture polish or wax in small, circular motions. Buff the surface with a soft cloth until it regains its lustrous shine. Your table will be looking radiant in no time!
Can you recoat polyurethane without sanding
Ah, the allure of recoating without the hassle of sanding! The good news is, it’s possible, but with some important considerations. First, ensure the existing polyurethane is clean and free from any wax or grease. Then, lightly roughen the surface with fine-grit sandpaper or a Scotch-Brite pad. Finally, remove any dust and apply a fresh coat of polyurethane. Remember, proper adhesion is essential for a successful recoat!
How do you remove white spots from wood tables
White spots on wood tables can be an eyesore, but fear not, there’s a simple remedy. Mix equal parts baking soda and non-gel toothpaste, creating a thick paste. Gently rub the paste onto the white spots using a soft cloth, then wipe it clean. The slight abrasiveness of the paste helps lift those unsightly white spots, revealing the beauty of your wood table once more.
Can you polyurethane over old polyurethane
Yes, you can polyurethane over old polyurethane, and it can save you time and effort! Ensure the old polyurethane is clean and free from any wax or grease. Lightly sand the surface using fine-grit sandpaper or a Scotch-Brite pad to create a slight texture for better adhesion. Remove any dust, then apply a new coat of polyurethane. Your wood table will be in for a sweet, glossy treat!
How do you remove white spots from a tabletop
White spots on a tabletop can be a thorn in your aesthetic side, but fear not, for I have a solution! Grab a clean, lint-free cloth and dampen it with a mixture of equal parts vinegar and olive oil. Gently rub the affected area using small circles, ensuring the entire spot is covered. Let it sit for a few minutes, then wipe clean. Say goodbye to those white spots and hello to a stunning tabletop once again!
How do you remove white haze from wood
White haze on wood can be a real mood killer, but here’s a neat trick to make it disappear. Mix equal parts vinegar and water in a spray bottle, then spritz the affected area. Let the solution sit for a few minutes, then wipe it clean with a soft cloth. The acidic properties of vinegar work like a charm to banish that pesky white haze, unveiling the natural beauty of your wood.
How do you polish old polyurethane
If your old polyurethane needs a little TLC, fear not! Polishing it is simpler than you think. Start by cleaning the surface with a mild wood cleaner to remove any dirt or grime. Then, using a soft cloth, apply a thin layer of furniture polish or wax, working in small, circular motions. Buff the surface until it gleams with renewed radiance. Your old polyurethane will shine like a superstar!
Why does my wood table turn white
Oh no, a white wood table! Why, you ask? Well, it’s likely due to moisture trapped beneath the surface. When exposed to heat or humidity, the moisture reacts, causing that frustrating white discoloration. Just imagine your table playing peek-a-boo with you! The good news is, with the helpful tips in this FAQ, you can bid farewell to that mysterious white phenomenon!
How do you fix cloudy wood
Cloudy wood can dampen the beauty of your table, but fret not! You can restore its luster with ease. First, clean the surface with a mild wood cleaner to remove any dirt or debris. If that doesn’t suffice, give the old toothpaste trick a whirl. Apply a small amount of non-gel toothpaste to the cloudy area, gently rubbing with a soft cloth. Wipe clean and admire your cloud-free wood in all its glory!
How do you restore a polyurethane finish
Ah, the joy of restoring a polyurethane finish! Start by cleaning the surface with a mixture of warm water and mild dish soap to remove any dirt or grime. For the adventurous souls, a light sanding can help provide better adhesion for the new coat, but only if necessary. Afterward, apply a fresh coat of polyurethane using smooth, even strokes and let it dry. Once dry, sand lightly with fine-grit sandpaper, wipe clean, and apply a second coat. Your wood table will look as good as new, ready to impress with its glossy radiance!
Now that you have all the knowledge to restore the finish on your wood table, go forth and conquer those imperfections! Embrace the magic of sanding, the power of vinegar, and the wonders of toothpaste. Soon enough, your wood table will shine with breathtaking brilliance, leaving your friends and family in awe of your restoration skills. Happy fixing, and may your wood tables always dazzle!