If your ceiling fan’s light socket is not functioning properly or has stopped working altogether, it’s time to roll up your sleeves and replace it. Whether you’re dealing with a faulty socket, an outdated light fixture, or simply want to upgrade to a more energy-efficient option, this blog post will guide you through the process step by step.
In this comprehensive guide, you’ll learn how to determine if your light socket needs replacement, identify the type of light socket you have, and understand what causes a light socket to stop working. We’ll also cover essential tips for isolating a plug socket and changing a light fixture socket. Additionally, we’ll delve into common questions such as whether you need a qualified electrician for the job, different types of light sockets, and even how to replace the light portion of a ceiling fan.
By the end of this blog post, you’ll be equipped with the knowledge and confidence to replace your ceiling fan’s light socket, giving your space a refreshed and well-lit ambiance. So let’s get started on this DIY home improvement project and make your ceiling fan shine bright again!
Introduction
If your ceiling fan’s light socket is not functioning properly or has stopped working altogether, it’s time to roll up your sleeves and replace it. Whether you’re dealing with a faulty socket, an outdated light fixture, or simply want to upgrade to a more energy-efficient option, this blog post will guide you through the process step by step.
In this comprehensive guide, you’ll learn how to determine if your light socket needs replacement, identify the type of light socket you have, and understand what causes a light socket to stop working. We’ll also cover essential tips for isolating a plug socket and changing a light fixture socket. Additionally, we’ll delve into common questions such as whether you need a qualified electrician for the job, different types of light sockets, and even how to replace the light portion of a ceiling fan.
By the end of this blog post, you’ll be equipped with the knowledge and confidence to replace your ceiling fan’s light socket, giving your space a refreshed and well-lit ambiance. So let’s get started on this DIY home improvement project and make your ceiling fan shine bright again!

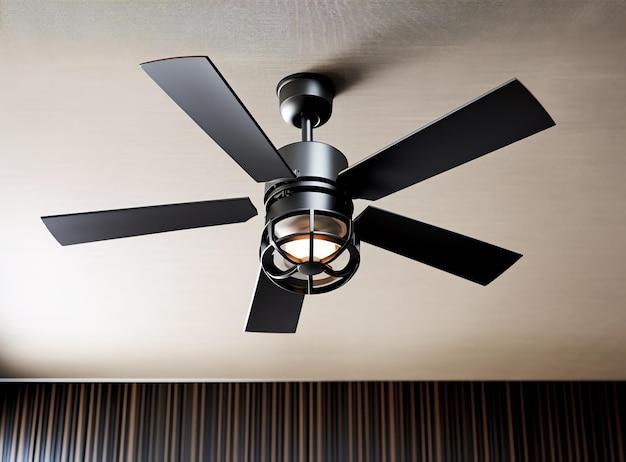
How to Easily Replace Your Ceiling Fan Light Socket
So, you’re feeling pretty proud of yourself for choosing to replace your ceiling fan light socket all on your own. Well, my friend, I applaud your decision! Not only will you save some cash, but you’ll also gain some DIY bragging rights. Now, let’s dive into the nitty-gritty and get that socket fixed like a pro!
Gather Your Tools and Channel Your Inner Handyman
Before you embark on this electrifying journey, you’ll need a few tools by your side. Don’t worry; this won’t require a whole workshop. Just grab yourself a pair of gloves (safety first, folks), a screwdriver (usually a Phillips one does the trick), and a new light socket to replace the old one.
Let’s Get the Party Started: Disconnect the Power
We don’t want you receiving any unexpected surprises during this project, especially of the electric kind. So, our first step is to ensure the power is off. Head over to your circuit breaker and find the switch that controls electricity to your ceiling fan. Flip that switch off and double-check that the power is indeed cut off by testing the light switch. No sparks flying? Great! Let’s move on.
Time to Unleash Your Ceiling Fan’s Inner Secret
Prepare to feel like a detective; it’s time to uncover the secret compartment of your ceiling fan. Most fan models have a little access panel to make your life easier. Locate this panel, grab your trusty screwdriver, and start by unscrewing it. Voila! The secrets of your fan are now exposed!
The Socket: Out with the Old, In with the New
Now that you’ve unveiled your fan’s hidden treasures, it’s time to wave goodbye to the old light socket and welcome its replacement. Carefully disconnect the wires from the old socket. Make a mental note of where each wire goes to prevent any mix-ups. Once the wires are free, unscrew the socket and remove it from the fan. Take a moment to bid the old socket farewell; it has served you well (well, until it didn’t).
A Slight Detour: Inspecting Those Wires
Before we proceed with installing the new socket, it’s essential to give those wires a quick once-over. Look for any signs of wear or damage like frayed or loose wires. If you spot any issues, you might need to replace the wires too. But if they’re in good shape, pat yourself on the back because we can keep moving!
Onto the Main Event: Meet Your New Socket
When you’re picking a new socket, make sure it’s the same type and size as the old one. This will ensure a seamless replacement process. If you’re not sure, take the old socket with you to the store or consult the fan’s manual. Now, let’s connect those wires! Attach each wire to the corresponding terminal on the new socket and tighten them up. Give the wires a gentle tug to make sure they’re secure. No one wants a socket that hangs loose!
Mission Almost Accomplished: Secure the Socket and Cover Your Tracks
Now that your new socket is nestled in its proper place, let’s secure it. Screw the socket back into position, making sure it’s snug but not overly tight. Remember that we’re going for Goldilocks-approved — not too loose, not too tight. Once the socket is secure, put the access panel back on, and screw it in tightly. No one needs a fan with secrets spilling out, after all!
Let There Be Light: Restore Power and Revel in Your Accomplishment
At long last, it’s time to bring back those luminescent vibes to your ceiling fan. Head back to your circuit breaker and flip the switch that controls the fan’s power back on. Then, with excitement and a smile, take a deep breath and flip the light switch. Behold! The room brightens, and you bask in the fantastic glory of your newly fixed ceiling fan light socket. You did it!
Now that you’ve successfully replaced your ceiling fan light socket, you can enjoy a well-illuminated room without any flickering mystique. Remember, my friend, DIY projects like these are not only empowering but also enlightening (pun intended). So, until the next home improvement adventure, keep those tools handy and let your inner handyman shine!
FAQ: How To Replace Ceiling Fan Light Socket
How do you know if a light socket is bad
If your light bulb keeps flickering, or if it doesn’t turn on at all, chances are that your light socket is the culprit. Another sign of a bad light socket is if you notice burn marks or a charred smell coming from the socket. To be sure, it’s always a good idea to use a voltage tester to check for any electrical current running through the socket.
How do I know what light bulb socket I have
Determining the type of light bulb socket you have is pretty straightforward. Take a close look at the base of your light bulb and compare it to the different socket types available, such as the standard Edison screw or the pin-type sockets used in fluorescent bulbs. You can also refer to the manufacturer’s specifications or consult an electrician if you’re uncertain.
How do I know what type of light socket I have
To identify the type of light socket you have, start by examining the shape and size of the socket base. For example, the most common types are the Edison screw-based sockets, which come in either medium (E26) or candelabra (E12) sizes. Other types include bayonet mount and twist-lock sockets. If needed, you can refer to a handy online socket compatibility chart for more details.
What causes a light socket to stop working
There can be several reasons why a light socket stops working. Over time, the socket contacts may become loose or corroded, preventing proper electrical connection. Excessive heat, power surges, or using bulbs with the wrong wattage can also lead to socket failure. Additionally, physical damage or faulty wiring can cause the socket to malfunction.
Can you change plug sockets yourself
While changing a plug socket might seem like a simple task, it’s important to prioritize safety. If you have the necessary electrical knowledge and skills, you can change plug sockets yourself. However, if you have any doubts or lack experience with electrical work, it’s best to consult a qualified electrician who can ensure the job is done correctly and safely.
What are the different types of light sockets
Light sockets come in various types, each designed for specific bulb bases. The most common types include Edison screw (E26 and E12), bayonet mount, bi-pin, and twist-lock sockets. Each type offers its own advantages and is compatible with different types of light fixtures and bulbs.
How do you isolate a plug socket
To isolate a plug socket, first, turn off the power supply at the circuit breaker or fuse box. Then, use a voltage tester to double-check that the power is truly off. Once you’ve confirmed it’s safe, you can proceed to remove the socket cover plate and disconnect the wiring connections. Take caution not to touch any exposed wires to avoid electric shock.
How do I change a light fixture socket
To change a light fixture socket, start by turning off the power and isolating the socket as described earlier. Next, remove the old socket by unscrewing it counterclockwise or releasing any clips holding it in place. Carefully disconnect the wires from the socket and attach them to the corresponding terminals on the new socket. Finally, secure the new socket in place and test it before restoring power.
Can you attach a light to a ceiling fan
Yes, it is possible to attach a light to a ceiling fan, provided the fan has a built-in light fixture or an available attachment point for one. Many ceiling fans come with pre-installed light kits or have optional light kits that you can purchase separately. Just make sure to follow the manufacturer’s instructions for proper installation and compatibility.
Can you change a light fitting yourself
Changing a light fitting can be done yourself if you have the necessary electrical skills and knowledge. However, keep in mind that electrical work can be dangerous if not done correctly. If you’re unsure or uncomfortable with electrical tasks, it’s highly recommended to hire a qualified electrician who can handle the installation safely and efficiently.
How do you change a light socket from an outlet
To change a light socket from an outlet, first, turn off the power supply at the circuit breaker. Then, remove the faceplate of the outlet to access the wiring. Locate the wires connected to the socket and carefully remove them from the terminals. Next, connect the wires to the corresponding terminals of the new light socket and secure it in place. Finally, replace the faceplate and restore power to the outlet.
Do you need a qualified electrician to change a socket
In most cases, changing a socket is a task that can be done by a skilled homeowner. However, if you have any doubts or concerns about electrical work, it is best to hire a qualified electrician. They have the expertise to ensure that the socket is installed correctly, minimizing the risk of electrical hazards or damage to your electrical system.
How do you change a light bulb socket
Changing a light bulb socket is a relatively simple process. Start by turning off the power to the socket and removing the bulb. Next, remove the socket cover or housing and disconnect the wires from the old socket. Attach the wires to the terminals of the new socket and secure it in place. Finally, reassemble the socket cover or housing, insert a new bulb, and restore power to the socket.
How do you fix a light socket that doesn’t work
If you encounter a light socket that doesn’t work, there are a few troubleshooting steps you can take. Start by checking the bulb to ensure it’s not burned out or improperly inserted. If the bulb is fine, use a voltage tester to check for any electrical current at the socket. If there is no current, the issue may lie with the socket itself, and you may need to replace it following the steps mentioned earlier.
Do I need an electrician to change a light fixture
In most cases, changing a light fixture is a task that can be done by a competent DIYer. However, if the installation involves complex wiring or you’re uncertain about electrical work, it’s best to hire a qualified electrician. They have the knowledge and skills to ensure the fixture is installed safely and according to local electrical codes, giving you peace of mind.
Can you replace the light portion of a ceiling fan
Yes, in the majority of cases, you can replace the light portion of a ceiling fan. Depending on the fan model, you may need to purchase a compatible light kit or replacement parts directly from the manufacturer. Make sure to follow the instructions provided with the light kit or consult the manufacturer’s website for guidance on properly replacing the light portion of your specific ceiling fan model.
What is the thing that holds a light bulb called
The item that holds a light bulb is called a socket. The socket is the part of a light fixture into which you screw or insert the light bulb. It provides a secure connection while allowing electricity to flow to the bulb, enabling it to illuminate your space.
How do I replace an old socket
To replace an old socket, begin by turning off the power supply to the socket at the circuit breaker. Remove the faceplate or cover of the socket to access the wiring. Mark the position of each wire connected to the old socket and disconnect them. Connect the corresponding wires to the terminals of the new socket and secure it in place. Finally, replace the faceplate or cover and restore power, ensuring the socket is functioning properly.
By familiarizing yourself with the basics of light sockets and their replacement process, you can easily address any issues and ensure the proper functioning of your ceiling fan’s light fixture. Whether you tackle the task yourself or choose to hire a professional, having a good understanding of the steps involved empowers you to make informed decisions and maintain a well-lit and comfortable environment in your home.