Are you tired of struggling to remove your bathroom light fixture cover? Whether it’s an old junction box, ceiling panels, or a stubborn glass shade, we’ve got you covered. In this comprehensive guide, we’ll walk you through the step-by-step process of removing different types of bathroom light fixture covers hassle-free.
You’ll discover the tricks of removing fluorescent light covers without clips, taking down an overhead fluorescent light fixture, and even removing a metal light box from the ceiling. We’ll also explore how to deal with plastic ceiling light covers, round bathroom fan covers, and square flush mount ceiling light covers.
With our expert tips and techniques, you won’t have to worry about damaging your fixtures or spending a fortune on professional help. So, let’s dive in and make your bathroom maintenance a breeze in 2023!
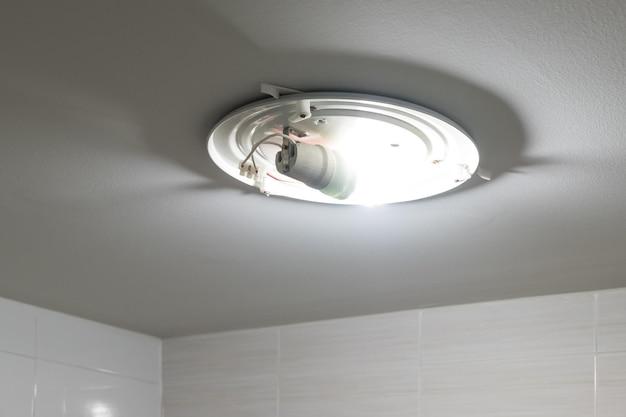
How to Remove a Stubborn Bathroom Light Fixture Cover
So, you’ve decided it’s finally time to give your bathroom a facelift, and that old, tired light fixture cover has got to go. But as you stand there, armed with your determination and a screwdriver, you quickly realize that removing that stubborn bathroom light fixture cover is not going to be as easy as you thought. Well, fear not, my friend! I’m here to guide you through this task with the finesse of a ninja and the humor of a stand-up comedian. Let’s dive in!
Gather your Tools and Turn Off the Power
Before embarking on this light fixture removal adventure, it’s crucial to gather the right tools. You’ll need a screwdriver, a ladder (if your fixture is high up), a voltage tester (safety is key!), and an extra sprinkling of patience. Once you’ve armed yourself, head over to your electrical panel and turn off the power to the bathroom. Safety first, folks! Nobody wants to get zapped while trying to shine a little light on their life.
Locate and Remove the Screws
Now that you’ve eliminated the risk of shocking surprises, it’s time to get down to business. Carefully observe your light fixture cover and locate the screws holding it in place. These sneaky little screws are often camouflaged and can be found tucked away at the sides or top of the cover. Once you’ve found them, whiz your screwdriver into action and unscrew those buggers counterclockwise.
Apply Some Elbow Grease and Gentle Persuasion
Sometimes, even after removing the screws, the light fixture cover refuses to be cooperative. It’s like dealing with that clingy ex who just won’t take the hint. Well, fear not, my determined DIYer! Give the cover a gentle yet firm tug downward while wiggling it from side to side. If it still won’t budge, it might be stuck due to years of grime or adhesive. You can try carefully prying it loose with a putty knife or even a credit card (just don’t max it out in the process!).
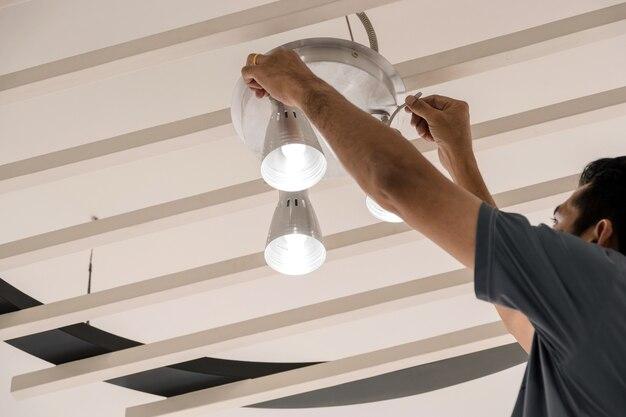
Say Hello to the Wire Connections
Congratulations, you’ve successfully liberated the elusive light fixture cover! But hold your horses, we’re not done just yet. Peer inside and take a gander at the wire connections. Notice how they resemble a high-stakes game of Twister? Before you proceed, snap a picture of the wires or make a note of their placement. This will save you from the frustration of playing electrical sudoku later on.
Disconnect and Remove the Light Bulbs
Now, to reach the ultimate goal of total light fixture liberation, it’s time to unscrew and remove the light bulbs. This step ensures you won’t accidentally break those delicate bulbs during the remainder of the removal process. Plus, who doesn’t love a good light bulb juggling act? Just kidding – safety first, remember?
Disconnect the Wire Connections Like a Pro
This is where things might get a tad tricky, so pay close attention. Using a screwdriver or pliers, disconnect the wire connections by loosening the wire nuts in a counterclockwise direction. Once the wire nuts are no longer gripping the wires like a possessive octopus, carefully separate the wires. Ta-da! You’ve successfully severed the connection, but don’t worry, it won’t end up on a true-crime podcast.
Remove the Mounting Bracket and Unscrew the Base
Almost there, my friend! Locate the mounting bracket, which secures the light fixture base to the wall or ceiling. Unscrew the screws holding the bracket in place by, you guessed it, turning them counterclockwise. Once you’ve freed the mounting bracket, unscrew the base of the light fixture like you would unscrew the cap of a pickle jar (if only light fixtures came with a satisfying pop sound).
Celebrate and Revel in Your Victorious Remodeling Skills
Huzzah! You have emerged triumphant from the battle of the bathroom light fixture cover. Take a moment to revel in your DIY victory, pat yourself on the back, and maybe even do a little happy dance. Your bathroom is one step closer to its glamorous transformation, thanks to your newfound lighting fixture removal expertise.
And there you have it, a comprehensive guide on how to remove a stubborn bathroom light fixture cover. Remember, safety is paramount, patience is your friend, and a touch of humor goes a long way in DIY adventures. Now go forth, my fellow DIYer, and light up your bathroom with confidence!
FAQ: How To Remove Bathroom Light Fixture Cover
Welcome to our comprehensive FAQ guide on removing bathroom light fixture covers. Whether you’re looking to replace a broken cover or just want to update your bathroom’s lighting, we’ve got you covered. In this FAQ-style guide, we’ll answer all your burning questions and provide step-by-step instructions for removing different types of bathroom light fixture covers. So, let’s get started!
How do you remove an old junction box
Removing an old junction box can be a bit tricky, but with the right tools and techniques, it can be done smoothly. Here’s how you can do it:
-
Turn off the power: Before starting any electrical work, it’s crucial to switch off the power to the junction box from your electrical panel.
-
Remove the cover plate: Unscrew the screws holding the cover plate of the junction box and carefully set it aside.
-
Detach the wires: Disconnect the wires connected to the junction box by unscrewing the wire nuts. Remember to label or take a picture to ensure proper reconnection later.
-
Take out the old box: Loosen the screws holding the junction box to the wall or ceiling, depending on its placement. Gently pull the box out, taking care not to damage any wires.
Can you remove ceiling panels
Absolutely! If you have ceiling panels obstructing your access to the light fixture cover, you can remove them to get the job done. Here’s how:
-
Locate the ceiling panel: Determine where the ceiling panel is located above the light fixture cover.
-
Measure and mark: Measure the size of the panel and mark it on the ceiling.
-
Cut an opening: Using a utility knife or a drywall saw, carefully cut along the marked lines to create an opening.
-
Remove the panel: Gently pull down the cut-out section of the ceiling panel and set it aside.
Now, you have easy access to the light fixture cover for removal.
How do you remove a bathroom ceiling fan cover
Are you fed up with the outdated bathroom ceiling fan cover and want to replace it? Here’s how you can do it:
-
Switch off the fan: Turn off the bathroom fan from the wall switch or breaker panel to ensure safety.
-
Locate the screws or clips: Inspect the edges of the ceiling fan cover to find any screws or clips holding it in place.
-
Remove the screws or unclip: Using a screwdriver or your fingers, carefully remove the screws or unclip the cover by pressing on the clips.
-
Gently pull down the cover: Once the screws or clips are removed, gently pull down the cover from the ceiling fan housing.
How do you remove fluorescent light covers without clips
If your fluorescent light cover does not have any visible clips, don’t worry! You can still remove it easily by following these steps:
-
Turn off the power: For safety purposes, switch off the power to the fluorescent light fixture from your electrical panel.
-
Locate the retaining tabs: Inspect the sides of the light cover to find the small retaining tabs.
-
Press the tabs inward: Using your thumbs or a flathead screwdriver, press the retaining tabs inward towards the center of the cover.
-
Gently lower the cover: While holding the tabs inward, lower the fluorescent light cover down slowly.
The cover should release from the fixture once all the retaining tabs are disengaged.
How do you remove an overhead fluorescent light fixture
To remove an overhead fluorescent light fixture, follow these steps carefully:
-
Safety first: As always, switch off the power to the fixture from your electrical panel.
-
Remove the bulbs: Take off the fluorescent bulbs from the fixture by twisting and pulling them out.
-
Unscrew the mounting screws: Locate the screws holding the fixture to the ceiling and unscrew them using a screwdriver.
-
Lower the fixture: Once the screws are removed, gently lower the fixture down while supporting its weight.
-
Detach the wires: Disconnect the wires by unscrewing the wire nuts and separate the fixture from the electrical wiring.
With these steps, you’ll be able to remove the overhead fluorescent light fixture safely.
How much does it cost to remove drop ceiling
The cost to remove a drop ceiling can vary depending on various factors such as the size of the area, labor costs, and disposal fees. On average, you can expect to pay around $2 to $5 per square foot for drop ceiling removal. It’s recommended to get estimates from local contractors to determine the exact cost for your specific project.
How do you remove knockouts from plastic electrical boxes
If you need to remove knockouts from plastic electrical boxes, here’s a simple method:
-
Identify the knockouts: Locate the knockout tabs on the plastic electrical box.
-
Score the knockout: Using a utility knife or a screwdriver, score the knockout along the perforated lines.
-
Break the knockout: Gently tap the scored knockout with a hammer until it breaks away from the box.
-
Smooth the edges: After removing the knockout, use a file or sandpaper to smooth any rough edges.
Following these steps will help you remove knockouts from plastic electrical boxes easily.
How do you remove a glass shade from a light fixture
If you want to remove a glass shade from a light fixture, here’s how you can do it:
-
Turn off the power: As always, switch off the power to the light fixture from your electrical panel.
-
Check for screws: Inspect the rim of the light fixture to see if there are any screws holding the glass shade in place.
-
Unscrew the screws: If there are screws, use a screwdriver to loosen and unscrew them.
-
Hold the shade: Once the screws are removed, hold the glass shade firmly with both hands.
-
Gently twist and pull: While holding the shade, gently twist it counterclockwise and pull it away from the fixture.
With these steps, the glass shade should come off without any major issues.
How do you remove metal conduit from a junction box
Removing metal conduit from a junction box requires careful attention. Here’s what you need to do:
-
Turn off the power: Always begin by turning off the power to the junction box from your electrical panel.
-
Unscrew the conduit nut: Locate the conduit nut where the metal conduit is connected to the junction box.
-
Loosen the conduit nut: Using a wrench or pliers, loosen the conduit nut by turning it counterclockwise.
-
Detaching the conduit: Once the nut is loosened, gently pull the metal conduit out of the junction box while twisting it slightly.
Remember to exercise caution to avoid damaging any wires or the junction box.
How do you remove an overhead light cover
To remove an overhead light cover, follow these instructions:
-
Switch off the power: Turn off the power to the light fixture from your electrical panel to ensure safety.
-
Find the attachment points: Examine the sides and bottom of the light cover to identify any screws or clips securing it.
-
Remove screws or unclip: Using a screwdriver or your fingers, remove the screws or unclip the cover by pressing the clips.
-
Carefully lower the cover: Once the screws or clips are removed, carefully lower the light cover from the fixture.
By following these steps, you’ll be able to remove an overhead light cover efficiently.
How do you remove a metal light box from the ceiling
Removing a metal light box from the ceiling can be a bit challenging, but with the right approach, you can do it effectively:
-
Turn off the power: Start by switching off the power to the light box from your electrical panel.
-
Remove the cover plate: Using a screwdriver, remove the screws holding the cover plate of the light box.
-
Disconnect the wires: Unscrew the wire nuts connecting the wires inside the light box and separate them.
-
Unscrew the mounting screws: Locate the mounting screws attaching the light box to the ceiling and unscrew them.
-
Carefully lower the box: Supporting the weight, gently lower the metal light box down from the ceiling.
Remember to take your time and exercise caution during the process to prevent any accidents.
What is a knock out box
A knock out box, also known as a knockout electrical box, refers to a type of electrical junction box that features removable tabs or knockouts. These knockouts allow for easy installation of electrical conduit or cable in various sizes. The knockouts can be removed to create openings in the box for accommodating different wiring configurations.
How do you open an electrical connector box
To open an electrical connector box, follow these steps:
-
Turn off the power: Ensure the circuit connected to the electrical connector box is switched off from your electrical panel.
-
Inspect the box: Identify any screws, latches, or clips securing the box together.
-
Remove screws or unlatch: Use a screwdriver or your fingers to remove any screws or unlatch the box by pressing on the clips.
-
Carefully open the box: Once the screws or clips are removed, carefully open the box to access the electrical connectors inside.
Always follow safety precautions and avoid touching live wires when dealing with electrical connectors.
How do you remove a plastic ceiling light cover
If you’re wondering how to remove a plastic ceiling light cover, check out these steps:
-
Switch off the power: Before attempting any work, ensure the power to the light fixture is switched off from your electrical panel.
-
Look for attachment points: Inspect the edges of the plastic ceiling light cover for screws or clips holding it in place.
-
Remove screws or unclip: Using a screwdriver or your fingers, remove the screws or unclip the cover by pressing on the clips.
-
Lower the cover gently: After removing the screws or clips, carefully lower the plastic light cover from the ceiling.
By following these steps, you’ll be able to remove a plastic ceiling light cover without any hassle.
How do you remove a round bathroom fan cover
Removing a round bathroom fan cover is easier than you might think. Here’s what you need to do:
-
Turn off the fan: Ensure the bathroom fan is turned off from the wall switch or breaker panel.
-
Locate the screws or clips: Check the edges of the round fan cover for any screws or clips securing it in place.
-
Remove the fasteners: Using a screwdriver or your fingers, remove the screws or unclip the cover by pressing on the clips.
-
Gently pull down the cover: Once the fasteners are removed, gently pull down the round fan cover to remove it.
Soon enough, you’ll have the round bathroom fan cover off and ready for replacement.
How do you remove a square flush mount ceiling light cover
If you’re looking to remove a square flush mount ceiling light cover, follow these steps:
-
Switch off the power: Ensure the power to the flush mount light fixture is switched off from your electrical panel.
-
Check for screws or clips: Inspect the edges of the square light cover to locate any screws or clips holding it in place.
-
Remove the screws or unclip: Using a screwdriver or your fingers, remove the screws or unclip the cover by pressing on the clips.
-
Lower the cover gently: Once the screws or clips are removed, gently lower the square light cover from the ceiling fixture.
With these steps, you’ll be able to remove a square flush mount ceiling light cover effortlessly.
How are electrical boxes attached in the ceiling
Electrical boxes in the ceiling are commonly attached in the following ways:
-
Mounting brackets or retrofit boxes: Some electrical boxes come with mounting brackets that secure them to the ceiling joists or studs. Screws or nails are used to secure the brackets in place, providing stability to the box.
-
Bar hanger brackets: For ceiling electrical boxes with bar hanger brackets, metal bars are used to support and attach the box to the ceiling framing. The bars are adjustable to fit different joist or stud widths.
-
Direct attachment: In certain cases, electrical boxes are directly attached to the ceiling by screws or nails. This method is typically used for lightweight fixtures or when there is limited space.
The specific method of attachment depends on the type of electrical box and the requirements of the installation.
How do you remove a wrap around light cover
Removing a wrap-around light cover is quite straightforward. Here’s what you need to do:
-
Switch off the power: Turn off the power to the light fixture from your electrical panel to ensure safety.
-
Locate the retaining clips: Look for the retaining clips that hold the wrap-around light cover in place. They are usually found on the sides or corners of the cover.
-
Press the clips inward: Using your fingers or a flathead screwdriver, press the retaining clips inward towards the center of the light cover.
-
Lower the cover: While holding the clips inward, gently lower the wrap-around light cover down and away from the fixture.
With these steps, you’ll be able to remove a wrap-around light cover effortlessly.
How do you remove a square ceiling light fixture without screws
Removing a square ceiling light fixture without screws may require a different approach. Here’s what you can do:
-
Turn off the power: Start by switching off the power to the light fixture from your electrical panel.
-
Inspect the cover: Examine the square light fixture cover to identify any tabs, clips, or screws that hold it in place.
-
Release the tabs or clips: If there are tabs or clips, press or squeeze them inwards. If there are screws, remove them using a screwdriver.
-
Lower the cover gently: Once the tabs, clips, or screws are released, carefully lower the square light fixture cover down from the ceiling.
By following these steps, you’ll be able to remove a square ceiling light fixture without screws successfully.
Congratulations! You’ve reached the end of our FAQ-style guide on removing bathroom light fixture covers. We hope this comprehensive and humorous FAQ section has answered all your burning questions and provided you with the knowledge