Are you tired of having straight or limp hair and want to add some bounce and texture to your locks? Look no further – perming your hair at home is a great way to achieve those beautiful, natural-looking curls! In this blog post, we’ll explore the ins and outs of DIY hair perming, providing you with step-by-step instructions, tips, and tricks to ensure successful results.
From understanding the science behind perming to learning how to create your own homemade perm solution, we’ve got you covered. We’ll also address common concerns, such as why your previous perm might not have turned out as curly as desired, whether perms are safe for your hair, and how long you can expect your DIY perm to last. So, get ready to embrace your inner hairstylist and transform your locks into a gorgeous curly mane right from the comfort of your own home!
Keywords: How do I make my hair curly, How do you make a homemade perm solution, Why is my perm not Curly, Is it easy to perm hair at home, Are perms safe for your hair, How much is a perm, How can I bring out my natural curls, How do u get a perm, What can I use instead of perm paper, How long does hair need to be to perm, Do perms smell bad, Does salt spray curly hair, Can perms make your hair curly forever, What is perm solution made of, How long does a DIY perm last, Do perms cause hair loss, How can I make my hair permanently curly without a perm, Can you naturally perm your hair, Can you put coconut oil on permed hair
How to Perm Hair at Home: A DIY Guide
So, you’re looking to add some fabulous curls to your locks without breaking the bank or subjecting yourself to the questionable skills of a hairdresser. Well, my friend, you’ve come to the right place. In this subsection, we are going to unveil the secrets of perming your hair at home like a pro. You’ll be rocking those bouncy curls in no time!
Gather Your Tools and Prep Your Space
Before diving headfirst into the perming process, you need to make sure you have all the necessary tools at your disposal. Grab a perm kit, a towel, a comb, some hair clips, and a positive attitude.
Once you’ve got everything, find a clean and well-lit space to work your magic. Avoid setting up shop near expensive electronics or priceless artwork—unless you want to give your home a trendy, burnt-hair scent.
Perform a Strand Test
There’s nothing worse than committing to a full perm and ending up with hair that could rival a poodle’s. Save yourself the embarrassment by starting with a strand test. Grab a small section of hair near the nape of your neck, follow the instructions on the kit, and see how your hair reacts. This way, you’ll avoid any unwanted surprises and have a better idea of how long to leave the solution on for the real deal.
Section and Roll
Alright, ladies and gents, it’s time to get down to business. Start by dividing your hair into manageable sections. How many sections, you ask? Well, that depends on the thickness and length of your hair. Use your best judgment and separate those luscious locks accordingly.
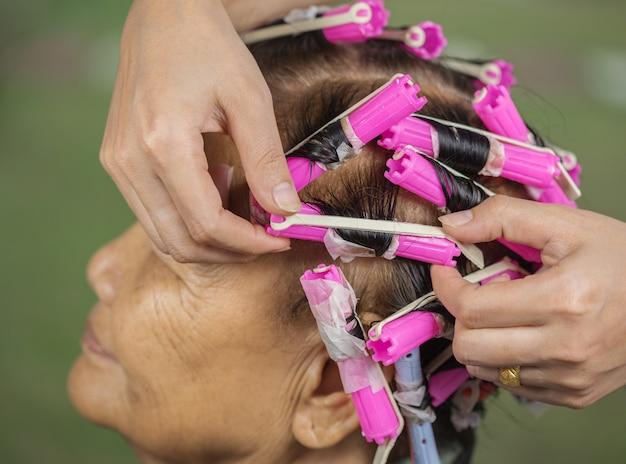
With your sections in place, set your sights on the perm rods. Now, I’m not talking about the kind your grandma uses to keep her glasses in place on top of her head. These perm rods come in various sizes, each offering a different level of curl. Choose wisely, my friends.
Take a section of hair, wrap it gently around the rod, and secure it with a clip. Repeat this process until you’ve transformed your hair into a medley of perm rods and clips. It might feel a little odd and look a bit peculiar, but hey, beauty is not always graceful.
Apply the Perm Solution and Wait it Out
It’s time to take out the big guns—the perm solution. Follow the instructions on the kit carefully, making sure you apply the solution evenly to each rod. Once you’ve slathered the solution on, it’s time to play the waiting game. Find a comfortable spot to pass the time, preferably one that doesn’t require a helmet or a seat belt.
Remember, patience is a virtue, and in this case, it’s also the key to fantastic curls. Follow the recommended timing guidelines provided in the kit, and resist the urge to check your progress every five seconds. Good things come to those who wait, my friend.
Rinse and Show Off Your New ‘Do
Congratulations! You’ve made it through the grueling wait. Now it’s time to rinse those curls to perfection. Head to the nearest sink or hop into the shower and let the water work its magic. Make sure you rinse thoroughly to get rid of any leftover perm solution.
Once you’ve finished rinsing, gently remove the perm rods and behold your stunning new hairstyle. Give your curls a good tousle, find your best angle, and strike a pose. It’s time to show off your DIY hairdo to the world!
Now that you’re armed with the knowledge and confidence to perm your hair at home, go forth and embrace your inner stylist. Remember, practice makes perfect, so don’t be discouraged if your first attempt doesn’t turn out as expected. With time and a bit of finesse, you’ll become a perm pro in no time. Happy perming!
FAQs about DIY Hair Perms: All You Need to Know
If you’ve always dreamt of voluminous, curly locks but never wished to spend a fortune at the salon, you’ve come to the right place! In this FAQ-style guide, we’ll answer all your burning questions about how to perm your hair at home DIY-style while keeping it safe, curly, and fabulous. Buckle up and let’s dive into the world of DIY hair perms!
How do I make my hair curly
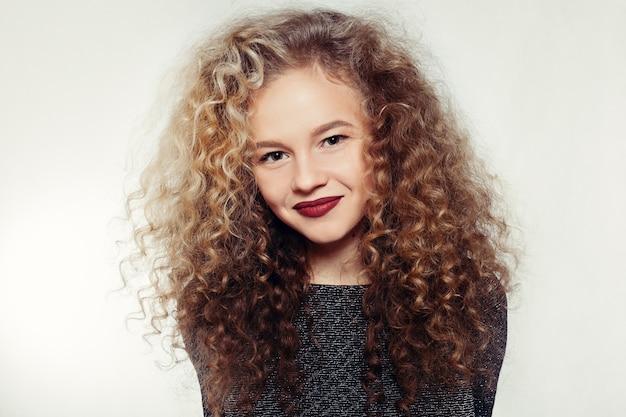
Curly hair is the epitome of fun and style! To make your hair curly, you can try a few methods. One option is to use a curling iron or hot rollers to create temporary curls. For a more long-lasting solution, a perm is your best bet. We’ll walk you through the steps of achieving glorious curls in the comfort of your own home.
How do you make a homemade perm solution
Creating your own homemade perm solution is possible, but it’s not as simple as whipping up a cake. With potentially damaging chemicals involved, it’s crucial to proceed with caution. It’s generally recommended to purchase a perm kit specifically designed for home use. These kits contain all the necessary ingredients and detailed instructions for safe application. Trust us, it’s better not to mess around when it comes to your precious locks!
Why is my perm not curly
Oh no, a perm gone wrong! If your hair isn’t looking as curly as expected, don’t panic just yet. There could be a few reasons for this unfortunate outcome. It’s possible that your hair may not have taken to the perm solution properly, or the products used might not have been strong enough for your hair type. If you’re experiencing this, it’s best to consult a professional hairstylist who can guide you on how to fix the situation.
Is it easy to perm hair at home
Well, we won’t sugarcoat it for you: perming your hair at home can be a bit daunting, especially if you’re a newbie. It requires patience, precision, and nerves of steel. However, with the right preparation, tools, and a steady hand, you can definitely achieve fabulous results. Just remember to follow the instructions carefully and never rush the process. You got this!
Are perms safe for your hair
Safety first, folks! While perms can work wonders for your tresses, it’s important to be aware of the risks involved. The chemicals used in the perming process can be harsh on your hair if not applied correctly or if left on for too long. It’s essential to thoroughly research the products you’ll be using and take the necessary precautions to minimize any potential damage. When in doubt, consult a professional – they’re the experts for a reason!
How much does a perm cost
Ah, the price of perfection! The cost of getting a perm can vary depending on several factors, including your location, the salon you choose, and the length of your hair. On average, a perm at a salon can range from $80 to $250. However, by opting for a DIY perm at home, you can save a significant amount of money. Just remember to invest in a quality perm kit and set aside some time for the process.
How can I bring out my natural curls
Sometimes, all you need is a little TLC to bring out your natural curls. Start by using a curl-enhancing shampoo and conditioner to nourish and hydrate your locks. Avoid over-brushing your hair and instead opt for a wide-toothed comb or your fingers to gently detangle. Applying a curl-defining product, like mousse or gel, to damp hair can also help accentuate your natural curls. Embrace those beautiful natural spirals!
How do you get a perm
If you’re looking to get a perm, there are two main options: visit a professional hairstylist or attempt a DIY perm at home. Both methods have their pros and cons, so it’s essential to choose the option that suits your budget, skill level, and time availability. Keep in mind that a professional stylist has the training and experience to ensure the best outcome, but DIY can be a fun and cost-effective alternative.
What can I use instead of perm paper
Ah, perm paper! If you find yourself in a pinch without any available, don’t fret. You can use alternatives such as plastic wrap or even strips of cotton fabric instead. These options can help protect your hair and keep the perm solution in place as it works its magic. Just remember, improvisation can be fun, but it’s always best to use the recommended products for optimal results.
How long does hair need to be to perm
The length of your hair plays a role in determining the success of your perm. For optimal results, it’s generally recommended to have hair that is at least four inches long. This length allows the perm solution to distribute evenly and create beautiful, bouncy curls. If your hair is shorter than this, you may need to wait a little longer before taking the plunge into the world of perms.
Do perms smell bad
Ah, the smell of beauty and chemistry mixing together! While some perm solutions may emit a strong odor during the process, many modern formulas have been developed to minimize this unpleasant scent. However, it’s essential to ensure proper ventilation in the area where you’ll be perming your hair to avoid any discomfort or overwhelming smells. Open up those windows and let the fresh air in!
Does salt spray curl hair
Salt spray, often associated with beachy waves, can indeed add some texture and definition to your hair, but it won’t give you a perm-like curl. Salt sprays typically work by absorbing moisture from the hair, creating a tousled, wavy look. While it may not give you the tight curls of a perm, it can be a great product to enhance the natural texture of your hair.
Can perms make your hair curly forever
If only we had a magic wand to make curls last forever! Unfortunately, perms are not a permanent solution. Over time, the curls will start to loosen and eventually fade away as your hair grows. The duration of your perm’s lifespan depends on various factors, including your hair’s natural growth rate and how well you care for your curls. On average, a DIY perm can last anywhere from two to six months. Enjoy those curls while they last!
What is perm solution made of
Behind every fabulous perm is a secret recipe of chemicals! Perm solutions typically contain ammonium thioglycolate (or its derivative) as the active ingredient. This powerful concoction helps break down and reform the protein bonds in your hair, allowing it to change shape and form those beautiful curls. It’s important to handle these solutions with care and follow the provided instructions closely to ensure optimal results.
How long does a DIY perm last
Ah, the lifespan of those luscious curls! A DIY perm can last anywhere from two to six months, depending on various factors. Your hair’s natural growth rate, the condition of your hair, and how well you care for your curls all play a role in determining how long the perm will last. You can help extend the lifespan of your curls by using curl-enhancing products, avoiding excessive heat styling, and providing proper nourishment to your hair.
Do perms cause hair loss
Oh no, we don’t want our precious mane to go anywhere! When done correctly and with proper care, perms should not cause hair loss. However, if the perm solution is applied incorrectly or if the hair is already damaged, hair loss can occur. It’s crucial to be gentle with your hair, follow the instructions precisely, and give your locks some extra TLC throughout the perming process. Healthy hair is happy hair!
How can I make my hair permanently curly without a perm
Dreaming of permanently curly hair but not ready to commit to a perm? There are a few tricks you can try. One option is to embrace heat styling tools such as curling irons or hot rollers to create temporary curls. Another alternative is to get a long-lasting hairstyle, such as a curly weave or extensions. These options allow you to enjoy curls for an extended period without permanently altering your natural hair.
Can you naturally perm your hair
Mother Nature has her ways of working wonders! While you can’t naturally perm your hair in the traditional sense, some methods can enhance your natural curl pattern. By adopting a proper hair care routine, using curl-defining products, and avoiding damaging practices like excessive heat styling, you can coax out your hair’s natural curls and make them more defined. Embrace those natural blessings from the hair gods!
Can you put coconut oil on permed hair
Ah, the many uses of coconut oil! Coconut oil can be a great ally in caring for permed hair. Its nourishing properties can help hydrate your locks, promote healthy hair growth, and reduce frizz. However, it’s essential to use coconut oil sparingly and avoid applying it directly before or after perming your hair, as it can interfere with the perm process. Moderation is key to ultimate hair happiness!
It’s time to unleash your inner hairstylist and bring those curls to life! Whether you decide to embark on a DIY perm journey or entrust your hair to a professional, armed with these FAQs, you’re well on your way to becoming a curly-haired sensation. Remember, patience and proper care are the keys to enjoying those bouncing, beautiful curls. Happy perming, and embrace the curly revolution!