Have you ever wondered how to make a toy car that moves on its own? It’s a fun and educational project that you can try at home. Whether you’re a kid or a kid at heart, building a toy car that actually moves can bring hours of joy and excitement. In this blog post, we’ll explore various methods and techniques to create a toy car that moves using simple materials and easy-to-follow steps.
From using everyday objects like cardboard boxes to more advanced techniques like incorporating remote control functionalities, we’ll cover different approaches to suit varying skill levels. We’ll also address common questions such as how to make a toy car go faster and what energy is involved in a moving toy car. So, grab your creative hat and join us in exploring the fascinating world of making a toy car that moves on its own!
Keywords: How do you make a car in Roblox?, How do you make a toy car out of a box?, How can I make a toy car?, How do you make a toy car go faster?, How fast can a toy car go?, How do you make a toy car move by itself?, What causes a toy car to move?, What does the toy car object do?, How do you make a toy car battery?, How does a pullback toy work?, How do you move a toy car without touching it?, How do you make a small electric car?, How do you move a toy car with a balloon?, How do you make a homemade remote control car?, How do you make easy toys?, What made the toy car travel the farthest?, How do you make a rubber band toy car move?, What energy is a moving toy car?
How to Create a Toy Car That Moves: Bringing Your Imagination to Life
Getting Started: The Joy of DIY Toys
We all know the childhood excitement of playing with a brand-new toy car, the thrill of racing it across the living room floor or down the hallway. But have you ever wondered what it would be like to build your own toy car? Well, get ready to rev up your creativity because today, we’re diving into the world of DIY toy cars!
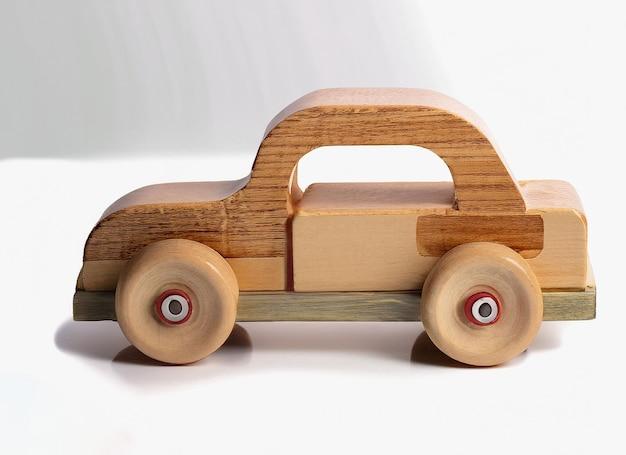
Unleashing Your Inner Engineering Wiz: Materials You’ll Need
To embark on this thrilling adventure, let’s gather the materials you’ll need:
- Cardboard: Find a sturdy piece of cardboard, strong enough to withstand your wild imagination.
- Scissors: A trusty pair of scissors will be your best friend in this endeavor.
- Wheels: Raid your toy collection for old toy cars you don’t mind repurposing for this grand project.
- Axles: Straws, toothpicks, or wooden dowels can serve as axles to attach the wheels to your car.
- Adhesive: Grab some glue or tape to keep everything in place.
- Decorations: Raid your craft supplies to add that personal touch to your creation.
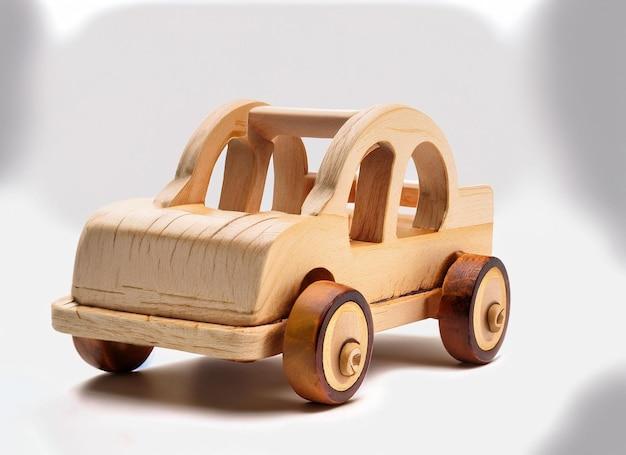
Start Your Engines: Step-by-Step Toy Car Creation
1. Designing Your Dream Car
Give your car a unique personality by sketching out your dream design on the cardboard. Let your creativity run wild and remember, no idea is too outlandish!
2. Cut, Cut, Cut!
Once you have your design, use those trusty scissors to carefully cut it out. Be sure to follow your outline precisely to ensure your car is symmetrical and visually pleasing.
3. Wheeling in Style
Now, let’s add some wheels to this masterpiece. Attach the repurposed wheels to your car using those ingenious axles we mentioned earlier. Slide them through the sides of the car and secure them in place.
4. Axle-Ting Adventure
To ensure your wheels can spin freely, cut small slits on the sides of the car where the axles are inserted. This will prevent any unwanted friction and allow for smooth movement.
5. Drive Your Design
Get ready to hit the imaginary racetrack! Give your car a test drive by pushing it back and forth. Watch as your creation comes to life, zipping across the room with each gentle push.
6. Customization Galore
Now comes the fun part – customizing your newly built car! Grab your craft supplies and let your artistic side shine. Paint it, stick on some stickers, or even glue on googly eyes to give your car that extra oomph!
Time to Put the Pedal to the Metal: Conclusion
Congratulations, DIY extraordinaire, you’ve successfully built a toy car that moves! Now that you know the secrets of creating these mini marvels, the possibilities are endless. Remember, the beauty of DIY is the freedom to explore and experiment, so don’t be afraid to continue tinkering and refining your skills.
Whether you’re zooming around your living room or impressing friends with your ingenuity, making your own toy car adds a personal touch to playtime. So, grab your tools, embrace your inner engineering wiz, and get ready to embark on a roaring adventure of creativity and imagination!
Now, go forth and let your DIY spirit soar into the fast lane!
FAQ: How To Make a Toy Car That Moves
Welcome to the FAQ section of our guide on how to make a toy car that moves! Here, we’ll answer some of the most commonly asked questions about creating your own toy car and getting it to zoom around. So, let’s dive right in and have some fun!
How do you make a car in Roblox
If you’re looking to create a car in the popular online gaming platform Roblox, you’re in for a treat! Follow these steps to bring your dream car to life:
- Start by opening Roblox Studio and creating a new place or opening an existing one.
- Click on “View” in the top menu bar and select “Explorer” to open the Explorer window.
- In the Explorer window, right-click on the “Workspace” folder and select “Insert Object.”
- Choose the “VehicleSeat” option to insert a seat for your car.
- Next, insert the desired parts and accessories to build the body and wheels of your car. Get creative!
- To make your car move, you’ll need to add a script. Right-click on the vehicle seat and select “Insert Object,” then choose “Script” from the options.
- Open the script by double-clicking on it and write the necessary code to control the car’s movement. There are many resources available online to help you with this step.
- Once you’re satisfied with your car, click on the “Play” button in Roblox Studio to test it out in a game.
With a little creativity and some coding, you’ll have your very own car cruising the virtual streets of Roblox in no time!
How do you make a toy car out of a box
Making a toy car out of a box is a fantastic DIY project that allows you to repurpose items you already have at home. With a few simple steps, you can transform a humble cardboard box into a cool ride:
- Find a sturdy box that is large enough to serve as the body of your car.
- Use a craft knife or scissors to carefully cut out the top and bottom flaps of the box. These will become the sides of your car.
- On one side of the box, cut out a rectangular shape large enough for your child to sit in comfortably. This will be the driver’s seat.
- Use additional cardboard pieces to create the wheels and attach them securely to the bottom of the box.
- To make the wheels roll smoothly, insert wooden dowels or pencils through the center of each wheel, ensuring they protrude slightly on each side to serve as axles.
- Decorate your car with paint, markers, stickers, or any other craft supplies you have on hand.
- Let the paint dry and then invite your little one to hop into their new cardboard car and let their imagination take them on exciting adventures!
Remember, safety first! Always supervise your child while they’re playing with their cardboard car to prevent any accidents.
How can I make a toy car
Making a toy car is a fun and rewarding activity that you can enjoy with your kids. Here’s a step-by-step guide to help you get started:
- Gather the necessary materials, including a small rectangular piece of wood or sturdy cardboard for the car’s body, four bottle caps for the wheels, and a wooden dowel or a thin stick for the axle.
- Attach the bottle caps to each corner of the car body using glue, allowing them to dry completely.
- Drill or poke holes through the bottle caps and the car body at each wheel’s desired location.
- Insert the wooden dowel or stick through the holes to create the axles and secure them in place with glue or by tying knots at either end.
- Decorate your toy car using paints, markers, stickers, or any other craft materials you have on hand. Let your creativity shine!
- Once your car is fully decorated and the glue is dry, it’s ready to hit the road. Give it a gentle push, and watch it go!
Making a toy car is a fantastic way to encourage imaginative play and foster creativity in children while also providing a sense of accomplishment.
How do you make a toy car go faster
If you want your toy car to zoom across the floor with lightning speed, here are a few tips to give it an extra boost:
- Reduce friction: Ensure that the axles are smooth and spinning freely. Consider using lubricants like WD-40 or graphite powder to reduce friction between the wheels and axles.
- Improve weight distribution: Experiment with adding small weights to different parts of the car to achieve better balance and weight distribution. This can help increase stability and overall speed.
- Streamline the design: Evaluate the design of your car and make adjustments to reduce drag. Smooth out any rough edges, remove unnecessary protruding parts, and make the car as aerodynamic as possible.
- Optimize the wheels: Choose wheels that are lightweight, yet sturdy. Consider using ball bearings to reduce friction between the wheels and axles, allowing for smoother and faster movement.
- Increase the propelling force: If you’re using a pullback toy car, pull it back as far as possible before releasing it. The greater the force, the faster it will go.
Remember, every little tweak and modification can make a difference in your toy car’s speed. So, don’t be afraid to experiment and have fun!
How fast can a toy car go
The speed of a toy car depends on various factors, such as its design, weight, wheels, and the force applied to make it move. While toy cars aren’t typically built for extreme speed, they can still reach impressive velocities.
On average, a well-designed toy car can travel at speeds of around 5 to 10 miles per hour. However, specialized toy cars with advanced mechanisms can achieve even higher speeds, sometimes surpassing 20 miles per hour.
Keep in mind that safety should always be a top priority when operating toy cars, especially at higher speeds. Ensure you have enough space to allow the car to move freely without posing a risk to yourself or others.
How do you make a toy car move by itself
Making a toy car move by itself is an exciting challenge that requires a self-propelling mechanism. One popular method is to use a rubber band-powered propulsion system. Follow these steps to bring your toy car to life:
- Start by creating a small chassis for your car, either by using wood, plastic, or cardboard.
- Attach the wheels to each side of the chassis using axles. Ensure the wheels can rotate freely.
- On the rear axle, create a mechanism to wind up a rubber band tightly.
- Connect the wound rubber band to the rear axle and secure it well.
- When you release the wound-up rubber band, it will unwind and generate rotational force that propels the car forward.
- Experiment with different rubber band sizes and tensions to achieve the desired speed and distance.
With a little tinkering and some trial and error, you’ll be able to create a toy car that moves on its own, thanks to the magical power of rubber bands!
What causes a toy car to move
The movement of a toy car is a result of several scientific principles at play. Here are the key factors that cause a toy car to move:
- Newton’s laws of motion: When a force is applied to a stationary toy car, according to Newton’s third law, the car exerts an equal and opposite force, propelling it forward.
- Friction: Friction between the wheels and the surface provides the necessary traction for the toy car to move. Reduced friction allows for smoother and faster movement.
- Kinetic and potential energy: As the toy car moves, it converts potential energy (stored energy) into kinetic energy (motion energy). This energy conversion allows the car to keep rolling.
- Wheels and axles: The wheels and axles provide rotational movement and allow the toy car to travel in a straight line or turn when necessary.
By understanding these principles, you can appreciate the underlying science behind the movement of toy cars and deepen your curiosity about the world around you.
What does the toy car object do
In the world of toy cars, the toy car object serves as the central entity that brings the vehicle to life. It encapsulates all the necessary components, including the body, wheels, and mechanisms, to create a functional and enjoyable toy car.
The toy car object acts as a blank canvas for customization. It allows you to unleash your creativity while building and decorating your dream car. Whether you’re using a pre-existing toy car model or assembling one from scratch, the toy car object is the foundation on which you can create a unique and exciting playtime experience.
So, grab your toy car object and let your imagination run wild as you embark on thrilling adventures with your miniature mechanical masterpiece!
How do you make a toy car battery
Creating a toy car battery requires some basic electrical knowledge and a few components. Here’s a simple guide to crafting your own toy car battery:
- Gather the necessary materials: You’ll need a small, lightweight, and rechargeable battery (such as a lithium-ion battery), battery connectors, wires, and a switch.
- Connect the battery: Attach battery connectors to both ends of the battery. These connectors will allow you to easily connect and disconnect the battery from your toy car.
- Wiring the circuit: Connect one wire from the positive terminal of the battery to one side of the switch. Connect another wire from the other side of the switch to the motor or power source of your toy car. Finally, connect the negative terminal of the battery to the motor or power source.
- Secure the connections: Ensure that all connections are tight and secure, using electrical tape or small clamps to hold them in place.
- Test it out: Switch on the battery and watch as your toy car comes to life!
Remember to exercise caution when working with batteries and electrical components. If you’re unsure about this DIY project, it’s always best to seek assistance from an experienced adult or a professional.
How does a pullback toy work
Pullback toys are a classic favorite among kids for their simple yet captivating mechanism. Here’s how they work:
- Wind it up: Pullback toys have a retractable mechanism. Pull the car backward while it’s on a flat surface and wind up the internal spring or rubber band as far as it will go.
- Energy storage: As you wind up the toy, potential energy is stored in the spring or rubber band, which creates tension.
- Release and go: Once you let go of the toy car, the stored potential energy is rapidly converted into kinetic energy, causing the car to propel forward. The energy release moves the wheels, and the car takes off!
The pullback mechanism offers a fun and effortless way to make toy cars zoom across the room, providing hours of entertainment for kids and adults alike.
How do you move a toy car without touching it
Moving a toy car without touching it may sound like magic, but it’s actually possible with the power of air! You can create a simple DIY balloon-powered car using these steps:
- Gather your materials: You’ll need a small toy car with wheels, a balloon, a flexible straw, and tape.
- Prepare the balloon engine: Attach the balloon to the end of the flexible straw and secure it tightly with tape to prevent air leakage.
- Attach the balloon engine: Tape the other end of the straw to the back of the toy car, ensuring the balloon is not blocked or obstructed by any other parts.
- Inflate the balloon: Blow air into the balloon through the straw, holding it closed to prevent air from escaping.
- Release and watch it go: Let go of the balloon and allow the escaping air to propel the car forward!
As the air rushes out of the balloon, it creates a forward push, propelling the car without any direct physical contact. It’s a fantastic experiment to explore the power of air pressure in a fun and interactive way.
How do you make a small electric car
Creating a small electric car is an electrifying project that combines mechanics with basic electrical knowledge. Here’s a simplified guide to help you get started:
- Gather the necessary materials: You’ll need a small chassis, DC motor, wheels, battery, switch, wires, and electrical connectors.
- Build the chassis: Construct a small frame or chassis that can house the motor, battery, and other components.
- Attach the wheels: Connect the wheels to the chassis using axles. Ensure they rotate freely.
- Install the motor: Position the DC motor securely on the chassis and connect it to the wheels using gears or directly, depending on your design preference.
- Wire the circuit: Connect the positive terminal of the battery to one side of the switch. Connect another wire from the other side of the switch to the DC motor. Finally, connect the negative terminal of the battery to the motor.
- Secure the connections: Make sure all the electrical connections are solid and insulated to prevent short circuits or loose wires.
- Test it out: Turn on the switch, and your electric car should come to life!
Remember, this is a simplified guide, and creating a fully functional electric car can be more complex. Always prioritize safety and take necessary precautions when working with electronics and batteries.
How do you move a toy car with a balloon
Moving a toy car with a balloon is a fun and quirky experiment that demonstrates the power of air pressure. Here’s how you can make it happen:
- Gather your materials: You’ll need a toy car, a balloon, a drinking straw, and tape.
- Secure the straw: Tape the drinking straw onto the roof or back of the toy car. Ensure it’s aligned in a way that allows the balloon to blow air towards the wheels.
- Inflate the balloon: Blow air into the balloon, but don’t tie it off just yet.
- Attach the balloon: Stretch the opening of the balloon around the end of the straw, ensuring a tight seal.
- Release and enjoy: Hold the balloon closed while placing the car on a smooth surface. Let go of the balloon and watch as the escaping air propels the car forward!
As the air escapes from the balloon, it creates a force that pushes the toy car in the opposite direction, demonstrating a unique application of air pressure in motion.
How do you make a homemade remote control car
Creating a homemade remote control car is a more advanced project that requires some electronics know-how