Welcome to our comprehensive guide on how to keep pine cones closed and preserve their natural beauty for crafting and decorating purposes. If you’ve ever collected pine cones during a leisurely stroll or while out hiking, you may have noticed that they tend to open up and lose their shape over time. But fear not! In this blog post, we will share some effective methods to help you keep pine cones closed and maintain their gorgeous natural form.
Pine cones have long been a popular element in various crafts, wreaths, and home decor. However, understanding how to properly treat and preserve pine cones is essential to ensure they stay intact and visually appealing for an extended period. We will cover everything from sealing and stabilizing pine cones to cleaning and adding a shiny finish to them. So, grab your favorite cup of coffee, put on some relaxing music, and let’s dive into this pine cone preservation adventure.
How to Keep Pine Cones Closed
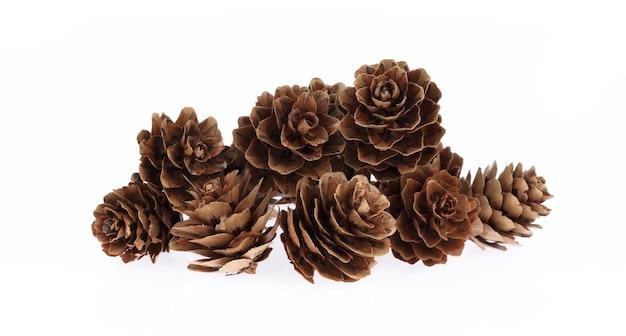
Pine Cones on the Loose: A Sticky Situation
So, you picked up some beautiful pine cones on your nature walk, and now you’re scratching your head, wondering how to keep those pesky things closed. You’ve come to the right place! We’ve got the lowdown on all the tips and tricks to tackle this puzzling problem.
The Heat is On: Baking Your Way to Closed Cones
One nifty method to keep pine cones closed is to give them a little toasty time in the oven. Preheat your oven to 200°F (93°C) and place the pine cones on a baking sheet. Let them bask in the heat for about 30 minutes, allowing the scales to expand and then contract as they cool down. This shrinkage action should help keep those cones tightly shut.
Let’s Get Sticky: Secure Your Pine Cones with Glue
For a foolproof way to seal up your pine cones, grab a trusty glue gun and get ready to wield it like a pro. Apply a small drop of hot glue to the base of each scale and hold it closed for a few seconds. Be careful not to get too trigger-happy with the glue gun, or you might end up in a sticky situation yourself!
Rubber Band Finesse: Wrangling Those Wild Pine Cones
If you’re looking for a quick and easy fix, reach into your drawer (or wide array of hair accessories) and snag a rubber band. Gently squeeze the scales together, wrap the rubber band around the pine cone, and voila! The elastic pressure should help keep those stubborn cones tightly shut.
Embrace Mother Nature: Enlist the Help of Time and Patience
Sometimes, nature knows best. If you’re not in a rush to display your pine cones, simply let them be. Over time, they may naturally close up as they dry out. Find a cool, dry place for your pine cones to chill out, and watch the magic happen. You’ll be amazed at how time and a little bit of patience can work wonders.
A Pine Cone Spa Day: Soak the Day Away
If your pine cones are being particularly stubborn, it’s time to bring out the big guns — a relaxing spa day! Give your cones a soothing soak in warm water for a couple of hours. As they absorb the moisture, they may swell and close up. Once they’ve had their spa treatment, let them air dry and revel in their newfound closed state.
Keeping pine cones closed doesn’t have to be a thorny problem. With a touch of creativity and a sprinkle of know-how, you can conquer those unruly cones. Whether you choose the baking method, embrace the power of glue, or employ other techniques, your pine cones will be closing up shop in no time. So go forth, dear pine cone lover, and keep those cones closed tight, because as we say in 2023, “Closed cones, happy homes!”
FAQ: How To Keep Pine Cones Closed
Can You Use Pine as a Knife Handle
Yes, pine wood can indeed be used as a knife handle! Pine is a popular choice due to its durability and beautiful natural grain. Just ensure that the wood is properly treated and sealed to prevent moisture damage.
How Do You Treat Pine Cones for Decorations
To prepare pine cones for decorations, you can start by baking them in the oven at a low temperature (around 200°F or 93°C) for about 30 minutes. Baking helps kill any critters and dries the cones out. Afterward, allow them to cool before proceeding with your chosen preservation method, such as sealing or spraying them with a clear protective coating.
How Do You Seal Pine Cones
Sealing pine cones is essential to ensure their longevity in crafts and decorations. One option is to use a clear acrylic or polyurethane spray. Simply hold the can of sealant about 12 inches (30 cm) away from the cones and spray them evenly, making sure to cover all sides. Allow the sealant to dry thoroughly before using the pine cones in your crafts.
How Do You Prepare Pine Cones for Crafts
Preparing pine cones for crafts starts with collecting them and cleaning off any dirt or debris. You can gently brush the cones using a soft paintbrush or rinse them with water and let them dry completely. If you find any closed pine cones, you can place them in a warm oven for a few minutes to encourage them to open up and release their seeds. Once dry and open, you can proceed with the desired crafting technique.
Do You Need to Bake Pine Cones Before Crafting
Baking pine cones before crafting is not always necessary, but it can be beneficial. Baking helps remove any moisture, kills any bugs or critters, and opens closed pine cones. It’s particularly helpful if you’ve collected fresh cones. However, if you’re purchasing pine cones from a store, they are usually already dry and clean, so baking may not be required.
Do You Have to Stabilize Pine Cones
Stabilizing pine cones can be an excellent option if you want to ensure they remain intact and don’t crumble over time. There are various methods for stabilization, such as soaking the pine cones in a mixture of glycerin and water, or using a commercial stabilizing solution. These methods help preserve the natural structure and prevent the cones from deteriorating.
How Do You Remove Pine Sap from Pine Cones
Removing pine sap from pine cones can be a sticky situation! There are a few approaches you can take. One method is to soak the cones in rubbing alcohol or a mixture of warm water and mild dish soap for about 15-20 minutes. Afterward, gently scrub the cones with a soft brush or toothbrush to remove the sap. Rinse them thoroughly and let them air dry.
How Do You Make Pine Cones Shiny
Making pine cones shiny is an excellent way to enhance their natural beauty. Once the cones are clean and fully dry, you can apply a coat of clear varnish or shellac using a soft paintbrush. This will give them a glossy finish. Alternatively, you can use a metallic spray paint or dust them with a shimmering glitter for a touch of sparkle.
How Is Wood Stabilized
Wood stabilization is a process that involves infusing the wood with a stabilizing agent, such as resin or acrylic. This process helps strengthen the wood, prevent warping, and enhance its durability. It’s commonly used for knife handles, turning blanks, and other woodworking projects to ensure the wood remains stable and resistant to moisture.
What Makes Pinecones Open and Close
Pinecones have a unique opening and closing mechanism that responds to changes in humidity. They contain specialized cells in the cone scales that expand and contract based on moisture levels. When it’s dry, the scales contract, causing the pine cone to close. Conversely, when it’s humid, the scales expand, allowing the cone to open and disperse its seeds.
How Do You Clean and Prepare Pine Cones for Crafts
Cleaning and preparing pine cones for crafts involves a simple process. Start by gently brushing off any loose dirt or debris using a soft brush or rinse them with water. Afterward, place the cones on a baking sheet and bake them in a preheated oven at a low temperature (around 200°F or 93°C) for about 30 minutes. This helps kill any bugs or critters and removes excess moisture.
Does Hairspray Preserve Pine Cones
While it’s true that hairspray can temporarily stiffen pine cones, it doesn’t provide long-term preservation. Over time, the hairspray may deteriorate or become sticky, causing the cones to lose their shape or attract dust and debris. It’s recommended to use proper sealants or preservation methods specifically designed for crafting with pine cones.
How Do You Keep Pine Cones from Closing
To prevent pine cones from closing, you can apply a sealant or clear coat to the cones. This helps create a protective barrier that minimizes moisture absorption and stabilizes their shape. Additionally, storing the pine cones in a cool and dry environment can help maintain their open state for a longer time.
How Long Does It Take to Bleach Pinecones
Bleaching pinecones can be a fun way to create unique decorations. The duration it takes to bleach pinecones depends on various factors, including the concentration of bleach, the size of the cones, and the desired lightness. Typically, soaking pinecones in a bleach and water solution for 24-48 hours should achieve a bleached effect. However, it’s crucial to handle bleach with care and follow safety instructions.
How Do You Preserve Pine Needles for Crafts
Preserving pine needles for crafts is relatively simple. Start by collecting fresh pine needles and gently patting them dry to remove excess moisture. Next, lay the pine needles flat on a baking sheet and place them in an oven set to the lowest temperature (around 150°F or 65°C) for about 30 minutes. This helps dry and sterilize the needles, making them suitable for various craft projects.
How Do You Stop a Wreath from Shedding
Dealing with a shedding wreath can be frustrating, but fear not! To minimize shedding, you can apply a clear acrylic spray or shellac to the pine cones and foliage of your wreath. This will help seal the natural materials and reduce the likelihood of shedding. Additionally, avoid hanging the wreath in direct sunlight or areas with high humidity, as these conditions can contribute to increased shedding.
How Do You Color Pine Cones
Coloring pine cones can add a vibrant touch to your crafts and decorations. One method is to use acrylic paints. Simply dip a soft brush into the paint and apply it to the scales of the pine cones, allowing the colors to blend naturally. Alternatively, you can use diluted fabric dye or food coloring for a more subtle or pastel effect. Let the cones dry completely before using them in your projects.
Why Do Pinecones Close in Water
Pinecones close in water as a natural response to moisture. The cone scales, which are made of a special tissue called hygroscopic tissue, absorb water and expand. As they expand, the scales push against each other, causing the cone to close. This mechanism helps protect the seeds inside from getting too wet and ensures they are dispersed when the cone opens again.
How Do You Force a Pine Cone to Open
If you want to force a pine cone to open, you can follow a simple method. First, moisten a closed pine cone by soaking it in warm water for a couple of hours. Then, place the damp cone on a baking sheet and bake it in the oven at a low temperature (around 200°F or 93°C) for approximately 15-20 minutes. The moisture combined with the heat should encourage the cone to open up. Remember to handle it with care when it’s hot.
Thank you for reading through our comprehensive FAQ on how to keep pine cones closed! We hope these answers have shed some light on the various aspects of preparing, preserving, and crafting with pine cones. Have fun exploring the wonderful world of pine cone crafts and let your creative imagination take flight!