Welcome to our comprehensive guide on how to flash EEPROM on a 3D printer! If you’re a 3D printing enthusiast or a beginner who wants to optimize their printer’s performance, this blog post is for you. We’ll cover everything you need to know about EEPROM, firmware, and the process of flashing it to your printer.
But first, let’s address the burning question: What is EEPROM? In the world of 3D printing, EEPROM (Electrically Erasable Programmable Read-Only Memory) refers to a memory chip on your printer’s mainboard that stores crucial data such as settings, configurations, and calibration values. It acts as a bridge between your 3D printer’s hardware and software, ensuring smooth and accurate prints.
So, if you’re ready to learn how to update and optimize your 3D printer’s firmware by flashing the EEPROM, let’s dive in! We’ll explore the latest Ender 3 V2 firmware, discuss the differences between RepRap and Marlin, and guide you through the process of flashing your new firmware. Exciting adventures in the world of 3D printing await you!

How to Flash EEPROM on Your 3D Printer
Welcome to our comprehensive guide on how to flash EEPROM on your 3D printer. In this section, we will walk you through the process of updating the firmware and unlocking a world of endless possibilities for your trusty printing companion. So, grab your soldering iron and get ready to embark on this electrifying journey with us!
The Exciting World of EEPROM
Ah, EEPROM, the gateway to customizability and improved performance of your 3D printer. But before we delve into the nitty-gritty of flashing, let’s take a moment to appreciate the magnificence of this small yet mighty piece of wizardry.
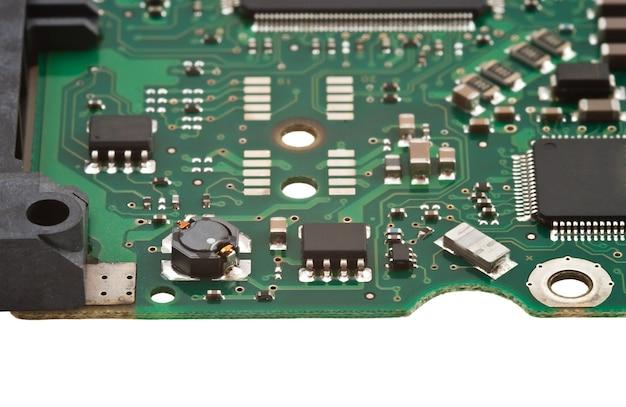
What is EEPROM, You Ask?
EEPROM, or Electrically Erasable Programmable Read-Only Memory, is a fancy term for the storage chip that holds the firmware of your 3D printer. Think of it as the brain of your machine, responsible for executing commands and making all the magic happen.
Why Should You Mess with EEPROM?
Flashing the EEPROM opens up a plethora of opportunities for you to optimize your printer’s performance. From fine-tuning temperature settings to unlocking additional features, it’s like giving your 3D printer a turbo boost with a sprinkle of unicorn dust (not scientifically proven, but it sounds cool, right?).
Safety First, Fun Second
Before we dive into the exciting world of flashing, let’s put on our safety goggles and ensure we have a fire extinguisher nearby. While flashing EEPROM is generally safe, it’s always better to be prepared for the unexpected. We apologize for being the party-poopers, but we want you to have uninterrupted printing adventures!
Gather Your Tools, Adventurer
To conquer the quest of flashing EEPROM, you’ll need a few trusty tools by your side. Here’s a quick rundown of the items you’ll need for this electrifying adventure:
1. Soldering Iron
A soldering iron is your trusted companion in this journey. It helps you unlock the magical world of firmware updates on your 3D printer. Whether you’re a soldering sorcerer or a newbie apprentice, this tool is a must-have.
2. Screwdriver Set
Ah, the humble screwdriver set—a timeless hero! With different sizes and types of screws holding your printer together, having a reliable screwdriver set ensures you conquer any hurdle that comes your way during the flashing process.
3. Patience
The third and most valuable tool on this journey is patience. Take your time, follow the guide, and remember that Rome wasn’t built in a day. Patience will guide you through any technical glitch or hiccup that may arise.
Let the Flashing Begin!
Now that you’ve armed yourself with the right tools and embraced the virtue of patience, it’s time to unravel the secrets of flashing EEPROM on your 3D printer. In the next section, we will guide you step by step, ensuring you slay any firmware-related dragons that cross your path. Get ready to flex those technical muscles!
Congratulations! You’ve made it through the first section of our comprehensive guide on flashing EEPROM for your 3D printer. Now that you understand what EEPROM is and have gathered the necessary tools, you’re all set for the exciting adventure that lies ahead. Stay tuned for the next section where we dive into the step-by-step process of flashing your printer’s firmware. Happy flashing, fellow 3D printing wizards!
FAQ: How To Flash EEPROM in a 3D Printer
What is 3D Printer EEPROM
The EEPROM (Electrically Erasable Programmable Read-Only Memory) in a 3D printer is a small section of memory that stores various settings and parameters. It allows you to save important data like calibration values, machine configurations, and other firmware settings.
What is the Latest Firmware for Ender 3 V2
As of 2023, the latest firmware for the Ender 3 V2 is Marlin 2.0. This firmware provides enhanced features, improved performance, and bug fixes for the printer. Keeping your firmware up-to-date ensures you have access to all the latest functionalities and improvements.
Is RepRap the Same as Marlin
No, RepRap and Marlin are not the same. RepRap is a self-replicating 3D printer project, focusing on creating printers that can build other printers. On the other hand, Marlin is an open-source firmware widely used by various 3D printers, including RepRap printers. Marlin provides the software interface between the printer’s hardware and the user, enabling control and customization.
How Do I Flash New Firmware to My 3D Printer
Flashing new firmware to your 3D printer involves a series of steps. Here’s a simplified guide to help you through the process:
- Download the latest firmware version for your specific printer model from the manufacturer’s website.
- Connect your computer to the printer using a USB cable.
- Install the necessary firmware flashing software, such as Arduino IDE or Pronterface.
- Open the firmware in the flashing software and configure the settings according to your printer’s specifications.
- Connect the printer to a stable power source to avoid any interruptions during the flashing process.
- Click the “Upload” or “Flash” button in the software to start the firmware upload to the printer.
- Wait for the process to complete, and once finished, power cycle your printer to activate the new firmware.
Remember to follow the specific instructions provided by the firmware manufacturer or consult your printer’s user manual if you encounter any difficulties.
How Do You Use UBL Marlin
Unified Bed Leveling (UBL) is a feature available in Marlin firmware that helps compensate for uneven bed surfaces. Here’s a brief overview of how to use UBL in Marlin:
- Make sure your 3D printer is properly assembled and the firmware is up-to-date with Marlin.
- Send the G29 command (either by manually entering it or adding it to your slicer’s start g-code) to start the UBL process.
- The printer’s nozzle will move to multiple positions on the bed and use its sensors to measure the distance between the nozzle and the bed surface.
- Once the UBL process is complete, the printer will generate a mesh or map of the bed, which can be used to compensate for unevenness during printing.
- Save the UBL data to the EEPROM using the G29 S2 command, so it can be recalled for future prints.
- You can activate UBL compensation during a print by using the G29 command.
Remember to consult the Marlin firmware documentation or your printer’s user manual for specific instructions on using UBL with your particular setup.
What is EEPROM Fault
EEPROM fault refers to an error or issue with the Electrically Erasable Programmable Read-Only Memory on your 3D printer’s control board. This fault can disrupt the storage and retrieval of settings and configurations stored in the EEPROM. Common causes include corrupted data, faulty connections, or hardware malfunctions. If you encounter an EEPROM fault, it is recommended to troubleshoot the issue or seek technical support to rectify the problem.
How Do I Flash Pro Micro QMK
Flashing the Pro Micro with QMK (Quantum Mechanical Keyboard Firmware) allows you to customize the behavior and features of your keyboard. To flash a Pro Micro with QMK, follow these steps:
- Download and install QMK firmware from the official QMK GitHub repository.
- Connect the Pro Micro to your computer using a USB cable.
- Open the QMK Toolbox application, which provides a graphical interface for flashing firmware.
- In the QMK Toolbox, select the Pro Micro from the devices list.
- Click on the “Open” button and navigate to the firmware file you wish to flash.
- Ensure the Pro Micro is in the flashing mode (usually done by holding down a specific button or shorting two pins on the board).
- Click on the “Flash” button in the application, and the firmware will be uploaded to the Pro Micro.
- Once the flashing process completes, you can disconnect the Pro Micro from the computer and use it with the newly flashed firmware.
Remember, it’s always a good idea to refer to the specific documentation provided by QMK or the manufacturer of the Pro Micro for detailed instructions and troubleshooting tips.
What is Firmware on a Printer
Firmware on a printer is the software that controls its operations. It acts as the bridge between the hardware components of the printer and the instructions or commands given by the user. Firmware dictates how the printer behaves and handles tasks such as movement, temperature control, and other functionalities. Upgrading or modifying the firmware allows you to add features, improve performance, and fix issues on your 3D printer.
What Does 3D Printer Firmware Do
3D printer firmware is responsible for managing and controlling the printer’s various functions and components. It interprets G-code commands received from the host software or slicing program and converts them into specific instructions for the printer’s motors, heaters, sensors, and other hardware. Firmware enables precise movement control, heating regulation, bed leveling, filament extrusion, and overall coordination of the printer’s operations. It plays a crucial role in ensuring accurate prints and reliable performance.
Does Ender 3 V2 Have EEPROM
Yes, the Ender 3 V2 3D printer has EEPROM (Electrically Erasable Programmable Read-Only Memory). This means you can save and retrieve settings and configurations on the printer itself. The EEPROM allows you to store important calibration values, machine configurations, and other firmware settings directly on the printer, making it convenient to retain specific preferences even when disconnecting from external devices.
What is EEPROM Reset Keyboard
An EEPROM reset keyboard, also known as a reset button or a factory reset button, is a physical control or combination of keys on a keyboard that triggers a reset or restore process for the keyboard’s firmware. When the EEPROM reset keyboard is activated, it erases any custom settings or configurations previously stored in the keyboard’s memory, reverting it to its default state.
Does Ender 3 V2 Come with an SD Card
Yes, the Ender 3 V2 3D printer typically comes with an SD card included in the package. The SD card allows you to transfer print files, firmware updates, and other data to the printer without the need for a direct computer connection. It offers convenience and flexibility by enabling standalone printing, where the printer reads the print instructions directly from the SD card.
What Does Initializing EEPROM Do
Initializing the EEPROM refers to the process of resetting or initializing the Electrically Erasable Programmable Read-Only Memory on your 3D printer. This process clears all the data stored in the EEPROM, including settings, configurations, and calibration values. By initializing the EEPROM, you start with a clean slate, allowing you to set up the printer with fresh preferences or default settings.
How Do You Make Firmware
Creating firmware for a 3D printer or any device involves software development with specific programming languages and tools. Here’s a simplified guide on creating firmware:
- Determine the requirements and desired features for the firmware.
- Choose a suitable programming language and environment to develop the firmware, such as C/C++ with Arduino or specific hardware platform SDKs.
- Write and compile the firmware code using an integrated development environment (IDE) or text editor and appropriate libraries for the target hardware.
- Test the firmware on the intended hardware, ensuring functionality, compatibility, and stability.
- Debug and optimize the firmware code, resolving any issues or errors encountered during testing.
- Document the firmware, providing instructions, release notes, and support information for users.
- Distribute the firmware through official channels or platforms, depending on the device’s specifications.
Creating firmware can be a complex process that requires programming knowledge and expertise. It’s recommended to refer to online resources, forums, or consult with experienced developers when creating firmware for your specific printer or device.
What is Gcode M501
Gcode M501 is a command used in 3D printing to retrieve and display the current configuration settings stored in the printer’s memory, such as the EEPROM. When you send the M501 command to the printer, it will respond by listing the various settings and values related to print parameters, axis steps, thermistor readings, PID (Proportional-Integral-Derivative) settings, and other relevant information. This allows you to check and verify the stored settings on your printer.
What is EEPROM DAT Ender 3
EEPROM DAT Ender 3 refers to the Electrically Erasable Programmable Read-Only Memory file specifically designed for the Ender 3 3D printer. The EEPROM DAT file contains the configuration settings, including calibration values, axis steps, acceleration parameters, and other printer-specific parameters. It can be used to backup, restore, or transfer the settings from one Ender 3 printer to another, ensuring consistency and convenience in printer setup.
How Do I Put My Keyboard in Flash Mode
To put your keyboard in flash mode for firmware flashing, follow these general steps:
- Identify the specific flash mode activation method for your keyboard model, as it can vary between different keyboards.
- Usually, the flash mode is activated by either pressing and holding a specific key or using a combination of keys during power-on or reset.
- Consult the documentation or manufacturer’s instructions for your keyboard to find the proper key combination or switch position.
- Once you locate the flash mode activation method, power off or disconnect the keyboard if necessary.
- Activate the flash mode by pressing and holding the designated key combination or switching the flash mode switch.
- While in flash mode, you can proceed with firmware flashing or any other necessary operations.
Remember to refer to your keyboard’s user manual or the manufacturer’s website for specific flash mode instructions, as different keyboard models may have unique flash mode activation methods.
What is Flashing QMK
Flashing QMK refers to the process of uploading or installing the QMK (Quantum Mechanical Keyboard Firmware) software onto a compatible mechanical keyboard. By flashing QMK, you replace the existing firmware on the keyboard’s microcontroller with the customized QMK firmware. This allows you to program and personalize the behavior of individual keys, macros, layers, and other advanced features according to your preferences, giving you a highly customizable keyboarding experience.
What Gcode Flavor Does Klipper Use
Klipper firmware for 3D printers primarily utilizes the “Marlin flavored” G-code. This means Klipper interprets and executes G-code commands in a similar way to Marlin firmware. The Marlin-flavored G-code is widely used and supported across various 3D printing slicers and software, making it compatible with popular tools and workflows.
How Do I Reset My EEPROM IC
Resetting the EEPROM IC (Electrically Erasable Programmable Read-Only Memory Integrated Circuit) on your 3D printer’s control board typically requires specific hardware knowledge and tools. This process involves clearing the ESPROM’s contents manually and potentially reprogramming it if necessary. As EEPROM IC reset methods can vary between printer models and control board designs, it’s advised to consult your printer’s documentation or seek guidance from the manufacturer or experienced technicians familiar with your specific printer’s hardware.
What Do You Mean by EEPROM
EEPROM stands for Electrically Erasable Programmable Read-Only Memory. It is a type of non-volatile memory used in electronic devices, including 3D printers. The EEPROM retains stored data even when power is removed, allowing devices to store and retrieve information reliably and consistently. In the context of 3D printing, the EEPROM holds settings and configurations that help maintain consistent performance and behavior across multiple prints.
What is Gcode Flavor
In the context of 3D printing, G-code flavor refers to the specific dialect or variant of G-code used by a printer’s firmware. Different printers and firmware may use slightly different versions of G-code, which may have minor syntax variations or added functionalities. Marlin, for example, supports various G-code flavors like Marlin (default), RepRap, UltiGCode, and Klipper. Understanding and selecting the appropriate G-code flavor ensures compatibility and proper interpretation of G-code instructions for optimal printer performance.
How Do I Reset My EEPROM
Resetting the EEPROM on your 3D printer involves clearing all the stored settings and configurations. To reset the EEPROM, follow these general steps:
- Access the printer’s firmware settings menu or interface.
- Locate the option to reset or initialize the EEPROM.
- Select the reset option, which may sometimes require confirmation.
- Once confirmed, the EEPROM will be cleared, and the printer’s settings will return to their default values.
- Power cycle the printer or reset it for the changes to take effect.
Remember that after resetting the EEPROM, you might need to reconfigure specific printer settings according to your preferences, calibrate the printer, and set up any necessary adjustments to achieve desired print results.