Welcome to our comprehensive guide on how to fix low spots in a shower floor! If you’ve ever experienced the frustration of having standing water on your bathroom floor, you’re not alone. Low spots in a shower floor can lead to poor drainage, which not only has the potential to damage your bathroom but can also create a breeding ground for mold and mildew.
In this blog post, we will cover everything you need to know about fixing low spots in your shower floor. From understanding the proper slope for water drainage to learning how to apply mortar effectively, we’ve got you covered. We’ll also discuss whether products like flex seal can be used, the importance of a pre-slope, and how to fix cracks in a concrete shower floor. So let’s dive in and find the solution to your low spot troubles!
Introduction
Welcome to our comprehensive guide on how to fix low spots in a shower floor. If you’ve ever experienced the frustration of having standing water on your bathroom floor, you’re not alone. Low spots in a shower floor can lead to poor drainage and potential damage to your bathroom. In this blog post, we’ll cover everything from the proper slope for water drainage to fixing cracks in a concrete shower floor. Let’s find the solution to your low spot troubles!
How to Fix Low Spots in Your Shower Floor
Identifying the Problem
We’ve all experienced the frustration of standing in a shower with low spots, feeling the water pooling around our feet like a mini swimming pool. But fear not, my fellow shower enthusiasts, for there is a solution to this pesky problem! Before we dive into the fix, let’s first understand what causes low spots in shower floors.
The Culprits
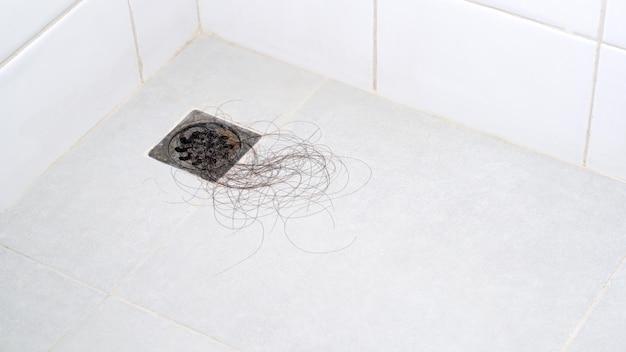
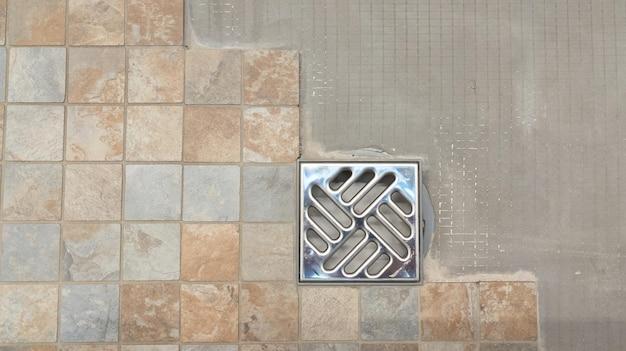
Low spots in shower floors can be attributed to various factors. Aging or poorly installed shower pans, improper sloping, or simply the wear and tear of time can contribute to this issue. No matter what the cause may be, the low spots are a surefire way to ruin your shower experience and create a breeding ground for mold and mildew.
Tools of the Trade
Now that we know what we’re up against, it’s time to gather our weapons of choice. Here’s the arsenal you’ll need to fix those low spots:
1. Spirit Level
A trusty spirit level will be your best friend in this battle. It helps you determine the exact slope of your shower floor and pinpoint those dreaded low spots.
2. Thinset Mortar
Thinset mortar acts as the adhesive that will level out your shower floor. Opt for a high-quality mortar for a long-lasting fix.
3. Trowel
A good trowel will help you spread the thinset mortar evenly across the low spots. Look for one with notched edges for better application.
The Fix: Step by Step
Now that we have our tools ready, let’s jump right into the fix. Here’s a step-by-step guide to help you bring back that smooth shower sensation:
1. Assess the Slope
Grab your trusty spirit level and place it in different areas of your shower floor to determine where exactly the low spots are located. This step is crucial in ensuring you have an accurate understanding of the issue at hand.
2. Prepare the Mortar
Follow the instructions on your thinset mortar package to prepare the mixture. Be sure to wear gloves and a mask to protect yourself from any potential respiratory irritation.
3. Apply the Mortar
Using your trowel, spread a generous layer of thinset mortar over the low spots in your shower floor. Make sure to apply it evenly and cover the entire affected area.
4. Level it Out
Using the flat side of your trowel, smooth out the mortar, ensuring it is level with the rest of the shower floor. Pay extra attention to the low spots and make sure they are adequately filled.
5. Let it Cure
Allow the thinset to cure as per the manufacturer’s instructions. This may take some time, so it’s crucial to exercise patience and resist the temptation to test your newly leveled shower floor prematurely.
Enjoy Your Flat-Footed Showers!
Congratulations, my determined shower troubleshooter! You have successfully vanquished those pesky low spots and restored your shower floor to its former glory. Say goodbye to the mini swimming pool and hello to a smooth, level surface that will make you feel like dancing with joy every time you step into your shower. Now go forth and enjoy those water cascades without any pesky interruptions. You’ve earned it!
FAQ: How to Fix Low Spots in Shower Floor
In this FAQ-style subsection, we’ll address common questions related to fixing low spots in your shower floor. We’ll provide helpful solutions, expert tips, and some entertaining insights along the way.
How Do You Fix a Low Spot in a Shower Floor
To fix a low spot in your shower floor, follow these steps:
- Prepare the area: Remove any loose or damaged tiles, clear debris, and ensure the surface is clean and dry.
- Mix the floor leveling compound: Follow the manufacturer’s instructions to prepare the floor leveling compound. Make sure it has a fluid consistency.
- Apply the compound: Pour the compound onto the low spot, using a trowel or a straightedge to spread it evenly. Feather the edges to blend with the surrounding area.
- Allow it to dry: Let the compound dry according to the manufacturer’s specifications. This may take a few hours or overnight.
- Check for levelness: Use a level to ensure the repaired area is now level with the rest of the shower floor.
- Replace tiles: Once the compound is fully dry and level, you can replace the tiles using a suitable adhesive.
How Do You Get Standing Water Off a Bathroom Floor
Having standing water on your bathroom floor can be frustrating. Here’s what you can do to address it:
- Investigate the cause: Determine why water is collecting on the floor. It could be due to a shower leak, blocked drains, or improper slope.
- Fix the underlying issue: Address the root cause by repairing any leaks, unclogging drains, or adjusting the shower slope.
- Enhance drainage: Install a floor squeegee or use a mop to remove excess water after each use. Consider adding a floor mat or towel nearby to absorb extra moisture.
- Improve ventilation: Ensure proper airflow in the bathroom to allow for faster drying. Use exhaust fans or open windows when possible.
What Fall Should a Shower Have
A shower should have a minimum fall or slope of 1/4 inch per foot (approximately 2% slope) to ensure proper water drainage. This slope allows water to flow towards the drain effectively, minimizing the chance of standing water and potential damage.
How Thick Can Mortar Be Applied
When applying mortar to fix low spots or level a shower floor, it’s important to ensure the right thickness. The maximum thickness for mortar application should generally be 3/4 inch. Keep in mind that thicker applications may take longer to dry and cure properly.
What Is the Minimum Slope for Water Drainage
For optimal drainage, the minimum slope required is 1/4 inch per foot. This slope allows water to flow naturally towards the drain, preventing standing water and potential moisture-related issues.
Will Flex Seal Work on a Shower Floor
While Flex Seal is known for its sealing properties and versatility, it is not recommended as a primary solution for fixing low spots in a shower floor. Flex Seal is more suitable for sealing small leaks or cracks, rather than leveling or repairing the entire shower floor.
Is Pre-Slope Necessary for Shower Pan
Yes, a pre-slope is necessary for a shower pan. A pre-slope is a slight incline created in the shower base before installing the waterproofing membrane and final floor. It ensures proper drainage by directing water towards the drain, preventing water from pooling.
How Do You Fix a Crack in a Concrete Shower Floor
To fix a crack in a concrete shower floor, follow these steps:
- Prepare the area: Clean the crack thoroughly, removing any loose debris or residue. Use a vacuum to ensure the area is clean and dry.
- Apply concrete epoxy: Fill the crack with a concrete epoxy using a putty knife or trowel. Make sure to push the epoxy firmly into the crack, filling it completely.
- Smooth and level: Smooth the epoxy surface with a trowel, ensuring it is level with the surrounding concrete.
- Allow it to dry: Give the epoxy ample time to dry and cure according to the manufacturer’s instructions.
- Seal the repaired area: Apply a concrete sealer to protect the repaired area from moisture and prevent future cracks.
Can I Use Thinset as a Skim Coat
Yes, thinset can be used as a skim coat to level a shower floor. Thinset, a mixture of cement, sand, and additives, can be applied as a thin layer to smooth out uneven surfaces and create a uniform base for tile installation.
How Do You Fix a Dip in a Bathroom Floor
To fix a dip in a bathroom floor, you can follow these steps:
- Determine the cause: Identify the underlying cause of the dip, such as water damage, improper subfloor installation, or structural issues.
- Repair the cause: Address the root cause by fixing the water damage, reinforcing the subfloor, or consulting a professional for structural repairs.
- Level the floor: Use a floor leveling compound to fill the dip, following the manufacturer’s instructions. Ensure the compound is applied evenly and feathered at the edges for a smooth transition.
- Allow it to dry: Give the leveling compound ample time to dry and cure, following the recommended drying time on the product packaging.
- Replace flooring: Once the area is level and dry, you can proceed to replace the flooring material with a suitable option of your choice.
Check out our related article on fixing bathroom floor dips for more detailed guidance!
Can I Use Mortar as a Floor Leveler
While mortar can be used to level certain surfaces, it is not recommended as a floor leveler for shower floors. Mortar is typically used as an adhesive or a binding agent for masonry work, such as laying bricks or attaching tiles. For floor leveling purposes, it’s better to use specialized floor leveling compounds designed for the task.
Can You Finish Cement Board Like Drywall
Yes, you can finish cement board like drywall. After ensuring the cement board is installed securely, you can apply joint compound to the seams, embed joint tape, and feather out the edges. Once dry, you can sand the joints and apply additional coats of joint compound as needed. Finally, the surface can be primed and painted, or tiled directly.
What Is the Proper Slope for a Shower Floor
To ensure proper drainage, the slope of a shower floor should be a minimum of 1/4 inch per foot. This slope allows water to flow correctly toward the drain, preventing water buildup and potential leaks. It’s important to maintain this slope when constructing or renovating a shower to avoid any future issues.
Can You Skim Over Old Thinset
Skimming over old thinset can be done if the existing layer is flat, clean, and well-bonded to the substrate. However, it’s important to check the manufacturer’s guidelines for the specific product you plan to use, as some may have limitations or recommendations regarding skim coating over thinset. Proper surface preparation is essential to ensure adhesion and a successful skim coat.
What Is the Minimum Slope for Shower Pan
The minimum slope for a shower pan is 1/4 inch per foot. This slope allows water to flow seamlessly toward the drain, ensuring efficient drainage and preventing water pooling or potential leaks. It’s crucial to adhere to this slope requirement during shower pan installation to maintain a functional and water-resistant shower.
Can I Use Thinset to Level a Shower Floor
Thinset is primarily used as an adhesive for tile installation and is not intended for leveling purposes on shower floors. Using a suitable floor leveling compound specifically designed for leveling shower floors is recommended to achieve a smooth and even surface.
Do You Need to Skim Coat Before Tiling
Skim coating before tiling is not always required, but it can be beneficial, especially if you have uneven or damaged surfaces. Skim coating helps create a level and stable base for tile installation, ensuring better adhesion and a professional finish. If you’re unsure whether skim coating is necessary for your specific project, consult with a professional or follow the tile manufacturer’s recommendations.
What Is the Cheapest Way to Level a Concrete Floor
One of the most cost-effective ways to level a concrete floor is by using a self-leveling compound. Self-leveling compounds are easy to use and typically require minimal surface preparation. They can help you achieve a level surface without the need for extensive manual leveling or hiring professionals.
Can I Use Mortar Instead of Cement
Mortar and cement are both important components in construction, but they serve different purposes. Mortar is a mixture of cement, sand, and water used for bonding materials together, such as bricks or stones. Cement, on the other hand, refers specifically to the powdered material used to make concrete. While they may contain similar ingredients, it’s important to use the right product for the specific task at hand.
How Do You Fix Standing Water in the Shower
To fix standing water in your shower, follow these steps:
- Check the drain: Ensure the drain is clear of any debris or clogs. Use a plunger or a drain snake to remove any blockages.
- Inspect the slope: Evaluate the slope of your shower floor using a level. If the slope is insufficient, you may need to consider leveling or reconstructing the shower floor to improve drainage.
- Unclog or replace drain pipes: If the standing water persists, there may be issues with the drain pipes. Consult a professional plumber to diagnose and fix any pipe obstructions or damages that may be causing the problem.
Is Floor Leveler the Same as Thinset
Floor leveler and thinset are two different materials used for separate purposes. Floor leveler is specifically designed to level or smooth uneven surfaces, creating a level base for flooring installation. Thinset, on the other hand, is a tile adhesive used to bond tiles to a prepared surface. While both materials can be used for tile installations, they serve different functions and should not be used interchangeably.
Now armed with this FAQ-style guide, you have the knowledge to tackle low spots in your shower floor like a pro. Remember, a leveled and properly drained shower not only prevents water issues but also adds to your overall showering experience. Happy fixing!
Note: This blog post is for informational purposes only and should not be considered professional advice. Always consult a licensed contractor or professional for specific guidance on your individual project.