Crafting with natural elements such as tree branches can add a rustic and unique touch to your projects. But before you can dive into the creative process, it’s important to properly dry out your branches. Whether you want to make centerpieces, decorations, or crafts, drying out branches is a crucial step to ensure their longevity and stability.
In this blog post, we will explore various methods and techniques to help you successfully dry out branches for your crafts. You’ll learn how to preserve tree branches, how to make cut branches last longer, and how to dry twigs for your creative endeavors. We’ll also address common questions, such as how long it takes for a branch to dry out and whether you can use freshly cut branches or burn them.
So, if you’re eager to unleash your inner crafter and turn nature’s offerings into beautiful creations, keep reading to discover the best ways to dry out branches for crafts in 2023.

How to Dry Out Branches for Crafts
So, you’ve got a sudden urge to get your craft on. You’ve got your glue gun, your glitter, and your imagination. But what’s missing? Ah, yes, the perfect dried out branches to add that rustic touch to your masterpiece. Fear not, my crafty friend, for I am here to guide you through the mystical art of drying out branches for crafts.
Timing is Everything
First things first, let’s talk about timing. You can’t just snap a branch off a tree and expect it to be ready for crafting duty. No, no, my friend, nature doesn’t work that way. The branches need time to dry out, and it’s crucial to pick the right moment. The best time to gather branches for drying is during the dormant season, which is usually late fall to early spring. So, put on your favorite cozy sweater and venture out into nature’s craft store during this magical time.
Choose Your Branches Wisely
Now that you’ve bravely stepped into the great outdoors, you’ll need to choose your branches wisely. Not all branches are created equal. When selecting branches for crafts, look for ones that are sturdy, without any signs of rot or insect damage. Don’t be tempted by the quirky twisted ones – they may look cool, but they won’t hold up in the long run. Trust me, you don’t want your masterpiece to collapse, leaving you with nothing but disappointment and a jar of glue.
Snip & Trim
Once you’ve found the perfect branches, it’s time to bring out your inner Edward Scissorhands and give them a little trim. Grab your trusty pair of pruning shears (or regular scissors if you want to feel extra badass) and cut the branches to your desired length. It’s best to trim the branches when they are still fresh, as they are easier to handle and shape. Plus, it gives you the chance to show off your superior snipping skills. Snip snip, my crafty friend, snip snip.
Indoor Spa Day
Now that you’ve harvested your branches and given them a snazzy trim, it’s time to treat them to a well-deserved indoor spa day. Find a well-ventilated area in your home, preferably away from prying eyes and judgmental pets (we don’t need any side-eye from Fluffy). Arrange the branches in a single layer on a drying rack or a piece of newspaper. Make sure they have plenty of space to breathe – nobody likes a crowded spa.
The Waiting Game
Ah, the waiting game. This might be the most challenging part of the process. But fear not, my impatient friend, for good things come to those who wait. Patience is a virtue, and in this case, a necessary one. It can take anywhere from a few weeks to several months for the branches to fully dry out, depending on their size and moisture content. So, distract yourself with other crafts, binge-watch your favorite shows, or take up yoga. Namaste, and let the drying commence.
Testing, Testing
Once you think your branches have dried out and undergone their spa transformation, it’s time for the ultimate test. Grab a branch and give it a gentle flex. If it snaps like a cracker, congrats! You’ve got yourself some perfectly dried branches. However, if it bends like a limp noodle, it’s back to square one, my crafty friend. Put it back in the drying zone and extend your patience just a little bit longer. Rome wasn’t built in a day, and neither are well-dried branches.
Craft Away
Finally, the moment you’ve been waiting for – it’s craft time! Now that your branches are dry and sturdy, you can let your creativity run wild. Use them as a base for wreaths, as rustic table centerpieces, or even as wall art. The possibilities are endless, and the only limit is your imagination. So, go forth, my crafty friend, and create something magnificent from those humble branches. You’ve earned it, and your glue gun is anxiously waiting for action.
So there you have it, the magical art of drying out branches for crafts. Now go forth and gather thy branches, for your creative kingdom awaits. Remember, patience is key, and a little bit of waiting can lead to extraordinary things. Happy crafting, my friend! May your projects be as breathtaking as the branches themselves.
FAQ: How to Dry Out Branches for Crafts
How do you preserve tree branches for centerpieces
If you want to create stunning centerpieces using tree branches, you’ll need to preserve them properly. The best way to do this is by air-drying the branches. Start by selecting branches that are free from damage or disease. Then, remove any leaves or twigs from the branches and give them a good shake to remove any debris. Next, place the branches in a well-ventilated area, preferably on a drying rack or suspended from a ceiling, allowing for maximum airflow. It may take a few weeks for the branches to completely dry out, so be patient. Once they are fully dried, you can use them to create beautiful and unique centerpieces.
How do you preserve evergreen branches with glycerin
Preserving evergreen branches with glycerin is a fantastic way to maintain their vibrant green color and prevent them from drying out. To do this, you’ll need a glycerin solution. Start by mixing one part glycerin with two parts hot water in a container large enough to submerge the branches. Then, make a fresh cut at the base of each branch and immediately place them in the glycerin solution. Allow the branches to soak in the solution for about two weeks, or until they have absorbed enough glycerin to make them pliable and supple. Once they are ready, take them out of the solution and let them air dry for a few days. Voila! You now have beautifully preserved evergreen branches ready for your crafts.
How do you make cut branches last longer
It can be disappointing when cut branches start to wilt and lose their charm before you even have a chance to use them. But fear not, there are a few tricks to make your cut branches last longer. The first step is to give them a fresh cut at the base, removing at least an inch of the stem. This will allow the branches to absorb water more easily. Place the branches in a clean vase filled with fresh water and add a few drops of bleach to minimize bacterial growth. Don’t forget to change the water every few days to keep it fresh. Additionally, keeping the branches away from direct sunlight and drafts will help prolong their lifespan. With these simple steps, you can enjoy your freshly cut branches for a longer time.
How long does wet wood take to dry
Ah, the age-old question – how long does wet wood take to dry? Well, it depends on several factors, such as the type of wood, the thickness of the pieces, and the drying conditions. On average, it can take anywhere from a few weeks to several months for wet wood to fully dry. And let’s face it, waiting for wood to dry can feel like an eternity. But remember, good things come to those who wait! To speed up the drying process, make sure the wood is stacked properly with enough spacing between the pieces for adequate air circulation. Also, placing the wood in a dry and well-ventilated area, preferably with some sunshine, will help it dry more quickly. So, be patient, my friend, and before you know it, your wood will be ready for crafting!
How do you dry out a branch
Drying out a branch doesn’t have to be as dull as watching paint dry. In fact, it can be quite an entertaining process! To dry out a branch, start by removing any leaves, twigs, or unwanted bark. Then, find the perfect spot for your branch to hang out and soak up some air. A well-ventilated area is ideal, so consider a dry corner of your garage or a covered porch. If you’re feeling extra adventurous, you can even fashion a drying rack or use some twine to suspend the branch from the ceiling. Just make sure it’s secure and won’t come crashing down like a fallen star. Depending on the size of your branch and the environmental conditions, drying it out can take anywhere from a few weeks to a couple of months. So grab some popcorn, put on a good movie, and enjoy the show as your branch transforms into a prime crafting material!
How do you use real branches for decorations
Using real branches for decorations can add a touch of nature’s charm to any space. There are endless possibilities for incorporating branches into your decor, so let your creativity run wild! One popular idea is to create a captivating centerpiece by arranging branches in a tall vase and adorning them with fairy lights or hanging ornaments. You can also create a rustic wall hanging by attaching branches to a sturdy board, then embellishing them with decorative elements like feathers, ribbons, or dried flowers. For a whimsical touch, you can even use branches as a unique alternative to traditional curtain rods. The key is to let your imagination soar and embrace the natural beauty that real branches bring to your decorations.
How do you make tree branches for crafts
Crafting with tree branches opens up a world of possibilities. To make your own tree branches for crafts, start by gathering fallen branches from your backyard or local park. Look for branches that are relatively straight and free from cracks or rot. Once you have your branches, thoroughly clean them by removing any loose bark, dirt, or critters that may have taken up residence. Then, give them a good sanding to smooth out any rough patches and prevent splinters. If you want to add some pizzazz, you can paint the branches or apply a clear coat to enhance their natural beauty. Once dry, your tree branches are ready to be transformed into unique and eye-catching crafts. So, grab your glue gun, unleash your creativity, and let those branches shine!
Can you burn freshly cut branches
The urge to burn freshly cut branches may be tempting, but it’s not as straightforward as it seems. Burning wet or freshly cut branches can create a lot of smoke, making it a less than pleasant experience for you and your neighbors. Plus, wet or green wood doesn’t burn efficiently and can leave you with a sputtering fire. If you absolutely must burn freshly cut branches, make sure they are small, dry, and properly seasoned. Seasoned wood refers to wood that has been left to dry for at least six to twelve months, allowing the moisture content to decrease. So, if you’re craving the warmth and crackle of a good fire, be patient and let those branches dry out properly before throwing them in the flames.
How do you dry twigs for crafts
Drying twigs for crafts is like preparing tiny pieces of art for your masterpieces. To dry twigs, start by removing any leaves or excess foliage from the branches. Then, arrange the twigs in a single layer on a clean tray or drying rack, making sure they are not overcrowded. Find a spot with good airflow, like a well-ventilated room, and place the twigs there. Patience is key, my crafty friend, as it can take a few days up to a couple of weeks for the twigs to fully dry. Once they are dry, you can use them for various craft projects, such as wreaths, decorative accents, or even as delicate additions to handmade cards. So, get ready to twirl your creative wand and let those dry twigs work their magic!
How do you preserve a piece of wood
Preserving a piece of wood is like giving it a fresh coat of life’s best qualities. To preserve the natural beauty and longevity of wood, you’ll need to apply a protective finish. First, make sure the wood is clean and free from dust or debris. Then, choose your weapon of choice: paint, varnish, or sealant. Paint is great for adding color and creating a unique look. Varnish provides a clear protective coat that enhances the wood’s natural beauty. Sealants, such as polyurethane or wax, offer both protection and a lovely sheen. Whichever method you choose, follow the manufacturer’s instructions for application and drying times. Remember, the better you preserve your piece of wood, the longer it will stand the test of time and remain a cherished part of your crafts or furniture.
What do you do with fallen tree branches
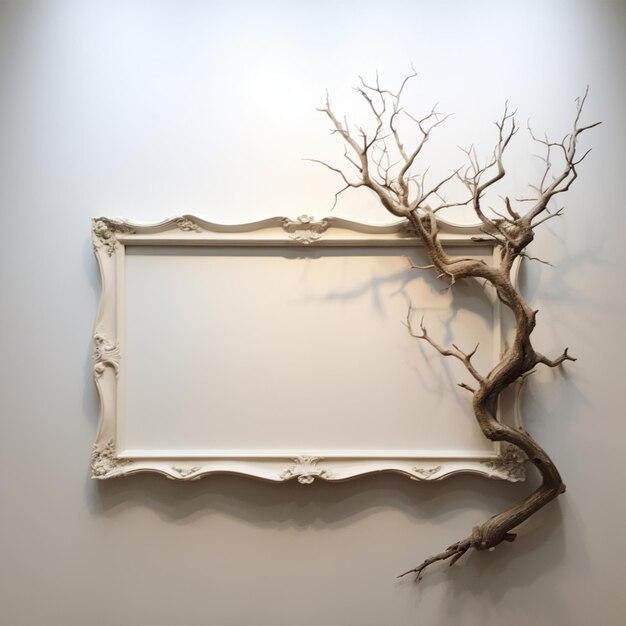
When life gives you fallen tree branches, why not turn them into something magnificent? Fallen tree branches offer a wealth of crafting opportunities. You can transform them into rustic picture frames, natural candlesticks, or one-of-a-kind coat racks. If you’re feeling more adventurous, create a stunning macrame wall hanging by attaching branches together with colorful yarn or twine. You can also chop them into smaller sections and use them as unique plant markers in your garden. The possibilities are endless, limited only by your imagination. So, instead of letting those fallen branches go to waste, channel your inner artist and let them become the stars of your next crafting endeavor!
Can you dry out twigs in the oven
It may sound like a recipe from a witch’s potion book, but drying twigs in the oven can indeed be a magical experience. To dry out twigs in the oven, start by preheating it to a low temperature, around 200°F (93°C). While the oven is heating up, spread out the twigs on a baking sheet in a single layer, ensuring they are not overlapping. Place the baking sheet with the twigs in the oven and leave the door slightly ajar to allow moisture to escape. Let the twigs bake in the gentle heat for about an hour or until they are dry and brittle to the touch. Keep a close eye on them to avoid any fiery accidents! Once they are fully dried, remove them from the oven and let them cool before incorporating them into your craft projects. Remember, safety first, my friend, and let the oven work its magic!
How do you preserve real tree branches
Preserving real tree branches allows you to extend their lifespan and enjoy their natural beauty for longer. The secret lies in the power of moisture removal. First, remove any leaves, twigs, or unwanted bark from the branches. Then, give them a gentle rinse to remove any dirt or pests that may be hitching a ride. Afterward, let the branches air dry for a day or two to remove surface moisture. Once dry, the branches are ready for their final preservation treatment. There are a few options you can choose from: using a desiccant like silica gel to absorb moisture, applying a wood stabilizer to harden and protect the branches, or varnishing them for an extra layer of defense. Whichever method you choose, the end result will be beautifully preserved tree branches, ready to take on any crafting adventure!
How do you treat decoration logs
Treating decoration logs is like giving them a spa day, and who doesn’t love a bit of pampering? First, clean the logs by removing any loose bark, dirt, or critters that may have made a home there. Then, determine whether the logs need any special treatment. If you want to preserve the natural look of the logs, a simple clear coat of varnish or sealant will protect them from moisture and wear. However, if you’re feeling bold and adventurous, unleash your inner Picasso by painting or staining the logs with colors that speak to your creative soul. Just make sure to use paint or stain that is specifically designed for wood to ensure a long-lasting finish. Once you’ve treated your decoration logs, they’ll be ready to bring a touch of rustic charm to any corner of your home.
How do you dry tree branches for decorations
Drying tree branches for decorations is like prepping them for their red carpet moment. You’ll want them to look their best! Start by selecting healthy branches without any signs of disease or pests. Remove any leaves, twigs, or unwanted bark, and give them a gentle shake to send any lingering debris on its way. Next, it’s showtime for your branches! Find a well-ventilated area with good air circulation, like a covered porch or an open garage, and arrange the branches in a single layer. Avoid overcrowding to ensure each branch gets enough individual attention. Depending on the thickness of the branches and the environmental conditions, drying them can take anywhere from a few weeks to a couple of months. Remember, patience is key, and soon those branches will be ready to steal the spotlight as stunning decorations in your home.
How do you seal wood branches
Sealing wood branches is like giving them a protective hug that says, “I’ve got you covered!” To seal wood branches, you’ll need a sealant that can withstand the test of time and protect them from moisture, wear, and UV rays. Start by making sure the branches are clean and dry. Then, it’s time to choose your sealant superhero. Polyurethane, varnish, or clear epoxy resin are all excellent choices that will give your branches the shield they deserve. Follow the manufacturer’s instructions for application and drying times, and apply multiple coats for maximum protection. Whether you’re using a brush, roller, or spray, make sure to cover every nook and cranny. Once the sealant is dry, those branches will be ready to face the world with confidence, knowing they have the ultimate defense against the elements.
How do you preserve wood logs with bark
Preserving wood logs with bark intact is like honoring their natural beauty and allowing them to shine. First, make sure the logs are clean and free from dirt or pests. Gently brush or wipe away any debris, but be careful not to damage the bark. Once the logs are clean, it’s time to show them some love and protection. Apply a clear wood sealant to the bark, following the manufacturer’s instructions for application and drying times. This will help preserve the bark and prevent it from deteriorating over time. Keep in mind that the sealant will not only protect the bark but also enhance its natural color and texture. With the bark properly preserved, those wood logs will become stunning focal points in your crafts or home decor projects for years to come.
How long does it take for a branch to dry out
Ah, the waiting game! How long does it take for a branch to dry out? Well, the drying time can vary depending on several factors, such as the thickness of the branch, environmental conditions, and the type of wood. On average, it can take anywhere from a few weeks to several months for a branch to fully dry. While waiting for the drying magic to happen, make sure to keep an eye on the branch and monitor its progress. Once the branch is completely dry, it will be lighter, more brittle, and devoid of any moisture. So, while anticipation may make the waiting seem longer