Birch branches are a versatile and beautiful natural material that can be used for various craft projects. Whether you want to create rustic decorations, unique centerpieces, or even natural jewelry, using clean and well-preserved birch branches is essential to achieve the best results.
In this guide, we will walk you through the process of cleaning and preparing birch branches for crafts. From disinfecting large branches to preserving tree bark for decorations, we’ve got you covered. You’ll also learn about drying out branches and sealing them for long-lasting use. So, let’s dive right in and discover the secrets to working with birch wood in your craft projects!
Keywords: How do you clean birch wood for crafts, How do you preserve twigs for crafts, How do you disinfect a large branch, How do you clean birch wood, Does birch need wood conditioner, How do you disinfect wood from outside, How do you preserve birch branches for decorations, How do you prepare branches for crafts, How do you preserve tree branches with leaves, How do you dry out a branch, How do you clean tree bark in crafts, How long does it take for small tree branches to dry out, How do you clean wild wood, How do you seal a tree branch for decorations, How do you seal birch wood, How do you make branches safe for reptiles, What is a good finish for birch wood, How do you preserve tree bark to decorate, How do you preserve pine branches for decorations.
How to Clean Birch Branches for Crafts
Crafting with birch branches can add a touch of rustic charm to your home decor projects. But before you start designing, it’s important to give your birch branches a good cleaning to ensure they’re ready for crafting. In this section, we’ll walk you through the steps on how to clean birch branches, so you can unleash your creativity without any bark-ward surprises!
Shake It Off, Shake It Off!
The first step in cleaning birch branches is to remove any loose debris. Hold the branches firmly by the base and give them a gentle shake. This will help dislodge any loose bark, leaves, or critters that may have decided to make a home in the cozy nooks and crannies of your branches. Don’t worry if a few more leaves fall off—it’s just nature’s way of saying hello!
Scrub-A-Dub-Dub, Branches in the Tub
Once you’ve shaken off the excess debris, it’s time to give your birch branches a spa treatment! Fill a bathtub or large sink with warm water and add a splash of mild dish soap. Gently place the branches in the water, making sure they’re completely submerged. Let them soak for about 15 minutes, giving the soap time to work its magic and loosen any dirt or grime.
Don’t Get Sappy, Use a Toothbrush!
After the branches have had their bubbly soak, it’s time to get up close and personal with them. Grab a toothbrush (preferably not the one you use to brush your pearly whites) and gently scrub the branches, paying extra attention to any stubborn spots or sticky sap. The bristles of the toothbrush will help remove any remaining dirt or sap without damaging the delicate bark.
Rinse, Rinse, and Then Rinse Some More
Once you’re satisfied with your scrub-a-dub-dubbing skills, it’s time to rinse off the soap. Place the branches under running water, using your hands to gently rub away any soap residue. Make sure to rinse thoroughly so that no soap is left behind, as this could affect the longevity of your branches and the success of your crafts. Give them a final shake to remove excess water—like a leafy birch branch version of the Hokey Pokey!
Take It Slow, Let It Dry
Now that your branches are squeaky clean, it’s time to let Mother Nature work her drying magic. Find a cool, well-ventilated area away from direct sunlight and lay the branches out to dry. Patience is key here, as it can take several days for the branches to dry completely. And remember, don’t rush the process by using artificial heating methods, as this could cause the branches to warp or crack. Good things come to those who wait!
An Oil Massage for a Gleaming Finish
If you want to give your birch branches a shiny sheen, you can apply a light coat of mineral oil once they’re dry. Using a soft cloth, gently rub the oil onto the surface of the branches, following the direction of the grain. This will not only enhance the natural beauty of the bark but also help protect the branches from drying out or cracking over time. Just be careful not to overdo it—a little oil goes a long way!
The Final Touch of Crafty Brilliance
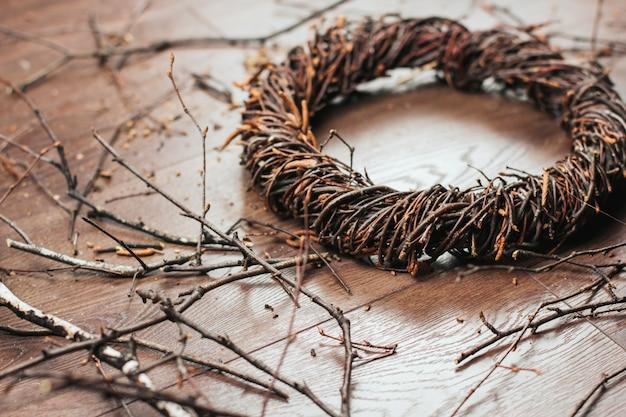
With your freshly cleaned and pampered birch branches, you’re now ready to embark on your crafting journey! Whether you’re creating stunning wreaths, unique wall art, or whimsical candle holders, your birch branches will be the star of the show. So go ahead, unleash your creativity, and let your crafts flourish with the natural beauty of birch!
Crafting with birch branches is a great way to bring the beauty of nature into your home. By following these simple cleaning steps, you’ll ensure that your branches are in tip-top shape for all your crafty endeavors. So, put on your apron, grab your glue gun, and let the birch branch fun begin!
FAQ: How Do You Clean Birch Branches To Use For Crafts
Crafting with birch branches can add a touch of rustic charm to your home decor or DIY projects. But before you start, it’s important to know how to properly clean and prepare birch branches for crafts. In this FAQ-style guide, we’ll address all your burning questions about cleaning and preserving birch branches for various crafting purposes.
How Do You Clean Birch Wood for Crafts
To clean birch wood for crafts, follow these simple steps:
- Start by brushing off any loose dirt or debris from the branches.
- Fill a bucket with warm water and add a small amount of mild dish soap.
- Dip a soft brush or sponge into the soapy water and gently scrub the branches, removing any stubborn dirt or stains.
- Rinse the branches thoroughly with clean water to remove any soap residue.
- Pat the branches dry with a clean towel and allow them to air dry completely before using them in your crafts.
How Do You Preserve Twigs for Crafts
Preserving twigs for crafts ensures their longevity and minimizes the risk of pests or decay. Here’s a simple preservation method:
- Remove any leaves or loose bark from the twigs.
- Mix equal parts water and glycerin in a container.
- Submerge the twigs in the glycerin mixture and let them soak for about a week.
- Once the twigs have absorbed the glycerin, remove them from the mixture and let them air dry for a few days.
- The preserved twigs are now ready to be used in your crafts!
How Do You Disinfect a Large Branch
If you have a large branch that needs disinfecting, follow these steps to ensure cleanliness:
- Wear protective gloves and eyewear before handling the branch.
- Fill a spray bottle with a mixture of equal parts water and white vinegar.
- Spray the solution generously on the branch, making sure to cover all surfaces.
- Let the vinegar solution sit on the branch for about 10 minutes to allow it to disinfect.
- After 10 minutes, wipe down the branch with a clean cloth or paper towel.
- Leave the branch in a well-ventilated area to air dry completely before use.
How Do You Clean Birch Wood
To clean birch wood, you can use a combination of mild dish soap and warm water. Follow these steps:
- Mix a small amount of mild dish soap with warm water in a bucket.
- Dip a soft cloth or sponge into the soapy water and wring it out to remove excess moisture.
- Gently wipe down the birch wood, making sure to clean all surfaces.
- Rinse the cloth or sponge with clean water and wipe away any soapy residue.
- Dry the birch wood with a clean towel and allow it to air dry completely before use.
Does Birch Wood Need Wood Conditioner
Birch wood can benefit from the application of wood conditioner, especially if you plan to stain or finish it. Wood conditioner helps to even out the absorption of stain or finish, resulting in a more consistent finish. Apply wood conditioner according to the manufacturer’s instructions before proceeding with any staining or finishing.
How Do You Disinfect Wood from Outside
If you’re using wood that has been exposed to the elements, such as fallen branches from your backyard, it’s important to disinfect it properly. Follow these steps:
- Wear protective gloves and eyewear before handling the wood.
- Brush off any loose dirt or debris from the wood.
- Fill a spray bottle with a mixture of bleach and water (1 part bleach to 10 parts water).
- Spray the solution generously on the wood, ensuring all surfaces are covered.
- Let the bleach solution sit on the wood for about 10 minutes to disinfect.
- Rinse the wood thoroughly with clean water to remove any bleach residue.
- Allow the wood to air dry completely before use.
How Do You Preserve Birch Branches for Decorations
Preserving birch branches for decorations is a great way to extend their lifespan. Here’s a simple preservation method:
- Remove any loose bark or leaves from the birch branches.
- Mix equal parts water and glycerin in a container or bucket.
- Submerge the branches in the glycerin mixture and let them soak for about a week.
- Once the branches have absorbed the glycerin, remove them from the mixture and let them air dry for a few days.
- The preserved birch branches are now ready to be used as eye-catching decorations in your home!
How Do You Prepare Branches for Crafts
Preparing branches for crafts involves a few essential steps:
- Start by selecting branches that are straight and free from any signs of decay or pests.
- Remove any loose bark, leaves, or twigs from the branches.
- If desired, sand the branches lightly to smooth out any rough areas.
- Clean the branches using the methods mentioned earlier in this guide.
- Allow the branches to air dry completely before using them in your crafts.
How Do You Preserve Tree Branches with Leaves
Preserving tree branches with leaves helps retain their natural beauty. Here’s how you can do it:
- Select healthy, vibrant tree branches with leaves.
- Bundle the branches together and secure them with twine or rubber bands.
- Hang the bundles upside down in a cool, dry place with good airflow.
- Leave the branches to dry naturally until the leaves are fully dried and crisp.
- Once the branches are dry, you can use them as-is or apply a protective sealant for added longevity.
How Do You Dry Out a Branch
Drying out a branch is a crucial step in preparing it for crafts. Here’s how to do it:
- Remove any loose bark, leaves, or twigs from the branch.
- Select a dry, well-ventilated area where the branch can be placed horizontally.
- Lay the branch on a clean surface, ensuring it is not in contact with any moisture.
- Allow the branch to air dry naturally for several weeks or until it is completely dry and lightweight to the touch.
- Once the branch is fully dried, it is ready to be used in your crafts.
How Do You Clean Tree Bark in Crafts
Cleaning tree bark in crafts is essential for a polished finished look. Follow these steps to clean tree bark:
- Brush off any loose dirt or debris from the tree bark using a soft brush or cloth.
- Gently scrub the tree bark with a mixture of warm water and mild dish soap using a soft brush.
- Rinse the bark with clean water to remove any soap residue.
- Pat the bark dry with a clean towel and allow it to air dry completely before using it in your crafts.
How Long Does It Take for Small Tree Branches to Dry Out
The drying time for small tree branches depends on various factors such as humidity levels and the thickness of the branches. On average, small branches can take anywhere from a few weeks to several months to dry completely. It’s essential to monitor them regularly and ensure they are fully dry before using them in crafts.
How Do You Clean Wild Wood
Cleaning wild wood requires extra care due to the potential presence of pests or diseases. Follow these steps to clean wild wood:
- Wear protective gloves and eyewear before handling the wild wood.
- Brush off any loose dirt or debris using a soft brush or cloth.
- Fill a spray bottle with a mixture of mild dish soap and warm water.
- Spray the solution on the wood, making sure to cover all surfaces.
- Use a soft brush or sponge to gently scrub the wood, removing any dirt or stains.
- Rinse the wood thoroughly with clean water to remove any soap residue.
- Allow the wood to air dry completely in a well-ventilated area before use.
How Do You Seal a Tree Branch for Decorations
Sealing a tree branch for decorations not only enhances its appearance but also helps to protect it. Here’s how to seal a tree branch:
- Ensure the branch is clean and dry before starting.
- Apply a wood sealant or primer to all surfaces of the branch using a brush or spray.
- Allow the sealant to dry according to the manufacturer’s instructions.
- Once the sealant is dry, you can paint, stain, or decorate the branch as desired.
How Do You Seal Birch Wood
Sealing birch wood helps to enhance its natural beauty and protect it from wear and tear. Follow these steps to seal birch wood:
- Start by sanding the birch wood using fine-grit sandpaper to smooth out any imperfections.
- Wipe away any dust or debris with a clean cloth.
- Apply a thin and even coat of wood sealer or polyurethane using a brush or foam applicator.
- Allow the sealer to dry completely according to the manufacturer’s instructions.
- Lightly sand the surface with a fine-grit sandpaper and apply subsequent coats if necessary.
- Once the final coat is dry, the birch wood is sealed and ready for use.
How Do You Make Branches Safe for Reptiles
If you plan to use branches for reptile habitats, it’s crucial to ensure their safety. Follow these guidelines to make branches safe for reptiles:
- Choose branches that are free from harmful substances, pesticides, or chemicals.
- Thoroughly clean the branches using a reptile-safe disinfectant or a vinegar-water solution.
- Rinse the branches with clean water to remove any residue.
- Bake the branches in an oven at a low temperature (around 200°F/93°C) for 30 minutes to kill any potential pests or bacteria.
- Let the branches cool down completely before placing them in the reptile’s habitat.
What Is a Good Finish for Birch Wood
A good finish for birch wood depends on the desired look and level of protection. Here are some popular options:
- Clear polyurethane: Provides a glossy, protective finish that highlights the natural beauty of birch wood.
- Tung oil: Enhances the grain and color of the wood while providing a durable finish.
- Danish oil: Offers a rich, warm finish that accentuates the natural character of birch wood.
- Wax: Provides a smooth and subtle sheen while protecting the wood from moisture and dirt.
How Do You Preserve Tree Bark to Decorate
Preserving tree bark for decoration purposes keeps it intact and adds a touch of rustic charm to your crafts. Follow these steps to preserve tree bark:
- Spray a clear acrylic sealer or polyurethane onto the tree bark, covering all surfaces.
- Let the sealer dry completely before applying a second coat if desired.
- Once the bark is sealed and dry, it is ready to be used for various decorative purposes.
How Do You Preserve Pine Branches for Decorations
Preserving pine branches for decorations can help maintain their vibrant green color and scent. Here’s a simple preservation method:
- Remove any loose or dead needles from the pine branches.
- Mix equal parts water and glycerin in a container or bucket.
- Submerge the branches in the glycerin mixture and let them soak for about a week.
- Once the branches have absorbed the glycerin, remove them from the mixture and let them air dry for a few days.
- The preserved pine branches are now ready to be used in your delightful decorations!
Now that you have all the information you need on how to clean and prepare birch branches for crafts, you’re ready to unleash your creativity and bring nature’s beauty into your projects. Happy crafting!