Revit, the popular software used in architectural design and building information modeling (BIM), provides architects and designers with powerful tools for creating detailed 3D views. One essential skill for creating accurate and visually appealing models in Revit is knowing how to draw lines in a 3D view. Whether you want to add reference lines, detail lines, or grid lines, mastering this technique is essential.
In this blog post, we will explore various methods to draw lines in a 3D view using Revit. We will cover topics such as rotating sheet views, saving 3D views, adding and annotating lines, locking and unlocking views, scaling views, and much more. So, if you’re looking to enhance your Revit skills and learn the art of drawing lines in a 3D view, this guide is all you need.
So let’s dive in and unlock the secrets of drawing lines in a 3D view in Revit!
How to Draw Lines in a 3D View in Revit
So, you’ve mastered the basics of Revit and are ready to take your 3D modeling skills to the next level. One of the fundamental techniques you need to know is how to draw lines in a 3D view. Fear not, my friend, for I am here to guide you through this seemingly daunting task with humor, wit, and a touch of American panache.
Understanding the Art of Line Drawing in Revit
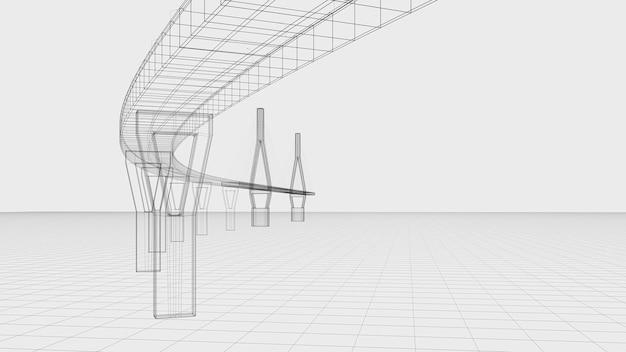
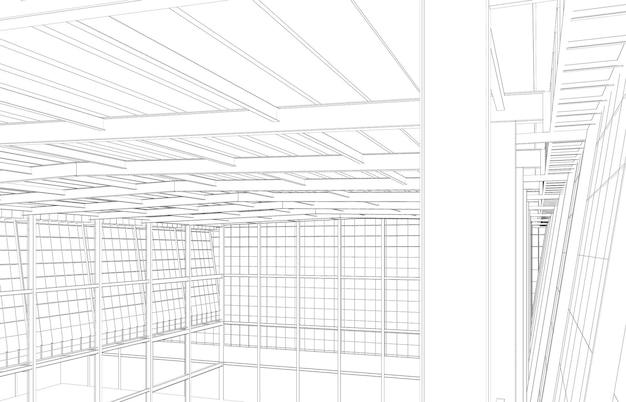
Before we delve into the nitty-gritty of drawing lines in a 3D view, let’s take a moment to appreciate the beauty of lines themselves. They’re like the backbone of any design, providing structure, flow, and direction. In Revit, lines are your artistic brushes, ready to create stunning 3D masterpieces. So, let’s grab our virtual pencils and get sketching!
Commanding the Line Tools
Revit offers a plethora of tools to create lines in a 3D view. To access these tools, head over to the “Modify” tab and unleash the power of your creativity. One of the most commonly used line tools is the “Model Lines” tool, which allows you to draw lines on an imaginary canvas.
Navigating the 3D Maze
Now that we have our drawing tools at the ready, let’s explore the 3D view in Revit. It’s like stepping into a virtual world where you can manipulate objects and bring your imagination to life. Use the navigation controls to zoom, pan, and orbit around your model. Feel free to pretend you’re a superhero flying through a cityscape; after all, designing in Revit should be an adventure!
Assembling your Line Symphony
Now comes the fun part – let’s start drawing some lines! Select the appropriate line tool and click on the canvas to lay down the foundation of your design. Whether you’re sketching the outline of a building or creating intricate patterns, Revit’s line drawing capabilities are your ticket to architectural stardom.
Tips and Tricks from the Virtual Drawing Board
Drawing lines in a 3D view can sometimes be as unpredictable as a game of Pictionary. But fear not, dear artist, for I have a few tricks up my sleeve that will make your line drawing experience a breeze:
-
Snap to Grid: To ensure precision, enable the “Snap to Grid” option. This handy feature aligns your lines perfectly, saving you from a wonky and asymmetrical design.
-
Line Weights: Experiment with line weights to add depth and definition to your model. Thick lines can make elements pop, while thin lines can convey subtlety and elegance.
-
Invisible Lines: Sometimes, you might want to hide certain lines to achieve a cleaner look. Revit allows you to make lines invisible with a simple click, giving your design that extra touch of finesse.
Congratulations, my fellow Revit adventurer! You have now unlocked the secrets of drawing lines in a 3D view. Remember to embrace your creative spirit, unleash your imagination, and let those lines dance across the screen like a ballet in cyberspace. May your designs be awe-inspiring, your lines be straight, and your journey through the virtual realm of Revit be nothing short of fabulous. Happy drawing!
Enjoyed this article? WANNA READ MORE? Check out our blog for more Revit tips and tricks!
Frequently Asked Questions: How to Draw Lines in a 3D View in Revit
Welcome to our comprehensive FAQ section, where we’ve gathered the most common questions about drawing lines in a 3D view in Revit. Whether you’re new to Revit or looking to expand your skills, we’ve got you covered. Read on to find answers to your burning questions!
How do you rotate a sheet view in Revit
Rotating a sheet view in Revit is surprisingly simple. Just follow these steps:
- Select the sheet view you wish to rotate.
- Go to the “Modify” tab.
- Click on the “Rotate” tool in the “Modify” panel.
- Click on the sheet view and select a rotation angle.
- Hit the enter key or click the green checkmark to finalize the rotation.
How do you save a 3D view in Revit
Saving a 3D view in Revit is a piece of cake. Just follow these steps:
- Navigate to the 3D view you want to save.
- Go to the “View” tab.
- Click on the “Save to Project” button in the “Windows” panel.
- Give your view a name and hit save.
How do you add lines in Revit
To add lines in Revit, simply follow these steps:
- Go to the “Architecture” tab.
- Click on the “Model” button in the “Build” panel.
- Select the “Line” tool.
- Click to place the starting point of your line.
- Move your cursor to create the desired line shape.
- Click again to finish drawing the line.
Where is the view control bar in Revit
The view control bar in Revit is located at the bottom of the application window. It offers a variety of useful tools for navigating and interacting with your views. Keep an eye out for it and make the most of its convenient features!
Where are detail lines in Revit
Detail lines in Revit can be found in the “Annotate” tab, specifically in the “Detail” panel. Look for the “Detail Line” tool, which will allow you to add those precise and accurate lines to your project.
How do you create reference lines in Revit
Creating reference lines in Revit is a breeze. Just follow these steps:
- Go to the “Architecture” tab.
- Click on the “Model” button in the “Build” panel.
- Select the “Reference Line” tool.
- Click to place the starting point of your reference line.
- Move your cursor to create the desired line shape.
- Click again to finish drawing the reference line.
Can you annotate a 3D view in Revit
Absolutely! You can annotate a 3D view in Revit to add clarity and information. Use tools like dimensions, text, and detail lines to highlight important elements and provide additional context to your 3D model.
How do you lock a view in Revit
Locking a view in Revit is a useful way to prevent accidental changes. To lock a view, follow these steps:
- Go to the “View” tab.
- Click on the “Lock/Unlock” button in the “Windows” panel.
- Select the view you want to lock.
- Confirm the lock by clicking the green checkmark.
How do you draw guide lines in Revit
Drawing guide lines in Revit is a fantastic way to maintain accuracy in your designs. Here’s how you do it:
- Go to the “Architecture” tab.
- Click on the “Model” button in the “Build” panel.
- Select the “Line” tool.
- Hold down the CTRL key on your keyboard.
- Click and drag to create a guide line.
How do you draw a line in a family in Revit
Drawing a line in a family in Revit is a straightforward process. Just follow these steps:
- Open the family editor.
- Go to the “Create” tab.
- Click on the “Line” tool in the “Draw” panel.
- Click to place the starting point of your line.
- Move your cursor to create the desired line shape.
- Click again to finish drawing the line.
How do you view drawings in Revit
Viewing drawings in Revit is essential for reviewing and analyzing your designs. To view drawings, simply:
- Open your Revit project.
- Navigate to the “View” tab.
- Click on the “Sheet Composition” button in the “Create” panel.
- Select the drawing you want to view from the available sheets.
Can I dimension a 3D view in Revit
Absolutely! You can dimension a 3D view in Revit to provide accurate measurements and convey critical information. Utilize the dimension tools available in the “Annotate” tab to add dimensions to your 3D views with ease.
How do you draw a grid line in Revit
Drawing grid lines in Revit is a fundamental step in establishing the framework of your project. To draw grid lines, simply follow these steps:
- Go to the “Architecture” tab.
- Click on the “Datum” button in the “Build” panel.
- Select the “Horizontal” or “Vertical” grid line tool.
- Click twice to define the length and position of the grid line.
How do you draw 3D in Revit
Drawing in 3D is where Revit truly shines. To draw in 3D, follow these steps:
- Go to the “Architecture” tab.
- Click on the “Model” button in the “Build” panel.
- Select the desired 3D drawing tool.
- Click to place the starting point of your element in 3D space.
- Move your cursor to create the desired shape or form.
- Click again to finish drawing in 3D.
How do you make a detail line in 3D Revit
Creating detail lines in 3D Revit can add depth and complexity to your designs. Follow these steps to make a detail line:
- Go to the “Architecture” tab.
- Click on the “Model” button in the “Build” panel.
- Select the “Detail Line” tool.
- Click to place the starting point of your detail line in 3D space.
- Move your cursor to create the desired shape.
- Click again to finish drawing the detail line.
How do you draw a center line in Revit
Drawing a center line in Revit is essential for indicating symmetry or dividing elements. Just follow these simple steps:
- Go to the “Architecture” tab.
- Click on the “Model” button in the “Build” panel.
- Select the “Centerline” tool.
- Click to place the starting point of your center line.
- Move your cursor to create the desired line shape.
- Click again to finish drawing the center line.
How do you unlock a view in Revit
Unleashing the full potential of a locked view is as easy as pie. Follow these steps to unlock a view in Revit:
- Go to the “View” tab.
- Click on the “Lock/Unlock” button in the “Windows” panel.
- Select the locked view you want to unlock.
- Confirm the unlock by clicking the green checkmark.
How do you scale a 3D view in Revit
Scaling a 3D view in Revit allows you to adjust the relative sizes of elements. To scale a 3D view, perform the following steps:
- Go to the “View” tab.
- Click on the “Scale” button in the “Windows” panel.
- Select the 3D view you want to scale.
- Choose a scale factor from the available options.
- Click the green checkmark to finalize the scale.
Can you convert detail lines to model lines in Revit
While you can’t directly convert detail lines to model lines in Revit, you can achieve the same result by using the “Pick Lines” tool. Follow these steps:
- Go to the “Modify” tab.
- Click on the “Line Styles” button in the “Annotation” panel.
- Select the “Detail” line style from the drop-down menu.
- Choose the “Pick Lines” tool.
- Select the detail line.
- Choose the “Model” line style.
- Click the green checkmark to confirm the conversion.
How do you freeze a view in Revit
Freezing a view can be handy when you want to preserve the current state of your design. Follow these steps to freeze a view in Revit:
- Go to the “View” tab.
- Click on the “Freeze/Thaw” button in the “Windows” panel.
- Select the view you wish to freeze.
- Check the “Freeze” box.
- Click the green checkmark to freeze the view.
What are detail lines in Revit
Detail lines in Revit are used to define precise and accurate geometry, such as symbols, annotation elements, and custom detailing. These lines are not considered part of the 3D model but provide critical information and embellishments to enhance your project.
How do you pin a 3D view in Revit
Pinning a 3D view in Revit prevents it from being inadvertently changed or moved. To pin a 3D view, follow these steps:
- Go to the “View” tab.
- Click on the “Pin/Unpin” button in the “Windows” panel.
- Select the 3D view you want to pin.
- Confirm the pin by clicking the green checkmark.
Now that we’ve answered your burning questions about drawing lines in a 3D view in Revit, you’re ready to dive into the world of precise and captivating designs. Keep exploring and experimenting, and don’t hesitate to reach out if you have any further inquiries. Happy designing!