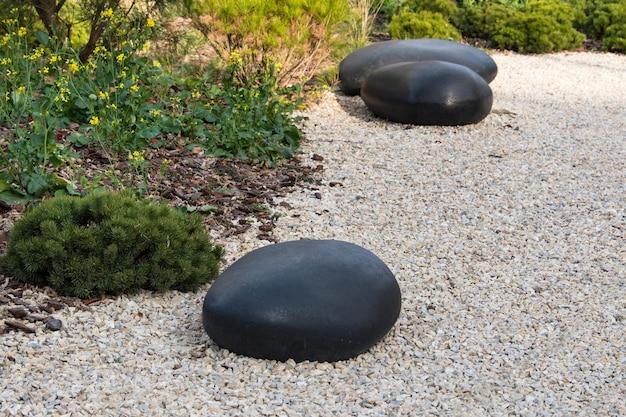
If you’re looking to transform the appearance of your outdoor space and add depth to your landscaping, darkening landscape rocks can be an effective solution. Whether you want to make flagstone darker, change the color of exterior stone, or enhance the color of rocks, there are various methods you can use to achieve the desired effect. In this blog post, we’ll explore different techniques and answer frequently asked questions like can you spray paint landscape rocks or darken rocks with dye. Get ready to unlock the secrets of making your landscape rocks look effortlessly stunning and aesthetically pleasing.
Many homeowners wonder if spray paint is a viable option for changing the color of landscape rocks. We’ll not only address this query but also delve into alternative approaches like staining, dyeing, and using natural solutions such as linseed oil. Additionally, we’ll explore techniques for making rocks look wet, as well as ways to enhance the color and texture of different types of stone, including sandstone and gravel. By following the step-by-step instructions and incorporating our tips and tricks, you’ll be able to achieve a darker, richer look for your landscape rocks, enhancing the overall appeal of your outdoor space.
So, if you’re ready to embark on a journey of rock transformation and beautification, read on to discover the various methods you can use to darken landscape rocks and breathe new life into your outdoor environment. Let’s explore how you can make your landscape rocks stand out in all their natural glory, leaving your neighbors envious and your outdoor space looking exquisite.
Darkening Landscape Rocks: Enhancing Your Outdoor Spaces with Style
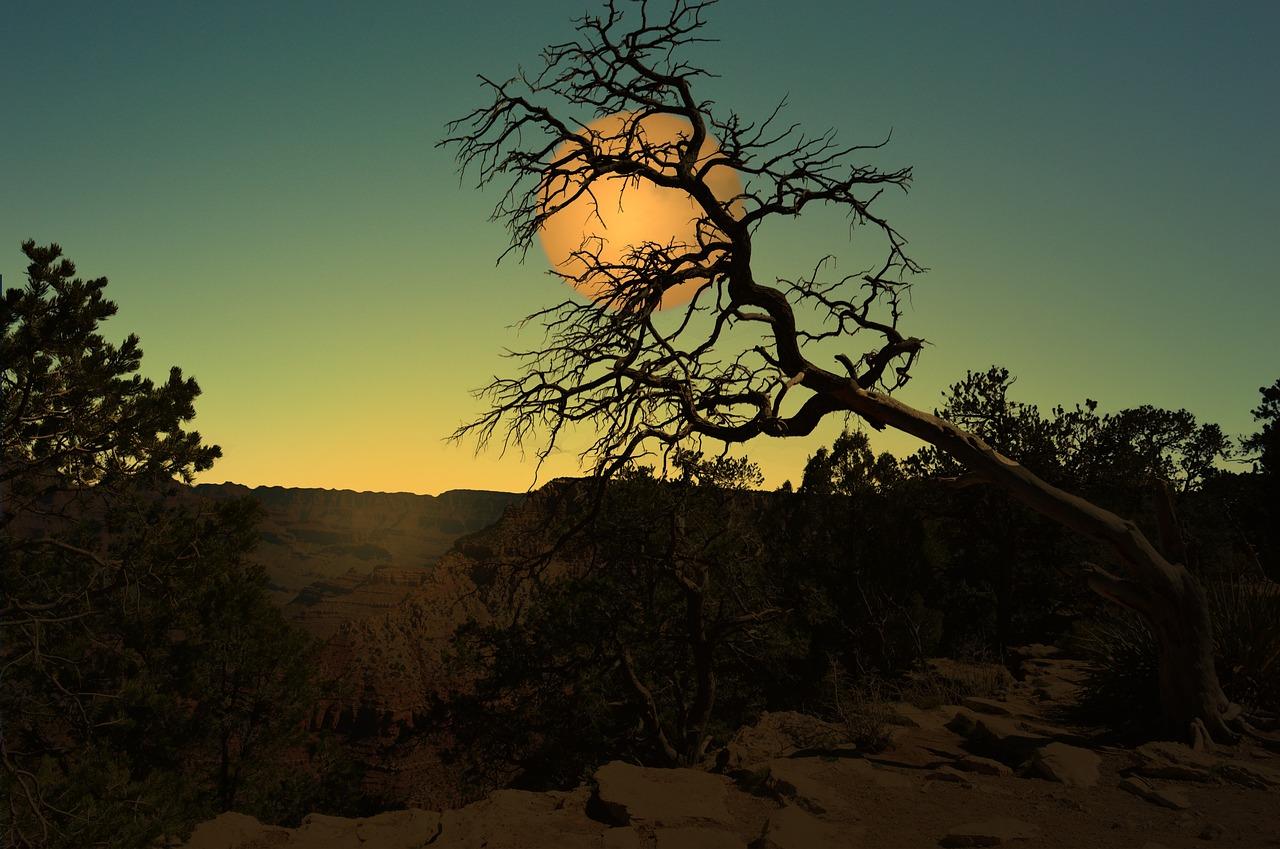
Imagine strolling through your backyard, its lush greenery and vibrant flowers tickling your senses. But as you catch sight of your landscape rocks, the contrast is jarring. Faded, dull, and lifeless, they stand out like a sore thumb amidst the natural beauty. Fear not, for in this guide, we’ll unveil the secrets to darkening landscape rocks and transforming your outdoor spaces into captivating havens. So, grab your gardening gloves and let’s dive into the art of rock rejuvenation!
Choosing the Right Shade: Rock On!
Before we embark on this rock-darkening adventure, it’s essential to choose the right shade that will harmonize with your overall landscape aesthetic. First, consider the colors that dominate your outdoor space. Are earthy tones your go-to, or do you lean towards a more contemporary palette? Once you have a clear vision in mind, head over to your local garden center and explore different rock stains and pigments.
Prepping the Rocks: Wipe Away the Grime
Our darkening journey commences with a thorough cleaning of the rocks. After all, a clean canvas ensures optimal absorption of the chosen rock stain. Begin by removing any loose dirt, leaves, or debris from the rocks. Next, arm yourself with a bucket of warm soapy water and a sturdy scrub brush. Scrub away any stuck-on grime and give your rocks a refreshing bath. Rinse them off with a hose and allow them to air-dry completely before continuing with the next steps.
Rock Painting: An Artistic Adventure
With your clean and dry rocks eagerly awaiting their makeover, it’s time to paint the town… or rather, the rocks! Get your hands on a high-quality rock stain or pigment designed specifically for outdoor use. Make sure to follow the manufacturer’s instructions, as application techniques may differ between products. Whether you choose a brush, sponge, or spray, apply an even and generous coat of the rock stain to each rock, making sure to cover all sides. Don’t be shy – embrace the transformation!
Drying and Sealing: Rock Solid
As tempting as it may be to jump straight to the grand reveal, patience is key. Allow the rocks to dry according to the stain’s recommended drying time. This step is crucial to ensure the color adheres properly and won’t easily chip or fade. Once the rocks are dry, apply a sealant to protect your rock art from the elements. Opt for a sealant specifically formulated for outdoor use, as it will shield your newly darkened rocks from UV rays, water damage, and everyday wear and tear.
Arrangement and Landscaping: Rocking the Final Look
Now that your rocks have undergone an epic transformation, it’s time to bring them back into the embrace of your outdoor space. Let your creativity run wild as you consider how to incorporate them into your landscaping design. Create eye-catching borders, build rock formations, or scatter them strategically to add depth and texture. Remember, the darkened rocks act as anchoring elements, tying together the various components of your outdoor oasis.
Maintenance: Keeping the Darkness Alive
Congratulations! Your landscape rocks have reclaimed their rightful place as stunning features in your garden. But the journey doesn’t end here. To maintain their darkened allure, regular upkeep is essential. Embrace their uniqueness as you tend to them – check for signs of fading or wear, touch up any small areas that may need a boost, and clean them periodically to keep them looking fresh and captivating. Let your darkened rocks be a testament to your dedication to outdoor elegance.
In Conclusion
Darkening landscape rocks is an art form that brings an extra touch of allure and style to your outdoor spaces. By choosing the perfect shade, prepping the rocks, applying the stain, and sealing them for durability, you can create a visually captivating landscape that harmonizes with the surrounding elements. Don’t shy away from the transformative power of rejuvenated rocks – embrace it and watch your outdoor oasis come to life in delightful darkness. Happy rock painting, landscaping enthusiasts!
FAQ: How To Darken Landscape Rocks
How do you make flagstone look darker
To make flagstone look darker, you can follow these simple steps:
- Clean the flagstone: Start by cleaning the surface of the flagstone to remove any dirt or debris. Scrubbing with a stiff brush and water should do the trick.
- Apply a stone enhancer: Look for a stone enhancer specifically designed for flagstone. Apply it evenly on the surface using a brush or a roller. This will not only darken the color but also enhance the natural beauty of the stone.
- Allow time for absorption: Let the stone enhancer seep into the flagstone for the recommended time specified on the product label.
- Wipe off excess: After the absorption time has passed, use a clean cloth to wipe off any excess enhancer that may still be on the surface.
- Let it cure: Give the flagstone enough time to cure and dry completely before using it or walking on it.
Remember, following the manufacturer’s instructions is essential to achieve the desired darker look for your flagstone.
Can I spray paint landscape rocks
Yes, you can definitely spray paint landscape rocks to darken their appearance. Here’s how you can do it:
- Choose the right paint: Opt for a paint that adheres well to stone surfaces, such as acrylic or enamel spray paint. Make sure it is suitable for outdoor use and provides a durable finish.
- Clean the rocks: Thoroughly clean the landscape rocks to remove any dirt or debris. Dry them completely before painting.
- Prepare the area: Find a well-ventilated space and lay down a drop cloth or plastic sheet to protect the surrounding area from overspray.
- Apply primer (optional): If desired, apply a primer specifically designed for stone surfaces. This will help the paint adhere better and create a smoother finish.
- Spray the rocks: Holding the spray paint can about 8-12 inches away from the rocks, apply the paint in even, sweeping motions. Start with a light coat and let it dry before applying additional coats if needed.
- Allow for drying time: Follow the manufacturer’s instructions regarding drying time. It’s important to give the rocks ample time to dry and cure before handling or placing them in your landscape.
Spray painting your landscape rocks allows you to easily customize their appearance and achieve the desired darker color.
Can you spray paint gravel rocks
While it is possible to spray paint gravel rocks, it may not be the most effective method for darkening them. The porous nature of gravel rocks makes it challenging for the paint to adhere and create a long-lasting, even finish. Additionally, the texture of the gravel may result in uneven coverage. However, if you prefer an experimental approach, here’s what you can do:
- Clean the gravel: Give the gravel rocks a good wash to remove any dirt or debris. Let them dry completely before proceeding.
- Primer application (optional): Consider applying a stone primer specifically designed for gravel surfaces. This may help the paint adhere better to the rough texture of the rocks.
- Spray paint application: Using a spray paint designed for outdoor use, apply thin and even coats of paint to the gravel rocks. Hold the can about 8-12 inches away and use sweeping motions for best results. Allow each coat to dry before applying the next one.
- Seal the paint (optional): To increase the durability and longevity of the paint, you can apply a clear sealer or varnish designed for outdoor use. This will help protect the paint from wear and weathering.
Keep in mind that the painted gravel rocks may not withstand heavy foot traffic or constant exposure to the elements as well as natural rocks with a darker hue. Consider alternative methods, such as using dyed gravel or incorporating darker-colored rocks into your landscape design, for a longer-lasting solution.
Can you change the color of exterior stone
Yes, you can change the color of exterior stone to give your house a fresh new look. Here’s what you need to know:
- Clean the stone: Start by cleaning the exterior stone with a mild detergent and water to remove any dirt, grime, or mold. Rinse thoroughly and allow it to dry completely.
- Choose the right paint: Look for a high-quality exterior stone paint that is specifically formulated to withstand outdoor conditions. Ensure it is compatible with the type of stone you have.
- Priming (if necessary): If the stone is porous or has a rough surface, consider applying a stone primer before painting. This will provide a better surface for the paint to adhere to and improve the overall result.
- Paint application: Using a brush, roller, or sprayer, apply the stone paint evenly to the exterior surface. Work in small sections and make sure to cover all areas thoroughly.
- Allow drying and curing time: Follow the paint manufacturer’s instructions regarding drying time between coats and overall curing time. It’s important to give the paint enough time to dry and harden for optimal durability.
- Consider a sealer: To protect the newly painted stone and extend its lifespan, apply a clear sealer designed for exterior use. This will act as a barrier against moisture and UV rays.
Changing the color of your exterior stone can dramatically transform the appearance of your house and give it a fresh and updated look. However, make sure to choose a color that complements your overall design scheme and is suitable for your neighborhood.
How do I make my rocks look wet all the time
If you want to make your rocks appear wet all the time without the hassle of maintaining actual moisture, here are a few tricks:
- Water-based stone sealers: Apply a high-quality water-based stone sealer to the surface of your rocks. These sealers can give the rocks a glossy appearance, simulating the look of wetness. Choose a sealer labeled as “wet look” or “enhancing” for best results.
- Enhancing sealers: Consider using an enhancing sealer specifically designed for rocks and other porous surfaces. These sealers help bring out the natural colors and textures of the rocks, giving them a vibrant and wet appearance.
- Glossy stone sprays: Look for glossy stone sprays or coatings that are designed to create a wet look on various stone surfaces. These sprays typically provide a clear, glossy finish that mimics the appearance of wet rocks.
- Reapply as needed: Keep in mind that these products may wear off over time due to weathering and foot traffic. Make sure to reapply the sealer or spray periodically to maintain the desired wet look.
By using these methods, you can achieve the illusion of perpetually wet rocks, enhancing the visual appeal of your landscape and creating a more vibrant outdoor space.
How do you make sandstone darker
To darken sandstone and bring out its natural beauty, here’s what you can do:
- Clean the sandstone: Start by cleaning the surface of the sandstone using a soft brush and a mixture of mild detergent and water. Rinse thoroughly and allow it to dry completely before proceeding.
- Apply a stone enhancer: Look for a stone enhancer specifically formulated for sandstone. These solutions can darken the color and enhance the overall appearance of the stone. Apply the enhancer using a brush or a roller, ensuring even coverage.
- Let it absorb: Give the sandstone ample time to absorb the stone enhancer. Follow the manufacturer’s instructions regarding absorption time.
- Wipe off excess: After the absorption period, use a clean cloth to wipe off any excess enhancer that remains on the surface.
- Allow curing time: Let the sandstone cure and dry completely before walking on it or placing any objects on its surface.
By following these steps, you can darken the color of your sandstone, allowing it to blend harmoniously with the surrounding landscape and creating a richer, more vibrant outdoor space.
How do you make a stone darker
Looking to make a stone darker? Here’s a step-by-step guide to help you achieve the desired effect:
- Choose the right stone dye: Select a stone dye that is suitable for the type of stone you have. There are various types of stone dyes available, such as acid-based dyes or water-based dyes. Consider using a stone dye that is specifically formulated to darken the color of stones.
- Clean the stone: Thoroughly clean the surface of the stone to remove any dirt or debris. This will ensure that the dye adheres to the stone properly.
- Apply the stone dye: Follow the manufacturer’s instructions for the stone dye you have chosen. Most dyes can be applied with a brush or sprayed onto the stone. Apply the dye evenly, making sure to cover all areas of the stone.
- Allow for absorption: Give the stone enough time to absorb the dye. The absorption time will depend on the type of dye used, so refer to the product instructions for guidance.
- Wipe off excess: After the absorption period, use a clean cloth to wipe off any excess dye that may still be on the stone’s surface.
- Let it cure: Allow the stone to cure and dry completely before using or displaying it.
By following these steps, you can successfully darken the color of your stone, enhancing its natural beauty and creating an aesthetically pleasing look.
What kind of dye do you use to color rocks
When it comes to coloring rocks, you have several options to choose from. Here are some common types of dyes that work well for rock coloring:
- Acrylic craft paint: Acrylic craft paints are versatile and readily available at craft stores. They come in a wide range of colors and can be mixed to create custom shades. Mix the paint with water to create a transparent dye or use it full-strength for a more opaque finish.
- Fabric dye: Fabric dyes, such as Rit Dye, can also be used to color rocks. These dyes often come in powder or liquid form and can produce vibrant, long-lasting colors. Be sure to follow the dye manufacturer’s instructions for best results.
- Natural dyes: If you prefer a more eco-friendly approach, you can experiment with natural dyes made from plants or vegetables. For example, you can try boiling red cabbage to create a purple dye or simmering onion skins to produce a yellow hue.
- Concrete pigments: Concrete pigments are specifically designed for coloring concrete, but they can also be used on rocks. These pigments come in powder form and can be mixed with water or a clear sealer to create a dye.
Experiment with different dyes and techniques to achieve the desired color and effect on your rocks. Remember to wear gloves and work in a well-ventilated area when using dyes.
How do you enhance the color of rocks
If you want to enhance the color of your rocks and make them stand out, try these methods:
- Using a stone enhancer: Stone enhancers are specially formulated products that can enrich the colors of rocks. Apply a stone enhancer with a brush or roller, following the manufacturer’s instructions. It will not only deepen the hues but also give the rocks a glossy sheen.
- Applying a clear sealer: A clear sealer can help intensify the natural colors of rocks by adding a protective layer. Choose a sealer specifically designed for stone surfaces and apply it according to the product instructions.
- Polishing the rocks: Polishing rocks not only enhances their colors but also brings out their shine. Use a rock tumbler or handheld polisher with abrasive materials to gradually polish the rocks and reveal their vibrant hues.
- Arranging rocks strategically: Placement and arrangement can affect the perception of rock colors. Experiment with different arrangements to highlight color variations and create eye-catching displays.
By employing these methods, you can enhance the colors of your rocks, adding depth and visual interest to your landscape or rock collection.
Can you tie dye rocks
Yes, you can absolutely tie dye rocks to create unique and colorful patterns. Follow these steps to achieve a tie-dye effect on your rocks:
- Clean the rocks: Thoroughly clean the rocks to remove any dirt or debris. This will ensure that the dye adheres properly.
- Prepare the dye: Mix fabric dye, such as Rit Dye, according to the manufacturer’s instructions. Choose a variety of colors to get the desired tie-dye effect.
- Wrap or tie the rocks: Use rubber bands, twine, or plastic wrap to tightly bind sections of the rocks. This will create areas that will remain undyed, resulting in the tie-dye pattern.
- Apply the dye: Submerge the rocks in the dye mixture or use a brush to apply the dye to the exposed areas. Make sure to saturate the rocks thoroughly.
- Allow for dye absorption: Follow the dye manufacturer’s instructions for the recommended absorption time. This will ensure that the colors fully penetrate the rocks.
- Remove the bindings: Carefully remove the rubber bands, twine, or plastic wrap from the rocks once the dye has absorbed.
- Rinse and dry: Rinse the rocks under cool running water to remove excess dye. Allow them to air dry completely.
Tie-dying rocks can be a fun and creative way to add a splash of color to your rock collection or decorative displays.
How do you make landscape rocks look wet
To make your landscape rocks look wet and glistening, you can follow these steps:
- Choose the right stone sealer: Look for a stone sealer specifically designed to create a wet look. These sealers typically contain additives that enhance the appearance of wetness.
- Clean the rocks: Thoroughly clean the landscape rocks to remove any dirt or debris. Dry them completely before applying the sealer.
- Apply the sealer: Pour the stone sealer into a tray or container. Dip a brush or roller into the sealer and apply it evenly across the surface of the rocks. Be sure to cover all areas.
- Allow drying time: Follow the manufacturer’s instructions regarding drying time for the sealer. It’s important to give the rocks enough time to dry and for the sealer to set properly.
- Reapply as desired: If you want to intensify the wet look, you