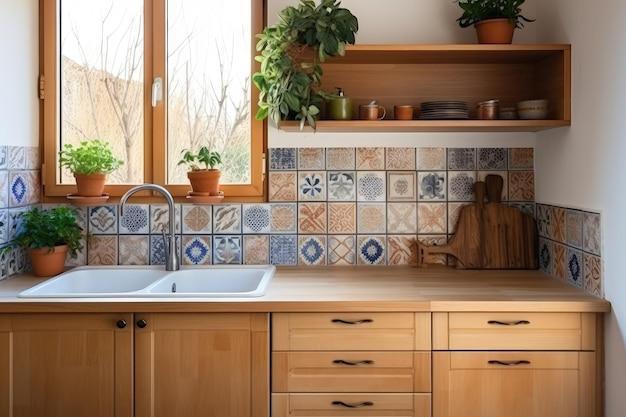
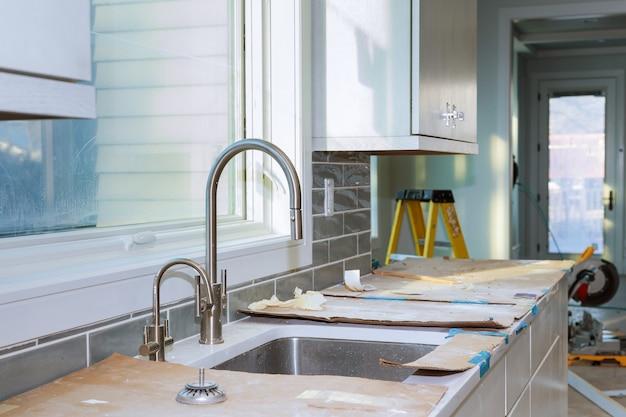
Are you planning to upgrade your kitchen or bathroom and wondering how to tackle the task of cutting tile around cabinets? Removing cabinets to install tile can be a daunting and time-consuming process. But fear not! With a few simple steps and the right tools, you can easily cut tile to fit seamlessly around your cabinets without having to remove them.
In this blog post, we’ll explore the process of cutting tile around cabinets, answer common questions like whether you need to remove cabinets before installing new flooring, and provide helpful tips to make your tile-cutting experience a breeze. Whether you’re a seasoned DIYer or a novice, this guide will equip you with the knowledge you need to achieve a professional-looking tile installation without the hassle of removing cabinets.
So, if you’re ready to transform your kitchen or bathroom with new tile, let’s dive into the world of cutting tile around cabinets and create a stunning, updated space that will impress for years to come.
How to Expertly Navigate the Tiling Maze Around Cabinets
So, you’re gearing up to tackle a DIY tiling project and you’ve hit a roadblock – how do you cut tile around those pesky cabinets? Don’t fret, my fellow DIY enthusiast! I’ve got your back. In this guide, I’ll walk you through the art of cutting tile around cabinets like a seasoned pro. So, grab your tile cutter and let’s dive in!
Preparing for Tiling: The (Not So) Sexy Stuff
Before we even think about firing up that tile cutter, we need to prep our workspace like a seasoned surgeon ready to operate. First things first, take a good, hard look at those cabinets. Are they level? Are they sturdy? If you nod your head in approval, then kudos to you! If not, well, let’s fix that before we attempt any fancy tile cutting, shall we?
Level Up Your Cabinets, My Friend
Grab your trusty level and make sure those cabinets are nice and level. If they’re not, shim that bad boy up until it is. We don’t want any wonky tiles around here – we’re aiming for perfection. Plus, nothing screams “here lies a DIY disaster” more than crooked tiles glaring at your guests.
Calculating the Gap: Precision or Perdition
Now that we have our cabinets looking fly and level, it’s time to deal with the gap between the cabinets and the tile. This is where things can get a little tricky. But fear not! With the right approach, you’ll conquer this challenge like a tile-cutting ninja.
Channel Your Inner Mathematician
First things first, grab your measuring tape and get down and dirty with those numbers. Measure the gap between your cabinets and the neighboring wall or backsplash. Take measurements at multiple points to account for any potential inconsistencies. Now, grab your calculator and do a little math dance. Take the average of your measurements and subtract it from the width of your grout joint. You’ve just calculated the width of your tile strips!
Cutting Tile: Turning Ordinary Pieces into Masterpieces
We’ve made it to the main event – the actual tile cutting. Now, every true DIYer knows that when it comes to wielding that tile cutter like a boss, it’s all about the technique. So, let’s dive into the different ways you can cut tile around cabinets.
Option 1: Simple Straight Cuts
If your cabinets have a completely flat surface, consider yourself lucky – you can simply make straight cuts. Measure and mark the width of your tile strip on your tile, ensuring it aligns with your calculations from earlier. Place the tile on your cutter, line up your mark with the cutter’s guide, and apply even pressure as you score the tile. Once scored, give it a gentle nip along the score line, and voila! You’ve got yourself a neat little tile strip.
Option 2: Curves? No Problem!
Now, if you’re dealing with cabinets sporting curvy edges, things might look a bit dicey. But hey, where’s the fun in life without a little challenge, right? Fear not, my friend, for I’m about to reveal a little secret weapon to conquer those curvy cuts – the trusty tile nipper.
Grab your tile nipper and start nibbling away at the tile following the curve of the cabinet. Take it slow and steady, making small, controlled bites. Remember, Rome wasn’t built in a day, and your tile masterpiece won’t be either. Embrace the process, channel your inner sculptor, and watch those curvy tiles take shape under your skilled hands.
The Finishing Touch: Admire Your Handiwork
Congratulations, my DIY compadre! You’ve successfully maneuvered the labyrinth of tile cutting around cabinets, transforming a potentially daunting task into a work of art. Step back, take a moment to admire your handiwork, and revel in the satisfaction of a job well done. Now, it’s time to bring out the grout and put those tiles in their rightful place.
Remember, every DIY journey is an opportunity for growth and learning. So, next time you encounter another tiling conundrum, embrace it with open arms and a can-do attitude. Happy tiling, my friend!
FAQ: How to Cut Tile Around Cabinets
Can You Replace Bathroom Floor Without Removing Vanity
Yes, you can replace a bathroom floor without removing the vanity. While it may require some extra effort and precision, it is definitely possible. By following the correct steps and using the right tools, you can achieve a seamless and professional-looking result.
What Is the Purpose of a Toe Kick
A toe kick serves both functional and aesthetic purposes in a kitchen or bathroom cabinet. Functionally, it provides space for your toes to rest comfortably while standing close to the cabinet. Aesthetically, it helps create a seamless look by concealing the gap between the floor and the bottom of the cabinets.
In What Order Do You Remodel a Kitchen
When remodeling a kitchen, it is generally recommended to follow a specific order to ensure a smooth and efficient process. Here is a typical order of kitchen remodeling:
- Demolition: Remove any existing cabinets, appliances, countertops, and flooring.
- Plumbing and Electrical Work: Make any necessary changes or repairs to the plumbing and electrical systems.
- Cabinets and Countertops: Install new cabinets and countertops.
- Flooring: Lay the new flooring, making sure to cut the tiles around the cabinets.
- Appliances: Install new appliances such as the fridge, stove, and dishwasher.
- Finishing Touches: Paint the walls, install backsplashes, and add any final details to complete the remodeling process.
Can a Toe Kick Saw Cut Tile
Yes, a toe kick saw can indeed cut tile. This handy tool is specifically designed to make precision cuts at the bottom of cabinets, including cutting through tile. By using a toe kick saw with a diamond blade, you can easily achieve clean and accurate cuts without damaging the surrounding tiles.
How Do You Replace Kitchen Tiles Without Removing Them
Replacing kitchen tiles without removing them can be a challenging task, but it is possible with the right approach. Here’s how you can do it:
- Prepare the area: Clean the tiles and surrounding grout thoroughly to ensure a smooth removal process.
- Score the grout: Use a grout saw or rotary tool with a grout removal attachment to carefully score the grout around the tile you want to replace.
- Remove the damaged tile: Gently pry up the damaged tile using a chisel or putty knife, being careful not to damage the surrounding tiles.
- Clean the area: Remove any remaining grout or adhesive from the area and ensure it is clean and smooth.
- Replace the tile: Apply adhesive to the back of the new tile and carefully press it into place. Allow it to dry according to the manufacturer’s instructions.
- Grout the tile: Apply grout to the gaps between the tiles, ensuring a consistent and even finish.
- Clean and polish: Clean off any excess grout and polish the tiles to give them a beautiful, finished look.
Should I Remove Cabinets Before Flooring
It is generally recommended to install flooring before cabinets. Doing so allows for a cleaner and more professional-looking installation. By installing the flooring first, you can avoid the hassle of cutting tiles around cabinets and ensure a seamless and uniform appearance throughout the entire space.
Does Vinyl Flooring Go Under Cabinets
No, vinyl flooring does not typically go under cabinets. Vinyl flooring is usually installed up to the edges of the cabinets, leaving a small gap to accommodate any future changes or repairs. This gap can be covered with a toe kick or other suitable trim to create a finished look.
How Do You Cut Tile Around Cabinets
Cutting tile around cabinets requires patience and precision. Here’s a step-by-step guide to help you achieve a professional finish:
- Measure and mark: Measure the dimensions of the tile that needs to be cut and mark those dimensions onto the tile using a pencil or marker.
- Score the tile: Use a tile cutter or wet saw to score along the marked line. This will create a groove on the surface of the tile.
- Break the tile: Hold the tile over a padded surface or use tile nippers to gently break along the scored line.
- Fine-tune the cut: Use a tile file or sandpaper to refine the cut and ensure a perfect fit around the cabinet.
- Test the fit: Place the cut tile around the cabinet and check for any adjustments needed. Make any necessary tweaks to achieve a snug fit.
- Install the tile: Apply the adhesive or mortar to the back of the tile and press it into place. Allow it to dry according to the manufacturer’s instructions.
- Grout and finish: Apply grout to the gaps between the tiles and clean off any excess. Finish by polishing the tiles for a pristine look.
Should Floors Be Installed Before Cabinets
Yes, it is generally recommended to install floors before cabinets. By installing the floors first, you ensure a seamless and continuous appearance throughout the space. It also allows for easier installation since you don’t have to cut the flooring around the cabinets, resulting in a cleaner and more professional finish.
How Do You Retile a Kitchen Floor Without Removing Cabinets
Retiling a kitchen floor without removing cabinets can be a challenge, but it is possible with some careful planning. Follow these steps to achieve a successful retiling project:
- Prepare the area: Clean the existing tiles thoroughly, ensuring they are free from dirt, grease, and debris.
- Score the grout: Use a grout saw or rotary tool to score the grout around the tiles you want to replace.
- Remove the old tiles: Carefully pry up the old tiles using a chisel or putty knife, taking care not to damage the surrounding tiles or cabinets.
- Clean the subfloor: Remove any remaining adhesive or grout from the subfloor, ensuring it is clean and level.
- Install the new tiles: Apply adhesive to the subfloor and carefully lay the new tiles, ensuring they are level and properly spaced.
- Grout the tiles: Once the adhesive has dried, apply grout to the gaps between the tiles, ensuring a consistent and even finish.
- Clean and seal: Clean off any excess grout and apply a sealer to protect the tiles and grout from future stains or damage.
What Is a Toe Kick Saw Used For
A toe kick saw is a specialized tool used for cutting precise lines or openings near the bottom of cabinets, specifically for installing flooring or making modifications. It is designed to reach tight spaces and can be invaluable when cutting tile, baseboards, or toe kicks. This versatile tool helps ensure a professional look and saves time and effort during the installation process.
How Can I Update My Floor Tiles Without Removing Them
If you are looking to update your floor tiles without removing them, you have a few options to consider:
- Stenciling: Use stencils to create a new pattern or design on top of your existing tiles. This can give your floor a fresh look without the need for removal.
- Vinyl tile stickers: Apply vinyl tile stickers directly on top of your existing tiles. These stickers come in various patterns and styles, allowing you to transform your floor easily.
- Area rugs or mats: Cover your existing tiles with area rugs or mats to change the appearance of the floor without altering the tiles themselves.
- Paint: With proper surface preparation and the use of suitable paint, you can paint over your existing tiles to give them a new color or pattern.
Is There Flooring Under Bathroom Vanity
Yes, typically, there is flooring under a bathroom vanity. However, the vanity is installed on top of the flooring, and the edges of the flooring may be concealed by the vanity’s base. It is essential to consider this when planning for any flooring modifications or replacements in a bathroom.
Do You Need to Remove Cabinets to Install Tile
No, you do not need to remove cabinets to install tile. It is possible to install tile around cabinets by carefully measuring and cutting the tiles to fit around the cabinet edges. This requires precision and patience, but it allows you to achieve a professional finish without the need for cabinet removal.
Do You Put New Flooring Under Kitchen Appliances
No, it is not necessary to put new flooring under kitchen appliances. Appliances such as refrigerators, dishwashers, and stoves are typically installed directly on the subfloor or existing flooring. When replacing flooring, you can install it up to the edges of the appliances for a clean and seamless look.
Does Flooring Go Under Vanity
Flooring does not typically go under a vanity in a bathroom. The vanity is usually installed on top of the finished flooring, allowing for a smooth and consistent appearance throughout the space. However, it is important to ensure that the vanity is level and properly secured to prevent any movement or damage to the flooring.
Do You Put Vinyl Flooring Under Vanity
No, vinyl flooring is generally not installed under a vanity in a bathroom. Vinyl flooring is typically installed up to the vanity edges, allowing for easy maintenance and potential future changes or modifications. The vanity provides a barrier between the flooring and the wall, ensuring a clean and finished appearance.
How Do You Cut Toe Kicks from Base Cabinets
Cutting toe kicks from base cabinets requires precision and the right tools. Here’s a simple guide to help you achieve a professional result:
- Measure and mark: Measure the desired height for the toe kick on the front of the base cabinet and mark it with a pencil or marker.
- Cut the toe kick: Use a jigsaw or reciprocating saw to carefully cut along the marked line. Take your time and follow the line closely to ensure a clean and accurate cut.
- Sand and smooth: Use sandpaper or a file to smooth the cut edges of the toe kick, ensuring it is free from any roughness or splinters.
- Install the toe kick: Attach the cut toe kick to the base cabinet using screws or nails, making sure it is level and properly aligned.
- Finish the toe kick: Fill any gaps or holes with wood filler, then sand and paint the toe kick to match the rest of the cabinet.
By addressing these frequently asked questions about cutting tile around cabinets, you now have a better understanding of how to tackle this challenging task. Whether you’re remodeling a kitchen or bathroom, remember to approach the process with patience and precision for a professional and polished end result. Now, armed with the right knowledge, go ahead and confidently transform your space into a tile masterpiece!
Disclaimer: This article is for informational purposes only. Always consult a professional for specific advice and guidance regarding your individual situation.