Welcome to our comprehensive guide on how to draw a chest step by step! Whether you’re an aspiring artist or simply looking for a new creative outlet, this tutorial will walk you through the process of drawing a chest in a simple and enjoyable way.
In this blog post, we’ll cover everything you need to know about drawing a chest, from basic shapes and proportions to adding intricate details and shading. We’ll also address some common questions related to chest anatomy and artistic techniques along the way.
So grab your sketchbook and let’s get started on this artistic journey together! By the end of this tutorial, you’ll have the skills and confidence to draw a realistic chest that will impress your friends and family. Let’s dive in!
How to Draw a Chest Step by Step
So, you’ve decided to master the art of drawing a chest, huh? Well, my friend, you’ve come to the right place! In this step-by-step guide, I’ll walk you through the process of drawing a chest that will make even Michelangelo green with envy. Grab your pencils, put on your artist’s hat, and let’s get sketching!
Getting Started: Tools of the Trade
Before we dive into the world of chest drawing, it’s important to gather the right tools. You wouldn’t go to battle without your trusty sword, would you? Well, the same goes for art. Here’s what you’ll need:
- Paper: Grab a clean sheet of paper that will be your canvas for this artistic conquest. Don’t forget, size does matter, so choose wisely!
- Pencils: No, not just any old pencil will do. Treat yourself to a set of quality graphite pencils. You’ll want a range of softness from HB to 6B to add depth and texture to your masterpiece.
- Eraser: Mistakes happen to the best of us, my friend. So make sure you have a trusty eraser by your side to correct any mishaps along the way.
- Blending Stumps: These nifty little tools will bring your shading game to a whole new level. Trust me, your chest drawing will go from “meh” to “wow” with just a little bit of blending.
Anatomy 101: Understanding the Chest
Before we jump into the actual drawing, let’s take a moment to appreciate the wonder that is the human chest. It’s not just a flat surface, oh no! The chest has curves, muscles, and a unique shape that gives it character. Understanding the anatomy will help you bring life to your drawing.
Muscles Galore: Pectoralis Major and Minor
The pectoralis major and minor are the stars of the show when it comes to the chest. They give it that defined, muscular look that we often associate with heroes and bodybuilders. Pay close attention to their placement and curves as you draw, and don’t be afraid to exaggerate those bulging muscles for added impact!
Rib Cage: Not Just for Protecting Organs
Ah, the rib cage, nature’s way of protecting our precious organs. When drawing a chest, keep in mind that the rib cage gives it structure and shape. Imagine it as the foundation that everything else rests upon. Take the time to study the ribs and how they curve, as this will greatly enhance the realism of your artwork.
Step 1: Outline Like a Pro
Now that you have a solid understanding of chest anatomy, let’s start putting pencil to paper! Begin by lightly sketching the outline of your chest. Remember, perfection is overrated, so don’t worry about getting it exactly right on the first try. You can always make adjustments as you go.
Step 2: Adding Depth and Shadows
Here’s where things start to get exciting! Using your range of graphite pencils, start adding depth and shadows to your chest. Think about where the light is coming from and how it would interact with the different muscles and curves. This is where those blending stumps come in handy too. Don’t be afraid to experiment and play with shading techniques until you achieve the desired effect.
Step 3: Fine Details and Textures
Now that your chest is taking shape, it’s time to add those fine details and textures that will make it truly come alive. Pay close attention to the small nuances, like the texture of the skin, the contours of the muscles, and any other intricate features that make your chest unique. Remember, the devil is in the details, so take your time with this step.
Step 4: Stand Back and Admire
Congratulations, my friend! You’ve successfully drawn a chest step by step. Now it’s time to step back, admire your masterpiece, and give yourself a well-deserved pat on the back. Be proud of what you’ve accomplished and don’t forget to share your artwork with the world!
So there you have it, a detailed guide on how to draw a chest like a pro. Remember, practice makes perfect, so keep honing your skills and pushing the boundaries of your creativity. Who knows, maybe one day your chest drawings will become legendary!
FAQ: How To Draw A Chest Step By Step
Welcome to our comprehensive FAQ guide on how to draw a chest step by step. Drawing a chest can be a challenging task, but fear not! We are here to provide you with all the answers you need to create a masterpiece. Whether you’re a beginner or an experienced artist, this guide will help you unleash your creativity and draw a chest with confidence.
How do you draw a mussel
When it comes to drawing mussels, we’re not talking about the seafood delicacy. We’re referring to the muscle group! To draw a muscular chest, follow these steps:
- Start by sketching the outline of the chest using simple geometric shapes.
- Add details to the chest muscles by drawing curved lines to represent the pectoralis major and minor muscles.
- Don’t forget to include the clavicles and the sternum to add realism to your drawing.
- Shade the different muscle groups to give your drawing depth and dimension. Use cross-hatching or stippling techniques for shading.
Remember, practice makes perfect. So, grab a pencil and start sketching those muscles!
Why do girls wear bras
Ah, the age-old question! Girls wear bras for various reasons. Here are a few:
- Support: Bras provide support to the breasts by reducing discomfort and minimizing movement during physical activities.
- Shape: Bras can enhance or alter the shape of breasts for aesthetic purposes.
- Modesty: Wearing a bra can help prevent nipples from showing through clothing, providing a modest appearance.
- Confidence: Some girls feel more confident and comfortable wearing a bra, as it can enhance their self-image.
It’s important to note that everyone has different preferences and reasons for wearing bras. Ultimately, it’s a personal choice!
How do you draw in chess
If you’re looking to become a master chess player, you’re in the wrong subsection! However, if you want to draw an image related to the game of chess, follow these steps:
- Start by drawing a square for the chessboard.
- Add the signature checkered pattern by alternating dark and light squares.
- Draw the chess pieces on the board, keeping in mind their unique shapes. Pawns are small and cylindrical, while the king and queen have more intricate designs.
- Detail the chess pieces with fine lines to represent their features, such as the eyes, crowns, and rooks.
- Shade your drawing for added depth, using lighter and darker tones to create a realistic look.
Remember, you don’t have to possess grandmaster skills to draw a chessboard and its pieces. Just have fun with it!
How do you make a shield in Minecraft
Creating a shield in Minecraft is essential for protecting yourself from enemies. Here’s a step-by-step guide:
- Gather the necessary resources: you’ll need six wooden planks and one iron ingot.
- Open your crafting table.
- In the crafting grid, place one iron ingot in the top center box and fill all remaining boxes with wooden planks.
- Drag the shield from the crafting table into your inventory.
- Voila! You now have a shield to defend yourself from creepers, zombies, and other dangers in the blocky world of Minecraft.
Go forth, brave explorer, and shield yourself from the perils of the pixelated realm!
What happens if you squeeze your breast too hard
Ouch! Squeezing your breasts too hard can be quite painful and potentially cause injury. Remember that breasts are made up of delicate tissues and are sensitive to pressure. Excessive force can lead to discomfort, bruising, or even damage to the breast tissue.
It’s important to treat your breasts with care and be mindful of the amount of pressure applied. Regular breast self-exams to check for any abnormalities are recommended but should be done gently and without causing pain. If you have concerns or experience persistent discomfort, it’s always best to consult a healthcare professional.
What’s the difference between Community Chest and Chance in Monopoly
In the popular board game Monopoly, Community Chest and Chance are two types of cards that players can draw, each offering different instructions or opportunities. Here’s the rundown:
Community Chest: This card deck consists of various actions that can affect players positively or negatively. Drawing a Community Chest card might instruct you to pay or receive money, advance or move back on the board, or even take a trip to Jail.
Chance: The Chance cards, much like Community Chest, present a mix of opportunities and challenges. Drawing a Chance card can result in anything from collecting rent, paying fines, or experiencing unexpected windfalls or setbacks.
Both card types add an element of surprise and unpredictability to the game, so draw them with anticipation and hope for the best!
How do breasts feel when touched
Ah, the million-dollar question! Disclaimer: This subsection aims to provide informative content strictly related to drawing, not to provide explicit details about real-life experiences.
When it comes to drawing breasts, capturing their appearance and texture can be challenging. Here are a few tips for adding realism to your artwork:
- Study references: Observe different body types in art or photographs to understand the variations in breast shape, size, and form.
- Emphasize form and motion: Use shading techniques to convey the three-dimensional shape of breasts and create the illusion of gravity and weight.
- Pay attention to clothing and support: Consider how clothing interacts with the breasts, as well as the effect of bras or other support garments on their appearance.
Remember, drawing breasts is an artistic pursuit and requires respect for the human form. Focus on creating accurate representations rather than explicit or objectifying renderings.
What is inside the breast
The breast’s internal structure consists of several glands, tissues, and ducts involved in milk production and transportation (in lactating individuals). Here’s a brief overview of these components:
- Mammary Glands: These structures produce milk in response to hormonal changes during pregnancy and breastfeeding.
- Fatty Tissue: Adipose tissue provides shape, support, and protection for the breast.
- Milk Ducts: Tubes that carry milk from the mammary glands to the nipple during breastfeeding.
- Connective Tissue: Ligaments provide structural support to the breast and hold it in position, preventing sagging.
- Blood Vessels and Lymph Nodes: These networks supply nutrients and drain waste from the breast tissue.
Understanding the anatomical components can help you accurately represent the intricacies of the breast in your drawings.
How do you draw a body like a Sir
If you aspire to draw a noble, knightly figure, here are some tips to give your character a “Sir-worthy” appearance:
- Begin with basic shapes: Sketch a simplified outline of the body using circles, ovals, and rectangles to establish proportions and pose.
- Add armor and clothing: Draw armor plates, chainmail, or intricate clothing details to create the knightly look. Consider the design elements typically associated with medieval armor.
- Define facial features: Pay attention to the knight’s face, illustrating a strong jawline, a confident expression, and perhaps a beard or mustache.
- Enhance with accessories: Don’t forget about the knight’s trusty sword, shield, and helmet, as these accessories help define their warrior persona.
- Refine and shade: Once you’ve captured the basic structure, refine your lines and add shading to give depth and dimension to your drawing.
With practice and a touch of chivalry, you’ll be drawing Sir-worthy characters in no time!
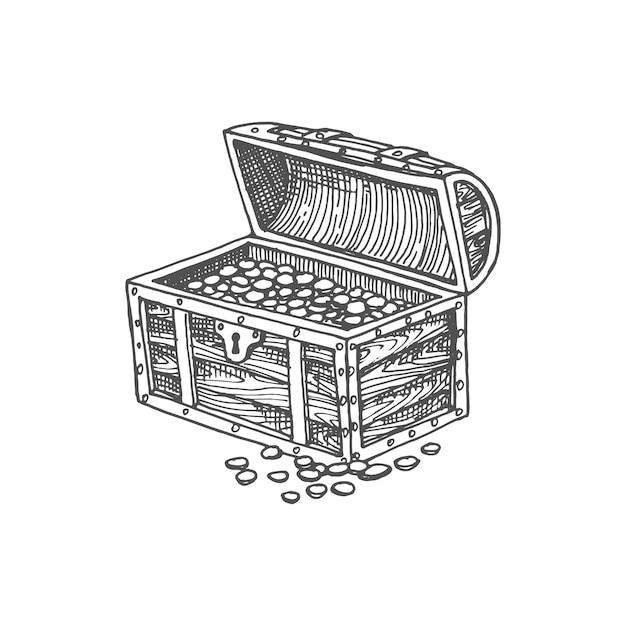
How do you make a 2D treasure chest
Arr, ye be seeking to create a 2D treasure chest, ya scurvy scallywag! Here’s how ye can achieve this artistic feat:
- Grab ye pencil, matey!
- Draw a rectangle as the base of ye treasure chest.
- Add two smaller rectangles on top to form the lid.
- Sketch ye lock and handle on the front of the chest using simple geometric shapes.
- Detail the chest with brass bands, wood grain, or any other elements that ye fancy.
- Finish it off by shading and coloring ye chest to make it come alive.
Now ye have yer very own 2D treasure chest fit for a true pirate of the arts!
What’s written on the Chance cards in Monopoly
Ahoy, matey! On the Chance cards in Monopoly, ye be findin’ various instructions and surprises. Here be a glimpse of what ye may discover when ye draw a Chance card:
- “Advance to Go”: Move directly to the Go space and collect ye $200 booty!
- “Take a ride on the Reading Railroad”: Travel to the Reading Railroad space, matey.
- “Go directly to Jail”: Avast! Ye’ve been caught, scoundrel! Move directly to the Jail space without collectin’ ye $200.
- “Bank pays ye dividend”: Collect ye $50 from the bank, savvy sailor.
- “Get out of Jail free”: Huzzah! Ye’ve received a Get Out of Jail Free card. Keep it safe for when ye find yerself locked up in the future.
Remember, the cards be havin’ a mix of fortune and misfortune. But in the end, that be the thrill of the game, me hearties!
What does the Jolly Roger flag look like
Ah, the Jolly Roger flag, the symbol of piracy! Set yer eyes on this description, ye landlubbers:
- The Jolly Roger be a black flag, dark as a moonless night.
- In the center, ye shall see a white skull with crossbones beneath it.
- Sometimes, ye might find extra embellishments or designs, like a hat or swords, to add a touch of personality to the flag.
Hoist the colors high, me maties! But please, don’t embark on a piratical journey of yo’ own; this here be a guide for artists, yarrr!
How do you draw a girl’s torso
Ahoy, aspiring artists! If ye wish to draw a girl’s torso, follow these steps:
- Begin with a simple hourglass shape to establish the overall form.
- Add two curved lines towards the top for the collarbones.
- Draw ye breast shapes, keeping in mind that they can vary in size, shape, and positioning.
- Add the waist and hips, making sure to maintain the desired proportions.
- Connect the torso to ye shoulders and hips using gentle curves.
- Refine yer lines and add shading to give depth and form to the torso.
With practice, ye’ll be drawing anatomically accurate girl’s torsos worthy of a standing ovation!
How do you make anime feet
Ah, creating anime feet, a noble pursuit for all anime enthusiasts! Follow these steps to draw kawaii feet:
- Start with a simple oval shape for the base of ye foot.
- Add ye toes by drawing small rectangular shapes at the front of the oval.
- Detail the foot with simple curved lines for ye foot arch.
- Add a hint of ye ankle by connecting the foot to the leg with a curved line.
Remember, in the world of anime, proportions may vary, and exaggeration is common. Embrace the whimsical nature of anime and let your creativity shine!
How do you make a compass rose
Ah, the compass rose, a guide for sailors and adventurers alike! Draw ye compass rose with these simple steps:
- Start by drawing a circle as the base of ye compass rose.
- Divide the circle into eight equal segments with lines intersecting in the middle.
- Label the eight main directional points: North, South, East, West, Northeast, Northwest, Southeast, and Southwest.
- Add an outer ring with cardinal directions, such as “N” for North and “S” for South.
- Detail ye compass rose with decorative elements like arrows, fleur-de-lis, or waves to add flair to yer creation.
Now, me matey, ye be equipped with a compass rose to navigate even the stormiest seas!
Has any pirate treasure been found
Arr, ye be curious about pirate treasure, do ye? There be tales of discovered booty and lost fortunes, but here’s a glimpse into some famous examples:
- The Atocha: In 1985, Mel Fisher and his team discovered the remains of the Spanish galleon Nuestra Señora de Atocha, laden with gold, silver, and precious gems.
- The Whydah: In 1984, underwater explorer Barry Clifford discovered the wreck of the pirate ship Whydah off the coast of Cape Cod, Massachusetts. It yielded a vast treasure trove.
- The Pirate Republic of Libertatia: Now, this be a bit of myth and legend. Some tales speak of a pirate utopia known as Libertatia, where treasure was said to be hidden. However, no definitive evidence has been found to prove its existence.
While the allure of pirate treasure captures the imagination, many treasures remain lost to the depths of the sea, waiting for intrepid souls to discover them!
How do you make a treasure hunt
Ahoy, landlubber! If ye be seekin’ to create a thrilling treasure hunt for yer friends or young scallywags, follow these steps:
- Map it out: Create a treasure map with landmarks, X marks, and clues leading to the treasure’s hiding spot.
- Write yer riddles: Craft clever riddles or rhymes as clues for each location along the treasure hunt.
- Set the course: Hide the clues at various points, ensuring they lead yer hunters step by step to the final booty.
- Prepare the treasure: Choose a worthy treasure to reward the victor – be it candies, coins, or even a special surprise.
Avast, me hearties! Ye’ve created a treasure hunt that’ll keep yer crew entertained and filled with delight. Happy hunting!
How do you make a sword in Minecraft
If ye be yearnin’ to create a sword to defend yerself against the menacing mobs in Minecraft, ye be followin’ these steps:
- Gather resources: Ye’ll need two wooden sticks and either two wooden planks, cobblestone, iron ingots, gold ingots, or diamonds, depending on the type of sword ye want to make.
- Open yer craftin’ table