Are you interested in exploring the world of burnt wood art? If so, you’re in for a treat! In this blog post, we’ll guide you through the process of creating beautiful burnt wood art using Illustrator. With the help of this powerful design software, you can bring your creative ideas to life and achieve stunning results.
Throughout this tutorial, we’ll share step-by-step instructions and valuable tips on how to achieve a realistic burnt wood effect, add textures, create logos, and more. We’ll also answer common questions like the difference between pyrography and wood burning, how to finish wood burning projects, and which software is best for logo design.
Whether you’re a seasoned artist or just starting with digital art, this guide will equip you with the knowledge and techniques you need to create eye-catching burnt wood art. So, let’s dive in and unlock the possibilities of this captivating art form in the digital world!
How to Create Stunning Burnt Wood Art in Illustrator
The Smokin’ Technique that Will Set Your Art On Fire
Ready to take your digital art skills to the next level? Look no further than burnt wood art in Illustrator. This unique technique combines the rustic beauty of burnt wood with the precision of digital art. Follow our step-by-step guide to master this smokin’ hot trend in the world of design.
Tools You’ll Need: Matches, Illustrator, and a Creative Spark
Before we dive into the exciting world of burnt wood art, make sure you have all the necessary tools at your disposal. Grab a box of matches (but remember, safety first!), fire up your Illustrator software, and get ready to unleash your creativity. Let’s light it up!
Step 1: Blaze a Trail with a New Document
Fire up Illustrator and open a new document. Choose the desired dimensions for your masterpiece, but remember, bigger is not always better. Start with a smaller canvas to get comfortable with the technique, then ignite your imagination.
Step 2: Flames of Inspiration: Sketch Your Design
A burnt wood art piece begins with a sketch. Grab a digital pen or dive into the whimsical world of the mouse. Let your imagination run wild and create a design that captures the essence of what you want to burn into the wood. It can be anything from a majestic forest to a fierce dragon breathing fire.
Step 3: Heating Things Up: Create the Burnt Effect
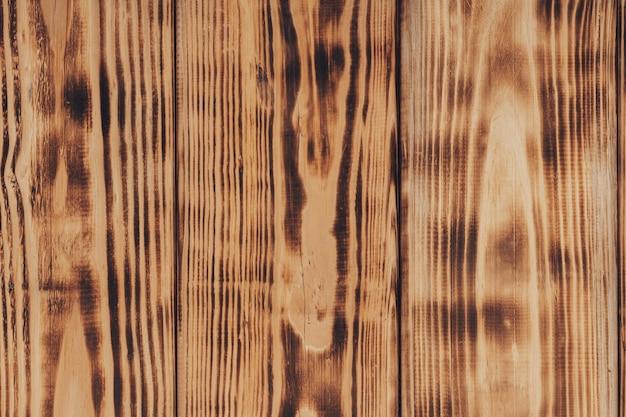
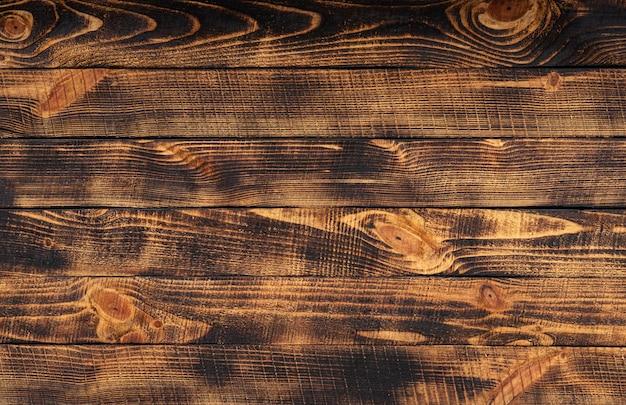
With your sketch in hand, it’s time to bring the heat. Select the Pen tool in Illustrator and trace over your sketch, creating clean lines and shapes. Now, here comes the magic. Choose the “Burnt Wood” brush from the Brush library and apply it to your artwork. Your design will instantly transform into a realistic burnt wood masterpiece.
Step 4: Adding Fiery Details: Shadows, Highlights, and Embers
A true burnt wood art piece is not complete without the subtle cracks, shadows, and glowing embers that bring it to life. Use the Blob Brush tool to create shadowy areas, add highlights with the Gradient tool, and sprinkle some fiery embers with the Scatter brush. Remember, the devil is in the details!
Step 5: Smoldering Final Touches: Fine-tune and Refine
As your artwork begins to take shape, take a step back and appreciate its mesmerizing beauty. But don’t stop there! Fine-tune your composition, adjust the colors to evoke the warmth of burning wood, and experiment with different brush styles to truly make your piece stand out. Let your inner artist shine!
Step 6: Blaze of Glory: Export and Share
Congratulations, you’ve successfully created a burnt wood art masterpiece in Illustrator! Now it’s time to show it off to the world. Export your artwork in a high-resolution format and share it on social media, your portfolio, or even print it out and display it proudly. Let the blazing beauty of your creation leave everyone in awe.
Let Your Creativity Catch Fire!
Creating burnt wood art in Illustrator is a fiery adventure that allows you to combine traditional craftsmanship with digital design. So go ahead, ignite your imagination, and let your creativity catch fire. Embrace the smoldering beauty of burnt wood art and set the design world ablaze with your exceptional skills. Happy burning!
FAQ: How To Make Burnt Wood Art In Illustrator
How do you do the emboss effect in Illustrator
To create a stunning emboss effect in Illustrator, follow these simple steps:
- Open your desired image or artwork in Illustrator.
- Select the artwork and navigate to the “Effect” menu at the top.
- From the dropdown menu, choose “3D” and then “Extrude & Bevel.”
- Adjust the settings according to your preference, such as the depth and angle of the emboss effect.
- Click “OK” to apply the effect, and voilà! Your artwork now has a captivating embossed appearance.
How do I engrave a logo in Photoshop
Engraving a logo in Photoshop is a piece of cake! Here’s how:
- Open your logo image in Photoshop.
- Create a new layer above the logo layer.
- Choose the “Brush” tool and select a brush shape that resembles an engraving tip.
- Adjust the brush size, hardness, and opacity as needed.
- With the new layer selected, start painting over the areas where you want the engraving effect to appear.
- Use different shades of gray to create depth and texture.
- If desired, lower the layer opacity to achieve a more subtle engraving effect.
- Tada! Your logo now looks like it was beautifully etched into a surface.
How do you add a texture in Illustrator
Adding texture to your illustrations in Illustrator is a fantastic way to enhance visual interest. Here’s how you can do it:
- Open your illustration or create a new one in Illustrator.
- Locate an image of the desired texture and import it into Illustrator.
- Place the texture image on top of your illustration.
- Adjust the opacity of the texture image to achieve the desired effect.
- Experiment with blending modes, such as “Multiply” or “Overlay,” to further enhance the texture.
- If necessary, use the “Clipping Mask” function to confine the texture within specific areas.
- Marvel at the newfound depth and character that the texture adds to your illustration!
What is the difference between pyrography and wood burning
Ah, the sizzling question of pyrography versus wood burning! Let’s clear up the smoke:
Pyrography and wood burning essentially refer to the same art form, but they may have slightly different connotations depending on the context. Pyrography generally involves utilizing heated tools to create detailed designs, patterns, or images on wood surfaces. On the other hand, wood burning can encompass a broader range of techniques and mediums, including burning wood with chemicals or even utilizing lasers.
In essence, pyrography is a specialized form of wood burning that focuses specifically on using heat to create artistic effects on wood.
How do you finish a wood burning project
Completing a wood burning project is the cherry on top! Follow these steps:
- When your wood burning is complete, let the artwork cool down.
- Use a soft cloth or brush to remove any loose wood particles or soot.
- If desired, lightly sand the surface to smooth out any rough spots.
- Apply a wood finish, such as varnish or polyurethane, to protect and enhance the artwork. Follow the manufacturer’s instructions for proper application.
- Let the finish dry completely, and then marvel at your beautifully finished wood burning project!
Which software is best for logo design
When it comes to logo design, Adobe Illustrator reigns supreme! With its powerful vector editing capabilities and versatile design tools, Illustrator provides the ideal playground for creating stunning logos that can be scaled to any size without losing quality. So leave the pixelated logo nightmares behind and embrace the wonders of Illustrator!
Is wood burning easy to learn
Wood burning may seem intimidating at first, but fear not! With a bit of practice and patience, anyone can learn this captivating art form. Starting with simple designs and gradually progressing to more complex ones will help you build confidence and improve your skills. So go ahead, grab that woodburning tool, and unlock your inner pyro artist!
Is wood burning profitable
Absolutely! Wood burning art has gained immense popularity in recent years, making it a potentially profitable venture for skilled artisans. As people seek unique and personalized decor, custom wood burnings are in high demand. Whether you choose to sell your creations online, at craft fairs, or even offer commissioned pieces, there is a market waiting to embrace your smoldering talent!
How hard is it to wood burn
Wood burning requires a steady hand and a keen eye, but fear not, aspiring burners! While it may take time to master the art, anyone with dedication and practice can achieve impressive results. Start with simple designs, experiment with different types of wood, and most importantly, enjoy the process. Remember, every masterpiece began with a spark!
How do you create a logo in Illustrator
Creating an unforgettable logo in Illustrator is a breeze. Here’s a step-by-step guide:
- Start by brainstorming and sketching your logo ideas on paper.
- Open Illustrator and create a new document.
- Use shapes, lines, and the powerful pen tool to bring your design to life.
- Experiment with different colors, fonts, and sizes to achieve the desired look.
- Ensure your logo is scalable by using vector graphics.
- Once you’re satisfied with your design, save it in a suitable file format, such as SVG or EPS.
- Voila! Your brand now has a visually striking logo ready to make a lasting impression.
How do I create a texture pattern in Photoshop
Creating a captivating texture pattern in Photoshop is a delightful endeavor! Follow these simple steps:
- Open Photoshop and create a new document.
- Select the “Paint Bucket” tool and choose a base color for your texture pattern.
- Create a new layer above the background layer.
- Use the desired brushes, filters, or texture overlays to apply texture to the new layer.
- Experiment with blending modes and layer opacities to refine the look and feel.
- Duplicate and arrange the textured layers to create a seamless pattern.
- Use the “Define Pattern” function to save your pattern for future use.
- You’re now the proud creator of a captivating texture pattern!
How do you do wood effects in Illustrator
Adding wood effects to your designs in Illustrator is like giving them a touch of natural charm. Here’s how it’s done:
- Open your design or create a new one in Illustrator.
- Locate an image of wood texture and import it into Illustrator.
- Place the wood texture on top of your design.
- Experiment with blending modes, such as “Multiply” or “Overlay,” to integrate the wood texture with your design seamlessly.
- Adjust the opacity of the wood texture to achieve the desired effect.
- If necessary, use the “Clipping Mask” function to confine the wood texture within specific areas of your design.
- Bask in the warmth and character that the wood effects bring to your artwork!
What is the bevel effect
The bevel effect is a design technique that adds depth and dimension to objects, giving them a three-dimensional appearance. It creates the illusion that the object has been carved or chiseled out of the surrounding surface. The bevel effect achieves this by adding highlights and shadows to the edges of the object, simulating the way light interacts with physical surfaces.
Think of the bevel effect as a subtle touch of craftsmanship that elevates your design from flat to fabulous!
What is it called when you burn pictures into wood
When you burn pictures into wood, you’re engaging in the ancient art of pyrography. This captivating technique allows you to use heat to create intricate designs, patterns, or images directly onto the wooden surface. So, whether you’re recreating a scenic landscape or immortalizing a beloved pet, prepare for the magical transformation as your pictures come alive through the burned strokes on wood!
How do I make a logo look branded in Photoshop
Creating a branded logo in Photoshop is an artful blend of creativity and strategy. Here’s a recipe for success:
- Start by identifying your brand’s personality, values, and target audience.
- Choose colors, fonts, and design elements that align with your brand identity.
- Incorporate your brand’s name or acronym into the logo design.
- Experiment with visual metaphors or symbols that convey your brand’s essence.
- Ensure your logo is distinct and memorable, standing out from the competition.
- Use hierarchy and composition principles to create balance and visual appeal.
- Finally, double-check that your logo reflects the brand’s essence and captivates your audience. Let it sizzle with branded appeal!
How do you make a seamless pattern
Creating a seamless pattern is like weaving visual magic! Follow these enchanting steps:
- Open your design software of choice or Illustrator.
- Create a new document and design the artwork or pattern you want to make seamless.
- Ensure the edges of your design align seamlessly by duplicating and adjusting the artwork if necessary.
- Use the “Pattern” or “Tile” function in your software to create a repeatable pattern.
- Adjust the pattern size, orientation, and any other settings to refine the seamless result.
- Preview the pattern to ensure it flawlessly repeats without visible seams.
- Once you’re satisfied with the outcome, save the pattern as a repeatable file format, such as PNG or JPG.
- Wave your creative wand, and voila! You’ve conjured a captivating seamless pattern!
How do you make a wood grain vector
Creating a wood grain vector is like etching nature’s beauty into your designs. Follow this enchanting process:
- Open Illustrator and create a new document.
- Draw a rectangular shape to represent a section of wood.
- Select the “Rectangle” tool and adjust the stroke properties to mimic the desired wood grain thickness.
- Copy and paste the rectangular shape, positioning it beside the original one.
- Use the “Eraser” tool to remove parts of the duplicated shape, creating irregularities resembling wood grain lines.
- Repeat steps 4-5, pasting and erasing until you achieve the desired wood grain effect.
- Vary the stroke color and opacity to add depth and realism.
- Group the shapes together, and voila! You now have a captivating wood grain vector ready to elevate your designs!
Is Photoshop good for logo design
Indeed, Photoshop is a powerful tool that can work wonders for logo design! While Illustrator is the go-to software for creating scalable vector logos, Photoshop offers a plethora of design possibilities. It excels in creating texture, manipulating images, and intricate visual effects that can enhance your logo’s impact. So whether you’re unleashing your creativity in Illustrator or exploring Photoshop’s visual versatility, both software applications offer valuable tools for crafting captivating logos.