Welcome to our blog post on how to clean twigs for crafts! If you’re someone who loves DIY projects and enjoys adding a touch of nature to your creations, then you’ve come to the right place. Twigs and branches can be a versatile and rustic element to incorporate into various crafts, but they often require proper cleaning and preparation before use.
In this guide, we’ll answer some common questions like how to preserve and clean tree branches for crafts, what can you do with old twigs, and how to disinfect and sterilize wood for different purposes. Whether you’re an experienced crafter or just starting out, we’ll provide you with practical tips and techniques to make your twigs and branches safe, long-lasting, and ready to be transformed into stunning works of art.
So let’s dive in and discover how to make the most out of those natural treasures that trees have to offer!

How to Clean Twigs for Crafts
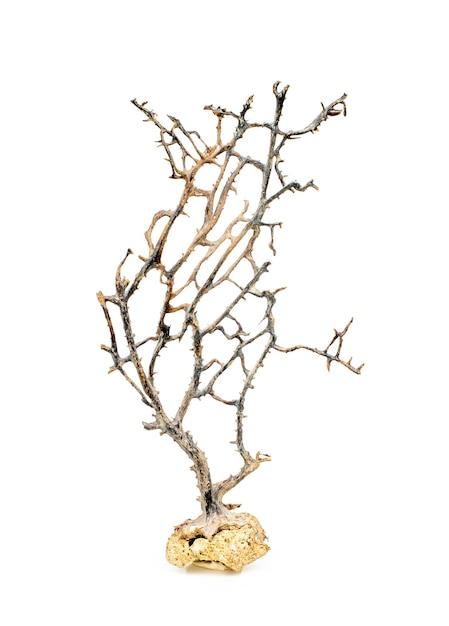
With the abundance of nature’s treasures surrounding us, it’s hard not to get inspired to create beautiful crafts using twigs. However, before you dive into your twig-tastic creations, it’s important to learn how to properly clean those twigs. After all, nobody wants their crafts to be infested with insects or filled with dirt and grime. Fear not, dear crafters! Cleaning twigs for crafts is easier than it seems, and I’m here to guide you through the process.
Gather Your Supplies
Before you embark on your twig cleaning adventure, make sure you have the necessary supplies at hand. You’ll need a few basic items:
- Gloves to protect your hands from splinters and dirt.
- Garden shears or pruners to trim the twigs if needed.
- A bucket or sink filled with water.
- Mild dish soap to help remove any stubborn dirt or residue.
- A soft-bristle brush or toothbrush for scrubbing.
Step 1: Inspect and Trim
First things first, give your twigs a thorough inspection. Look for any signs of damage, rot, or infestation. If you come across any problematic twigs, it’s best to discard them to ensure the health and longevity of your craft project. Once you’ve weeded out the troublemakers, grab your garden shears or pruners and trim the twigs to your desired length.
Step 2: Rinse and Soak
Now that your twigs are trimmed, it’s time to give them a good rinse. Place them in a bucket or sink filled with water and gently swish them around. This will help remove any loose dirt or debris clinging to the twigs. Let them soak for a few minutes to loosen up any stubborn gunk that might be hiding.
Step 3: Scrub-a-Dub-Dub
After your twigs have had their refreshing soak, it’s time to scrub away the remaining dirt and grime. Grab your trusty soft-bristle brush or toothbrush and get to work. Give each twig a gentle scrubbing, paying extra attention to any caked-on dirt or tricky spots. Use a bit of mild dish soap for those extra stubborn areas.
Step 4: Rinse and Dry
Now that your twigs have been thoroughly scrubbed, it’s time for the final rinse. Give them another swish in clean water to remove any residue from the soap. Shake off any excess water and lay the twigs out on a clean towel or paper towels to dry. Make sure they’re in a well-ventilated area where they can air dry naturally.
Step 5: Optional Finishing Touches
Once your twigs are dry, you may want to give them some extra love and attention. If you prefer a smoother finish, you can lightly sand your twigs using sandpaper. This will remove any rough edges or splinters, giving your crafts a more polished look. Additionally, you can apply a clear protective varnish or sealant to enhance the natural beauty and longevity of the twigs.
And voila! Your twigs are now clean and ready to be transformed into extraordinary crafts. So go ahead, let your imagination run wild and turn those clean twigs into one-of-a-kind masterpieces. Happy crafting!
Keywords: how to clean twigs, cleaning twigs for crafts, clean twigs for crafts, craft projects, nature-inspired crafts, twig cleaning adventure, gathering supplies, inspecting and trimming twigs, rinsing and soaking twigs, scrubbing dirt and grime, optional finishing touches, unique crafts
FAQ: How To Clean Twigs For Crafts
Hooray! You’ve stumbled upon the ultimate FAQ for all your twig-related craft endeavors. We know twigs can be a bit pesky to clean and preserve, but fear not! We’ve got you covered with answers to all your burning questions. So let’s dive right in, shall we?
How do you preserve branches for crafts
Preserving branches for crafts is as easy as pie. To ensure longevity and durability, follow these simple steps:
Step 1: Harvest with Care
Gently collect your branches, making sure to choose ones that are healthy and sturdy. Avoid any branches that look weak or damaged – we want the best of the best!
Step 2: Remove Leaves and Debris
Give your branches a little TLC by removing any leaves or debris clinging to them. A quick swipe with your hand should do the trick. Goodbye, unwanted hitchhikers!
Step 3: Air Drying
Find a cool, dry place to let your branches air dry. Depending on the thickness, it can take anywhere from a few weeks to a couple of months for them to dry completely. Patience is a virtue, my crafty friend!
Step 4: Seal the Deal
To ensure your branches stand the test of time, coat them with a sealant or wood preservative. This will protect them against the elements and prevent any unwanted decay.
What can I do with old twigs
Ah, the possibilities are endless when it comes to repurposing old twigs. Here are a few creative ideas to get those crafty gears turning:
Branch Jewelry Holder: Arrange your twigs in a funky pattern and attach them to a wooden base. Voila! A stylish holder for your favorite necklaces and bracelets.
Twig Picture Frame: Craft a rustic picture frame by gluing twigs around a plain frame. It’ll add a touch of natural charm to your favorite snapshots.
Twig Vase: Take a glass jar or bottle and hot glue twigs around it. Fill it with fresh or faux flowers for an enchanting centerpiece.
Outdoor Twig Art: Get artsy with your garden by creating sculptures or decorative structures using twigs. Let your imagination run wild!
How do you clean tree branches in crafts
Cleaning tree branches can be quite the adventure! Here’s a nifty little guide to help you get those branches squeaky clean:
Step 1: Shake it Off
Give your branches a good shake to remove loose dirt, dust, and insects. We wouldn’t want any surprise guests popping up during your crafting session!
Step 2: Gentle Scrub
Fill a bucket or sink with warm water and a mild soap. Using a soft brush, gently scrub the branches to remove any stubborn grime. Treat them like delicate twigs, because, well, they are!
Step 3: Rinse and Dry
Rinse off the soapy residue with clean water and pat your branches dry using a towel. Pro tip: Don’t leave them out to air dry on a windy day unless you want to play fetch with twigs all over your yard.
How do you disinfect a large branch
Got a massive branch that needs some serious disinfecting? Here’s how to tackle that beast:
Step 1: Safety First
Put on a pair of gloves and safety goggles. You don’t want any accidents ruining your crafting marathon!
Step 2: Scrub Away
Using a stiff brush, scrub the branch thoroughly with a mixture of equal parts water and bleach. This powerful duo will ensure those nasty germs get the boot.
Step 3: Rinse and Dry (Again!)
Give the branch a good rinse with clean water to remove any bleach residue. Then, lay it flat to air dry in a well-ventilated area. Soon enough, that branch will be disinfected and ready for your creative touch!
How do you preserve branches for centerpieces
Creating stunning centerpieces with preserved branches is a breeze! Follow these steps to make your centerpiece dreams come true:
Step 1: Mother Nature’s Gift
Start by choosing branches that have already dried naturally. It’s like finding your very own treasure in the wilderness.
Step 2: Smooth Operator
Gently sand your branches to get rid of any rough edges or splinters. Smooth them out, so they’re safe to handle and admire up close.
Step 3: Seal the Deal…Again!
Assemble your centerpiece using your preserved branches and secure them in a container or vase. To maintain their glorious condition, give them a final coat of sealant or wood preservative.
Now, sit back, relax, and bask in the glory of your stunning centerpiece. Who knew twigs could be so fabulous?
Can you use twigs for crafts
Absolutely! Twigs are a gift from nature, just waiting to be transformed into stunning works of art. Whether you’re into wreath making, furniture embellishments, or creating whimsical sculptures, twigs are your trusty companion. So go ahead, unleash your creativity and let those twigs become the stars of your crafts!
How do you treat decoration logs
Decorating logs can be a blast! Here’s a little step-by-step guide to make those logs shine:
Step 1: Log Love
Select logs that are in good condition and free from pests or rot. Let’s keep things classy!
Step 2: Sanding Session
Using sandpaper, give your logs a good sanding to remove any rough patches or splinters. Smooth is the name of the game!
Step 3: Coloring Fun
If you want to add a pop of color, grab some wood stain or paint and unleash your artistic prowess. Let your logs bask in the colors of the rainbow!
Step 4: Protective Measures
To keep your logs looking fabulous for years to come, apply a sealant or wood preservative. This will safeguard them from the trials of time and any unwanted guests.
Now, stand back and admire your transformed logs. They’re ready to take center stage in your decorative endeavors!
How do you make branches safe for reptiles
Reptiles need their branches to be safe and comfortable in their habitats. Follow these guidelines to create a reptile-friendly branch:
Step 1: Branch of Champions
Start by selecting branches from reptile-safe tree species, such as oak, maple, or birch. We don’t want any toxic surprises for our scaly friends!
Step 2: Scrub-a-Dub-Dub
Give the branch a thorough scrub with warm water and mild soap. This will remove any dirt or unwanted critters.
Step 3: Rinse and Bake
Rinse the branch with clean water and then bake it in the oven at a low temperature (around 200°F) for a couple of hours. This will eliminate any potential hitchhikers that could harm your reptile pals.
Step 4: Cool and Safe
After baking, let the branch cool down completely before placing it in your reptile’s habitat. Safety first, my cold-blooded companions!
How do you disinfect wood from outside
If you’ve got some wood that’s been hanging out in the great outdoors and needs a little TLC, here’s how to disinfect it:
Step 1: Brush it Off
Start by brushing off any dirt, moss, or debris from the wood. A sturdy brush will do the trick!
Step 2: Natural Magic
Mix equal parts water and vinegar in a spray bottle. Spritz the mixture generously on the wood, ensuring it’s thoroughly soaked. Let the natural magic happen!
Step 3: Time to Dry
Allow the wood to dry completely in a well-ventilated area. This might take a few days, depending on the weather conditions. Patience, my crafty friend, patience!
Step 4: Inspect and Confirm
Inspect the wood for any signs of pests or mold. If everything looks clean and clear, congratulations! You’ve successfully disinfected wood from the wild.
How do you Sterilize branches
Sterilizing branches ensures they’re germ-free and ready for your crafts. Here’s an easy sterilization process:
Step 1: Hot Water Bath
Place your branches in a pot of boiling water and let them simmer for at least 10 minutes. We’re giving those germs a spa treatment they won’t survive!
Step 2: Drain and Delight
Remove the branches from the pot and let them drain and cool. They’re sterilized and ready to rock your crafty world.
Now, go forth and create amazing twig masterpieces, knowing your branches are as clean as a whistle!
How do you seal a tree branch
Sealing a tree branch is a crucial step in preserving its natural beauty. Follow these steps to seal them with love:
Step 1: Goodbye Splinters
Start by sanding down any rough areas or sharp edges on the branch. We want smooth sailing for our delicate hands!
Step 2: Choose your Sealant
Select a wood sealant that suits your needs and preferences. There are various options available, from clear finishes that enhance the natural beauty to colored stains that add a touch of pizzazz. Take your pick!
Step 3: Love Coat
Using a brush, generously apply the sealant to the entire surface of the branch. Don’t hold back – show that branch some love!
Step 4: Patience is a Virtue
Allow the sealant to dry completely according to the manufacturer’s instructions. This is the moment when patience becomes your best friend.
Congratulations! You’ve successfully sealed your tree branch and ensured its long-lasting beauty.
How do you keep cut tree branches alive
Want to extend the life of your cut tree branches? Follow these simple tips to keep them alive and thriving:
Step 1: Quick Action
As soon as you’ve cut the branches, place them in a bucket of water. We’re on a mission to keep them hydrated!
Step 2: Optimal Environment
Keep your branches in a cool, shaded area to prevent them from drying out. A little TLC goes a long way!
Step 3: Fresh Water Love
Change the water daily to ensure your branches stay fresh and hydrated. It’s like giving them a spa day every day!
Step 4: Trim and Retrim
Every few days, make a fresh cut at the bottom of the branches at a 45-degree angle. This helps them absorb water more efficiently. Snip, snip, and keep those branches happy!
With proper care and lots of water, your cut tree branches will impress everyone with their lifelike appearance.
How long does it take for small tree branches to dry out
Ah, the waiting game! Drying small tree branches is like watching a pot boil, but rest assured, it will happen. Small branches generally take around two to four weeks to dry out completely. Patience is key, my crafty friend! Resist the temptation to rush the process, and soon enough, you’ll have beautifully dried branches ready for your creative escapades.
How do you preserve tree branches for decorations
Creating stunning decorations with preserved tree branches is a piece of cake – or should we say a branch of cake? Here’s how to turn them into everlasting beauties:
Step 1: Select with Care
Choose healthy and visually appealing branches for your decorations. After all, we want them to take center stage!
Step 2: Timing is Everything
Harvest your branches during the dormant season when sap flow is minimal. This ensures optimal preservation and prevents any sticky situations.
Step 3: Remove Imperfections
Give your branches a bit of a makeover by removing any unwanted twigs or bark. They deserve to look their best!
Step 4: Preservation Power
To preserve their beauty, coat your branches with a sealant or wood preservative. This will protect them from the elements and ensure they remain stunning for years to come.
Now, gather your preserved branches and let your creative instincts run wild. Deck your halls, spruce up your parties, and let those branches steal the show!
What can be made from twigs
Oh, the wonders of twigs! These humble little branches offer endless opportunities for crafty creations. Here are some fantastic ideas to get those creative juices flowing:
Twig Mobile: Create a whimsical mobile by stringing together twigs and attaching little trinkets or ornaments. Let it spin and enchant!
Twig Coasters: Slice thin sections of twigs and glue them together to make adorable coasters. Stylish protection for your tabletops!
Twig Wall Art: Arrange twigs in an intricate pattern and fasten them to a wooden canvas. Instant rustic wall art that will impress any visitor.
Twig Plant Markers: Label your beloved plants by attaching small, labeled twigs to their pots. No more plant identity crises!
The possibilities are as vast as the branches on a mighty oak. Let your imagination roam free and create something truly extraordinary with those twigs!
How do you preserve birch branches for decorations
Birch branches bring a touch of elegance and charm to any decorative endeavor. Follow these steps to preserve their beauty:
Step 1: Harvest with Caution
Cut your birch branches during their dormant season, just as nature snuggles down for a winter’s nap. This minimizes sap flow and ensures a successful preservation process.
Step 2: Gentle Cleanse
Give your birch branches a gentle cleanse by wiping them with a damp cloth. Goodbye dirt, hello pristine beauty!
Step 3: Moisture Matters
To prevent drying out, mist your branches lightly with water every few days. They’ll appreciate the extra hydration!
Step 4: Preserving Perfection
Coat your branches with a sealant or wood preservative to keep them in tip-top shape. This protective layer will guard against fading and maintain their natural charm.
Now, let your preserved birch branches steal the show in your decorations. Mother Nature would be proud!
How do you dry twigs for crafts
Drying twigs for crafts is a simple process that requires a bit of time and patience. Here’s what you need to do:
Step 1: Nature’s Warmth
Place your twigs in a warm, well-ventilated area, preferably out of direct sunlight. Nature will work its magic and start the drying process.
**Step 2: Time Waits