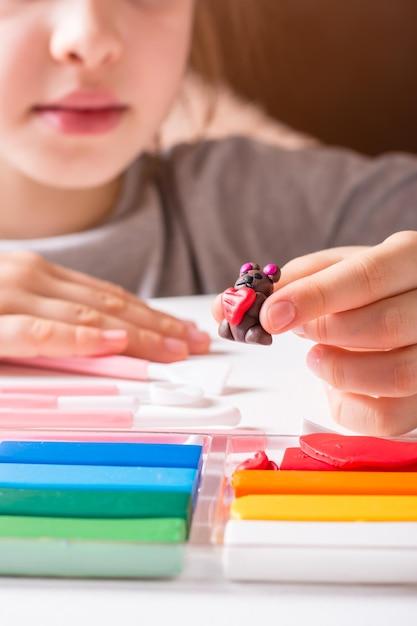
Polymer clay is a versatile and popular material for crafting colorful jewelry, figurines, and other creative projects. But once you’ve baked your creations to harden them, you might be left wondering how to clean them properly. That’s where we come in! In this blog post, we’ll guide you through the process of cleaning polymer clay after baking, answering common questions like whether you can use rubbing alcohol, acetone, or even hand sanitizer on your pieces.
We’ll also address other related concerns, such as why your polymer clay may develop bubbles after baking and how to get rid of them. Additionally, we’ll explore storage tips for unfinished polymer clay projects and discuss whether you can bake polymer clay on glass. If you’ve ever struggled with getting smooth surfaces on your polymer clay earrings or preventing the clay from sticking to your cutters, we’ve got you covered.
So, if you’re ready to learn how to properly clean, smooth, and maintain your polymer clay creations, let’s dive in!
How to Keep Your Polymer Clay Looking Fresh and Clean
Cleaning Your Polymer Clay Masterpieces Like a Pro!
So, you’ve baked your beautiful polymer clay creations, and now it’s time to give them that sparkling finish they deserve. Cleaning polymer clay doesn’t have to be a tedious task. With a few handy tips and tricks up your sleeve, you can keep your creations looking fresh, shiny, and positively drool-worthy. Let’s dive in and discover how to clean polymer clay after baking like a pro!
Removing Dust and Debris: The “Dust Buster” Technique
First things first, your polymer clay masterpiece might have picked up some dust or lint during the baking process. Fear not! Grab a soft, clean brush like a makeup brush or a dedicated clay brush, and gently sweep away any unwanted particles. Think of yourself as a superhero, saving your creation from the clutches of dirt and dust, one stroke of a brush at a time.
Bid Farewell to Fingerprints: The “Smooth Operator” Technique
Ah, fingerprints. Those sneaky little marks that always seem to find their way onto your precious polymer clay creation. But fear not, my friend! You can easily remove those pesky smudges with a little bit of rubbing alcohol and a cotton ball. Dab a small amount of rubbing alcohol onto the cotton ball, and gently wipe away those fingerprints with a smooth, circular motion. Voila! Your creation is now smoother than a baby’s bottom.
Tackling the Grease Monster: The “Grease Terminator” Technique
Sometimes, the battle with grease is real. If your polymer clay masterpiece has fallen victim to the grease monster, there’s a simple solution. Grab some dish soap and warm water, and create a soapy mixture. Gently wash your creation with this soapy goodness, making sure to rinse it thoroughly afterwards. Ta-da! The grease monster has been defeated, and your polymer clay creation is once again worthy of admiration.
Dealing with Sensational Smudges: The “Magical Eraser” Technique
Have you ever found yourself facing a stubborn smudge on your polymer clay creation? Fear not, for we have the magical eraser technique! Grab a white eraser, preferably a kneaded one, and gently rub it over the smudged area. The magical eraser will work wonders, erasing the smudge as if it never existed. It’s like having your very own wizard in your craft box!
Say Goodbye to Shiny Surfaces: The “Matte Marvel” Technique
If you prefer a matte finish on your polymer clay creations, there’s a simple trick to achieve that velvety smoothness. Grab some fine-grit sandpaper, and gently sand the surface of your baked clay. Be careful not to sand too aggressively, as we don’t want to distort the shape of your masterpiece. Sand lightly and evenly until you achieve the desired matte effect. You are now the proud owner of a marvelous matte creation!
Conclusion: Polished, Pristine Polymer Clay
Congratulations, my clay-loving friend! You’ve mastered the art of cleaning polymer clay after baking. By employing these handy techniques to remove dust, fingerprints, grease, smudges, and even to achieve a stunning matte finish, your polymer clay creations will always look polished, pristine, and ready to flaunt their beauty to the world. So go forth, create, bake, and clean with confidence. Your polymer clay masterpieces will forever thank you!
FAQ: How Do You Clean Polymer Clay After Baking
So you’ve baked your polymer clay masterpiece and now it’s time to give it that final touch of perfection. Cleaning polymer clay after baking is an essential step in the process, ensuring your creation shines like a diamond. In this FAQ-style guide, we’ll answer all your burning questions about cleaning polymer clay, from storing unfinished projects to banishing those pesky air bubbles. Get ready to make your artwork gleam and your creativity soar!
How do you store unfinished polymer clay projects
When it comes to storing unfinished polymer clay projects, you’ll want to ensure they stay pristine and ready for future molding. The ideal solution is to wrap them tightly in a layer of plastic wrap or seal them in a resealable plastic bag. Store them in a cool and dry place away from direct sunlight to prevent the clay from becoming too soft or discolored.
Can you use rubbing alcohol on polymer clay
Indeed, you can! Rubbing alcohol is a versatile tool in the world of polymer clay. Whether you’re looking to remove fingerprints or pesky dust particles, simply dampen a clean cloth or cotton ball with rubbing alcohol and gently wipe the surface. Remember to let your creation dry completely before continuing your clay adventure.
Why does my polymer clay bubble after baking
Oh, those mysterious air bubbles! They can be quite the nuisance, but fear not, we have the answers. Polymer clay bubbles occur due to trapped air or moisture within the clay. To prevent this, make sure to knead your clay thoroughly before sculpting and avoid baking projects in an enclosed space. Pricking the bubbles with a fine needle or toothpick before baking can also help release the trapped air and give you smoother results.
Can you bake polymer clay on glass
Yes, you can bake polymer clay on glass, but with a few precautions. Glass can heat up more quickly than other surfaces, so you’ll want to lower your oven temperature by 10-25 degrees Fahrenheit (5-14 degrees Celsius). Additionally, place a barrier between the clay and the glass surface, such as a sheet of parchment paper, to prevent the clay from sticking or scorching.
How do you make polymer clay earrings smooth
Smooth like butter, baby! To achieve that flawless finish on your polymer clay earrings, there are a few techniques you can try. First, after baking, sand your earrings with fine-grit sandpaper or a nail buffer to eliminate any rough edges. Then, use a small amount of baby oil or a clay gloss to gently rub the surface, allowing the clay to shine and become as sleek as can be.
How do you know when your polymer clay is done baking
Call it the clay baking dance! Before you throw your hands in the air and declare your polymer clay masterpiece complete, there’s one essential step to follow. To ensure your creation is thoroughly baked, reference the manufacturer’s instructions for the recommended baking time and temperature. For most polymer clays, baking typically takes around 15-30 minutes per 1/4 inch (6mm) thickness. Use an oven thermometer to verify the accuracy of your oven’s temperature and avoid overbaking or underbaking your clay.
How do you keep polymer clay from sticking to cutters
Sticky situations are best avoided in the world of polymer clay. To keep your clay from sticking to cutters, there are a few tricks up our sleeves. Lightly dusting your cutters with cornstarch or baby powder before each use can help reduce adhesion. Alternatively, you can brush a thin layer of water or a silicone mold release agent onto the clay surface before cutting. And, of course, remember to clean your cutters between each use to prevent any unwanted clay buildup.
Can I use acetone on polymer clay
While acetone is great for removing nail polish, it’s not the superhero we need when it comes to polymer clay. Acetone can actually cause the clay to dissolve or become discolored, leading to a less-than-desirable outcome. It’s best to steer clear of acetone and opt for alternative cleaning methods, such as rubbing alcohol or gentle soap and water.
Do you clean polymer clay before or after baking
The clean-up game starts before the baking fun begins! Cleaning polymer clay is most effective before baking. Removing any fingerprints, lint, or stray debris ensures a smooth and flawless surface after baking. But don’t fret if you missed a spot, as you can still clean and perfect your clay art even after it has been baked.
Can I use hand sanitizer to smooth polymer clay
Ah, hand sanitizer, the versatile elixir of clean hands and beyond! While it’s perfect for keeping our hands germ-free, it’s not the ideal tool for smoothing polymer clay. The alcohol content in hand sanitizer can actually interact with the clay, leading to potential issues like stickiness or texture changes. Stick to the trusty techniques of sanding, buffing, or using specialized clay tools for the ultimate smoothness.
How do you smooth polymer clay after baking
To smooth things over after baking, you’ve got a few options up your clay-covered sleeve. Sanding is a popular technique that involves carefully rubbing your creation with fine-grit sandpaper or a nail buffer. Start with a lower grit (around 400) and gradually work your way up to a higher grit (around 2000) for that coveted buttery smoothness. Alternatively, you can use a clay gloss or polish to give your piece a glossy finish and mask any imperfections.
Can you sand polymer clay after baking
Absolutely! Sanding polymer clay after baking is a great way to refine your masterpiece and achieve that flawless finish. Just remember to take it slow and steady, using gentle strokes and gradually increasing the grit of your sandpaper. Don’t forget to keep the sandpaper wet or use it with a bit of water to avoid excessive dust. And remember, patience is key as you transform your clay creation from ordinary to extraordinary.
How do you smooth polymer clay with alcohol
Sometimes, polymer clay demands a drink—and by that, we mean rubbing alcohol! Dipping a cotton swab or brush into rubbing alcohol and gently rubbing it over the surface of your clay can help smooth out any imperfections. Just be sure to let the alcohol dry completely before handling your creation further. Cheers to a smoother clay journey!
How do you get fluff out of polymer clay
Ah, those pesky fluff invaders! If you find your polymer clay infested with unwanted fibers, fear not. A simple and effective solution is to wrap a piece of clear tape around your finger with the sticky side facing out. Gently press the tape onto the clay surface, allowing it to pick up any pesky fluff or lint. Repeat as necessary until your clay is as clean as a whistle.
Can I use baby oil to smooth polymer clay
Well, well, well, baby oil to the rescue! You can indeed use a small amount of baby oil to lend a helping hand in smoothing polymer clay. Apply a tiny drop of baby oil to your fingertips or use a soft brush to lightly spread the oil over the surface of your creation. This technique can work wonders in minimizing finger marks or fine scratches. Remember, a little bit of baby oil goes a long way, so use it sparingly for the best results.
How do you get rid of air bubbles in polymer clay after baking
Ah, those sneaky air bubbles! If you notice them making an appearance in your polymer clay delights after baking, don’t fret. A secret weapon in the battle against air bubbles is a trusty pin or needle. Gently prick the bubbles with the pin or needle, encouraging the air to escape. Be careful not to disturb the surrounding clay too much, as you want to preserve the integrity of your masterpiece. With a simple pop here and there, your creations will be bubble-free in no time.
Can you wash polymer clay
While polymer clay can endure many adventures, taking it for a swim in the washing machine is not one of them. Unlike your favorite pair of jeans, polymer clay should never be submerged in water or washed. Introducing water to the equation can cause the clay to soften, dissolve, or lose its shape. Instead, stick to gentle cleaning methods like wiping with a damp cloth or using non-abrasive soap and water for stubborn stains. Keep your clay dry and happy!
How long can you leave polymer clay before baking
Oh, the anticipation! If you’ve crafted a brilliant polymer clay creation but can’t bake it right away, fear not. Polymer clay typically has a longer shelf life compared to cupcakes from the local bakery. You can generally leave polymer clay, either raw or partially baked, for several weeks, even months, before baking. Just make sure to store your clay properly to prevent it from getting too soft or becoming contaminated.
Will polymer clay harden without baking
While we applaud your optimism, polymer clay won’t harden on its own without a little help from the oven. Baking is an essential step in the polymer clay process, as it activates heat-sensitive additives that allow the clay to harden and become durable. So, gather your baking trays and preheat the oven—it’s time to give your creations the firmness and longevity they deserve!
Cleaning polymer clay after baking is an essential part of the creative journey. From storing unfinished projects to banishing air bubbles and achieving a smooth finish, we’ve covered all the bases in this FAQs guide. So go forth, armed with the knowledge and the humor, and create clay wonders that sparkle and shine. Remember to enjoy the process and let your imagination soar, because in the world of polymer clay, there are no limits to what you can achieve!