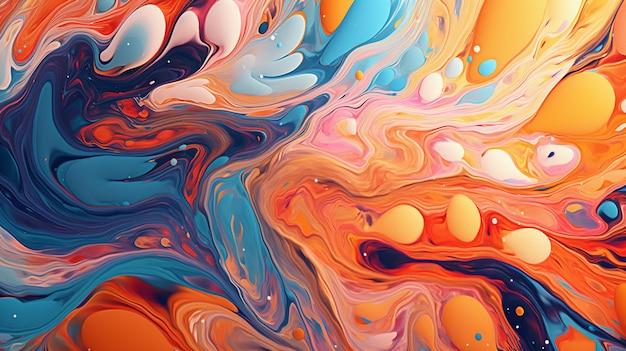
If you’ve recently tried your hand at hydro dipping, you may find yourself faced with a new challenge: how to remove the hydro dip design from your item. Whether you’re looking to change the design, fix a mistake, or simply start fresh, this comprehensive guide will walk you through the process of removing hydro dipping.
Hydro dipping, also known as immersion printing or water transfer printing, is a popular technique used to create custom designs on various surfaces. But what if you’re not satisfied with the end result or simply want to move on to something new? In this blog post, we’ll address common questions and concerns surrounding the removal of hydro dipping, providing you with step-by-step instructions and helpful tips along the way.
From understanding the materials you’ll need to the best methods for removing hydro dipping, we’ll cover it all. So whether you’re dealing with hydro dipped guns, automotive parts, or even household items, get ready to learn how to remove hydro dipping like a pro. Let’s dive in!
How to Remove Hydro Dipping
When Hydro Dipping Goes Wrong: A Guide to Fixing Your Flops
So, you took a dip in the hydro dipping pool and realized that maybe your creative genius has its limits. Don’t worry, we’ve all been there. Whether you accidentally dipped your favorite mug or your prized phone case turned out looking like a kindergartener’s finger painting project, fear not! In this handy guide, we’ll walk you through the process of erasing your hydro dipping mishaps. Let’s dive in!
Assessing the Damage: Is It Salvageable
Before we unleash our magical hydro dip fixing tricks, it’s important to determine if your beloved item is salvageable or not. Take a close look at the dipped piece and ask yourself, “Does this still bring me joy, or does it make me want to hide it far, far away?” If you find yourself leaning towards the latter, it might be time to move on and bid adieu to your failed experiment. But if there’s a glimmer of hope and you’re determined to give it another shot, let’s keep the hydro dipping removal party going!
Embracing the Power of Chemicals: Removing That Stubborn Dip
Now that you’ve made the brave decision to salvage your hydro dipped disaster, it’s time to unleash the power of chemicals! But fret not, we’re not talking about anything too dangerous here. Grab a bottle of acetone and some cotton balls, and let’s get to work. Soak a cotton ball in acetone, gently dab it on the affected areas, and watch the magic happen. The acetone will break down the hydro dip’s bond, making it easier to wipe away. Keep in mind, though, excessive rubbing might leave you feeling like you just completed a rigorous arm workout at the gym. Pace yourself!
Patience, Young Grasshopper: The Waiting Game
Just like waiting for that perfect slice of pizza to cool down before diving in, removing hydro dipping requires a pinch of patience. After treating the dipped item with acetone, it’s best to let it sit for a while. Ideally, give it a good 24 hours for the acetone to work its magic and fully break down the hydro dip. And hey, you can use this time to reflect on your creative journey and ponder your future dipping adventures. Who knows, maybe a masterpiece awaits!
Armed with Scrubbing Tools: Cleaning Up the Remnants
Now that the waiting game is over, it’s time to arm yourself with some scrubbing tools and give that hydro dip a final farewell. Grab a soft-bristle brush or even an old toothbrush, dip it in some warm, soapy water, and gently scrub away the remnants of your failed artistry. Remember, soft strokes are key here. Scrubbing like you’re trying to remove your worst enemy’s name from your high school yearbook might cause more harm than good. Take your time and let the gentle scrubbing work its magic.
A Fresh Start: Priming and Repainting
Congratulations, brave hydro dip remover! You’ve successfully erased the evidence of your not-so-successful artistic endeavor. Now, let’s give your item a fresh start. After cleaning off the remnants, it’s essential to prime the surface before painting over it. Invest in a good-quality primer that suits the material of your item, whether it’s metal, plastic, or wood. Once the primer is dry, it’s time to unleash your creative juices once again! Grab your favorite paints and brushes, and let your imagination run wild. This time, though, maybe stay away from any dipping pools unless you’ve truly mastered the art.
The Joy of Second Chances: Learning from Mistakes
Remember, dear hydro dip enthusiast, every failure is a stepping stone to success. Embrace the joy of second chances and learn from your mistakes. Maybe your next hydro dipping adventure will produce a masterpiece worth hanging on the walls of an art gallery (or at least your living room). Keep experimenting, keep refining your techniques, and most importantly, keep having fun. After all, art is all about expressing yourself, even if it involves a few failed dips along the way!
And there you have it, folks! A comprehensive guide to removing hydro dipping gone awry. So, gather your failed dipped items, put on your creative thinking cap, and let the removal and redemption process begin. Happy fixing, and may your future hydro dips be nothing short of awe-inspiring!
FAQ: How To Remove Hydro Dipping
What Supplies Do You Need for Hydro Dipping
To embark on this colorful journey, you’ll need a few essentials. Here’s what you’ll need: water, a container large enough to accommodate your object, hydro dipping film, gloves, surface cleaner, and a clear coat spray. Of course, don’t forget the item you want to transform into a work of art!
Does Hydro Dipping Last on Firearms
Ah, the eternal question for gun enthusiasts! Fear not, for hydro dipping can absolutely withstand the test of time on firearms. As long as you properly prepare the surface, apply a sufficient clear coat, and maintain your gun with care, your hydro-dipped masterpiece should remain intact for years to come.
Can You Hydro Dip in Icy Waters
Despite our penchant for adventure, hydro dipping in frigid waters is not recommended. Cold temperatures can affect the film’s adherence and prevent it from properly transferring onto your object. So, be patient and wait for those waters to warm up before diving into your hydro dipping escapades!
Is Priming Necessary Before Hydro Dipping
You might think hydro dipping is a bit like painting, but fear not, my friend. You do not need to prime your object before taking the plunge into the vibrant world of hydro dipping. The activator does the trick by activating the film to adhere flawlessly to the surface, making priming unnecessary.
Does Hydro Dipping Scratch Easily
While hydro dipping provides a durable and eye-catching finish, it is not impervious to scratches, just like any other painted surface. However, by applying a clear coat protective finish after hydro dipping, you can significantly enhance the resilience of your newly dipped treasure, minimizing the risk of scratches.
Is Cerakote a Superior Alternative to Hydro Dipping
Now, now, let’s not start a painting revolution! Though Cerakote does offer excellent durability and corrosion resistance, hydro dipping is no slouch either. It all boils down to personal preference. Cerakote provides a more uniform and opaque finish, while hydro dipping offers a unique, marbled appearance. The choice is yours!
Do You Need to Apply Clear Coat After Hydro Dipping
Oh, absolutely! To ensure your hydro-dipped creation stands the test of time, applying a clear coat after the dipping process is crucial. This will enhance the longevity of your design, protect it from scratches, and give it a glossy finish that is sure to turn heads.
Is Hydro Dipping a Permanent Process
Ah, the ephemeral nature of art! Hydro dipping is not necessarily a permanent process, but with proper preparation, application, and sealing, you can extend its lifespan considerably. Of course, as time goes on, factors such as wear and tear may cause the design to fade or scratch, but that’s all part of the artistic journey!
Can You Sand After Hydro Dipping
Indeed, you may sand your hydro-dipped creation if needed, but take heed: be gentle! Light sanding with fine-grit sandpaper can help smooth out any imperfections or uneven surfaces. Ensure not to sand too aggressively, as you may risk damaging the design or exposing the base layer beneath the hydro dip.
Can You Hydro Dip an Object Twice
Two coats are better than one, right? Unfortunately, it is not ideal to hydro dip an object twice. The second dip may cause the original pattern to distort or become muddled. However, if you’re feeling particularly adventurous, you can always experiment on a test piece to see what artistic magic you can conjure up!
What Is Activator in Hydro Dipping
Ah, the secret ingredient! Activator plays a vital role in the hydro dipping process. When sprayed over the hydro dipping film, it chemically reacts with it, dissolving the ink and creating a liquid in which the design floats. This “activated” film then adheres to the object when you dip it, leaving you with a perfectly dipped masterpiece.
Is Hydro Dipping an Expensive Hobby
Fear not, art lover, hydro dipping is a hobby that won’t break the bank! While initial investment in supplies and equipment is required, the overall cost of hydro dipping is relatively affordable compared to other painting techniques. So dive into this creative venture without worrying about emptying your pockets!
How Can I Remove Plasti Dip from My Home
Oh dear, did a plasti-dipped disaster befall your humble abode? Fret not, for the solution lies within your reach. To remove Plasti Dip from your home, simply apply a generous amount of acetone to a cloth or sponge and gently scrub away the offending layer. Just remember to keep the area well-ventilated and don’t forget your sense of humor!
What Color Options are There with Cerakote
Ah, the rainbow awaits! Cerakote offers an extensive array of color options to ignite your artistic spirit. From earthy browns to vibrant purples and everything in between, you are bound to find the perfect shade to suit your creative vision. Let your imagination take flight on the wings of color!
Will Acetone Remove Hydro Dip
Indeed, acetone can work its magic on hydro dip. When applied to the hydro dipped surface, acetone dissolves the clear coat, allowing you to peel away the design. However, be cautious not to damage the object beneath or inhale too much acetone fumes. Remember, artistry requires a well-ventilated and safety-conscious environment!
How Can You Achieve a Smooth Hydro Dip
Ah, the pursuit of smoothness! To achieve a flawless hydro dip, ensure your surface is prepped and free from imperfections. Cleanliness is key! Take care to remove any dust, dirt, or oil before dipping. Additionally, applying a clear coat after the dip and gently sanding any uneven areas can further enhance that coveted smooth finish.
And there you have it, dear reader! A delightful FAQ-style journey through the enchanting world of hydro dipping. Now, armed with knowledge and a touch of humor, go forth and create masterpieces that will leave jaws dropping and minds swirling with questions!