Welcome to our comprehensive guide on how to apply LUTs in DaVinci Resolve! Whether you’re an aspiring filmmaker or a seasoned video editor, understanding how to effectively use LUTs can greatly enhance the look and feel of your footage.
LUTs, short for Look-Up Tables, are files that contain mathematical formulas used to transform the colors and tones of your videos. They allow you to achieve stunning cinematic effects, recreate specific moods, or match the color grading of different cameras. In this blog post, we will provide step-by-step instructions on how to find, install, and apply LUTs in DaVinci Resolve to take your video editing skills to the next level.
If you’ve ever wondered where to find LUTs, how to add an adjustment layer to your LUT, or what an input LUT is, we’ve got you covered. We’ll also explore topics such as how to open LUT files, install LUTs in other software like Final Cut Pro and Capture One, and even how to create your own custom LUTs. So, let’s dive in and unlock the power of LUTs in DaVinci Resolve!
How to Apply LUT in DaVinci Resolve
So you’ve got your hands on the powerful DaVinci Resolve software and now you’re wondering how to add some pizzazz to your videos with LUTs (Look-Up Tables). Well, you’re in luck! In this guide, we’ll walk you through the process step-by-step and have you slinging LUTs like a pro in no time. Let’s dive in!
Understanding LUTs: The Magic Behind the Colors
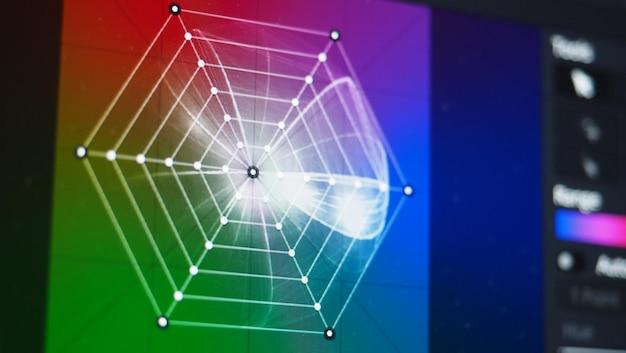
Before we jump into the nitty-gritty of applying LUTs, let’s take a moment to understand what they are and how they work. Think of LUTs as secret recipes for your videos. They are essentially small files that tell your video editing software how to transform the colors and tones of your footage. It’s like adding a filter, but with more control and precision.
Step 1: Importing Your Footage
To begin our LUT adventure, let’s import our footage into DaVinci Resolve. Once you have your project open and ready to go, simply navigate to the Media page and click on the Import button. Select the video file you want to work with and let DaVinci Resolve work its magic.
Step 2: Adding the LUT
Now that your footage is imported, it’s time to add the LUT. In the Edit page, locate the Color tab and click on it. This is where the magic happens! Within the Color tab, find the LUTs section and click on the Open LUT Folder button. This will open a file viewer window where you can browse and select your desired LUT.
Step 3: Applying the LUT
With the LUT file selected, it’s time to apply it to your footage. DaVinci Resolve offers different methods to apply the LUT – you can choose to apply it globally or to individual clips. To apply it globally, simply click and drag the LUT file from the LUTs section onto the Nodes graph. If you want to apply the LUT to a specific clip, right-click on the clip and choose 3D LUT > Choose LUT from the context menu. Select your preferred LUT from the list, and voila! Your footage is now transformed.
Step 4: Fine-Tuning Your LUT
While the LUT has done its magic, you might still want to tweak the settings a bit to achieve the perfect look. In the Color tab, you’ll find a plethora of options to refine the colors and tones of your footage. From adjusting the brightness and contrast to fine-tuning the saturation and hue, you have complete control over the final result. Play around with the settings and let your creativity soar!
Step 5: Viewing Your Masterpiece
Now that you’ve applied and fine-tuned your LUT, it’s time to sit back and admire your work. Switch to the Edit tab and watch your footage come to life with vibrant colors and stunning tones. Feel free to experiment with different LUTs and settings to create unique looks for your videos.
Conclusion: Unlocking the Power of LUTs in DaVinci Resolve
Congratulations! You’ve successfully learned how to apply LUTs in DaVinci Resolve like a pro. Remember, LUTs are not only a color correction tool but also a way to bring your creative vision to life. So go ahead, explore the realm of LUTs, and turn your videos into visual masterpieces that captivate your audience. Happy editing!
And there you have it! A comprehensive guide on how to apply LUTs in DaVinci Resolve. With these simple steps, you’ll be able to transform your videos into eye-catching works of art. So go ahead, unleash your creativity, and let your videos shine with the power of LUTs. Happy editing, my fellow video enthusiasts!
FAQ: How To Apply LUT in DaVinci Resolve
In this FAQ-style guide, we’ll cover everything you need to know about applying LUTs in DaVinci Resolve. Whether you’re a beginner or an experienced user, these frequently asked questions will help you navigate the world of LUTs and enhance your video editing skills. So let’s dive right in!
Where Can I Find LUTs
LUTs, or Look-Up Tables, can be easily found online on various platforms and websites. You can find both free and paid LUTs by searching on popular video editing communities, marketplaces, or even directly from the official websites of LUT creators. Be sure to choose LUTs that suit your specific editing needs and style.
How Do I Add an Adjustment Layer to My LUT
To add an adjustment layer to your LUT in DaVinci Resolve, follow these steps:
- Go to the Edit page.
- Click on the “Effects Library” tab.
- Search for “Adjustment Layer” in the Effects Library search bar.
- Drag and drop the Adjustment Layer to the video track above your clips.
- Apply the desired LUT to the Adjustment Layer.
What is Input LUT
Input LUT, or Look-Up Table, is a specific type of LUT that is used to transform the color and tonality of the input footage to a desired color space. It helps to ensure consistency and accuracy when working with different camera formats and color profiles. By applying an Input LUT, you can achieve a consistent starting point for your color grading process.
How Do You Install a LUT
Installing a LUT in DaVinci Resolve is a straightforward process. Here’s how you can do it:
- Launch DaVinci Resolve and open your project.
- Go to the Color page.
- Click on the “Open LUT Folder” icon located at the bottom right of the screen.
- Copy and paste the downloaded LUT file into the LUT folder.
- Restart DaVinci Resolve if it was open during the installation.
- Your newly installed LUT will now be available in the LUT browser within DaVinci Resolve.
What Does LUTs Mean
LUTs, short for Look-Up Tables, are mathematical algorithms that are used to map one set of colors to another. They are widely used in post-production to achieve specific looks or color grading effects in videos or images. LUTs act as a guide, helping to transform the visual appearance of a video or image by manipulating color, contrast, saturation, and other elements.
How Do You Put LUTs in DaVinci Resolve
Putting LUTs in DaVinci Resolve is a breeze. Follow these steps:
- Open DaVinci Resolve and load your project.
- Switch to the Color page.
- Locate the LUTs panel on the right side of the screen.
- Click on the “Browse” button in the LUTs panel.
- Navigate to the folder where your LUTs are stored.
- Select the desired LUT file and click “Open”.
- The LUT will now be applied to your selected clip or adjustment layer.
How Do You Open a LUT File
Opening a LUT file in DaVinci Resolve is quite simple. Here’s what you need to do:
- Launch DaVinci Resolve and open your project.
- Go to the Color page.
- Locate the LUTs panel on the right side of the screen.
- Click on the “Browse” button in the LUTs panel.
- Navigate to the folder where your LUT files are stored.
- Select the desired LUT file and click “Open”.
- The LUT will now be available in the LUT browser for application.
How Do I Add LUTs to Final Cut Pro
Adding LUTs to Final Cut Pro requires a few simple steps. Here’s how you can do it:
- Open Final Cut Pro and load your project.
- Go to the Effects browser by clicking on the “Effects” tab located in the top-right section of the interface.
- Search for the “Custom LUT” effect in the Effects browser search bar.
- Drag and drop the “Custom LUT” effect onto the clip you want to apply the LUT to.
- Open the Inspector panel by clicking on the “Inspector” icon located in the top-right corner of the interface.
- In the Inspector panel, click on the “Choose Custom LUT” button.
- Navigate to the folder where your LUT files are stored.
- Select the desired LUT file and click “Choose”.
- The LUT will now be applied to your selected clip in Final Cut Pro.
What is LUT Pack
A LUT pack is a collection of multiple LUTs bundled together. LUT packs often contain a variety of LUTs that cater to different moods, styles, or color effects. They provide users with a wide range of options for color grading and allow for easy experimentation and customization in video editing software like DaVinci Resolve or Final Cut Pro.
How Do I Use LUT Adjustment Layer
To use a LUT adjustment layer in DaVinci Resolve and apply it to multiple clips, follow these steps:
- In the Edit page, click on the “Effects Library” tab.
- Search for “Adjustment Layer” in the Effects Library search bar.
- Drag and drop the Adjustment Layer to a video track above the clips.
- Apply the desired LUT to the Adjustment Layer.
- The LUT will now be applied to all the clips underneath the Adjustment Layer on that video track.
How Do You Make a LUT
Creating your own LUT requires using specialized software or applications like Adobe Photoshop, Adobe Lightroom, or DaVinci Resolve. The exact process may vary depending on the software you choose. Generally, you start by editing a reference image or video to achieve the desired look and color grading. Then you export the color settings as a LUT file, which can be applied to other footage for a consistent look.
How Do You Apply LUTs to All Clips
To apply LUTs to all clips in DaVinci Resolve, use the adjustment layer technique mentioned earlier. By adding the LUT to an adjustment layer and placing it on a track above all the clips, the LUT will be applied to all the clips beneath that adjustment layer. This allows for quick and efficient application of LUTs to multiple clips in one go.
What is LUT in DaVinci Resolve
In DaVinci Resolve, a LUT, or Look-Up Table, is a file that contains color and tonal adjustments. LUTs are used to transform the appearance of footage, achieving specific looks or grades. DaVinci Resolve provides a range of built-in LUTs, and users can also import and apply their own custom LUTs to enhance their creative vision and achieve distinct visual styles.
What is Apply LUT in OBS
Apply LUT in OBS refers to the process of applying a LUT, or Look-Up Table, to color grade and modify the appearance of video footage in Open Broadcaster Software (OBS). OBS offers various filters and effects, including the ability to apply LUTs, which can greatly enhance the visual quality and aesthetics of live streaming or recorded videos.
What is “.cube” File
A “.cube” file is a commonly used file format for LUTs. It contains the color mapping information that instructs software or hardware how to alter the color and tonality of an image or video. The “.cube” file format is widely supported by video editing software, making it easy to use LUTs created or obtained in this format across different platforms and applications.
How Do I Use Webcam LUT
To use a LUT for your webcam in video conferencing or recording software, follow these steps:
- Open the software you use for video conferencing or recording.
- Look for video settings or options related to webcam settings.
- Find the option to apply custom video effects or filters.
- Enable the option to apply LUT.
- Browse and select the desired LUT file.
- The LUT will now be applied to your webcam feed, enhancing the colors and appearance of your video.
How Do You Use LUT
Using LUTs in video editing involves importing the LUT file into your chosen software and applying it to your footage or adjustment layer. The specific steps may vary depending on the software, but generally, you’ll need to access your software’s effects or color grading tools, find the option to load or apply a LUT, and browse for the desired LUT file on your computer. Once applied, the LUT will instantly transform the colors and overall look of your footage, allowing you to achieve the desired visual style or mood.
Can I Use LUTs in Capture One
Yes, Capture One supports the use of LUTs for color grading and style adjustments. In Capture One, you can import and apply LUTs to your raw images to enhance their appearance or achieve specific visual effects. By leveraging LUTs in Capture One, you can streamline your post-processing workflow and easily experiment with different looks and color grades to create stunning images.