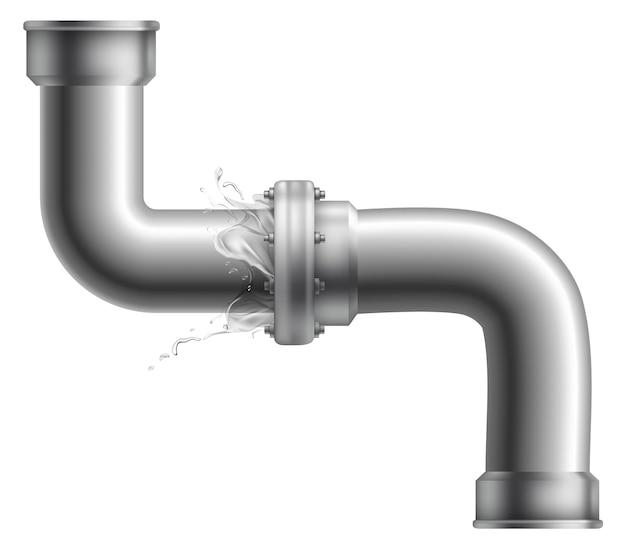
Leaking drain pipes can be a headache, whether it’s an outside drain pipe or an ABS pipe joint. The constant dripping not only adds to your water bill but also causes damage to your property. So, what can you do to fix this annoying problem? Don’t worry! We are here to help you with some simple and effective solutions.
First things first, let’s understand what ABS drain pipes are. ABS, short for Acrylonitrile Butadiene Styrene, is a type of plastic commonly used for plumbing systems. ABS pipes are known for their durability and resistance to chemicals, making them a popular choice for drainage systems.
Now, let’s tackle the issue at hand – a leaking ABS drain pipe joint. When the joint connecting two ABS pipes starts to leak, it can be frustrating. But fret not, you don’t need to be a plumber to fix it. With a few handy tools and a little bit of knowledge, you can save the day!
One common solution to fix a leaking ABS joint is using an ABS pipe leak sealer. This specially formulated sealer is designed to bond with the plastic, creating a watertight seal. Simply apply the sealer to the joint, following the product instructions, and watch as it stops the leak in its tracks.
But what if you don’t have access to an ABS pipe leak sealer? Don’t worry, we’ve got you covered! Another option is to repair the leak using ABS pipe repair resin. This resin is a quick and effective way to seal leaks without the need for special tools or expertise.
Now, you may be wondering, can I use silicone on ABS pipe? The short answer is no. While silicone is a popular choice for many plumbing repairs, it is not recommended for use on ABS pipes. The different chemical compositions of silicone and ABS can prevent proper adhesion, leading to ineffective repairs. It’s best to stick to ABS-specific products for a reliable fix.
In the next sections, we will guide you through the process of fixing a leaking ABS drain pipe joint, whether it’s an indoor or outdoor pipe. So, roll up your sleeves and get ready to become a DIY plumbing hero!
ABS Drain Pipe Leaking at Joint
How to Identify and Fix the Issue
You’re peacefully going about your day when suddenly you notice a small puddle of water forming near the base of your sink cabinet. Panic sets in as you realize that your ABS drain pipe might be leaking at the joint. Don’t worry, we’ve got you covered! In this guide, we’ll walk you through the steps to identify and fix this common plumbing issue.
Step 1: Inspect the Problematic Joint
The first thing you need to do is locate the leak. Get down on your hands and knees, grab a flashlight if needed, and carefully examine the joint connecting your ABS drain pipes. Look for any signs of water drips, discoloration, or moisture around the joint. If you spot any of these telltale signs, you’ve likely found your culprit.
Step 2: Turn Off the Water Supply
Before you start any repair work, it’s essential to turn off the water supply to avoid further leakage or damage. Locate the shut-off valve that controls the water flow to the affected area. Turn it clockwise until it’s fully closed. This will prevent water from flowing into the leaky joint while you work on fixing it.
Step 3: Identify the Type of Joint
ABS drain pipes can be joined together using various methods, such as solvent cement, compression fittings, or rubber couplings. Knowing the type of joint you’re dealing with will help determine the appropriate repair method. Each joint has its unique characteristics and requires specific repair techniques.
Step 4: Repair Techniques for Different Joint Types
Solvent Cement Joint
If your ABS drain pipe features a solvent cement joint, you’ll need to disassemble the joint by carefully unscrewing the connection. Clean both pipe ends to remove any debris, then apply a generous amount of ABS cement to the outside of one pipe end and the inside of the corresponding fitting. Reassemble the joint and hold it firmly for a few seconds to allow the cement to set.
Compression Fitting Joint
For a compression fitting joint, unscrew the nut and pull the joint apart. Inspect the rubber gasket for any damage or wear. If it’s in good condition, clean the pipe ends and reassemble the joint. If the gasket is worn out, replace it with a new one before reassembling the joint.
Rubber Coupling Joint
In the case of a rubber coupling joint, begin by loosening the stainless-steel clamps on both sides of the joint. Once the clamps are loose, separate the joint and examine the rubber sleeve for any tears or cracks. Replace the sleeve if necessary, and reconnect the joint before tightening the clamps securely.
Step 5: Test for Leaks
After completing the repair, it’s crucial to test for leaks before turning the water supply back on. Run water through the repaired ABS drain pipe for a few minutes and carefully observe the joint. If you notice any water dripping or signs of leakage, double-check the connection and make any necessary adjustments to ensure a watertight seal.
Remember, it’s always a good idea to consult a professional plumber if you’re unsure about tackling the repair yourself or if the issue persists. By following these steps and addressing the problem promptly, you’ll be on your way to a leak-free and happy plumbing system!
ABS Pipe Leak Sealer
Understanding the Need for ABS Pipe Leak Sealer
Nobody likes dealing with leaking pipes. Whether it’s a small drip or a full-blown leak, it can quickly become a frustrating and messy plumbing issue. One common problem homeowners face is an ABS drain pipe leaking at the joint. Fortunately, there is a solution that can save you time, money, and headaches: ABS pipe leak sealer.
How Does ABS Pipe Leak Sealer Work
ABS pipe leak sealer is a handy product designed to seal leaks in ABS drain pipes. It works by forming a watertight seal around the joint, preventing any water from escaping. This sealer is specifically formulated for ABS pipes, ensuring it bonds perfectly with the material, providing a reliable and long-lasting solution.
The Benefits of ABS Pipe Leak Sealer
Using ABS pipe leak sealer offers several benefits. First and foremost, it provides a quick and effective fix for leaking ABS pipes. Rather than spending hours trying to locate the exact source of the leak and then attempting a potentially complicated repair, you can simply apply the sealer to the joint and be done with it.
Additionally, ABS pipe leak sealer is a cost-effective solution. In contrast to extensive repair work or pipe replacements, the sealer is an affordable option that gets the job done. It can save you a significant amount of money, especially in cases where a pipe replacement would require tearing up walls or floors.
Applying ABS Pipe Leak Sealer
Applying ABS pipe leak sealer is a relatively straightforward process. First, ensure that the joint is clean and dry. This will help maximize the effectiveness of the sealer. Then, carefully follow the instructions provided with the sealer, applying it evenly around the joint. Give it some time to cure, and voila! Your leak should be sealed.
Dealing with a leaking ABS drain pipe at the joint can be a headache, but with the right solution, you can quickly and easily resolve the issue. ABS pipe leak sealer offers a simple, affordable, and effective fix for these types of leaks. So, the next time you encounter a leaky ABS pipe, remember the power of ABS pipe leak sealer – a convenient, reliable, and cost-effective solution that’ll save you from any plumbing-related woes.
ABS Pipe Repair Resin
Introduction
When dealing with a leaking ABS drain pipe joint, it’s essential to know your options for fixing the issue. One effective method is using ABS pipe repair resin. In this section, we will explore what ABS pipe repair resin is and how it can be used to fix leaks in ABS drain pipes.
What is ABS Pipe Repair Resin?
ABS pipe repair resin is a special adhesive specifically designed for repairing leaks in ABS drain pipes. It is a durable and flexible material that forms a strong bond with ABS pipe surfaces, ensuring a long-lasting and watertight seal.
How to Apply ABS Pipe Repair Resin
Repairing a leaking ABS drain pipe joint with resin is a straightforward process. Follow these steps:
1. Prepare the Surface
Clean the area around the leak and ensure it is dry and free from any debris. This will help the resin adhere properly to the pipe surface.
2. Mix the Resin
Follow the manufacturer’s instructions to mix the resin. Use a clean container and stir thoroughly until the resin is well blended.
3. Apply the Resin
Apply the resin directly to the leaking joint, covering the entire area of the leak. Use a brush or spatula to spread the resin evenly, ensuring it fills any gaps or holes in the joint.
4. Let it Cure
Allow the resin to cure fully according to the manufacturer’s instructions. This usually takes a few hours, but it’s best to wait until the resin is completely dry and hardened before using the drain again.
Benefits of ABS Pipe Repair Resin
Using ABS pipe repair resin has several advantages:
– Easy Application
Applying ABS pipe repair resin is a simple and hassle-free process. You don’t need any specialized tools or equipment, making it accessible to anyone.
– Cost-effective Solution
Repairing a leaking ABS drain pipe joint with resin is an affordable option compared to replacing the entire pipe. It allows you to fix the issue without breaking the bank.
– Durable and Long-lasting
ABS pipe repair resin creates a strong and durable bond with the ABS pipe surfaces, ensuring a reliable and long-lasting repair.
– Versatility
ABS pipe repair resin can be used for various types of ABS drain pipes, making it a versatile solution for different plumbing systems.
In conclusion, ABS pipe repair resin is an excellent option for fixing leaks in ABS drain pipes. Its easy application, cost-effectiveness, durability, and versatility make it a popular choice among DIY enthusiasts and professionals alike. By following the steps outlined above, you can effectively repair a leaking ABS drain pipe joint and prevent further damage to your plumbing system.
Can I Use Silicone on ABS Pipe
Introduction
When it comes to plumbing issues, one common problem that many homeowners face is a leaking ABS drain pipe joint. Luckily, there are several solutions available to fix this issue. One method that often comes to mind is using silicone to seal the leak. In this section, we will explore whether it is safe and effective to use silicone on an ABS pipe.
Is Silicone Compatible with ABS Pipes
Before we dive into the question, let’s first understand what ABS pipes are made of. ABS stands for Acrylonitrile Butadiene Styrene, a type of thermoplastic commonly used in plumbing systems. Silicone, on the other hand, is a rubber-like material known for its flexibility and water-resistant properties. So, is it safe to use silicone on ABS pipes?
The Compatibility Factor
While silicone can adhere to various surfaces and materials, it is not recommended to use it directly on ABS pipes. ABS pipes have a smooth surface that may not provide sufficient adhesion for the silicone sealant. Additionally, ABS pipes expand and contract under different temperature conditions, and the flexibility of silicone may not be able to accommodate these movements effectively.
Alternative Solutions for ABS Pipe Leaks
Instead of relying on silicone, it is better to use methods specifically designed for repairing ABS pipe leaks. One effective option is using ABS cement or solvent weld. This adhesive is specially formulated to chemically bond ABS pipes and fittings together. It not only provides a secure and watertight seal but also allows for the expansion and contraction of the ABS pipe without compromising its integrity.
In conclusion, when it comes to fixing a leaking ABS drain pipe joint, using silicone may not be the best solution. While silicone is a versatile sealant, it may not adhere well to ABS pipes, which can compromise the effectiveness of the repair. It is advisable to opt for alternative solutions such as ABS cement or solvent weld, which are specifically designed for ABS pipes. By choosing the right method, you can ensure a long-lasting and reliable repair for your ABS pipe leaks.
How to Fix a Leaking Drain Pipe
Assess the Damage: Is it a Tiny Drip or a Niagara Falls
Before grabbing your trusty toolbox, you need to evaluate the severity of the leak. Is it just a tiny drip or a full-blown water show resembling Niagara Falls? If it’s just a minor leak, you might be able to fix it easily. However, if water is gushing out like a wild river, it’s best to call in a professional plumber, unless you fancy a homemade indoor swimming pool.
Turn off the Water Supply: Avoid a Plumbing Catastrophe
To avoid any unfortunate accidents, make sure to turn off the water supply before diving into your DIY project. Locate the shut-off valve, usually found under the sink or near the main water supply. Remember, we’re fixing a leak, not creating a watery disaster!
Prepare for Battle: Gather Your Weapons
Assemble the tools you’ll need for this epic battle against the leaky drain pipe. You’ll likely require a wrench, pliers, plumber’s tape, PVC glue, and, of course, a bucket to catch any water that may escape during your heroic repair efforts. Don’t forget to put on your superhero cape – it’s essential for maximum DIY effectiveness.
Release the Pipe: Set it Free!
Now, it’s time to release the pipe from its watery shackles. Use your wrench or pliers to loosen the nuts holding the pipe in place. With a little leverage and a lot of determination, you’ll soon have that pipe in your hands, free to be repaired, just like a superhero rescuing a damsel in distress.
Inspect and Clean: A Pipe Makeover
Now that you have the pipe in your hands, take a good look at it. Is there debris or old pipe joint sealant clinging on for dear life? Give it a nice scrub to ensure it’s clean and ready for its new lease on life. Think of it as a mini spa treatment for your drain pipe – it deserves a little pampering after all the hard work it does.
Get Sealing: Kiss Goodbye to Leaks
Apply plumber’s tape to the threads of the pipe to create a tight seal that will prevent any future leaks. This step is crucial for ensuring a leak-free pipe joint. Be generous with the tape, but don’t go overboard – we want a leak-free pipe, not a mummified one.
Reconnect and Tighten: Lock it in Place
Gently reattach the pipe to its rightful place, making sure the threads align perfectly. Use your wrench or pliers to tighten the nuts firmly but carefully. Remember, we’re aiming for a tight connection, not a broken pipe. No need to Hulk out during this part.
Test the Waters: Triumph Over Leaks
Turn the water supply back on and witness the moment of truth. Did your superhero efforts pay off? Listen closely for any sounds of dripping or hissing, indicating that your pesky leak has been vanquished. With a little luck and some DIY magic, you can now revel in your victory over the leaking drain pipe.
Celebrate with a Victory Dance: DIY Champion
You’ve done it! You’ve successfully fixed a leaking drain pipe, saving the day and your home from plumbing woe. Now is the time to do your victory dance in your newly dry and leak-free surroundings. Go on, shake those hips and rejoice in your newfound DIY champion status.
So, the next time a leaky drain pipe tries to rain on your parade, don’t despair! Follow these steps, channel your inner DIY hero, and conquer that leak like a true plumbing warrior. Remember, with a little know-how and a lot of determination, you can fix anything – even a leaky drain pipe!
How to Fix a Leaking ABS Joint
So, you’ve found yourself dealing with a pesky leaking ABS joint? Don’t worry, you’re not alone in this struggle. Leaks can be frustrating, but with a little know-how, you can take care of it yourself. Here are some steps to help you fix that annoying leakage and regain your peace of mind.
Assess the Situation
First things first, you need to identify the source of the leak. Is it really the ABS joint, or could it be coming from somewhere else? Take a close look at the area and see if you can spot any obvious cracks or gaps. Remember to turn off the water supply to prevent any further leaking while you work on fixing it.
Gather Your Tools
Once you’ve confirmed that it’s indeed the ABS joint leaking, it’s time to gather your tools. You’ll need a few things for this task, including a PVC cutter or hacksaw, ABS cement, a primer, and sandpaper. It’s essential to have these items ready before you start to ensure a smooth and hassle-free process.
Cut and Clean
Now that you have your tools, it’s time to get down to business. Start by using a PVC cutter or hacksaw to cut out the leaking section of the pipe. Make sure to measure and mark the appropriate length accurately. Once you’ve made the cut, use sandpaper to clean any rough edges on the remaining pipe and the new section you’ll be installing.
Apply Primer and Cement
Before proceeding further, apply primer to both the existing pipe and the new section. This step helps to ensure a strong bond between the two. After the primer dries, it’s time to coat both surfaces with ABS cement. Be generous with the cement, but remember not to go overboard. Align the new section with the existing pipe, and firmly press them together.
Let It Cure
Now, it’s time to exercise some patience. Allow the cement to cure for the recommended time. It typically takes a few hours, but check the manufacturer’s instructions to be certain. During this waiting period, avoid using any water through that particular drain to avoid any disturbances that could compromise the repair.
Test the Repair
Once the curing time is up, turn on the water supply and test your repair work. Keep a close eye on the joint area to ensure there are no more leaks. Running water through the drain for a few minutes will give you a good idea of whether or not the fix was successful. If all looks well, congratulations! You’ve successfully fixed your leaking ABS joint.
Wrapping Up
Fixing a leaking ABS joint may seem daunting at first, but with the right tools and a bit of patience, it’s a manageable task. Remember to assess the situation, gather your tools, cut and clean the pipe, apply primer and cement, let it cure, and test the repair. With these steps, you’ll be well on your way to enjoying a leak-free plumbing system once again.
So, next time you encounter a stubborn leak, roll up your sleeves and give it your best shot – you’ve got this!
Outside Drain Pipe Leaking at Joint
When it comes to plumbing issues, a leaking drain pipe joint can really throw a wrench in your plans. Whether it’s a gremlin sabotaging your pipes or simply wear and tear, dealing with a leaky drain pipe joint can be a real headache. So, let’s dive into the world of outside drain pipes and explore some tips for fixing that pesky leak at the joint.
Diagnosing the Problem
Before you roll up your sleeves and get to work, it’s important to properly diagnose the issue. Is the leak truly coming from the joint? Sometimes, water can trickle down from other areas, giving the illusion of a joint leak. So, grab your detective hat and do some sleuthing. Is the area around the joint wet? Are there any visible cracks or loose fittings? By pinpointing the exact location of the leak, you’ll have a better idea of what needs fixing.
Tighten Those Connections
In some cases, a simple solution may be tightening the connections on your outside drain pipe. Grab a pipe wrench or adjustable pliers and give those joints a gentle twist. Be careful not to over-tighten, though, as you don’t want to risk damaging the pipe or causing more leaks down the line. Sometimes, all it takes is a little elbow grease to secure the joint and stop that leak in its tracks.
Seal the Deal
If tightening the connections didn’t do the trick, it’s time to seal the deal. Reach for some plumber’s tape or joint compound to create a watertight seal around the leaky area. Apply the tape or compound according to the manufacturer’s instructions, making sure to cover the entire joint. This extra layer of protection will help plug any gaps and keep water from escaping.
Call in the Reinforcements
If your DIY efforts still haven’t resolved the issue, it may be time to call in the professionals. A qualified plumber has the expertise and tools to assess and repair complex plumbing problems. While it may be tempting to save a few bucks by taking the DIY route, it’s important to know when to throw in the towel and get some expert help. Plus, it can save you from potential headaches and expensive repairs down the line.
Prevention is Key
Now that you’ve fixed that pesky leak, it’s time to focus on prevention. Regularly inspect your outside drain pipes for any signs of wear and tear. Keep an eye out for cracks, loose connections, or any other potential weak points. By catching these issues early on, you can save yourself from future leaks and headaches.
So, there you have it – some handy tips for dealing with a leaking drain pipe joint on the outside of your home. Remember, take your time, be cautious, and don’t be afraid to call in reinforcements when needed. With a little know-how and some elbow grease, you’ll have that leak fixed in no time. Happy plumbing!
How to Repair a Leaking ABS Pipe Joint
Understanding the Problem
So, you’ve got a leaky ABS drain pipe at the joint, huh? Don’t panic just yet! Leaks happen, but luckily, fixing them doesn’t have to be a nightmare. Before we dive into the solution, let’s first understand what we’re dealing with here.
Identifying the Leak
The first step in fixing any leak is to locate the source. Grab some paper towels and dry the area around the leaky joint. Once it’s dry, turn on the water and keep an eye out for any drips or puddles. Pay close attention to the joint where the two ABS pipes connect, as this is often where the problem lies.
Necessary Tools and Materials
Before we get into the repair process, let’s gather the tools and materials you’ll need. Here’s a handy list to ensure you’re prepared:
- Rubber Gloves: Protect your hands from any dirt or chemicals you might encounter.
- Pipe Cutter: You’ll need this to remove the damaged section of the ABS pipe.
- ABS Cement: This is the magic glue that will fix your leak. Make sure you have enough for the job.
- Clean Rag: Keep it nearby for any spills or excess cement.
- Sandpaper: You’ll need this to roughen up the edges of the pipe for a better bond.
- Safety Goggles: We don’t want any cement splashing into your eyes, do we?
Step-by-Step Repair Process
Now that you’ve gathered your gear, it’s time to get your hands dirty and fix that leaky ABS pipe joint. Follow these steps carefully:
Step 1: Safety First
Put on your rubber gloves and safety goggles. Let’s make sure we’re protected while fixing that leak! Safety first, my friend.
Step 2: Cut Out the Leaky Section
Using your trusty pipe cutter, carefully remove the damaged section of the ABS pipe. Cut a little bit beyond the leak to ensure you remove all the problem areas.
Step 3: Clean and Roughen
Grab your sandpaper and gently roughen the edges of the remaining pipe. This step helps the ABS cement adhere better, creating a strong bond.
Step 4: Apply ABS Cement
Apply a generous amount of ABS cement to the outside of one pipe end, as well as the inside of the corresponding connector. Make sure to spread it evenly and cover the entire surface.
Step 5: Connect the Pieces
Push the two pipes together and twist slightly to ensure a good connection. Hold them in place for a few seconds to allow the cement to set. Wipe off any excess cement with a clean rag.
Step 6: Let It Cure
Allow the cement to cure for the recommended time mentioned on the product label. This typically takes around an hour or so. Patience is a virtue, my friend!
Problem Solved!
Well, there you have it! Your ABS drain pipe joint is no longer leaking. Give yourself a pat on the back; you’ve successfully repaired the leak like a pro! Remember, leaks can happen, but with a little know-how and some elbow grease, you can tackle them head-on. Now go forth, my friend, and enjoy your leak-free plumbing!