The process of tiling can be overwhelming, especially when you’re faced with the task of dealing with old adhesive from previous tile installations. It’s natural to wonder if removing the old adhesive is necessary before starting a new tiling project. In this blog post, we’ll delve into this common question and provide you with all the information you need to make an informed decision.
When it comes to tiling over old adhesive, there are several factors to consider. From the type of adhesive used to the condition of the surface, each aspect plays a role in determining whether removal is essential. We’ll explore different scenarios and provide tips on how to proceed, whether it involves tile cement, black adhesive, or mastic. Additionally, we’ll cover topics like drying time, tiling over existing surfaces like Lino, and the best adhesive choices for tiling over tiles.
So, if you’re contemplating a tiling project and wondering about the old adhesive, keep reading to find out if removing it is a necessary step or if you can save time and effort by tiling directly over it.
Do I Need To Remove Old Adhesive Before Tiling
So you’re thinking about giving your bathroom or kitchen a facelift with some brand new tiles. That’s great! But before you dive headfirst into this exciting project, there’s one question that’s probably nagging at the back of your mind: “Do I need to remove old adhesive before tiling?” Well, let’s get down to the nitty-gritty and answer that burning question once and for all.
The Sticky Situation: Old Adhesive
When you remove old tiles, whether they were attached to the floor or the walls, it’s likely that you’ll be left with a sticky situation – old adhesive. This adhesive is like a stubborn pest that refuses to leave your home. But does it really need to be banished before you can start tiling anew?
The Simple Answer: Yes
In most cases, it is advisable to remove the old adhesive before laying down new tiles. Why? Well, think of it like this: Would you want to build a solid foundation for your dream house on top of a pile of rubble? Of course not! The same principle applies to tiling. By removing the old adhesive, you ensure a clean and even surface for your new tiles to adhere to, resulting in a durable and long-lasting finish.
But Wait! There’s More!
Now, you might be thinking, “Oh no, more work! Can’t I just slap the new tiles on top of the old adhesive and call it a day?” Well, technically, you could. But let’s take a moment to consider the implications of that decision.
First off, leaving the old adhesive in place means your new tiles won’t sit as flush and level as you might want them to. This can result in uneven surfaces, making it difficult to walk or place furniture on your newly tiled floor. Plus, it just doesn’t look as polished or professional when you have wonky tiles scattered here and there.
Secondly, remember that pesky pest I mentioned earlier? Well, if you leave the old adhesive untouched, there’s a chance it might start to deteriorate over time. This could lead to your new tiles becoming loose and popping off, turning your beautifully tiled oasis into a jumbled mess.
The Removal Process: DIY or Get Professional Help
So, how do you go about removing that stubborn old adhesive? Well, you have a couple of options. If you’re the DIY type and want to save some cash, you can tackle the task yourself. All you’ll need are some patience, elbow grease, and a few trusty tools. With a scraper or chisel and some adhesive remover, you can chip away at the old adhesive and give your surface a blank canvas for tiling.
But let’s be real for a moment. Removing old adhesive can be a tedious and time-consuming task. It requires physical exertion and a fair amount of patience. If you’re not up for the challenge or simply don’t have the time, it’s best to call in the professionals. They have the expertise and specialized tools to get the job done efficiently, allowing you to sit back, relax, and admire your soon-to-be beautifully tiled space.
Final Thoughts
In conclusion, although it might be tempting to skip the step of removing old adhesive, it’s best to take the time and effort to do it right. By removing the old adhesive, you create a clean and level surface for your new tiles to adhere to. This ensures a finished product that not only looks great but stands the test of time. So, roll up your sleeves, put on some good music, and embrace the process. Your newly tiled bathroom or kitchen will thank you for it!
Note: Please remember to wear protective gear and follow proper safety precautions when removing old adhesive or engaging in any DIY activity. Safety first, my friend!
FAQ: Do I Need To Remove Old Adhesive Before Tiling
In the world of DIY home improvement, tiling is undoubtedly one of the most popular projects. Whether you’re sprucing up your bathroom or giving your kitchen a modern makeover, adding new tiles can completely transform the look and feel of a space. But before you embark on this exciting endeavor, there’s one burning question you may have: Do I need to remove old adhesive before tiling? Fear not, dear reader, for I have compiled a comprehensive FAQ section to answer all your adhesive-related queries. So let’s dive in!
Can You Tile over Old Tile Cement
Ah, old tile cement, the relic of a bygone era. While it may be tempting to lay your new tiles right on top of it, it’s generally not recommended. Old tile cement can prevent proper adhesion, leading to potential tile failure down the line. It’s best to remove the old tile cement to ensure a smooth and durable tiling surface.
Can You Tile over Old Adhesive
If you’ve ever tried peeling off a stubborn label, you know that adhesive can be quite tenacious. In the world of tiling, it’s a similar story. While it may be possible to tile over certain types of old adhesive, it’s generally advisable to remove it. Old adhesive can affect the bonding of the new tile adhesive, potentially causing tiles to become loose or crack. To ensure a sturdy and long-lasting tile installation, it’s best to bid farewell to the old adhesive.
Can You Lay Tile over Old Mastic
Ah, mastic, the sticky superstar of tile installations. While it may have served you well in the past, it’s time to say goodbye when undertaking a new tiling project. Similar to old adhesive, laying tiles over old mastic can compromise the integrity of your tile installation. Removing the old mastic is the way to go for a solid and reliable outcome.
How Do You Remove Cement-Based Tile Adhesive
Removing cement-based tile adhesive can be a labor-intensive task, but fear not, intrepid DIYer! With the right tools and a little elbow grease, you can conquer this challenge. Start by scoring the adhesive with a utility knife or scraper to break the surface. Then, using a chisel and mallet, gently tap away the adhesive in small sections. Remember to protect yourself with gloves and safety glasses and work in a well-ventilated area. If the adhesive proves particularly stubborn, you may need to employ a chemical adhesive remover. Always follow the manufacturer’s instructions and take breaks when needed, as this can be a time-consuming process.
Can You Tile over Black Adhesive
Black adhesive may give your tiles an edgy, avant-garde look, but alas, it’s not the best choice for a successful tile installation. As tempting as it may be to skip the removal process, it’s strongly recommended to strip away the black adhesive before tiling. Opting for a clean and adhesive-free surface will ensure optimal bonding and long-term resilience.
How Long Does Tile Adhesive Take to Dry
Ah, the waiting game. After diligently applying your tile adhesive, you’re undoubtedly eager to move forward with your tiling project. But patience, dear reader, is key. The drying time for tile adhesive can vary depending on factors such as humidity, temperature, and the type of adhesive used. As a general rule of thumb, allow at least 24 to 48 hours for the adhesive to fully dry before grouting or applying any additional weight or pressure on the tiles. Remember, haste makes waste, and rushing this crucial step may compromise the integrity of your tile installation.
Can I Tile on Top of Lino
Lino… a word that may evoke memories of kitchens from days of yore. While it may have had its heyday, when it comes to tiling, it’s best to bid adieu to the lino. Tiling directly on top of lino can lead to an unstable and uneven surface. To ensure a successful tiling project, remove the lino and create a clean and smooth base for your new tiles.
How Do You Tile over Existing Tile Adhesive
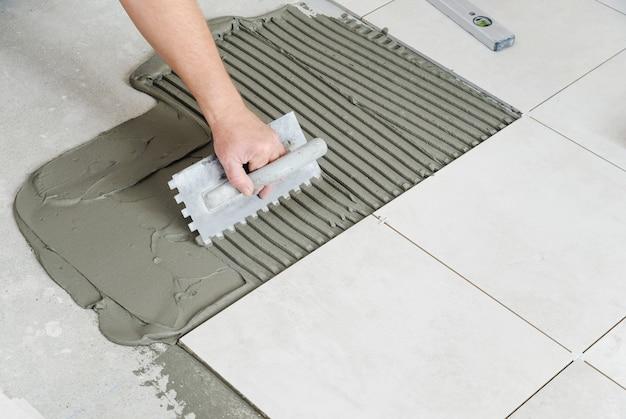
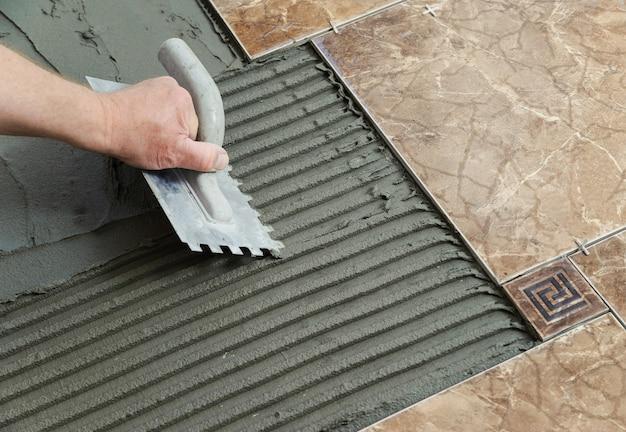
Embarking on a tiling project over existing tile adhesive may seem like a daunting task, but fear not, for I have some tips to ease your worries. Start by cleaning the existing tile adhesive, ensuring it is free from any dirt, dust, or grease. Then apply a suitable primer or bonding agent to promote adhesion between the new adhesive and the old surface. Finally, using a notched trowel, apply a fresh layer of tile adhesive and proceed with your tiling as usual. Remember, preparation is key to achieving a successful outcome.
Do You Have to Remove Old Mastic
Ah, old mastic, the remnants of a previous tile installation. While it may seem tempting to leave it be, it’s in your best interest to remove it. Old mastic can prevent the proper adhesion of your new tiles, potentially leading to unsightly gaps or loose tiles. Removing the old mastic ensures a clean and reliable surface for your tiling project.
How Do You Dissolve Tile Adhesive
When it comes to dissolving tile adhesive, it’s essential to choose the right product for the job. Look for adhesive removers specifically designed for the type of adhesive you’re dealing with. Follow the manufacturer’s instructions carefully, as different removers may require varying application techniques. Protect yourself with gloves and safety glasses, ventilate the area, and be patient. With persistence, the dissolving process will leave you with a clean slate for your tiling adventure.
Do I Need to Remove All Tile Adhesive
While it may be tempting to take shortcuts, removing all tile adhesive is generally recommended for a smooth and successful tiling project. Leaving behind old adhesive remnants may result in an uneven surface, compromising the integrity of your tile installation. Remember, a little extra effort now will save you from potential headaches in the future.
What Is the Best Adhesive for Tiling over Tiles
When it comes to tiling over existing tiles, selecting the right adhesive is crucial. Opt for a high-quality, polymer-modified thinset mortar specifically designed for tiling over tiles. This specialized adhesive offers excellent bonding properties and flexibility, ensuring a secure and long-lasting tile installation.
How Do You Remove Old Floor Tile Adhesive
Removing old floor tile adhesive requires a combination of grit and determination. Start by softening the adhesive with hot water or a commercial adhesive remover. Then, using a scraper or putty knife, carefully scrape away the softened adhesive. Remember to protect yourself with gloves and safety glasses, as this process can get messy. Once you’ve removed the bulk of the adhesive, clean the surface with warm, soapy water to ensure a clean and smooth base for your new flooring.
How Do You Remove Adhesive
Ah, adhesive removal, the unsung hero of tiling endeavors. The method of removing adhesive depends on the type of adhesive you’re dealing with. For water-based adhesives, simply soaking them with warm, soapy water and scraping away the softened residue may suffice. Solvent-based adhesives, on the other hand, typically require the use of a chemical adhesive remover. Always refer to the manufacturer’s instructions and exercise caution, ensuring proper ventilation and using gloves and safety glasses as necessary. Remember, removing adhesive is a labor of love, but the end result will be worth it!
How Do You Remove Old Plastic Tile Adhesive
Old plastic tile adhesive may cling to your tiles like a determined hummingbird to a feeder. But fear not, for you possess the power to remove it! Start by scoring the adhesive with a utility knife or scraper to break the surface. Then, using a heat gun or hairdryer, gently warm the adhesive to soften it. Once softened, carefully scrape away the adhesive using a scraper or putty knife. Take breaks when needed and use proper protective gear such as gloves and safety glasses. With steady hands and determination, you shall conquer the old plastic tile adhesive and create a clean canvas for your tiling masterpiece.
Can You Tile over Existing Tile Cement
Tile cement, like an ancient warrior guarding the realm of floor surfaces, must be respected. Tiling over existing tile cement is generally not recommended, as it can lead to an uneven surface and potential tile failure. To ensure a sturdy and successful tile installation, it’s best to bid farewell to the old tile cement and start with a clean slate.
Do You Have to Remove Old Tile Adhesive Before Tiling
Ah, the million-dollar question! While it may seem like a tedious task, removing old tile adhesive before tiling is highly recommended. Leaving behind old adhesive can compromise the bonding of your new tiles and result in a less than desirable outcome. Take the time to remove the old tile adhesive, and you’ll be rewarded with a seamless and beautiful tile installation that will stand the test of time.
And there you have it, dear reader, a comprehensive FAQ section to guide you through the mysterious world of tile adhesive removal. Armed with this knowledge, you can embark on your tiling adventure with confidence, knowing that you’re equipped to achieve a successful and stunning result. Happy tiling, and may your floors and walls be forever tiled in beauty and style!