Are you frustrated with the cracks, gouges, and holes in your wooden furniture or surfaces? Wood filler is a popular solution for repairing these imperfections, but what if you don’t have any on hand or simply prefer to explore other options? Thankfully, there are alternatives that can come to your rescue!
In this blog post, we will dive into various alternatives to wood filler and discuss their effectiveness, application techniques, and more. Whether you’re searching for an eco-friendly option, a budget-friendly solution, or simply want to explore different materials, we’ve got you covered. So, let’s roll up our sleeves and explore the world beyond traditional wood filler options, helping you make the most informed decision for your woodworking or DIY projects.
So, let’s get started and discover what alternatives are available for wood filler and how they can be used to tackle your wooden restoration projects effectively without compromising on quality or durability.
What Can I Use Instead Of Wood Filler
Let’s face it, sometimes wood needs a little extra TLC. Whether it’s a small crack, a hole, or a chip, wood filler is often the go-to solution. But what do you do when you’re fresh out of wood filler and need a quick fix? Don’t fret! There are several household items you can use as alternatives to wood filler. Here are some creative options to get you out of a sticky situation, without sticking wood filler in it.
1. Toothpaste: A Dental Delight for Your Wood
Believe it or not, toothpaste isn’t just for your pearly whites. It can also come to the rescue when your wooden masterpiece needs a touch-up. Grab a tube of white, non-gel toothpaste and apply it to the damaged area. Not only will it fill the void but it will also provide a temporary fix until you can get your hands on some proper wood filler. Just make sure to wipe off any excess toothpaste before it hardens, or you might end up with a minty fresh mess!
2. Crayons: Unleash Your Inner Artist
Remember those colorful wax sticks you used to create masterpieces as a child? Well, they can be more than just tools for creativity. Crayons can also serve as an alternative to wood filler. Simply find a crayon that matches the color of your wood, heat it up slightly to soften the wax, and then fill in the gaps. It’s like giving your wood a mini makeover! Plus, you can unleash your inner artist and mix different colors to create a custom shade. Who said DIY couldn’t be fun?
3. Baking Soda and Super Glue: A Chemical Bonding Miracle
When life gives you cracks in your wood, make a chemical reaction! Baking soda mixed with super glue creates a strong and durable filler that can tackle even the trickiest of crevices. Just sprinkle some baking soda into the crack, add a few drops of super glue, and watch the magic happen. The mixture will harden quickly, leaving you with a solid surface. Just be sure to smooth out the excess before it sets, or you might end up with a lumpy mess that resembles a science experiment gone wrong.
4. Sawdust and Glue: Recycling at Its Finest
If you’re a woodworking enthusiast, chances are you have some sawdust lying around. Instead of brushing it off as mere debris, put it to good use as a wood filler alternative. Mix the sawdust with some wood glue until you achieve a thick paste. Then, simply apply it to the damaged area and let it dry. The best part? You’re not only fixing your wood, but you’re also recycling the sawdust in a creative way. It’s a win-win for both your woodworking skills and the environment.
5. Soap Shavings: Clean Up Your Wood’s Act
Who knew that soap could do more than just keep you squeaky clean? This everyday household item can also serve as a makeshift wood filler. Simply shave a bar of soap into fine, powdery shavings and mix it with water to create a paste. Apply the paste to the damaged area and let it dry. Soap is surprisingly sturdy and will fill in those pesky gaps with ease. Plus, you’ll be left with wood that not only looks good but also smells fresh and clean. It’s like giving your wood a spa day!
Remember, these alternatives can be temporary fixes, so it’s always best to invest in proper wood filler for long-term results. But in a pinch, these creative solutions can save the day and add a touch of creativity to your woodworking projects. So, the next time you find yourself without wood filler, raid your bathroom, art supplies, or cleaning cabinet and let your imagination run wild. Your wood will thank you, and you might just discover a newfound appreciation for everyday items that can do so much more. Happy fixing, my creative woodworkers!
FAQ: What Can I Use Instead Of Wood Filler
Can I Use Liquid Nails on Wood
Yes, you can use Liquid Nails on wood. Liquid Nails is a versatile adhesive that can bond a wide range of materials, including wood. It is commonly used for construction and woodworking projects, providing a strong and durable bond. Just make sure to follow the manufacturer’s instructions for proper application and drying time.
What Is the Difference Between Wood Putty and Wood Filler
Wood putty and wood filler are both used to fill gaps and holes in wood surfaces, but they have slight differences. Wood putty is a dough-like substance made from a combination of wood dust and a binder. It is commonly used to fill small surface imperfections and can be easily kneaded and shaped. On the other hand, wood filler is a thicker paste-like material that contains binders and fibers to create a strong bond with the wood. It is better suited for filling larger holes and deep gaps.
Is Wood Glue the Same as Wood Filler
No, wood glue and wood filler are not the same. Wood glue, also known as carpenter’s glue, is specifically designed for bonding pieces of wood together. It provides a strong adhesive bond when applied properly and allowed to dry. Wood filler, on the other hand, is used to fill gaps and holes in wood surfaces. It is a material that can be molded and shaped to match the surrounding wood and create a seamless finish.
Is Wood Filler as Strong as Wood
While wood filler can provide a strong and durable bond, it is not as strong as solid wood. Wood filler is primarily used for cosmetic purposes, filling in gaps, and repairing minor surface imperfections. If you need to restore the structural integrity of a piece of wood or repair significant damage, it is best to replace the damaged sections with new wood or use additional reinforcement methods, such as screws or dowels.
Can You Paint Wood Filler
Yes, you can paint wood filler. Once the wood filler has dried and hardened, it can be sanded and painted to match the surrounding wood. However, keep in mind that the color of the wood filler may affect the final color of the painted surface. It is advisable to test the paint on a small, inconspicuous area before applying it to the entire surface to ensure a satisfactory result.
Can You Buy White Wood Filler at Walmart
Yes, you can find white wood filler at Walmart. They offer a variety of wood fillers in different colors, including white. Whether you’re looking to fill holes, gaps, or imperfections in your wood projects, you can check out the selection available at your nearest Walmart store or on their website.
Can You Make Your Own Wood Filler
Yes, you can make your own wood filler. There are DIY recipes available that allow you to create a custom wood filler using common household materials such as sawdust and glue. Making your own wood filler can be a cost-effective option, especially for small projects. However, commercially available wood fillers often offer additional benefits such as increased durability and faster drying times, so they may be more suitable for larger or more demanding repairs.
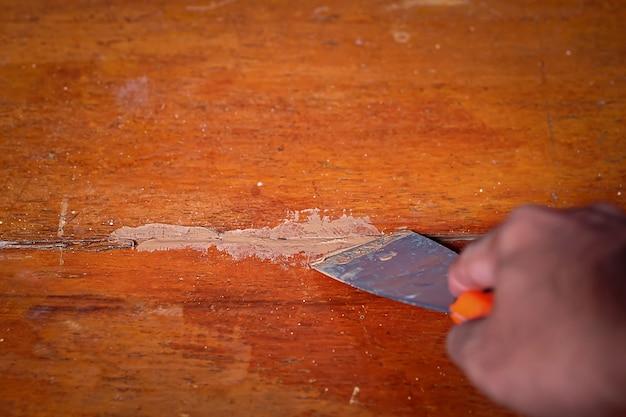
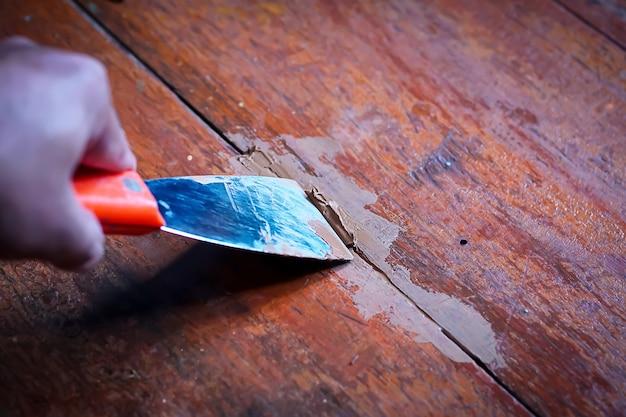
How Do You Fill in Damaged Wood
To fill in damaged wood, follow these steps:
-
Clean the damaged area: Remove any loose or damaged wood particles using a chisel or sandpaper. Ensure the area is clean and free from debris.
-
Prepare the wood filler: Mix or knead the wood filler according to the manufacturer’s instructions. If using a DIY wood filler, follow the recipe and ensure a smooth and consistent texture.
-
Apply the wood filler: Using a putty knife or a similar tool, press the wood filler into the damaged area, ensuring it fills the gap completely. Smooth out the surface for a seamless finish.
-
Allow it to dry: Leave the wood filler to dry for the recommended amount of time. This can vary depending on the type and brand of wood filler used.
-
Sand and finish: Once the wood filler is fully dry, sand the surface to match the surrounding wood. Apply paint, stain, or finish as desired to achieve a consistent appearance.
What Is the Best Filler for Wood
The best filler for wood depends on the specific project and requirements, but some popular options include epoxy-based wood fillers, polyester-based wood fillers, and water-based wood fillers. Epoxy-based wood fillers are known for their strength, durability, and ability to bond well with wood. Polyester-based wood fillers offer similar characteristics and are often used for demanding repairs. Water-based wood fillers are more environmentally friendly and can be easier to work with, especially for smaller repairs or cosmetic touch-ups.
What Is the Strongest Glue to Use on Wood
One of the strongest glues to use on wood is a polyurethane-based adhesive, such as Gorilla Glue. Polyurethane glues have excellent bonding strength and can provide a reliable hold on wood surfaces. They have a foaming action that helps fill gaps and create a strong bond. However, it’s important to follow the manufacturer’s instructions for proper application and curing time to achieve the best results.
Which Is Stronger: Wood Glue or Liquid Nails
When it comes to strength, Liquid Nails generally provides a stronger bond compared to wood glue. Liquid Nails is specifically designed for construction purposes and offers a durable adhesive bond that can withstand heavy loads and vibrations. Wood glue, while still providing a strong hold, is primarily designed for bonding pieces of wood together rather than offering the same level of versatility and strength as Liquid Nails.
Can I Use Caulk Instead of Wood Filler
Caulk can be used as a substitute for wood filler in certain situations. However, it’s important to note that caulk is typically more flexible than wood filler and may not be suitable for all applications. Caulk works best for filling small cracks and gaps and achieving a smooth finish. If you’re dealing with larger holes or deep gaps, using a wood filler specifically designed for those purposes may be a better option.
Is There Caulk Specifically for Wood
Yes, there are caulks specifically designed for use on wood. These wood caulks are formulated to provide excellent adhesion to wood surfaces, flexibility, and durability. They are often available in different colors to match various wood tones, making them ideal for filling gaps and cracks on wood trim, doors, and furniture. Look for wood-specific caulks at your local home improvement stores or online retailers.
What Can I Use in Place of Wood Filler
If you find yourself without wood filler, there are several alternatives you can use in a pinch. Some options include spackling paste, epoxy putty, joint compound, or even a mixture of sawdust and glue. These alternatives may not provide the exact same properties as wood filler, so it’s important to consider the specific requirements of your project and choose the alternative that best meets your needs.
Can You Stain Elmer’s Wood Filler
Yes, you can stain Elmer’s Wood Filler. Once the wood filler has dried completely, you can sand it to achieve a smooth surface. After sanding, you can apply a wood stain of your choice to match the color of the surrounding wood. Remember to follow the stain manufacturer’s instructions for application and drying time to achieve the desired result.
How Do You Fill in Deep Holes in Wood
Filling in deep holes in wood requires a slightly different approach. Here’s what you can do:
-
Clean the hole: Ensure the hole is free from loose debris, dust, or any other materials that may affect the filling.
-
Apply a filler wedge: Cut a small wooden wedge or use a wooden dowel with a diameter slightly larger than the hole. Apply wood glue to the wedge or dowel and insert it into the hole, leaving a portion exposed.
-
Apply wood filler: Mix or knead a suitable wood filler according to the manufacturer’s instructions. Press the wood filler into the hole, making sure it completely fills the space around the wedge or dowel. Smooth the surface for a seamless finish.
-
Allow it to dry: Leave the wood filler to dry completely, following the recommended drying time provided by the manufacturer.
-
Sand and finish: Once the wood filler is dry, sand the surface to match the surrounding wood. Apply paint, stain, or finish as desired to achieve a consistent appearance.
What to Use to Fill Cracks in Wood Before Painting
Before painting, filling cracks in wood helps ensure a smooth and finished look. To fill cracks in wood:
-
Prepare the crack: Clean the crack using a brush or compressed air to remove any loose particles or debris.
-
Choose an appropriate filler: Select a wood filler that matches the size and depth of the crack. For small cracks, wood putty or a water-based wood filler can work well. For larger cracks, consider an epoxy-based wood filler for added strength.
-
Apply the filler: Press the filler into the crack, using a putty knife or a similar tool. Ensure the crack is completely filled and leveled with the surrounding wood.
-
Allow it to dry: Let the wood filler dry according to the manufacturer’s instructions. Drying time can vary depending on the type and brand of filler used.
-
Sand and prime: After the wood filler has completely dried, sand the surface to smooth out any roughness. Apply a coat of primer before painting to ensure proper adhesion and a professional finish.
What Is the Best Wood Filler for Screw Holes
When it comes to filling screw holes in wood, a good option is to use a wood filler specifically designed for the purpose, such as a wood filler putty or a two-part epoxy wood filler. These types of fillers have excellent adhesion and strength, providing a reliable solution for filling and hiding screw holes in wood surfaces. Choose a filler that matches the color and characteristics of the wood for a seamless repair.
Can You Use Liquid Nails as a Wood Filler
While Liquid Nails is designed as an adhesive for bonding materials, it is not typically recommended as a wood filler. Liquid Nails may not have the same consistency or properties as a dedicated wood filler, and it may not provide the desired finish when used to fill gaps or holes in wood surfaces. For better results, it is recommended to use a wood filler specifically designed for filling and repairing wood.
How Do You Fill Holes in Wood Without Wood Filler
If you don’t have wood filler on hand, you can try the following alternatives to fill holes in wood:
-
Toothpicks or wooden matches: Dip toothpicks or wooden matches in wood glue or carpenter’s glue and insert them into the hole. Break off the excess and allow the glue to dry. Sand the surface for a smooth finish.
-
Sawdust and glue mixture: Mix sawdust from the same type of wood with wood glue or carpenter’s glue to create a paste-like consistency. Apply the mixture to the hole, pressing it down firmly. Allow it to dry and sand the surface as needed.
-
Epoxy putty: Use a two-part epoxy putty that can be kneaded and shaped. Follow the manufacturer’s instructions to mix and apply the putty to the hole. Once it hardens, sand the surface for a polished look.
These alternatives may not provide the same performance as dedicated wood fillers, but they can be effective temporary solutions or quick fixes until you can obtain proper wood filler.
And there you have it—a comprehensive FAQ-style guide that covers all your burning questions surrounding wood filler alternatives. Now you’re armed with the knowledge to choose the right materials and techniques for your woodworking projects. Happy filling and repairing!