Are you an aspiring video editor using Adobe Premiere Pro? If so, you know that audio is just as important as visuals in creating a captivating video. But what happens when your audio output isn’t quite what you expected? No worries – we’ve got you covered!
In this blog post, we’ll walk you through the process of changing audio output in Premiere Pro. Whether you’re looking to fade out music, fix out-of-sync audio and video, or allocate more RAM to enhance your editing experience, we’ll dive into all the essential steps and provide clarity on commonly asked questions related to audio in Premiere Pro.
So, get ready to take your audio editing skills to the next level as we explore the various options, tips, and tricks to ensure your video projects sound as amazing as they look. Let’s get started!
How to Change Audio Output in Premiere Pro
Have you ever found yourself in a situation where you’re editing a killer video in Premiere Pro, but the audio is coming out of the wrong speakers? It can be frustrating, to say the least. But fear not, my friend, for I am here to guide you through the process of changing the audio output in Premiere Pro like a pro!
Locating the Audio Output Settings
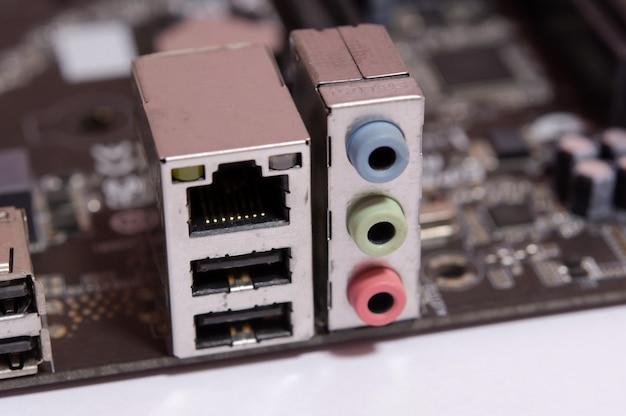
The first step in this audio adventure is to locate the audio output settings. In Premiere Pro, you can find them by going to the “Preferences” menu. Click on “Audio” and look for the “Audio Hardware” section.
Selecting the Right Audio Output Device
Now that you’re in the audio hardware settings, it’s time to choose the right audio output device. This is where you will unveil the magical powers of Premiere Pro and make it play ball with your desired speakers or headphones.
Click on the drop-down menu under “Default Output” and browse through the list of available audio output devices. It’s like window shopping for the perfect sound experience. Find your desired device and select it. Voilà! You’ve just told Premiere Pro where to send the audio love.
Overcoming Audio Output Device Indecisiveness
Sometimes, your audio output device might be a little indecisive. It’s not ready to commit to just one speaker or headphone. If that’s the case, don’t worry. Premiere Pro has got your back. You can actually select multiple audio output devices to play nice with each other.
Just below the “Default Output” setting, you’ll find another magical option called “Mapping.” Click on it, and a new window will appear, revealing all the available audio output devices. Select the ones you wish to use simultaneously, and let Premiere Pro work its audio magic. Now, you can have audio playing from one device while also hearing it through another. It’s like having your cake and eating it too!
Setting the Audio Output for Specific Tracks
So far, so good. But what if you want to get a little more specific and change the audio output for only certain tracks? Fear not, my adventurous friend, for Premiere Pro has a solution for that as well.
To change the audio output for specific tracks, click on the track mixer icon in the audio track header. It looks like a tiny mixing board, and it’s where all the audio track magic happens. In the track mixer, you’ll find the option to change the output routing for each track individually. It’s like being the conductor of your own audio orchestra.
Saving and Sharing Your Audio Output Settings
Congratulations! You have successfully conquered the world of audio output in Premiere Pro. But what if you want to save your hard-earned audio output settings or share them with your fellow video editing enthusiasts? Premiere Pro has a trick up its sleeve for this as well.
Under the “Preferences” menu, click on “Audio” once again. This time, look for the “External Device” section. Here, you can save your audio output settings as an XML file, which you can then share or import into other projects. It’s like having your audio output preferences on a portable USB drive, ready to be plugged into any editing station.
Wrapping Up
Changing the audio output in Premiere Pro may seem like a daunting task, but with these steps, you’ll be able to tackle it like a pro. From selecting the right audio output device to conquering audio output device indecisiveness, and even customizing audio output for specific tracks, you’re now equipped with the knowledge to master the audio world of Premiere Pro.
So go forth, my fellow video editing enthusiasts, and let your audio output shine bright like a diamond. Happy editing in 2023!
FAQ: How To Change Audio Output In Premiere Pro
How do you fade out music in Adobe Premiere
To fade out music in Adobe Premiere, follow these easy steps:
- Select the audio clip in the timeline you want to fade out.
- Go to the “Effect Controls” panel.
- Locate the “Opacity” option and click on the stopwatch icon next to it.
- This will create a keyframe at the current position.
- Move the playhead to where you want the music to fade out completely.
- Reduce the opacity to 0% or drag the slider down to fade out the music gradually.
Now you’ve smoothly faded out the music in Adobe Premiere!
How do I allocate more RAM to Premiere Pro
If you want to allocate more RAM to Premiere Pro and boost its performance, here’s what you need to do:
- Close Adobe Premiere and any other applications running in the background.
- Right-click on the Premiere Pro icon and select “Properties.”
- In the Properties window, go to the “Compatibility” tab.
- Click on the “Change settings for all users” button.
- Under the “Privilege Level” section, check the box that says “Run this program as an administrator.”
- Click “Apply” and then “OK.”
- Now, open Premiere Pro and navigate to “Edit” > “Preferences” > “Memory.”
- In the “Memory” panel, increase the value of the “RAM reserved for other applications” field.
- Click “OK” to save the changes.
By allocating more RAM to Premiere Pro, you’ll notice a significant improvement in its performance.
How do I use Audio Essentials in Premiere Pro
To make use of Audio Essentials in Premiere Pro and enhance your audio experience, here’s what you can do:
- Open Premiere Pro and import your audio file into the project.
- Drag the audio file to the timeline.
- Select the audio clip and go to the “Effects” panel.
- Search for “Audio Essentials” and drag it onto the audio clip.
- In the “Effect Controls” panel, you’ll find various options to adjust your audio.
- Explore features such as EQ, Reverb, Noise Reduction, and more to enhance or fix your audio.
- Adjust the settings according to your preference.
- Play the clip to listen to the changes.
- Make any necessary further adjustments.
Utilizing Audio Essentials in Premiere Pro allows you to fine-tune and enhance your audio for a superior sound experience.
Is GPU acceleration good
Yes, GPU acceleration is excellent! It can significantly improve rendering and exporting times in Premiere Pro. Using your computer’s graphics processing unit (GPU) to assist with video editing tasks reduces the workload on the CPU, resulting in faster performance and smoother playback. Enabling GPU acceleration utilizes the power of your graphics card to handle demanding tasks, making your editing experience more efficient and enjoyable. So, if you have a capable GPU, make sure to take advantage of this feature in Adobe Premiere Pro.
Why is my audio and video out of sync in Adobe Premiere
If you’re experiencing audio and video being out of sync in Adobe Premiere, there could be a couple of reasons:
- Mismatched frame rates: Ensure that your audio and video files have the same frame rates. If not, convert them to match before importing into Premiere Pro.
- Codec issues: If your audio and video are using different codecs, it can cause sync problems. Convert one or both of them to a common codec for smooth playback.
- Hardware limitations: If your system is struggling to handle the workload, it can lead to synchronization errors. Ensure your computer meets the recommended specifications for optimal performance.
- Playback settings: Check your sequence settings and confirm that they match your source files’ settings. Adjusting playback settings might help resolve the sync issue.
By investigating these potential causes, you can troubleshoot and restore the proper synchronization of your audio and video in Adobe Premiere.
What are the options in the essential sound to adjust sounds
Adobe Premiere Pro’s Essential Sound offers an array of audio adjustment options to enhance your audio:
- Dialogue: Use Dialogue settings to optimize speech clarity, reduce background noise, and even out volume levels.
- Music: Adjust Music settings to balance the various frequencies in your music tracks, ensuring a pleasant listening experience.
- Effects: This option allows you to fine-tune sound effects by applying filters and effects to enhance or alter audio elements.
- Ambience: Enhance or reduce background noise and ambience using the Ambience audio adjustment options.
- Master: The Master settings affect the overall mix of your audio tracks, including loudness and dynamic range.
By utilizing the Essential Sound options, you can easily adjust and improve various aspects of your audio to achieve a polished and professional sound.
What are the best Export settings for Premiere Pro
When it comes to exporting your video from Premiere Pro, choosing the right export settings is crucial to achieve optimal quality and compatibility. Here are some recommended export settings:
- Format: Select H.264 as the video format, which offers excellent video quality and broad compatibility.
- Preset: Choose a preset that matches your desired output resolution. For example, “Match Source – High Bitrate” is a suitable preset for high-quality exports.
- Resolution: Set the resolution based on your requirements. Common options include 1080p (1920×1080) and 4K (3840×2160).
- Bitrate: Use a high bitrate to ensure quality. For 1080p, a bitrate around 10-20 Mbps should suffice, while 4K usually requires a higher bitrate.
- Frame Rate: Maintain the same frame rate as your source footage to avoid any issues with playback.
- Audio: For audio settings, AAC with a bitrate of 256 kbps is a good choice for most scenarios.
- Output Location: Choose a location on your computer to save the exported video file.
Remember to experiment with different settings based on your specific needs and requirements, keeping in mind factors such as file size and intended playback platform.
How do I fix audio in Premiere Pro
When you encounter audio issues in Premiere Pro, following these steps can help you fix them:
- Check volume levels: Ensure that the audio track’s volume is not too low or muted.
- Repair audio using Essential Sound: Utilize Premiere Pro’s Essential Sound panel to fix common audio problems like background noise or uneven volume.
- Re-sync audio: If the audio and video are out of sync, manually adjust the audio position by milliseconds using the “Synchronize” function.
- Replace audio track: If the audio clip is problematic, try replacing it with a new audio track from the original source or using another suitable option.
- Clear cache: A bloated cache can cause audio problems. Go to “Preferences” > “Media” and hit the “Clean” button in the “Cache Files” section.
- Update drivers: Ensure your audio drivers are up to date. Visit the manufacturer’s website to download and install the latest drivers.
By going through these troubleshooting steps, you can address various audio issues encountered in Premiere Pro effectively.
What is consolidate transcode
Consolidate Transcode is a helpful feature in Adobe Premiere Pro that simplifies the organization of your project files. When you use this function, Premiere Pro creates new video and audio clips within your project, which are linked to the original media.
The process involves combining or “consolidating” multiple media files into a single, manageable file format. Additionally, Premiere Pro can transcode the consolidated files into a different codec if desired. This consolidated and transcoded media makes it easier to backup, archive, or work with the project on different machines without the need for original media sources.
By using Consolidate Transcode, Premiere Pro streamlines your project, reduces file clutter, and offers better compatibility with different systems.
Why is my GPU not being used in Premiere Pro
If your GPU is not being utilized in Premiere Pro, there could be a couple of reasons:
- Unsupported GPU: Ensure that your graphics card is supported by Premiere Pro. Check Adobe’s official system requirements to confirm compatibility.
- Outdated drivers: Make sure your GPU drivers are up to date. Visit the manufacturer’s website to download and install the latest drivers.
- Incorrect settings: Open Premiere Pro and go to “File” > “Project Settings” > “General.” Check if the video rendering and playback settings are configured to use the GPU.
- Software conflicts: Sometimes, other software or plugins can conflict with Premiere Pro’s GPU utilization. Try disabling or updating any third-party software or plugins.
- Hardware limitations: If your GPU is too old or doesn’t meet the minimum requirements, Premiere Pro may not utilize it. Consider upgrading to a more capable graphics card.
By investigating these potential causes and taking the necessary steps, you can ensure that Premiere Pro utilizes your GPU for improved performance.
How do I transcode media in Premiere Pro
To transcode media in Premiere Pro, follow these steps:
- Open Premiere Pro and import the media files you want to transcode into the project.
- Right-click on the media file in the Project panel.
- Select “Modify” > “Audio Channels” or “Video.” Choose the option that suits your transcoding needs.
- In the Modify Clip dialog box, make the desired modifications, such as changing audio channel configurations or adjusting video resolution.
- Click “OK” to apply the changes.
- Right-click on the media file again and go to “Proxy” > “Create Proxies.”
- Choose the desired Proxy preset, ensuring it matches your transcoding requirements.
- Click “OK” to start the transcoding process.
Premiere Pro will create transcoded files based on your selected settings, allowing for smoother editing and improved performance.
Is Adobe Essential Sound free
Yes, Adobe Essential Sound is a free feature available in Adobe Premiere Pro. It offers a wide range of tools and presets to enhance your audio quality, whether you’re working with dialogue, music, or effects. From reducing background noise to balancing volume levels, Essential Sound provides an accessible and intuitive way to improve your audio without any additional cost. Take advantage of this powerful toolset to achieve professional-level audio results in your video projects.
How do you use dynamics in Premiere Pro
Using dynamics in Premiere Pro allows you to control and adjust audio levels dynamically. Here’s how you can utilize dynamics:
- Select the audio clip in the timeline.
- Go to the “Audio Track Mixer” panel.
- Locate the “Dynamics” section and expand it if necessary.
- Adjust the “Threshold” slider to set the level at which dynamics processing starts to take effect.
- Fine-tune the “Ratio” slider to control the amount of compression applied.
- Modify the “Attack” and “Release” parameters to define how quickly the dynamics processing kicks in and how long it lingers.
- Play the audio clip to monitor the changes and make further adjustments as needed.
By using dynamics in Premiere Pro, you can maintain consistent audio levels, reduce sudden volume jumps, and create a more balanced soundscape in your videos.
Does Premiere Pro use GPU or CPU
Premiere Pro utilizes both the GPU (graphics processing unit) and CPU (central processing unit) to perform various tasks. However, the extent of their usage depends on the specific functions and operations being performed in the application.
The GPU is mainly used for accelerated rendering, video effects, and encoding tasks. It harnesses the graphical power of your graphics card to offload the processing workload from the CPU, resulting in faster performance and smoother playback.
On the other hand, the CPU handles general computing tasks, such as decoding media files, running software algorithms, managing software interface operations, and more. It remains an essential component for overall system performance and responsiveness.
In summary, Adobe Premiere Pro takes advantage of both the GPU and CPU, with the GPU playing a more prominent role in tasks that require graphics processing and acceleration.
How do I turn on GPU acceleration in Premiere Pro
To enable GPU acceleration in Premiere Pro, follow these steps:
- Open Premiere Pro and go to “File” > “Project Settings” > “General.”
- Under the “Video Rendering and Playback” section, locate the “Renderer” option.
- Click on the dropdown menu and select “Mercury Playback Engine GPU Acceleration” if available.
- If the option is grayed out or unavailable, ensure you have a compatible GPU and that your graphics drivers are up to date.
- Click “OK” to save the changes.
Enabling GPU acceleration in Premiere Pro unleashes the power of your graphics card, enhancing performance and expediting rendering and exporting times.
How do I export 1080p in Premiere Pro
Exporting your video in 1080p resolution from Premiere Pro is a straightforward process:
- Open the sequence containing your timeline in Premiere Pro.
- Go to “File” > “Export” > “Media” or use the shortcut “Ctrl+M” (Windows) or “Cmd+M” (Mac).
- In the Export Settings window, select the desired format under the “Format” dropdown menu. For example, choose “H.264.”
- Under the “Preset” dropdown menu, select a suitable 1080p preset, such as “Match Source – High Bitrate.”
- Make any necessary adjustments to the export settings according to your requirements.
- Choose a destination folder for the exported file.
- Click “Export” to start the export process.
Premiere Pro will export your video in 1080p resolution, ensuring high-quality playback and compatibility with various platforms.
How do I normalize audio in Premiere
Normalizing audio in Premiere is a simple process. Here’s what you need to do:
- Select the audio clip in the timeline that you want to normalize.
- Go to the “Effects” panel and search for “Normalize.”
- Drag the “Normalize” effect onto the audio clip in the timeline.
- In the “Effect Controls” panel, adjust the “Amplitude” or “Target Loudness” parameters to the desired normalization level.
- Playback the clip to listen to the changes and fine-tune if necessary.
By normalizing audio in Premiere, you ensure consistent and balanced volume levels throughout your project, enhancing the overall