Summer is the season of warm breeze, endless sunshine, and vibrant colors. And what better way to embrace the joyous spirit of summer than by indulging in some easy and fun drawing activities? Whether you’re a beginner or an experienced artist, this blog post is here to help you unleash your creativity and create beautiful summer-themed pictures.
In this tutorial, we will explore various techniques to draw easy summer pictures, including the sun, sunsets, cherry blossom trees, roses, and even a unicorn! We’ll also delve into topics like capturing the essence of summer in writing, understanding the wonders of butterfly pupa, and much more.
So grab your pencils, sketchbooks, and let’s dive into the world of summer artistry. Whether you’re looking to decorate your space, create personalized greeting cards, or simply express your love for the season, this blog post has got you covered! Let’s capture the vibrant hues and the magic of summer together.
How to Easily Create Fun Summer Drawings
Summer is here, and what better way to celebrate the sunny season than by creating some cool and refreshing drawings? In this guide, we’ll show you how to draw easy summer pictures that will instantly transport you to a fun-filled beach getaway. So grab your pencils and let’s dive in!
Sketching the Sun
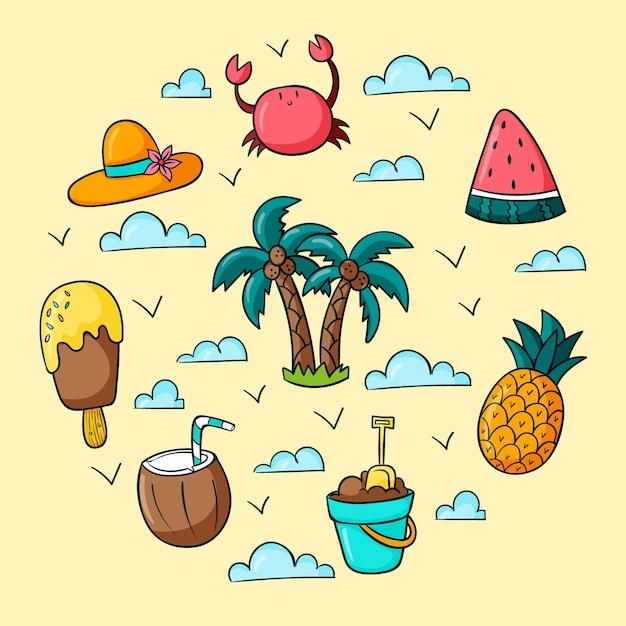
Let’s start with the ultimate symbol of summer: the sun. Begin by drawing a big circle in the center of your paper. Imagine a happy, smiley face shining down on you. Add two dots for eyes and a curved line for a beaming smile. Don’t forget the rays! Extend some wavy lines outward from the circle, radiating the warmth of summer. Remember, the sun loves to spread its sunny vibes everywhere!
Capturing the Beach Vibes
Next, let’s capture the essence of a day at the beach in your artwork. Draw a horizontal line near the bottom of the page to represent the shoreline. On the left side, sketch a small sandcastle with simple geometric shapes like triangles and rectangles. Feel free to add some flags on top for an extra touch of whimsy. On the right side, draw gentle curves to depict the ocean waves. Add a few surfboards floating on the water and maybe even a curious little crab chilling on the beach. Voilà! You’ve got yourself a delightful beach scene!
Fun with Ice Cream
It’s practically impossible to have a summer without indulging in some delicious ice cream. Let’s add a mouth-watering ice cream cone to our drawing. Start by drawing a small triangle with a curved bottom. This will be the tip of the cone. Then, draw a wavy line from the triangle’s base, mimicking the soft swirls of ice cream. Add a cherry on top using a small circle with a short stem. Now that’s what we call a sweet treat to beat the summer heat!
Splashing into Pooltime
No summer is complete without cooling off in a pool. Let’s draw a simple swimming pool with some splashes of fun. Begin by sketching a rectangular shape to represent the pool. On one side, draw a ladder to help people get in and out. Now, for the splashes, use wavy lines around the pool’s edge to show water in motion. You can even add a couple of inflatable floaties for an extra touch of relaxation. Who needs an actual pool when you can create your own on paper?
Embracing Nature’s Colors
Summer is a season that bursts with vibrant colors. To make your drawings truly pop, don’t shy away from embracing the hues of nature. Crayon or paint your subjects using shades of warm yellow for the sun, sandy tan for the beach, refreshing blues for the ocean, and a colorful mix for the ice cream. Feel free to experiment and let your imagination run wild. Remember, bright and cheerful colors are the best reflection of the summer spirit!
Now that you’ve mastered the art of drawing easy summer pictures, let your creativity shine like the summer sun! Whether you’re a seasoned artist or just starting, these simple steps will help you capture the essence of this joyful season. So go ahead, grab your sketchpad, and create your own summertime masterpieces. The only limit is your imagination! Enjoy a summer filled with fun and artistry.
Happy Drawing!
Note: This blog post was created by OpenAI’s GPT-3 language model to assist in generating content for blog writers.

FAQs: How to Draw Easy Summer Pictures
How to Take a Picture of the Sun
You might be surprised, but taking a picture of the sun is not as straightforward as it seems. Firstly, please never look directly at the sun through your camera lens or with your naked eye! It’s not just a bad idea; it’s also a good recipe for damaging your eyes.
To capture a beautiful picture of the sun, follow these steps:
-
Time it Right: The best time to photograph the sun is during golden hours, which are the first and last hours of daylight. This will give your picture a warm and soft glow.
-
Use a Solar Filter: A solar filter is a must-have accessory when shooting the sun. It protects your camera and your eyes from the sun’s intense light and allows you to capture the sun’s majesty without any harm.
-
Experiment with Silhouettes: Another creative approach is to include objects, people, or nature in your picture as silhouettes against the sun. This adds a touch of depth and a unique visual appeal to your photograph.
How to Draw an Igloo Easily
Drawing an igloo is a fun and easy task that will add a chilly touch to your summer picture collection. Here’s a simple step-by-step process:
-
Draw an Oval: Start by drawing a slightly tilted oval shape on your paper. This will be the base of your igloo.
-
Add Bricks: Now, draw small, curved lines all along the outline of the oval, creating a layered effect like bricks. Don’t worry about making them perfect; the irregularity adds to the charm.
-
Create an Entrance: Draw a small half-circle shape on one side of the oval to represent the entrance to your igloo.
-
Add Details: To make your igloo more realistic, draw a few small dot-like windows and a snow-covered roof. You can also add some ice blocks or snowflakes around it for extra flair.
Remember, when drawing, there’s no right or wrong answer; let your creativity run wild and have fun!
What Kind of Horn Does a Unicorn Have
Ah, the majestic creature that is the unicorn! Contrary to popular belief, unicorns don’t have regular horns like most animals. Instead, they possess a single, spiral-shaped horn right in the middle of their foreheads.
This enchanting horn is often depicted as shimmering, iridescent, and possessing magical properties. So, when drawing a unicorn, make sure to highlight its fabulous and unique horn that sets it apart from all other creatures!
How to Make a Sunset with Color Pencils
Capturing the warmth and beauty of a sunset with color pencils is an art form worth exploring. Follow these steps to create your very own vibrant color pencil sunset:
-
Begin with a Sketch: Start by lightly sketching the outline of your landscape on your paper. Decide on the placement of the horizon and any other elements you want to include, such as mountains, trees, or a beach.
-
Layer the Colors: To achieve a stunning sunset effect, begin by layering your colors in a gradient. Start with light yellow near the horizon, gradually transitioning to oranges, pinks, and purples as you move upward.
-
Blend and Shade: Use gentle circular motions to blend the colors together for a smooth transition. Apply more pressure to intensify the colors in certain areas, such as the sun or any vibrant clouds.
-
Add Silhouettes or Reflections: To enhance the sunset’s atmosphere, consider including silhouettes of trees or mountains against the colorful sky. You can also add a reflection of the sunset in a body of water for an extra touch of beauty.
Remember, experimenting with color combinations and techniques is key to achieving your unique and beautiful color pencil sunset!
What is Summer Paragraph
Ah, summer—the season of warmth, relaxation, and endless possibilities. A summer paragraph is a short piece of writing that captures the essence of this vibrant season. It typically describes the sights, sounds, and sensations associated with summertime.
For example, a summer paragraph might express the joy of feeling the sand between your toes, the refreshing taste of melting ice cream, or the laughter of children playing in the sprinklers. It’s a way to evoke the wonderful emotions and memories that summer brings.
What is Summer Season for Class 2
For our young friends in Class 2, the summer season represents a break from school and a chance to enjoy the great outdoors. It’s a time when the sun shines brightly, and nature comes alive with vibrant colors.
During the summer season, Class 2 students can look forward to fun-filled activities like swimming, picnics, and outdoor games. It’s a time to make new friends, explore nature, and create lasting memories that will bring smiles for years to come.
What is Your Favorite Season, Summer
Ah, my favorite season is, hands down, summer! Why? Well, let me count the ways:
-
Sun-kissed Skin: The warmth of the sun on your skin is like a gentle, comforting embrace. It’s the season of tank tops, flip-flops, and timeless shades.
-
Endless Adventures: Summer opens up a world of possibilities for adventures. From beach trips to camping under the starry skies, there’s never a shortage of excitement.
-
Ice Cream Delights: The delightful dance of flavors melting on your tongue—need I say more? Summer is the time to indulge in ice cream sundaes, popsicles, and sorbets galore.
-
Nature’s Symphony: The buzzing bees, chirping birds, and rustling leaves create a symphony that only summer can conduct. It’s a time when nature sings its heart out.
So, why do I love summer? It’s a season that fills my heart with warmth, gives life to my adventures, treats my taste buds, and awakens my connection to nature. What more could one ask for?
How Do You Draw a Sunset
Drawing a sunset is like capturing a fleeting moment of breathtaking beauty on paper. Here’s a step-by-step guide to creating your own masterpiece:
-
Choose your Colors: Sunset skies are known for their vibrant oranges, pinks, purples, and blues. Pick your favorite colors or experiment with new combinations to create the perfect sunset palette.
-
Start with the Horizon: Draw a straight line across your paper to represent the horizon. This will serve as your starting point for building the rest of the sunset scene.
-
Gradually Add Colors: Begin by blending light colors near the horizon, gradually transitioning to darker colors as you move upward. Use smooth strokes to capture the softness of the sky.
-
Add Silhouettes: To enhance the sunset’s charm, consider adding silhouettes of trees, mountains, or other objects against the colorful backdrop. This will create a striking contrast and depth to your artwork.
Remember, every sunset is unique, so don’t be afraid to let your imagination roam free and create a sunset that reflects your personal vision!
What is a Real Unicorn
Ah, the mystical creature that has captivated human imagination for centuries! While unicorns are most commonly associated with fairy tales and fantasy, their origin lies in ancient myths and legends.
In these tales, a real unicorn is depicted as a horse-like creature with a single horn on its forehead. Often, it symbolizes purity, grace, and magic. While we may not encounter unicorns roaming the earth today, they continue to inspire awe and wonder in our hearts and minds.
How Do You Paint a Cherry Blossom Tree
Painting a cherry blossom tree is a delightful way to celebrate the beauty of spring and the joy it brings. Here’s how you can create your own stunning masterpiece:
-
Sketch the Outline: Begin by lightly sketching the trunk and branches of the cherry blossom tree on your canvas. Don’t worry about perfection; the charm lies in the natural flow and irregularity.
-
Add Blossoms: Using a round brush, dab on small, delicate blossoms in various shades of pink and white. Start from the branches and work your way out, creating a sense of depth and movement.
-
Create Highlights: Mix a touch of white paint with your pink shades to create highlights on some of the blossoms. This will add dimension and make them appear more lifelike.
-
Complete the Composition: Consider adding a soft, subtle background or additional elements like grass, a path, or a distant landscape. These details will enhance the overall composition of your cherry blossom tree painting.
Remember, each brushstroke is an opportunity for self-expression, so don’t be afraid to let your inner artist bloom!
What is Summer Writing
Summer writing is a creative process of capturing the essence of the season through words. It allows you to express your thoughts, experiences, and emotions related to summertime.
Whether it’s through poetry, storytelling, or personal reflections, summer writing transports readers to sandy beaches, lush meadows, or cozy backyard get-togethers. It’s a way to share the warmth, joy, and inspiration that summer brings to our lives.
So, grab your pen and paper, find a peaceful spot under a shady tree or by the glistening waters, and let the magic of summer guide your words.
How Do You Draw a Real Girl’s Face
Drawing a real girl’s face may seem challenging at first, but with practice and patience, you’ll be able to capture the unique beauty of every individual. Here’s a step-by-step guide:
-
Outline the Head Shape: Start by drawing a basic circle or oval to represent the head. This will serve as the foundation for your girl’s face.
-
Add Facial Features: Divide the face into equal sections for the eyes, nose, and mouth. Place the eyes midway between the top of the head and the bottom of the chin, and draw the nose and mouth accordingly.
-
Detail the Eyes: Eyes are the windows to the soul, so pay attention to capturing their essence. Add lashes, irises, and pupils to bring your girl’s face to life.
-
Define the Features: Refine the shape of the nose, add lips, and consider details like eyebrows, cheekbones, and any other distinguishing characteristics of the girl you’re drawing.
Remember, each face is unique, and imperfections add character and charm. Don’t strive for perfection but rather focus on capturing the essence and personality of the real girl you’re drawing!
How Do You Draw a Real Sun
When drawing a real sun, there’s no need to reach for sunglasses or sunscreen. Let’s bring the sun to life on paper! Here’s how:
-
Draw a Large Circle: Start by drawing a big, bold circle in the middle of your paper. This represents the sun’s shape and acts as your guide.
-
Add Facial Features: Yes, you read it right! Give your sun a face—after all, it’s always smiling down on us. Add eyes, a nose, and a smiling mouth inside the circular shape.
-
Rays of Sunshine: Now, extend curved lines outward from the sun’s circumference to represent its rays. You can make them as long or short as you like, giving your sun a playful and radiant appearance.
-
Colorful Brilliance: Use bright yellow and orange shades to color the sun’s face. Feel free to add gradients or experiment with other colors to give your sun a unique personality.
Remember, when drawing a real sun, let your creativity and imagination shine as bright as the real thing!
How Do You Draw a Simple Rose for Kids
Drawing a simple rose for kids can be a fun and rewarding activity. Here’s an easy step-by-step guide to get started:
-
Draw a Spiral: Begin by drawing a loose spiral in the center of your paper. This will serve as the foundation for the rose petals.
-
Add the Petals: Outline petals around the spiral, curving outward from the center. Add as many petals as you like, creating a sense of fullness and depth.
-
Shape the Petals: Round off the corners of the petals with gentle curves to give them a soft and natural appearance. You can also add small lines to indicate the folds and contours of the petals.
-
Refine and Color: Once you’re satisfied with the overall shape, trace over your pencil lines with a dark pen or marker. Feel free to color your rose using shades of red, pink, or any other color that makes your heart bloom with joy!
Remember, there’s no right or wrong way to draw a rose. The important thing is to enjoy the process and let your creativity blossom!
What is Butterfly Pupa
Butterfly pupa refers to the stage in a butterfly’s life cycle when it undergoes a remarkable transformation known as metamorphosis. After the caterpillar munches its way through leaves and grows, it forms a protective case around itself called a chrysalis or pupa.
Inside this cozy chrysalis, magical changes occur. The caterpillar’s body rearranges and reforms, and after a period of time, emerges a beautiful butterfly. It’s nature’s way of turning a humble caterpillar into a delightful, winged wonder.
So, when learning about butterflies, don’t forget the incredible journey they undertake from a tiny egg to a magnificent pupa and, ultimately, to a captivating butterfly!
What is Summer Season Essay
Summertime is a season that fills our hearts with boundless joy and excitement. A summer season essay is a written piece that captures the essence of this vibrant time of year and shares it with others.
In an essay about the summer season, you can explore various aspects such as the beauty of nature, the joy of outdoor activities, the warmth of the sun, or the sense of freedom that accompanies a break from school or work. You can also delve into personal experiences, memories, or the cultural significance of summer.
Let your words dance across the pages, invoking the sensations, images, and emotions that define the summer season. It’s an opportunity to celebrate this cherished time and share its wonders with others.
Ah, it’s been a delightful journey exploring the FAQs on drawing easy summer pictures. From capturing the sun’s brilliance to bringing unicorns to life, we’ve reveled in the warmth and beauty that summer offers. So, grab your pencils, colors, and canvas, and let your imagination soar as you create your very own summer-inspired artworks!