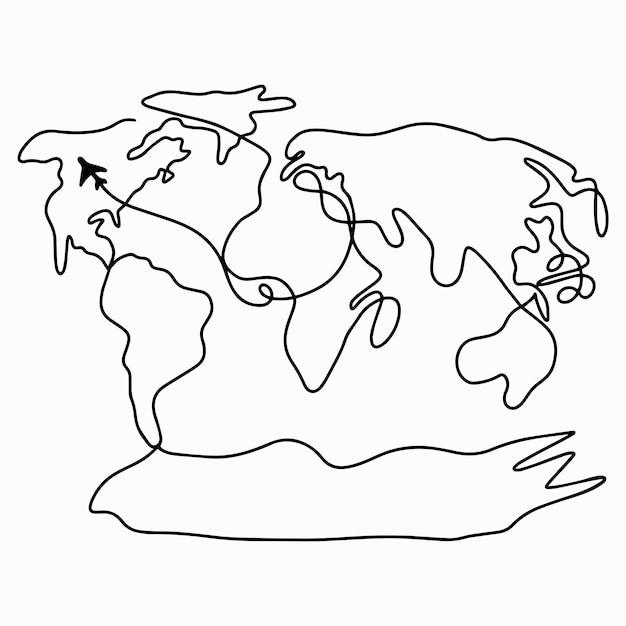
Welcome to our blog post on how to draw a simple map on the computer! In this digital age, being able to create your own maps has become both a valuable skill and a source of creative expression. Whether you’re planning a road trip, illustrating a story, or just exploring your artistic side, knowing how to draw a map on the computer opens up a world of possibilities.
In this comprehensive guide, we will walk you through the step-by-step process of creating a simple map using popular software like Microsoft Word, PowerPoint, and even Google Maps. We’ll cover essential techniques such as drawing, labeling, and adding details to make your map visually appealing and informative.
So, grab your digital pen or cursor, and let’s dive into the world of map-making in the digital realm. Ready to unleash your creativity? Let’s get started!
Drawing a Simple Map on Your Computer: Unleash Your Inner Cartographer
Are you a fan of treasure hunts and adventure-filled quests? Do you dream of creating your own imaginative worlds? If so, learning how to draw a simple map on your computer is a skill you definitely need in your arsenal. Grab your mouse and get ready to embark on a journey of map-making magic!
Choosing the Right Software: Beyond Paint and Paper
Gone are the days when drawing maps involved a plethora of colored pencils, stacks of paper, and hours of erasing mistakes. Thanks to the wonders of technology, you can now create stunning maps on your computer with just a few clicks. But which software should you choose?
1. Embrace the Power of Inkarnate
If you’re a beginner looking to dip your toes into the world of digital cartography, Inkarnate is the perfect choice. This user-friendly software lets you create beautiful, detailed maps without requiring a degree in graphic design. With a wide range of customizable features and an extensive collection of assets, your imagination is the only limitation.
2. Awaken Your Inner Artist with GIMP
For the more adventurous souls with an artistic flair, GIMP (GNU Image Manipulation Program) is a versatile software that allows you to create maps with a touch of sophistication. From manipulating terrain to adding layers of details, GIMP offers boundless possibilities to turn your imagination into awe-inspiring reality.
Preparing for Your Map-Making Adventure
Before diving headfirst into the world of map-making, it’s essential to gather your thoughts and prepare for the journey ahead. Here are a few tips to set you on the right track:
1. Sketch Out Your Vision
Grab a pen and paper (yes, the old-fashioned kind) and start sketching out a rough draft of your map. Consider the geography, landmarks, and points of interest you want to include. Don’t worry about perfection at this stage; it’s all about letting your creativity flow and capturing the essence of your world.
2. Get Inspired by Real-World Maps
Take a moment to explore existing maps, whether on the internet or in the physical realm. Notice how the cartographers use various symbols, colors, and typography to convey information. Borrow ideas and techniques that resonate with you, and infuse them with your unique style.
Embarking on Your Map-Making Odyssey
With your sketch in hand and a mind full of inspiration, it’s time to fire up your chosen software and bring your map to life. But wait! Before you start, there are a few essential steps to ensure a smooth journey:
1. Lay the Foundation with Land and Water
Start by creating the outline of your landmasses and bodies of water. Use different shades of green to denote forests and vibrant blues for oceans, lakes, and rivers. Remember, this is just the first layer, so keep it simple.
2. Conquer Cartographic Conundrums: Mountains and Hills
Next, it’s time to add some elevation to your map. Use subtle shading techniques to represent mountains and gentle slopes. Mountains can be the anchors of your world, so make them grand and awe-inspiring!
3. Infuse Life with Forests and Vegetation
No map is complete without lush forests and thriving vegetation. Use various shades of green to indicate dense forests, and scatter lighter greens to represent meadows, parks, or open landscapes. Don’t forget to add details like trees, shrubs, and winding paths to breathe life into your creation.
4. Unleash the Power of Symbols and Icons
Symbols and icons are the secret language of maps, conveying vital information at a glance. Whether it’s a castle, a tavern, or a hidden treasure, choose icons that reflect the essence of your world. Don’t be afraid to get creative and add your own personal touch!
5. Typography: Choosing Names That Carry Weight
Selecting the right fonts is crucial in adding a touch of authenticity to your map. Choose fonts that align with the mood and style of your world. For ancient realms, go for elegant and ornate scripts, while modern cities can benefit from sleek, minimalistic typography.
Become a Cartographic Legend
As you embark on your map-making journey, don’t forget that practice makes perfect. Have fun experimenting with different styles, palettes, and techniques. Remember, the world you’re creating is a reflection of your imagination, so let it soar! With each stroke of your digital pen, you’ll inch closer to becoming a cartographic legend. So, what are you waiting for? Unleash your inner cartographer and bring your fantastical worlds to life on your computer screen!

FAQ: How To Draw A Simple Map On The Computer
Welcome to our comprehensive FAQ guide on how to draw a simple map on the computer! If you’ve ever wanted to create your own maps but weren’t sure where to start, you’ve come to the right place. In this FAQ-style subsection, we’ll address common questions and provide step-by-step instructions to help you master the art of map-making on your computer. So let’s dive in and unleash your cartographic creativity!
How can I draw on a picture in Word
Drawing on a picture in Word is like adding the perfect finishing touch to your map. To do this, follow these simple steps:
- Insert the picture into your Word document.
- Right-click on the picture and select “Wrap Text” from the dropdown menu.
- Choose the option that best suits your needs (e.g., “In Front of Text”).
- Click on the “Drawing Tools” tab, then click “Format” to reveal more options.
- Select the “Draw Text Box” button to draw a text box over your picture.
- Customize the text box by adjusting the size, font, and color according to your preferences.
- Voila! Now you can annotate, label, or add captions to your picture to enhance your map.
How do you create a map in PowerPoint
PowerPoint isn’t just for presentations; it can also be a powerful tool for creating maps. Follow these steps to bring your map to life in PowerPoint:
- Open PowerPoint and create a new slide.
- Go to the “Insert” tab and click on “Shapes.”
- Choose a shape that represents your desired landmass or country.
- Click and drag on the slide to create the shape. Resize and position it accordingly.
- Repeat steps 2 and 3 to add more shapes for different areas or features.
- Customize the shapes by changing their colors, outlines, and gradients.
- To add labels or text, click on the “Text Box” button and draw a text box near the shape.
- Type the desired label and adjust the fonts, sizes, and positioning as needed.
- Continue adding shapes, labels, and other elements until your map is complete.
- Save your PowerPoint file, and you now have a fantastic map ready to impress your audience!
How do I draw on the Google Maps app
Drawing on the Google Maps app allows you to mark locations, create pathways, or highlight specific areas. Here’s how you can do it:
- Launch the Google Maps app on your phone or tablet.
- Search for the location you want to draw on or zoom in to locate it manually.
- Tap and hold on the desired location on the map. A red pin will appear.
- At the bottom of the screen, tap on the name of the location or address.
- Scroll down and select “Add a label.” This will create a new label on the map.
- Use your finger or stylus to draw lines or shapes directly on the map.
- If you want to add text or a description, tap on the label you created.
- Enter the relevant information and tap “Save.”
Now you can take full advantage of the Google Maps app to draw and mark your personalized map with ease!
How do I draw a pen in Word
Drawing a pen in Word might sound a bit unconventional, but hey, sometimes you’ve gotta get creative! Here’s a quirky way to draw a pen in Word:
- Open a new Word document and navigate to the “Insert” tab.
- Click on the “Shapes” button and choose the triangle shape.
- Draw a reasonably sized triangle on your document—let’s say it’s the pen’s body.
- To create the pen’s cap, select the triangle shape once more.
- Hold down the Shift key and drag the cursor to the desired size for the cap.
- Position the cap on top of the pen’s body, and you’ve got yourself a makeshift pen!
Remember, this might not be the most professional-looking pen, but it can add a touch of whimsy to your documents!
How do you draw a map properly
Drawing a map can be a meticulous process, but following these steps will help you do it properly:
- Determine the purpose and scope of your map. Clearly define the area or region you want to showcase.
- Gather the necessary reference materials, including existing maps, satellite imagery, or topographic data.
- Use specialized map-making software like ArcGIS, QGIS, or Adobe Illustrator to ensure accuracy and precision.
- Start by outlining the landmass or geographic boundaries of your map using the appropriate tools.
- Add essential features such as rivers, mountains, forests, and roads, using different symbols or styles for each element.
- Use colors, shading, or patterns to represent elevation, terrain, or other relevant data.
- Label important landmarks, cities, towns, and other locations with clear and legible text.
- Add a legend or key to explain the symbols and information displayed on your map.
- Proofread your map to ensure accuracy and correct any errors or inconsistencies.
- Finally, save your map in a suitable format for sharing, printing, or online publication.
By following these steps, you’ll be well on your way to creating a stunning and informative map!
Which software is used to draw maps
Several software options are available for drawing maps, each with its own advantages and features. Here are three popular choices:
-
ArcGIS: A powerful and widely-used geographic information system (GIS) software that enables you to create detailed and professional maps with extensive data analysis capabilities.
-
QGIS: An open-source GIS software that provides similar functionality to ArcGIS but is free to use. QGIS is ideal for beginners and those on a budget.
-
Adobe Illustrator: Although not specifically designed for map-making, Illustrator offers a wide range of tools and features that allow for precise and visually appealing map creation.
Choose the software that best suits your needs and level of expertise, and let your mapping adventures begin!
How do you draw a hill on a map
Drawing a hill on a map involves representing elevation and creating a three-dimensional effect. Here’s how you can do it:
- Start by drawing a curved line to represent the base or outline of the hill.
- Add contour lines by drawing parallel curves above the base, spaced evenly apart.
- Make sure the lines get closer together as they move upward, indicating a steeper slope.
- Shade the area between the contour lines progressively darker to depict the hill’s rise in elevation.
- Add additional details like trees, rocks, or other features to enhance the hill’s appearance.
With a little practice, your map will boast beautifully-rendered hills that transport your readers to rolling landscapes!
How do you make a simple map
Creating a simple map is easier than you might think! Follow these steps to get started:
- Determine the area you want to map, whether it’s a neighborhood, city, or fictional world.
- Gather reference materials such as existing maps, online resources, or your own sketches.
- Choose the appropriate software or tool to create your map. Consider options like Inkarnate, Wonderdraft, or even basic drawing applications.
- Sketch the main landmass or outline of your map using basic shapes or freehand drawing.
- Add major features such as rivers, mountains, or cities using symbols or icons.
- Label important locations, and use hatching or colors to represent different types of terrain.
- Review, revise, and refine your map until you’re happy with the overall look and feel.
- Share your masterpiece with the world or keep it as a personal treasure.
Remember, simple maps can be just as captivating and informative as intricate ones. So enjoy the creative process and let your imagination roam!
How do I label a map in PowerPoint
Adding labels to your map in PowerPoint is a breeze. Here’s how to do it:
- Open your PowerPoint presentation and navigate to the slide with your map.
- Go to the “Insert” tab and click on the “Text Box” button.
- Click and drag the cursor on the slide to create a text box near the desired location.
- Type the label text into the text box.
- Customize the font, size, color, and position of the label using the options available in the toolbar.
- Repeat these steps for each additional label you want to add to your PowerPoint map.
With these simple instructions, you’ll have your map labeled and ready to share in no time!
How do you label a diagram
Labeling a diagram can help clarify its components and improve understanding. Follow these steps to label your diagram correctly:
- Analyze the diagram and determine which elements require labeling.
- Use the appropriate software, such as Adobe Illustrator or Microsoft Visio, to open and edit your diagram.
- Locate the text tool in the software and click on the area where you want to add a label.
- Type the label text and adjust its font, size, and position as needed.
- Repeat steps 3 and 4 for each additional label you need to add.
By adding clear and concise labels, your diagram will become more informative and accessible to others.
How do I draw a sketch map in Word
Creating a sketch map in Word can add a touch of whimsy or personalization to your document. To draw a sketch map, follow these steps:
- Open a new Word document and navigate to the “Insert” tab.
- Click on the “Shapes” button and select the desired shape for your map.
- Use your mouse to draw the shape on your document. It can be any size or form you prefer.
- To add details, navigate to the “Insert” tab and insert additional shapes, icons, or text boxes.
- Customize the shapes, colors, and sizes of the inserted elements to further enhance your sketch map.
Remember, the key to a sketch map is its informality and uniqueness, so don’t be afraid to unleash your creativity!
What is a water draw
A water draw is a topographic feature found in hilly or mountainous terrains. It refers to a valley or depression where water naturally flows or collects. Water draws can indicate the path of drainage, helping mapmakers identify streams, creeks, or even potential water sources for communities or ecosystems.
Understanding water draws is essential for accurately representing the hydrology and terrain of an area on a map. By incorporating these features, your map will provide valuable insights into the natural flow of water and its impact on the landscape.
How do you draw on Google Docs
Although Google Docs doesn’t provide built-in drawing tools, you can still sketch and annotate images in your documents. Here’s what you need to do:
- Open your Google Docs document and insert the image you want to draw on.
- Right-click on the image and select “Image options.”
- In the right-hand panel, click on the “Crop & apply effects” icon (represented by a paintbrush).
- Scroll to find the “Draw” section and click on the pencil icon to enter drawing mode.
- Use your mouse or touchpad to draw, sketch, or annotate directly on the image.
- You can choose different brush colors, thicknesses, or even add text annotations using the options provided.
- Once you’ve finished drawing on the image, click “Apply” to save your changes.
Now, you can bring your images to life and make your Google Docs even more engaging with your artistic additions!
Can I draw on a Google Map
As of 2023, directly drawing on a Google Map using Google’s native tools isn’t yet available. However, fear not! You can achieve a similar effect by using external tools such as Google Earth Pro or specialized GIS software like ArcGIS or QGIS.
With these tools, you can import Google Maps imagery and overlay your own drawings, annotations, or custom layers onto the map. This allows you to personalize the map and mark specific locations, paths, or areas according to your needs.
So while you can’t directly draw on a Google Map, with a little extra effort, you can create stunning and customized map experiences!
What does a draw look like on a map
On a map, a draw appears as a V-shaped or U-shaped contour line that indicates the presence of a valley or depression. These contour lines typically curve inwards, following the path where water naturally flows or collects.
The contour lines associated with a draw form a pattern that resembles the shape of the terrain. By carefully studying these lines, map readers can visualize the topography of the area and determine its drainage patterns.
Draws are valuable features to include on a map, as they help map users understand the natural landscape and navigate accordingly.
How can I create a map
Creating a map involves a mix of artistry, geography, and technical skills. Follow these general steps to create your own map:
- Determine the purpose and scope of your map.
- Gather reference materials, including existing maps, online resources, or topographic data.
- Select the appropriate software or tools for your map-making process.
- Sketch the main features and outline the boundaries of your map.
- Add essential elements like landmasses, bodies of water, roads, or landmarks.
- Use colors, shading, or textures to represent different terrains or features.
- Label important locations accurately and legibly.
- Incorporate a legend or key to explain symbols or abbreviations used in your map.
- Proofread and edit your map to ensure accuracy and consistency.
- Save your map in a suitable format for sharing, printing, or online publishing.
By following these steps, you’ll be on your way to creating maps that inform, inspire, and captivate your audience!
How do you draw freely in Word
The ability to draw freely in Word can add a personal touch or boost your creativity. To unleash your artistic skills, try these steps:
- Open a new Word document and navigate to the “Insert” tab.
- Click on the “Shapes” button and select the “Scribble” tool.
- With your mouse or touchpad, freely draw or sketch on your document.
- If you want to change the line color, thickness, or style, navigate to the “Shape Format” tab.
- Experiment with different shapes, colors, or sizes to create unique drawings or annotations.
Remember