Are you an artist using Clip Studio Paint? If so, you may have wondered if it’s possible to change the canvas size while working on a drawing. Fortunately, in this blog post, we will explore the options available to alter canvas size during your creative process.
From selecting and resizing in Clip Studio to understanding the ideal canvas size for digital art, we’ll cover a range of topics to help you optimize your workflow. Whether you’re grappling with pixelation or blurry results in your digital art, we’ve got you covered. Plus, we’ll tackle common questions like the difference between 72 dpi and 300 dpi and whether Clip Studio Paint has a liquify feature.
So, grab your digital pen and let’s dive into the world of changing canvas sizes in Clip Studio Paint to enhance your artistic journey!
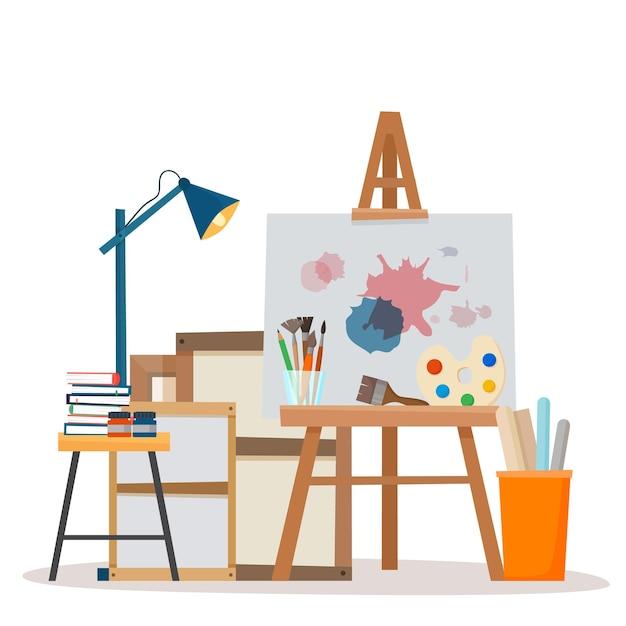
Can You Change Canvas Size During Drawing in Clip Studio Paint
Imagine this: you’re engrossed in creating a magnificent masterpiece in Clip Studio Paint, and suddenly you realize that your canvas size is not quite right. Panic sets in. Fear not, dear artist! In this subsection, we will explore the possibility of changing the canvas size while you’re in the midst of your creative flow.
Resize on the Fly with Clip Studio Paint
You’ll be delighted to know that Clip Studio Paint allows you to change the canvas size while you’re in the middle of your artistic journey. It’s like grabbing a magic wand and transforming your digital workspace with a flick of your wrist. Your art will thank you for this incredible feature.
The Easy Steps to Changing Canvas Size
Here’s the breakdown of how you can resize your canvas in Clip Studio Paint:
1. Find the Menu Bar
In the dark corners of the screen, amidst all the artistic possibilities, lies the coveted Menu Bar. Locate it with the precision of a squirrel searching for its hidden acorns.
2. Seek the Canvas Option
Within the depths of the Menu Bar, patiently waiting for your discovery, you’ll find the “Canvas” option. Click on it, and a world of resizing wonder shall unfold.
3. Embrace the Resize Option
As you venture into the “Canvas” menu, prepare yourself for the awe-inspiring sight of the “Resize” option. Do not be alarmed by its simplicity; it possesses the power to reshape your artistic destiny.
4. Choose Your Adventure
Once you’ve summoned the “Resize” option, a dialog box will materialize before your very eyes. Behold! The world of canvas resizing options awaits your selection. Decide whether you’ll increase or decrease the dimensions of your artistic realm.
5. Bask in the Glorious Resize
With your desired dimensions chosen, embrace the moment. Click that magical “OK” button, and watch as your canvas transforms before you. The heavens may part, and celestial light may illuminate your creative path. Okay, maybe not, but you get the idea.
A Seamless Transition
You may be wondering, “Will changing the canvas size interrupt my artistic flow?” Fear not, for Clip Studio Paint ensures a smooth transition without compromising your masterpiece. The existing elements of your artwork will adjust proportionally, ensuring your artistic vision remains intact.
Embrace the Possibilities
Now that you know the secrets of resizing your canvas mid-drawing in Clip Studio Paint, the world is your oyster. Dive into the vast ocean of artistic possibilities and let your imagination run wild. Change your canvas size with confidence, knowing that Clip Studio Paint has your back.
The Final Stroke
Clip Studio Paint’s ability to allow canvas size changes during the drawing process is a testament to the software’s dedication to artists’ needs. So go forth, create, resize, and conquer the digital artistic realm. The only limit is your imagination.
Happy resizing, fellow artists!
FAQ: Can You Change Canvas Size During Drawing Clip Studio Paint
Introduction:
Welcome to this comprehensive FAQ-style guide on how to change the canvas size during drawing in Clip Studio Paint. In this section, we will address common questions and concerns related to canvas resizing, digital art quality, DPI preferences, and more. So, let’s dive right in!
How do you select and resize in Clip Studio
To select and resize in Clip Studio Paint, follow these simple steps:
- First, select the “Move” tool from the Tools palette or press the “M” key on your keyboard.
- Next, click and drag on the canvas to create a selection around the area you want to resize.
- Once the selection is made, go to the “Edit” menu and choose “Transform.”
- From there, you can adjust the size of the selection by dragging the corner handles or inputting specific dimensions in the Transformation panel.
- Finally, click “Apply” to resize the selected area.
Why is my digital art so pixelated
Ah, the ever-infamous pixelation problem! Here are a few possible reasons why your digital art might be pixelated:
- Low resolution: If you’re working with a low-resolution canvas or using small dimensions, your artwork may appear pixelated when zoomed in.
- Scaling issues: Enlarging a small artwork can cause pixelation, especially if the resolution is not high enough to support the increased size.
- Using low DPI settings: A low dots per inch (DPI) value in your digital painting setup can lead to pixelation when printing or zooming in.
- The wrong file format: Saving your finished artwork in a low-quality image format, such as JPEG, can result in loss of detail and pixelation.
Remember, for crispy-clear digital art, opt for higher resolution, use appropriate DPI settings, and choose a file format that preserves image quality, such as PNG or TIFF.
What is the most popular painting canvas size
The most popular painting canvas sizes in the digital art community vary depending on personal preferences and project requirements. However, here are a few common canvas dimensions that artists often use:
- 1920 x 1080 pixels: This size is commonly known as “Full HD,” perfect for digital illustrations, concept art, or wallpapers.
- 3000 x 2000 pixels: A versatile canvas size suitable for various purposes, including digital paintings, character designs, and environments.
- Square formats like 2000 x 2000 pixels or 1080 x 1080 pixels: Great for social media posts, profile pictures, or square compositions.
Ultimately, the best canvas size is subjective and depends on your intended use, artistic style, and personal preference. Don’t be afraid to experiment and find what works best for you!
How does shrink selection work
The “shrink selection” feature in Clip Studio Paint allows you to reduce the size of your selected area by a specified number of pixels. It’s perfect for refining your selection or creating precise borders. Here’s how to use it:
- After making a selection with the “Selection” tool, go to the “Edit” menu and select “Transform” or use the shortcut Ctrl + T (Cmd + T on a Mac).
- In the Transformation panel, locate the “Shrink selection” option, usually represented by an arrow pointing inward.
- Enter the desired number of pixels by which you want to shrink the selection.
- Click “Apply” to finalize the changes.
Voila! Your selection will be reduced by the specified amount of pixels, allowing for more accurate editing and adjustments.
How do I shrink a drawing in Clip Studio Paint
If you want to shrink your entire drawing in Clip Studio Paint, follow these steps:
- Go to the “Edit” menu and select “Change Image Resolution.”
- In the “Change Resolution” dialog box, enter the desired dimensions for your resized image. Make sure to adjust the units (pixels, inches, or centimeters) according to your preference.
- Check the “Shrink contents proportionally” box to maintain the aspect ratio of your drawing while resizing.
- Click “OK” to apply the changes.
Your drawing will now be resized to the specified dimensions, all while preserving its original proportions. Keep in mind that shrinking a drawing may cause some loss of detail, so proceed with caution!
How do I flip the canvas in Clip Studio Paint shortcut
Flipping the canvas in Clip Studio Paint is a handy trick to check the symmetry of your artwork or see it from a different perspective. To flip the canvas using the shortcut, just press the “H” key on your keyboard. Easy as pie!
Is 300 DPI or 600 DPI better
Ah, the resolution dilemma! When it comes to choosing between 300 DPI and 600 DPI, there’s no definitive answer. The “best” DPI depends on the purpose of your digital art and how it will be used. Here’s a breakdown:
- 300 DPI: This resolution is standard for most print-related work, such as book illustrations, posters, or physical art prints.
- 600 DPI: While not necessary for most occasions, a higher DPI can be beneficial when printing small details, intricate linework, or high-quality textures.
Consider the intended output and the level of detail in your artwork to determine the optimal DPI. Remember, higher DPI usually translates to larger file sizes, so balance quality with practicality.
What canvas size should I use for digital art
The canvas size for digital art can vary based on individual preferences and project requirements. Here’s a nifty trick to help you decide:
- Determine the intended use of your artwork: Are you creating a social media post, a print-ready illustration, or a website banner? Each context may have specific dimension recommendations.
- Consider the aspect ratio: The aspect ratio is the relationship between the width and height of your canvas. Popular options include 16:9 for widescreen compositions or 1:1 for square formats.
- Adapt to the size of your ambitions: If you’re aiming for high-resolution prints or large-scale artworks, opt for bigger canvas dimensions. For web-based content, smaller sizes might suffice.
Remember, there’s no one-size-fits-all answer. Feel free to experiment and find the canvas size that best suits your artistic vision and project goals!
How do you resize a canvas
Resizing a canvas in Clip Studio Paint is a breeze. Just follow these steps:
- Go to the “Edit” menu and select “Change Image Resolution” or use the Ctrl + U (or Cmd + U) shortcut.
- In the “Change Resolution” dialog box, enter the desired width, height, and unit of measurement for your resized canvas.
- Check the “Resize all layers” box to resize all elements within your artwork, including backgrounds and additional layers. Leave it unchecked if you only want to resize the canvas without affecting individual layers.
- Click “OK” to apply the changes.
And there you have it! Your canvas will now be resized to your specifications, allowing you to expand or shrink your creative workspace as needed.
How do I change the stabilizer in Clip Studio Paint
To adjust the stabilizer settings in Clip Studio Paint, follow these simple steps:
- Select the “Brush” tool from the Tools palette or press the “B” key on your keyboard.
- Look for the “Stabilization” option in the Brush tool properties window.
- Use the slider or numerical input to adjust the stabilizer level. Higher values increase stability for smoother lines, while lower values offer more freedom and responsiveness.
- Experiment with different stabilizer settings until you find the perfect balance that suits your drawing style.
Don’t hesitate to play around with the stabilizer and explore its impact on your lineart quality. Remember, practice makes perfect, and finding the right stabilizer level can greatly enhance your digital drawing experience!
Is 600 DPI good for digital art
While 600 DPI can provide impressive print quality and capture fine details, it might be excessive for everyday digital art purposes. Keep these considerations in mind:
- Image size: Higher DPI means larger files. If storage space is a concern, consider the trade-off between quality and file sizes.
- Performance: Working with a high DPI setting can be resource-intensive for your computer, impacting software responsiveness, especially with complex artworks.
- Printing requirements: If your artistic endeavors involve print publications, high DPI is beneficial for preserving details and achieving crisp print output.
In most cases, a DPI range between 300 to 450 is more than sufficient for digital art. However, if you require impeccable detail or are specifically targeting high-quality prints, 600 DPI can be an excellent choice.
How do you flip a canvas in Clip Studio
Flipping the canvas in Clip Studio Paint is a useful technique to assess your artwork from a different perspective or improve symmetry. Here’s how you can do it:
- Select the “View” menu from the top toolbar.
- Choose the “Rotate/Invert” option.
- Click on “Flip Horizontal” or “Flip Vertical” to flip the canvas in the desired direction.
With just a few clicks, you can easily flip your canvas and add a fresh perspective to your creative process. Go ahead and give it a whirl!
What is the difference between 72 DPI and 300 DPI
When it comes to DPI (dots per inch), the difference between 72 DPI and 300 DPI lies in the intended output and usage. Here’s a breakdown:
- 72 DPI: Historically, 72 DPI was the standard for digital art displayed on computer screens or the internet. It provides a decent level of detail for on-screen viewing.
- 300 DPI: This resolution is often used for high-quality prints, ensuring sharp details and vibrant colors when your artwork is physically reproduced.
Think of 72 DPI as “screen resolution” and 300 DPI as “print resolution.” Depending on your artistic goals, consider the end medium and adjust the DPI accordingly for optimal results.
Does Clip Studio Paint have liquify
Yes, Clip Studio Paint includes a powerful Liquify feature. With its Liquify tools, you can reshape or manipulate your artwork in various ways, such as pushing, pulling, or twisting elements. To access the Liquify feature, go to the “Edit” menu and select “Liquify.” From there, unleash your creativity and have fun transforming your artwork with liquid-like flexibility!
How do I change the canvas size in Clip Studio Paint
Changing the canvas size in Clip Studio Paint is a straightforward process:
- Go to the “Edit” menu and select “Change Image Resolution” or hit the shortcut Ctrl + U (or Cmd + U).
- In the “Change Resolution” dialog box, enter the desired width, height, and unit of measurement for your canvas.
- Check the “Resize all layers” box if you want to adjust the size of all elements within your artwork. Leave it unchecked if you only want to resize the canvas without affecting individual layers.
- Click “OK” to apply the changes.
With these simple steps, you can effortlessly modify your canvas dimensions in Clip Studio Paint and open up new artistic possibilities!
What size is a canvas
The size of a canvas can vary depending on personal preference, project requirements, and intended use. In digital art, the canvas size is typically measured in pixels, representing the width and height of the digital workspace. Some commonly used canvas sizes include:
- 1920 x 1080 pixels: Known as “Full HD,” this size is ideal for digital illustrations, concept art, or wallpapers.
- 3000 x 2000 pixels: A versatile canvas size suitable for various purposes, including digital paintings, character designs, and environments.
- Custom sizes: Artists often create artwork on non-standard canvas sizes, tailoring them to specific needs or desired proportions.
Feel free to explore and experiment with different canvas sizes to find what works best for your artistic style, workflow, and project goals!
What canvas size should I use for pixel art
When it comes to pixel art, selecting the right canvas size is crucial to ensure the desired level of detail and a consistent pixel-to-pixel scale. Here are a few canvas size recommendations for pixel art:
- 16 x 16 pixels or 32 x 32 pixels: Great for tiny icons or sprites with minimal detail.
- 64 x 64 pixels or 128 x 128 pixels: Suitable for medium-sized pixel art, such as single characters or simple illustrations.
- 256 x 256 pixels or 512 x 512 pixels: Ideal for larger pixel art pieces, showcasing more intricate details or scenes.
Remember, in pixel art, less is more. Smaller canvas sizes can help maintain the charm and nostalgic aesthetic associated with this art style!
What is the best canvas size for Clip Studio Paint
The best canvas size in Clip Studio Paint depends on the specific project requirements and personal preferences. However, here are a few popular canvas size recommendations among artists:
- 1920 x 1080 pixels: A widely used canvas size for digital illustrations, concept art, or creating wallpapers.
- 3000 x 2000 pixels: A versatile canvas size suitable for various purposes, including digital paintings, character designs, or full-scale scenes.
- Custom sizes: Clip Studio Paint allows you to create your own canvas with custom dimensions to fit unique needs or specific aspect ratios.
Ultimately, the best canvas size is the one that accommodates your artistic vision, desired level of detail, and intended output. So, go ahead and unleash your creativity!
How do you choose canvas size
Choosing the right canvas size can make a significant difference in your overall digital art experience. Here’s a simple approach to help you make that decision:
- Define your purpose: Consider the purpose of your artwork. Are you creating for social media posts, prints, or web design? Each context may have specific recommendations.
- Aspect ratio matters: Determine the aspect ratio that suits your artistic vision. Common ratios include 16:9 for widescreen compositions or 1:1 for square formats.
- Prioritize flexibility: Opt for a canvas size that provides room for scalability. A larger canvas offers more flexibility for detailed work or potential print reproduction.
Remember, while a good canvas size can enhance your creative freedom, it’s ultimately your talent and imagination that bring your artwork to life. So, trust your instincts and choose a canvas size that empowers you to create your best!
Conclusion:
Congratulations! You’ve reached the end of this comprehensive FAQ